Let's talk chuck steak. It's a cut that's often seen as a bit of a workhorse, a tough-looking piece of meat relegated to stews and slow-cooked wonders. But, my friends, don't be fooled! This humble cut holds a world of flavour and can transform into a truly magnificent dish when you know how to treat it.
I'm talking about chuck steak cooked on the stovetop, a method that takes advantage of its inherent toughness to create a tender, flavour-packed masterpiece. In this guide, we'll go through every step, from choosing the perfect piece to braising it to perfection. Get ready to unlock the secrets of chuck steak magic.
(Part 1) Choosing Your Chuck Steak

Picking the Perfect Cut: It's All About Marbling
The first step is choosing your chuck steak. Now, you might be thinking, "any chuck steak will do," but trust me, it makes a difference. When it comes to braising, you want a cut that's got a good amount of marbling. Those little white veins of fat, they're the key to juicy, flavourful results. The fat melts during cooking, infusing the meat with incredible richness.
I always recommend going for a chuck roast or a chuck eye roast. These are pretty standard cuts, and they're generally readily available. Don't be shy, give it a good look over at the butcher's counter. Make sure it's firm and springy to the touch. It shouldn't have any strange smells. If you're unsure, ask the butcher for their advice – they're the experts!
Size Matters: Finding the Right Fit for Your Feast
The size of your chuck steak will depend on how many people you're feeding. A 1.5kg chuck steak is a good size for a family meal, but don't be afraid to go bigger or smaller depending on your needs. I often go for a larger one and freeze any leftovers for future culinary adventures.
(Part 2) Preparing Your Chuck Steak: Getting Ready to Cook

Room Temperature is the Key
Now that you've got your perfect chuck steak, it's time to prep it for cooking. Bring it to room temperature. It may sound simple, but it's a crucial step. This ensures that the meat cooks evenly, resulting in a tender and delicious final product. Take it out of the fridge about 30 minutes before you start cooking.
Pat it Dry for a Crispy Crust
Next, grab some kitchen paper and pat your chuck steak dry. This will help to prevent the meat from steaming in the pan, which can make it tough. We want a nice crispy crust, and this step is essential for achieving it.
Seasoning Up: The Secret to Flavour
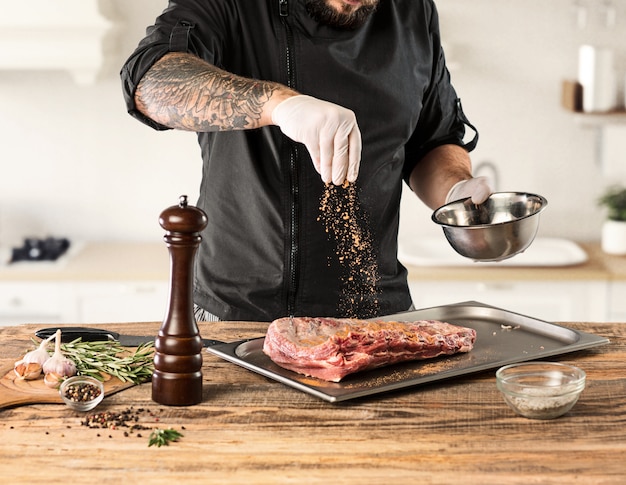
Seasoning is crucial, and it's your chance to get creative. I love a simple mix of salt and freshly ground black pepper, but feel free to explore! Experiment with a blend of herbs and spices, or even create your own homemade rub. Just make sure to season generously, especially if you're using a dry rub. This is where you build the flavour foundation for your culinary masterpiece.
(Part 3) The Art of Searing: Creating a Delicious Crust

The Cast Iron Advantage: Your Best Friend in the Kitchen
Now, the fun part – searing! This is where you'll give your chuck steak a beautiful crust, locking in those delicious juices. A cast iron skillet is my absolute go-to tool for searing. It gets super hot and provides an even sear, resulting in that perfect golden-brown crust.
Preheating is Key: Reaching the Right Temperature
Heat your cast iron skillet over a high heat until it's smoking hot. The hotter the pan, the better the sear. If you're not using cast iron, you can use a regular skillet, but make sure it's on a high heat. We're looking for that intense heat that will quickly caramelize the surface of the chuck steak.
Searing on All Sides: Ensuring Even Browning
Once the pan is screaming hot, add the chuck steak to the pan and sear it for about 3-4 minutes on each side. Don't crowd the pan; make sure the steak has plenty of space to get a good sear all over.
Patience is a Virtue: Avoiding Hasty Movements
Resist the urge to move the steak around too much. We want to develop that beautiful crust, not cook the meat all the way through. Let it sit, undisturbed, until it reaches the desired golden-brown colour.
(Part 4) Braising to Perfection: Slow and Gentle Cooking
Getting Ready: Assembling Your Braising Arsenal
Now that your chuck steak has a lovely crust, it's time to move on to the braising part. This slow, gentle cooking method is perfect for tougher cuts of meat, transforming them into melt-in-your-mouth delights.
Choosing the Right Pot: The Braising Vessel
You're going to need a large, heavy-bottomed pot with a lid. A dutch oven is ideal, but any sturdy pot with a lid will do. This will create a sealed environment that allows for the slow, gentle cooking process to work its magic.
Adding the Liquid: The Braising Broth
Pour your chosen liquid into the pot. I usually use a combination of beef stock and red wine, but you can use anything you like, even water. The liquid will help to create a rich sauce, so choose something that complements the flavour of your chuck steak.
The Braising Process: Slow and Steady Wins the Race
Bring the liquid to a simmer, then add the seared chuck steak to the pot. Reduce the heat to low, cover the pot with a lid, and let the chuck steak simmer gently for 2-3 hours, or until it's tender enough to shred with a fork.
Adding Flavour: Enhancing the Braising Symphony
Feel free to add any other ingredients you like to the pot while the chuck steak is braising. Some popular additions include chopped vegetables (like onions, carrots, and celery), garlic, and herbs. These ingredients will add depth and complexity to the braising liquid, creating a symphony of flavour.
(Part 5) How to Tell if it's Done: Signs of Braising Success
The Fork Test: The Ultimate Tenderness Indicator
The best way to tell if your chuck steak is done is to use the fork test. Stick a fork into the thickest part of the chuck steak. If it slides in easily and the meat falls apart, it's done. You're looking for a tender, yielding texture that melts in your mouth.
The internal temperature: Ensuring food safety
You can also use a meat thermometer to check the internal temperature of the chuck steak. It should reach an internal temperature of 145°F (63°C). This ensures that the chuck steak is cooked thoroughly and safe to eat.
Don't Overcook it: Finding the Sweet Spot
Be careful not to overcook the chuck steak. If you cook it for too long, it will become dry and tough. Overcooking is a culinary sin, so make sure you stop the braising process when the chuck steak is perfectly tender.
(Part 6) Resting and Shredding: Preparing for the Final Act
Giving it a Rest: Allowing the Juices to Redistribute
Once the chuck steak is cooked, remove it from the pot and set it aside on a cutting board. Let it rest for about 10 minutes. This will allow the juices to redistribute throughout the meat, resulting in a more succulent and flavourful dish.
Shredding Time: Transforming the Chuck Steak
After the resting period, shred the chuck steak using two forks. You can also use a couple of sharp knives to shred it if you find it easier. This transforms the chuck steak from a solid block of meat into a tender, manageable form that's perfect for serving.
(Part 7) Serving Up Your Masterpiece: Unleashing the Flavour
The Sauce: The Essence of Braising
Once the chuck steak is shredded, you'll have a delicious, rich braising sauce in the pot. This sauce is the essence of your braising process, infused with the flavours of the chuck steak and any other ingredients you added. It's perfect for serving over the shredded chuck steak.
A Variety of Options: Creative Serving Ideas
You can serve the shredded chuck steak on its own or in a variety of ways. Some popular options include:
- On a bun, with some pickles and coleslaw, for a delicious pulled beef sandwich
- Over mashed potatoes, with a dollop of sour cream or gravy
- In tacos, with your favourite toppings like salsa, guacamole, and cheese
- As a filling for a hearty casserole, alongside some pasta or rice
- In a salad, for a protein-packed and flavourful meal
Get Creative: Turning braised chuck steak into a Culinary Adventure
Let your imagination run wild! Braised chuck steak is incredibly versatile, lending itself to a range of culinary adventures. Just make sure to taste the braising sauce and adjust the seasoning as needed.
(Part 8) Leftovers: Making the Most of Your Culinary Creation
Storing and Reheating: Preserving the Goodness
Any leftover shredded chuck steak can be stored in an airtight container in the refrigerator for up to 3 days. You can reheat it in the microwave or in a saucepan on the stovetop.
Freezing Option: Extending the culinary journey
If you want to keep it longer, you can freeze it for up to 3 months. Just make sure to freeze it in a freezer-safe container or bag. This will allow you to enjoy your braised chuck steak creation at a later date.
(Part 9) Tips and Tricks: Mastering the Art of Chuck steak cooking
Don't Be Afraid to Experiment: Embracing Culinary Creativity
One of the great things about cooking chuck steak is that you can really experiment with the flavours. Try different combinations of herbs and spices, or add some chopped vegetables to the pot. This is your chance to make the dish your own.
Keep an Eye on the Liquid: Preventing Dryness
While braising, keep an eye on the liquid level in the pot. If it gets too low, add more beef stock or water. You don't want the chuck steak to dry out. The liquid is essential for creating a tender and flavourful dish.
Avoid Stirring Too Much: Protecting the Tenderness
Try to avoid stirring the chuck steak too much while it's braising. This can break it up and make it tougher. Let the chuck steak gently simmer in its own juices, undisturbed.
Don't Overcrowd the Pan: Ensuring an Even Sear
When searing the chuck steak, make sure not to overcrowd the pan. This will prevent the steak from getting a nice sear. The steak needs space to develop that beautiful golden-brown crust.
(Part 10) FAQs: Addressing Common Concerns
1. How can I make the chuck steak more tender?
Braising is the best way to make chuck steak tender. The slow cooking method allows the connective tissues in the meat to break down, resulting in a fork-tender texture. You can also use a pressure cooker to tenderize the chuck steak more quickly.
2. What are the best vegetables to add to the braising liquid?
Some popular vegetables for braising chuck steak include onions, carrots, celery, garlic, and mushrooms. You can also add root vegetables like parsnips or turnips for added flavour and texture.
3. Can I use any type of wine for braising?
While red wine is a popular choice for braising, you can also use white wine, beer, or even just water. The important thing is to choose a liquid that you enjoy the flavour of, as it will infuse the chuck steak.
4. How do I know if the chuck steak is safe to eat?
The chuck steak is safe to eat when it reaches an internal temperature of 145°F (63°C). You can use a meat thermometer to check the internal temperature.
5. What can I do with the leftover braising sauce?
You can use the leftover braising sauce as a base for a delicious gravy or soup. You can also freeze it in an airtight container for later use.
(Part 11) Conclusion: Embracing the Chuck Steak Journey
So there you have it, the ultimate guide to cooking chuck steak on the stovetop. It's a simple dish, but with a few key tips and tricks, you can create a meal that's both delicious and satisfying. Remember, it's all about patience and allowing the flavours to develop.
I hope you've enjoyed this journey into the world of chuck steak cooking. Now go forth, experiment, and create your own culinary masterpiece!
Everyone is watching

How to Cook Frozen Lobster Tails Perfectly: A Step-by-Step Guide
RecipesLobster. Just the word conjures up images of lavish meals, special occasions, and a taste of luxury. But let's...

Pigs in a Blanket Cooking Time: How Long to Bake for Perfect Results
RecipesAh, pigs in a blanket. Just the name conjures up images of those delightful little parcels of crispy pastry en...

Pork Fillet Cooking Time: How Long to Cook It Perfectly
RecipesPork fillet, or tenderloin as it's sometimes called, is a real favourite in our house. It's so versatile, and...

The Ultimate Guide to Cooking Delicious Frankfurters
RecipesLet's face it, we all love a good frankfurter. It's a classic, simple, and always satisfying. But let's be rea...

Wolf Meat Recipes: A Guide to Cooking Wild Game
RecipesLet's be honest, you don't see wolf meat at your local butcher shop every day. It's a bit of a wild card, but ...
