Let's be honest, folks – there's something magical about a warm, gooey cookie fresh from the oven. It's the kind of comfort food that brings back childhood memories and makes you feel all fuzzy inside. But achieving that perfect cookie isn't always a walk in the park. It takes a bit of knowledge, a dash of patience, and a whole lot of love (for cookies, of course!).
As a seasoned cookie enthusiast (and yes, a bit of a baking addict), I've spent years perfecting my craft, experimenting with different recipes and techniques, and learning from my (many) baking mishaps. Now, I'm ready to share my secrets with you. Whether you're a complete newbie or a seasoned baker, this guide will walk you through everything you need to know to become a cookie-baking maestro.
(Part 1) The Essential Ingredients: Building Blocks of Cookie Bliss

Just like a good house needs a strong foundation, perfect cookies start with the right ingredients. Think of them as the building blocks of your cookie masterpiece. Over the years, I've learned that quality ingredients make all the difference. So, ditch the bargain brands and embrace the good stuff!
Butter: The Key to Richness and Texture
Let's talk about butter – the golden nectar of the cookie world. It's not just about flavour; butter plays a crucial role in creating the perfect texture. You want that melt-in-your-mouth goodness, that soft, chewy bite, and butter is the key. I always recommend using real butter, unsalted or salted, depending on your taste. And remember, it's essential to bring your butter to room temperature. This ensures it's soft and creamy enough to mix with the sugar without separating, leading to a smoother, more even dough.
Sugar: Sweetness and Beyond
We all know sugar is essential for a good cookie, but there's more to it than just sweetness. Granulated sugar adds that crispness and bite, while brown sugar provides moisture and a delightful caramel flavour. The ratio of granulated to brown sugar can vary depending on the recipe, but generally, a mix of both will give you the best of both worlds. Remember, the right balance is what makes a cookie truly special.
Flour: The Backbone of Structure
All-purpose flour is your go-to for most cookies. It's the backbone that provides structure and helps bind all the ingredients together. Don't be tempted to swap it for self-raising flour – it'll make your cookies too airy and light. However, you can experiment with a mix of all-purpose and whole wheat flour for a slightly healthier and nuttier twist.
Eggs: Adding Richness and Moisture
Eggs are the secret ingredient for that rich, luxurious flavour and the perfect texture. They also bind everything together, ensuring your dough is smooth and even. Use fresh eggs at room temperature for best results – they'll mix in more easily and create a lighter, fluffier dough.
The Supporting Cast: Elevating Your Cookies
Beyond the core ingredients, a few supporting cast members are essential for elevating your cookies to the next level. Here's the lowdown on these crucial players:
- Baking Soda and Baking Powder: These are the magic ingredients that give cookies their airy, light texture. They react with the moisture in the dough, creating tiny air pockets that make each bite a little bit of heaven.
- Salt: Salt doesn't just add flavour; it enhances the sweetness of the sugar and brings out the taste of the butter. Just a pinch is enough to make a world of difference.
- Vanilla Extract: Vanilla extract is the secret weapon for adding that warm, comforting aroma and flavour that takes cookies from good to amazing. Don't skimp on the vanilla – it's a true game-changer.
- Chocolate Chips: Ah, chocolate chips – the ultimate crowd-pleaser. These little morsels of deliciousness add a sweet, satisfying crunch to every bite. Choose your favourite type, whether it's milk chocolate, dark chocolate, or semi-sweet – the possibilities are endless.
- Nuts: Chopped pecans, walnuts, or almonds bring a delightful crunch and a nutty flavour that adds another layer of complexity to your cookies. They're perfect for those who love a bit of texture in their treats.
- Spices: Cinnamon, nutmeg, or ginger add warm, festive flavours, especially during the holidays. They can transform a simple cookie into a delightful seasonal treat.
(Part 2) Mastering the Mixing Process: The Art of the Dough

Now that you've gathered your ingredients, it's time to get your hands dirty! The mixing process is where the magic really happens. It's not just about throwing everything together; it's about careful mixing to ensure the perfect texture and consistency for those heavenly cookies.
Creaming the Butter and Sugar: The Foundation of Texture
This is the first and most crucial step. Think of it as laying the foundation for your cookie masterpiece. You want to cream the butter and sugar together until they are light and fluffy. This incorporates air into the dough, which is key to creating those soft, chewy, melt-in-your-mouth cookies.
Use an electric mixer on medium speed and beat for about 2-3 minutes. You'll see the mixture lighten in colour and increase in volume. Don't overbeat, though. This can cause the butter to separate, leading to an uneven dough.
Adding the Eggs: A Gentle Touch
Once the butter and sugar are perfectly creamed, add the eggs one at a time, beating well after each addition. This ensures they're evenly incorporated into the dough. Remember, you want to mix them in until they're just combined. Overmixing the eggs can lead to tough cookies, so be gentle!
Dry Ingredients: A Gentle Blend
Now, for the dry ingredients. In a separate bowl, whisk together the flour, baking soda, baking powder, and salt. This helps ensure these ingredients are evenly distributed throughout the dough, leading to consistent baking and a light, airy texture.
Gradually add the dry ingredients to the wet ingredients, mixing on low speed until just combined. Resist the urge to overmix! Overmixing the dough can develop the gluten in the flour, leading to tough cookies.
Mixing in the Extras: The Final Touches
Finally, it's time to add your favorite extras, like chocolate chips, nuts, or spices. Gently fold them into the dough using a spatula. Again, resist the urge to overmix. It can make the extras clump together and create an uneven distribution in your cookies.
Your cookie dough is now ready for the next crucial step – chilling!
(Part 3) Chilling the Dough: The Secret to Perfection

I know it's tempting to skip this step and jump right into baking. But trust me, chilling the dough is a game-changer! It's like giving your cookies a little beauty sleep before their big debut in the oven. It's essential for preventing the cookies from spreading too much during baking, ensuring a beautiful shape and defined edges.
When you chill the dough, the cold butter solidifies. This makes it less likely to melt quickly in the oven, keeping your cookies from becoming flat and spreading out of control. It's a simple step that makes a huge difference in the final result.
Cover the dough tightly with plastic wrap and place it in the refrigerator for at least 30 minutes. If you have time, chilling it overnight will make your cookies even more delicious. The extra time allows the flavors to develop and the dough to become even more manageable. It's a perfect way to set yourself up for baking success.
(Part 4) Shaping Your Cookies: The Art of Scooping and Cutting
The time has come to transform your cookie dough into those delectable treats. There are a few methods you can use, each offering a different way to shape and create your cookies.
The Classic Scoop Method: Simple and Reliable
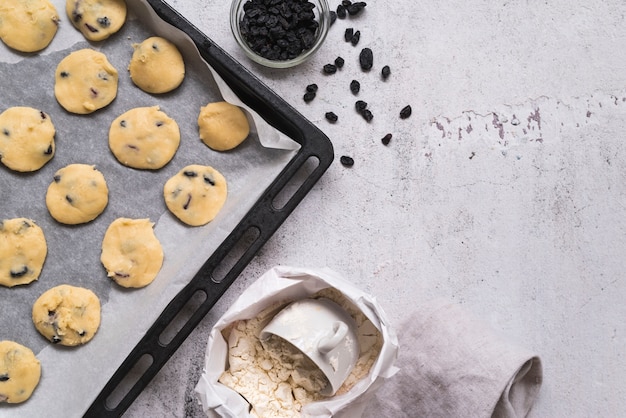
This is the easiest and most reliable method for creating evenly sized cookies. It takes the guesswork out of the whole process and ensures consistency. Simply use a cookie scoop to scoop out portions of dough and drop them onto a baking sheet lined with parchment paper. It's a great way to create beautiful, uniform cookies, perfect for a crowd.
The Rolling and Cutting Method: Creative and Versatile
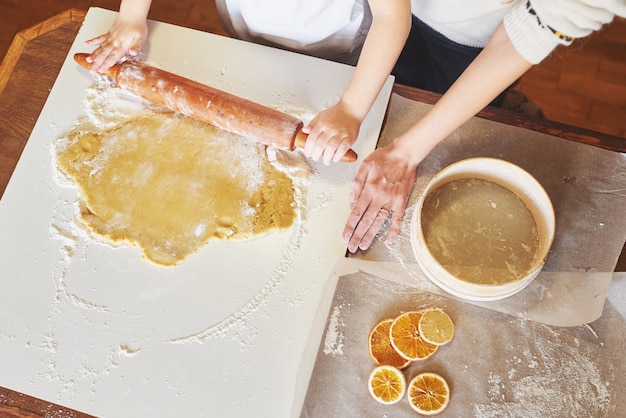
This method is perfect for creating decorative cookies or cookies with different shapes. Roll out the dough on a lightly floured surface to a thickness of about 1/4 inch. Then, use cookie cutters to cut out your desired shapes. You can experiment with different shapes, sizes, and designs, letting your creativity run wild.
The Free-Form Method: Embrace the Rustic Charm
If you're feeling a little adventurous, try shaping your cookies by hand. Use your fingers to form balls of dough and place them on the baking sheet. This method is great for creating rustic, free-form cookies with a charming, uneven look. Just remember that they may spread a bit more than the other methods, so be sure to leave enough space between each cookie.
No matter which method you choose, be sure to leave enough space between the cookies on the baking sheet. This allows them to spread and bake evenly, preventing them from sticking together and creating those delightful, individual treats.
(Part 5) Baking to Perfection: The Golden Rules of Oven Mastery
Now, it's time to unleash the magic of the oven! This is the moment you've been waiting for - the culmination of your cookie-baking journey. But don't worry, even if you're a baking newbie, you can master this part with a few simple rules and tips.
Preheating the Oven: The Foundation for Even Baking
Preheating the oven is a crucial step that many people overlook. It ensures that the cookies bake evenly and develop that beautiful golden-brown colour. Set your oven to the temperature specified in your recipe and let it preheat for at least 10 minutes. It's worth waiting for those few extra minutes for perfect, evenly baked cookies.
Baking Time: It's All About the Look
Baking time will vary depending on the size and thickness of your cookies and the type of oven you have. But there are some general guidelines to follow. Look for edges that are golden brown and a center that is just slightly soft. You can also use a toothpick to check for doneness. Insert it into the center of a cookie. If it comes out clean, the cookie is done.
Cooling on the Baking Sheet: The Final Stage
Once your cookies are out of the oven, let them cool on the baking sheet for a few minutes before transferring them to a wire rack to cool completely. This allows them to set and prevents them from becoming soggy. This is an essential step for achieving those perfectly crisp edges and a chewy center.
(Part 6) Storage: Keeping Your Cookies Fresh and Delicious
You've finally baked those perfect cookies. Now, you want to make sure they stay that way! Storing them properly is crucial for maintaining their freshness, texture, and flavour.
Airtight Containers: The Key to Preservation
The best way to store cookies is in an airtight container. This prevents them from drying out and absorbing unwanted flavors from other foods in your pantry.
Freezing Cookies: Saving Your Cookies for Later
If you want to keep your cookies for longer, you can freeze them. Simply place them in a freezer-safe bag or container and freeze for up to 3 months. To thaw, remove them from the freezer and let them sit at room temperature for about 30 minutes. You can also bake cookies ahead of time and freeze them before baking to save time later. This is a great way to have delicious cookies ready to go whenever you crave a sweet treat.
(Part 7) cookie variations: Beyond the Basic
Now that you have the basics down, it's time to explore the endless possibilities of cookie baking. You can experiment with different flavors, add-ins, and techniques to create cookies that are uniquely yours. The possibilities are truly endless.
Flavour Explorations: A World of Flavors
Think beyond the classic chocolate chip cookie. Try adding citrus zest for a bright, refreshing flavor, or incorporate spices like cinnamon, ginger, or nutmeg for warm, comforting notes. You can even experiment with exotic flavors like cardamom, lavender, or even a touch of chili for a spicy kick.
Add-Ins for Extra Deliciousness: Elevate Your Cookies
Get creative with your add-ins! Chopped nuts, dried fruit, pretzels, or even potato chips can add interesting textures and flavors to your cookies. Experiment with different combinations and create your own signature cookie creations.
Cookie Decorating: Unleash Your Inner Artist
Take your cookies to the next level with decorating! You can use frosting, sprinkles, candies, or even edible food markers to create beautiful designs. Get creative and let your imagination run wild. Transform your cookies into edible masterpieces, perfect for special occasions or just to add a touch of fun to your baking.
(Part 8) Troubleshooting: Solving Common Cookie Problems
Even the most seasoned bakers encounter a few bumps along the way. But don't worry, you can overcome those common cookie problems with a little knowledge and a few troubleshooting tricks.
| Problem | Solution |
|---|---|
| Cookies are too flat | Chill the dough longer, reduce the baking temperature, or use a smaller scoop to make thicker cookies. |
| Cookies are too chewy | Reduce the amount of brown sugar or increase the amount of flour. |
| Cookies are too dry | Increase the amount of butter or brown sugar. |
| Cookies are burnt | Lower the oven temperature or bake for a shorter amount of time. |
| Cookies are underbaked | Bake for a longer amount of time. |
| Cookies are spreading too much | Chill the dough longer, reduce the amount of butter, or increase the amount of flour. |
(Part 9) FAQs: Your Burning Cookie Questions Answered
I'm here to answer those burning cookie questions and provide the insights you need to bake those perfect cookies.
1. How do I know if my cookies are done?
Look for golden brown edges and a slightly soft center. If the center is still very soft or gooey, bake for a few more minutes. You can also insert a toothpick into the center of a cookie. If it comes out clean, the cookie is done.
2. Can I freeze cookie dough?
Absolutely! This is a great way to make cookies ahead of time. Simply scoop the dough into freezer-safe bags or containers and freeze for up to 3 months. When you're ready to bake, simply thaw the dough in the refrigerator overnight or at room temperature for a few hours. Then, bake as usual.
3. What's the secret to getting chewy cookies?
The key to chewy cookies is using a high ratio of brown sugar to granulated sugar, along with a good amount of butter. Also, make sure to chill the dough for at least 30 minutes before baking.
4. What if my cookies are too crispy?
You can try reducing the baking time or using a lower oven temperature. You can also increase the amount of brown sugar in the recipe for a chewier texture.
5. What's the best way to store cookies?
The best way to store cookies is in an airtight container at room temperature. This will keep them fresh and prevent them from drying out. If you want to keep them for longer, you can freeze them in a freezer-safe bag or container.
I hope this guide has inspired you to take on the world of cookie baking. It's a journey full of delicious discoveries, and I'm excited for you to create your own perfect cookies. Now get out there, grab your ingredients, and let the baking begin!
Everyone is watching

How to Cook Frozen Lobster Tails Perfectly: A Step-by-Step Guide
RecipesLobster. Just the word conjures up images of lavish meals, special occasions, and a taste of luxury. But let's...

Pork Fillet Cooking Time: How Long to Cook It Perfectly
RecipesPork fillet, or tenderloin as it's sometimes called, is a real favourite in our house. It's so versatile, and...

Pigs in a Blanket Cooking Time: How Long to Bake for Perfect Results
RecipesAh, pigs in a blanket. Just the name conjures up images of those delightful little parcels of crispy pastry en...

The Ultimate Guide to Cooking Delicious Frankfurters
RecipesLet's face it, we all love a good frankfurter. It's a classic, simple, and always satisfying. But let's be rea...

Wolf Meat Recipes: A Guide to Cooking Wild Game
RecipesLet's be honest, you don't see wolf meat at your local butcher shop every day. It's a bit of a wild card, but ...
