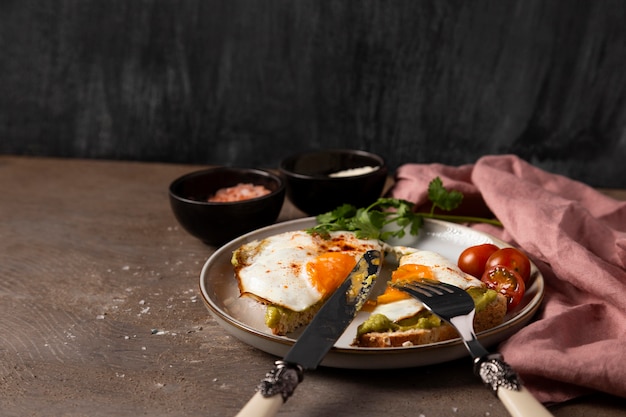
Let's be honest, there's nothing quite like the sheer joy of sinking your teeth into a perfectly cooked sunny side up egg. The vibrant yellow yolk, glistening with a golden halo, nestled within a pristine white – it's a visual symphony, a testament to culinary simplicity, and a delicious way to start the day. It's more than just breakfast; it's a symbol of sunshine on a plate, a beacon of pure culinary pleasure.
I've been on a lifelong quest to master the art of the sunny side up egg, a journey filled with burnt edges, runny yolks, and eventually, triumphant moments of golden halo perfection. And now, I'm eager to share my hard-earned wisdom, my passion for this simple yet delightful dish, and my insider tips with you.
So, grab your favourite pan, a trusty spatula, and a dash of culinary enthusiasm – we're about to embark on a journey together.
(Part 1) The Equipment: Your culinary arsenal
The first step towards achieving sunny side up perfection is understanding the tools of the trade. You don't need a fancy kitchen arsenal, but a few essential items will make all the difference. Let's explore the key players in our sunny side up symphony:
1. The Pan: The Foundation of Your Masterpiece
Think of the pan as the stage for your culinary performance. It's the foundation of your sunny side up masterpiece. I highly recommend a cast iron pan, or a good quality non-stick pan, for even heat distribution. A good pan is crucial for achieving that perfect, non-stick surface, preventing the eggs from sticking and resulting in a beautifully formed sunny side up.
Here's what to consider when choosing your pan:
- Size: A smaller pan (8-10 inches) is ideal for a single egg or two, as it allows for greater heat concentration and faster cooking, ensuring a crispier edge.
- Material: Cast iron pans are legendary for their superior heat retention and even cooking, creating a consistent cooking surface. However, they can be quite heavy and require some TLC to maintain their seasoning. Non-stick pans are a lighter alternative, perfect for quick cooking, but they may not last as long and require careful use to prevent scratching.
- Heat Distribution: Look for a pan with a base that heats evenly, to prevent hot spots that could burn the eggs and create uneven cooking. You want a consistent heat surface to achieve a beautifully cooked egg.
2. The Spatula: Your Egg Maestro
A good spatula is your trusty partner in crime when dealing with delicate eggs. I prefer a thin, flexible spatula, ideally made of silicone or metal, as it allows for easy maneuvering and prevents damage to the egg.
Here are some spatula tips to keep in mind:
- Flexibility: A thin, flexible spatula will glide smoothly beneath the egg, making it easier to lift and maneuver without breaking the yolk.
- Material: silicone spatulas are heat resistant and won't scratch your pan. Metal spatulas are durable, but they can scratch non-stick surfaces.
- Size: A medium-sized spatula is perfect for maneuvering the egg without it spilling and ensuring a secure grip.
3. Other Essential Kitchen Allies
Apart from your pan and spatula, a few other kitchen essentials will elevate your sunny side up experience:
- A Timer: Essential for keeping track of cooking time, especially if you are a beginner. Avoid overcooking or undercooking by keeping a close eye on the timer.
- A Small Bowl: For breaking the eggs and separating the yolks if needed. This allows you to avoid any shell fragments from ending up in your masterpiece.
- Salt and Pepper: Seasoning is a must for adding flavour to your eggs. A sprinkle of salt and pepper enhances the natural flavour of the egg.
(Part 2) choosing the right eggs: The Heart of the Matter
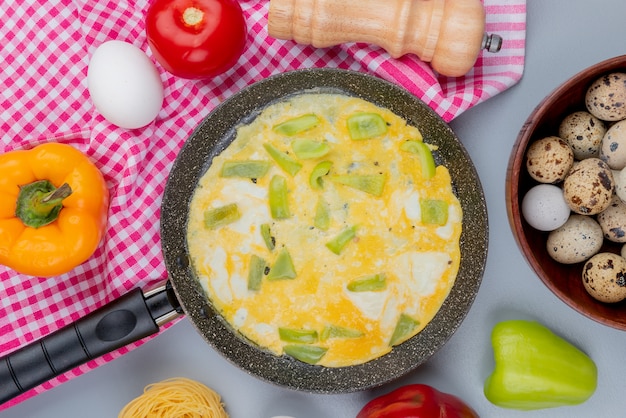
The key to achieving a truly perfect sunny side up lies in selecting the right eggs. It's not just about the colour of the shell, but also the quality of the egg itself. Here's what you need to consider for the best results:
1. Freshness: The Foundation of a Firm Yolk
Fresher eggs have a firmer yolk and a thicker white, making them ideal for sunny side up. Check the “best before” date on the carton, aiming for eggs that are as close to the date as possible. This ensures you're working with the freshest ingredients for the best possible texture and flavour.
A little trick to test freshness is to place the egg in a bowl of cold water. If the egg sinks to the bottom and lies flat, it’s fresh. If it rises to the surface, it’s older. This simple test can help you choose the freshest eggs for your culinary adventure.
2. Size: Finding the Perfect Balance
The size of the egg matters too! Smaller eggs cook faster and are easier to manage. For a perfect sunny side up, it’s best to use medium-sized eggs. This ensures even cooking, a beautiful golden halo, and a yolk that cooks to your desired level of doneness.
3. Colour: A Matter of Personal Preference
The colour of the shell doesn’t affect the flavour or texture of the egg. So, choose the colour you prefer and enjoy! It's all about personal taste and enjoying the beauty of a fresh egg.
(Part 3) Getting Started: Prepping the Stage
Now that you've gathered your tools and chosen the perfect eggs, it's time to get cooking! But before we dive in, it's important to prepare the battlefield, or rather, the pan, for the perfect sunny side up performance.
1. Preheating the Pan: The Key to Even Cooking
A preheated pan is key to achieving evenly cooked eggs with a crispy edge. Heat your pan over medium heat for 2-3 minutes, or until a drop of water sizzles and evaporates instantly. This ensures the pan is hot enough to create a consistent cooking surface, resulting in beautifully cooked eggs with a crispy edge.
Be careful not to overheat the pan, as this can lead to burnt edges and a tough, rubbery yolk. Once the pan is hot, add a small amount of oil or butter. You don't need much, just enough to lightly coat the pan. This helps prevent the eggs from sticking to the pan and ensures a smooth release.
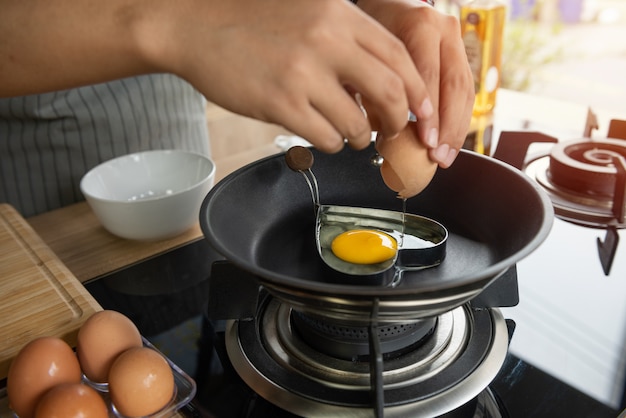
2. Cracking the Egg: Gentle, Yet Crucial
Crack the egg gently over a small bowl, separating the yolk from the white if you prefer. This prevents shell fragments from falling into the pan and ensures a pristine egg. Avoid cracking the egg directly onto the pan, as this can cause bits of shell to fall in.
(Part 4) The Cooking Process: The Culinary Dance
This is where the magic happens, where the delicate dance of heat and time transforms a simple egg into a culinary masterpiece. But remember, every pan and stove is different. So, adjust the cooking time accordingly and watch the egg closely. It's all about understanding your tools and the nuances of cooking.
1. Cooking the Whites: Creating a Delicate Base
Pour the egg gently into the preheated pan. The whites should start to set immediately, forming a thin, delicate layer around the yolk. Leave it undisturbed for a few minutes, allowing the whites to solidify. This is the foundation of your sunny side up egg, ensuring a sturdy base for the yolk.
You want to achieve a golden brown edge around the whites, which indicates they are cooked through but still soft and tender. If you’re using a cast iron pan, the heat will be more concentrated and the whites will cook faster. With a non-stick pan, the cooking time may be slightly longer.
2. The Golden Halo: A Moment of Culinary Focus
Once the whites are almost set, it's time to create the iconic golden halo. This is the moment where you need to focus your culinary attention, a key step towards achieving that perfect sunny side up.
Using a spatula, gently lift one edge of the egg. If the white is set and a light golden brown colour, you're on the right track. Now, carefully tilt the pan slightly, allowing the oil or butter to flow beneath the egg. This will create the desired golden halo around the yolk, giving it that perfect sunny side up finish. The result is a beautiful, visually appealing egg that's a testament to your culinary skills.
3. The Yolk: The Heart of the Matter
The yolk is the star of the show, and it's important to cook it to your desired level of doneness. If you want a runny yolk, cook for a shorter amount of time. If you prefer a slightly firmer yolk, cook it for a little longer.
Watch the yolk closely. As it cooks, it will start to thicken and become slightly firm. But it should still be runny and slightly jiggly in the centre. This is the art of perfecting the yolk, achieving the ideal texture for your taste preference.
4. The Final Touch: Gently Lifting Your Masterpiece
Once the egg is cooked to your liking, carefully slide the spatula underneath the egg and gently lift it out of the pan. Be careful not to break the yolk. This is the moment of truth, where you unveil your culinary masterpiece.
Transfer the egg onto a plate or toast, season it with salt and pepper to taste, and enjoy! This is the moment to savor the fruits of your labour, the culmination of your journey to achieve the perfect sunny side up egg.
(Part 5) Common Mistakes to Avoid: The Pitfalls of Sunny Side Up
Everyone makes mistakes. I've certainly had my fair share of burnt eggs and runny yolks. But over time, I’ve learned to avoid these common mistakes. Here are some key points to keep in mind to avoid those culinary mishaps:
1. Overcrowding the Pan: A Recipe for Soggy Eggs
Don’t try to cook too many eggs in one pan, as this can lead to uneven cooking and soggy eggs. It's best to cook one or two eggs at a time, ensuring ample space for them to cook evenly. This allows for proper heat distribution and prevents the eggs from steaming each other, resulting in a crispier edge and a perfectly cooked egg.
2. Overheating the Pan: The Enemy of the Perfect Yolk
An overheated pan can lead to burnt edges and a tough, rubbery yolk. Make sure the pan is preheated to medium heat, and watch the egg closely during cooking. Adjust the heat accordingly if necessary. This ensures that the egg cooks evenly without burning the edges and prevents a tough yolk.
3. Not Cooking Long Enough: The Perils of a Runny Yolk
Undercooked eggs can be runny and unappealing. Make sure the whites are set and the yolk is cooked to your desired level of doneness before removing the egg from the pan. This ensures that the egg is cooked through and avoids a runny, undercooked yolk.
4. Using Too Much Oil: A Greasy Mess
Too much oil can make the egg greasy and heavy. A small amount of oil or butter is all you need to lightly coat the pan. This ensures that the egg cooks evenly without being overly greasy and keeps the flavour profile crisp and clean.
5. Flipping the Egg: A Culinary No-No
Don’t flip the egg! The beauty of a sunny side up egg lies in its soft, runny yolk. Flipping the egg will disrupt the yolk and make it more difficult to achieve that perfect golden halo. This is a crucial step to remember, as flipping the egg will result in a different type of egg, not a true sunny side up.
(Part 6) Mastering the Variations: Beyond the Classic
The classic sunny side up egg is a delicious and versatile dish, but there's always room for a little creativity. Here are some variations you can experiment with to explore the world of sunny side up possibilities:
1. The Over Easy: A Touch of Firmness
This variation involves flipping the egg once the whites are set, allowing the yolk to cook slightly. The result is a slightly firmer yolk, with a golden brown crust on the top. To achieve the over easy, gently lift the egg with a spatula and flip it over, cooking for another 30-60 seconds. This is a variation for those who prefer a firmer yolk, with a golden brown crust adding a textural element.
2. The Basted Egg: A Luxurious Indulgence
This is a popular variation in American cooking, where the yolk is bathed in hot oil or butter to achieve a creamy, rich texture. To achieve the basted egg, add a tablespoon of oil or butter to the pan and allow it to melt. Once the whites are set, gently spoon the hot oil or butter over the yolk, allowing it to cook slightly. This will create a golden brown crust on the top and a creamy, rich yolk. This variation adds a touch of luxury and richness to the sunny side up experience.
3. The Sunny Side Up with Herbs and Spices: A Flavorful Fusion
This is a delicious way to add flavour to your sunny side up egg. Sprinkle some fresh herbs, like chives, parsley, or basil, onto the egg before cooking. You can also add a pinch of your favourite spices, such as paprika, cumin, or chili powder. This is a great way to personalize your sunny side up egg and experiment with different flavour profiles.
4. The Sunny Side Up with Cheese: A Cheesy Delight
This is a cheesy and indulgent twist on the classic sunny side up. After cooking the egg, sprinkle some shredded cheese, such as cheddar, mozzarella, or parmesan, over the yolk. Allow the cheese to melt and enjoy! This variation adds a cheesy element to the dish, perfect for those who love a bit of indulgence.
(Part 7) Serving Up Your Sunny Side Up: Culinary Creativity
Now that you’ve perfected your sunny side up eggs, it’s time to enjoy them. Here are some ideas for serving them up, adding a touch of creativity to your culinary masterpiece:
1. On Toast: A Classic Comfort
A classic and comforting way to enjoy a sunny side up egg is on a slice of toast. Use sourdough, white, or whole wheat bread, and toast it to your desired level of crispiness. Then, gently place the egg on top of the toast and enjoy. This is a simple yet satisfying way to enjoy a sunny side up egg, perfect for any breakfast occasion.
2. With Vegetables: A Flavorful Fusion
A sunny side up egg pairs perfectly with a variety of vegetables. Try pairing it with sautéed mushrooms, spinach, or asparagus. You can also add some roasted tomatoes or peppers for added flavour and colour. This is a great way to add a healthy and flavorful dimension to your sunny side up meal.
3. In a Salad: A Hearty and Refreshing Combination
A sunny side up egg can add a touch of protein and richness to any salad. Place the egg on top of a bed of greens, with some of your favourite toppings, such as grilled chicken, avocado, or nuts. This is a great way to add protein and texture to your salad, creating a hearty and satisfying meal.
4. With Bacon or Sausage: A Classic Pairing
For a hearty and satisfying meal, serve your sunny side up egg with some crispy bacon or sausage. This is a classic breakfast combination that is sure to please. This is a timeless pairing that delivers a satisfying and flavorful combination.
5. As a Sandwich Filling: A Versatile Option
A sunny side up egg can also be used as a sandwich filling. Use it in a breakfast sandwich, with bacon, cheese, and avocado. Or, try it in a burger, with your favourite toppings, such as lettuce, tomato, and onion. This is a versatile option for creating unique and flavorful sandwiches, whether for breakfast or lunch.
(Part 8) FAQs: Addressing the Sunny Side Up Dilemmas
1. What Happens If I Use Older Eggs?
While using older eggs is not ideal, you can still make a good sunny side up egg with them. However, the yolk may be a little more runny, and the white might spread a bit more than you’d like. It's best to choose fresher eggs for the ideal texture and flavour, but using older eggs won't ruin your culinary masterpiece.
2. How Do I Prevent the Yolk from Breaking?
The key to preventing the yolk from breaking is to handle the egg gently. Avoid cracking the egg directly onto the pan, and use a thin, flexible spatula to lift it out of the pan. Be gentle and avoid harsh movements.
3. Can I Add Salt to the Egg Before Cooking?
Adding salt to the egg before cooking can actually make the white spread more than you’d like. It’s best to season the egg with salt and pepper after it’s cooked. This ensures that the egg cooks evenly and prevents the white from spreading too much.
4. How Do I Know When the Yolk is Cooked?
The yolk will start to thicken and become slightly firm as it cooks. However, it should still be runny and slightly jiggly in the centre. If you want a firmer yolk, cook it for a little longer. Watch the yolk closely to achieve your desired level of doneness.
5. What Happens If I Burn the Edge of the Egg?
Don’t worry, a slightly burnt edge is not a deal breaker. Just trim it off before serving. You can also try reducing the heat slightly if you find that the eggs are burning too quickly. A slightly burnt edge won't ruin the flavour of the egg, and can be easily remedied with a little trimming.
Now, go forth and conquer the art of the perfect sunny side up egg! Remember, it’s all about practice and patience. Enjoy the process, and don’t be afraid to experiment. Soon, you’ll be whipping up sunny side up masterpieces with ease.
Everyone is watching

How to Cook Frozen Lobster Tails Perfectly: A Step-by-Step Guide
RecipesLobster. Just the word conjures up images of lavish meals, special occasions, and a taste of luxury. But let's...

Pigs in a Blanket Cooking Time: How Long to Bake for Perfect Results
RecipesAh, pigs in a blanket. Just the name conjures up images of those delightful little parcels of crispy pastry en...

Pork Fillet Cooking Time: How Long to Cook It Perfectly
RecipesPork fillet, or tenderloin as it's sometimes called, is a real favourite in our house. It's so versatile, and...

The Ultimate Guide to Cooking Delicious Frankfurters
RecipesLet's face it, we all love a good frankfurter. It's a classic, simple, and always satisfying. But let's be rea...

Wolf Meat Recipes: A Guide to Cooking Wild Game
RecipesLet's be honest, you don't see wolf meat at your local butcher shop every day. It's a bit of a wild card, but ...