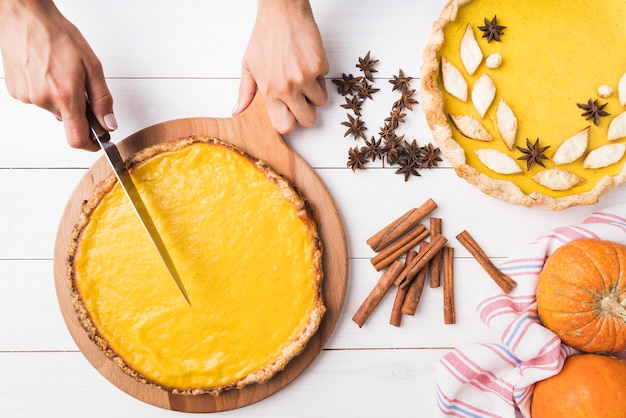
As the air turns crisp and the leaves begin their vibrant transformation, a familiar feeling of excitement washes over me. It's the anticipation of Thanksgiving, a time for gathering with loved ones, sharing laughter and gratitude, and indulging in a feast of delicious food. And for me, no Thanksgiving table is complete without a slice of my grandma's legendary pumpkin pie.
Now, I'll be honest, I wasn't always a pumpkin pie enthusiast. In my younger years, I preferred the classic apple or pecan varieties. But then, grandma's pie happened. It wasn't just the perfect blend of spices and sweetness; it was the way it transported me back to childhood memories. The scent of cinnamon and nutmeg wafting from the oven, the golden-brown crust, and the velvety smooth filling – it was pure magic.
Over the years, I've perfected my own version of grandma's recipe, drawing inspiration from her techniques and adding a few personal touches. And trust me, making a pumpkin pie from scratch isn't as intimidating as it might seem. In this article, I'll guide you through the entire process, sharing all my tips and tricks for creating a Thanksgiving showstopper that will impress even the pickiest eaters.
(Part 1) Ingredients: The Foundation of a Delicious Pumpkin Pie
Before we dive into the baking process, let’s talk about the stars of the show: the ingredients. Choosing the right ingredients is crucial for a truly amazing pumpkin pie, so pay attention!
1. The Pumpkin: The Heart of the Pie
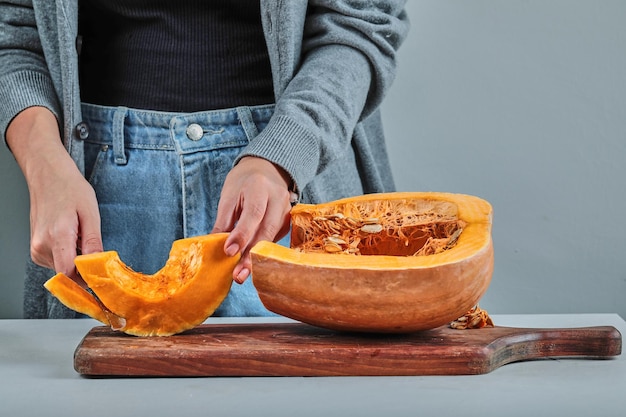
Let’s get this straight: canned pumpkin is a must. Don’t even think about using homemade pumpkin purée – it just won't have the same consistency. The canned variety is specifically formulated for baking and will give you a smooth, velvety texture that's perfect for pie. I always use a reputable brand like Libby’s or another high-quality option. The key is to look for 100% pure pumpkin purée, free of any added sugar or spices. You want the pure essence of pumpkin to shine through in your pie.
2. The Spices: A Symphony of Flavors
The spices are what give pumpkin pie its distinctive aroma and flavour. They create a warm and comforting blend that perfectly complements the sweetness of the pumpkin. I use a combination of cinnamon, nutmeg, ginger, and a pinch of cloves. Here's the breakdown:
- Cinnamon: The cornerstone of the flavour profile, providing a warm and comforting sweetness. Cinnamon is a classic spice that adds a touch of familiarity and nostalgia to pumpkin pie.
- Nutmeg: Adds a hint of earthiness and a slightly spicy kick. Nutmeg's unique aroma and flavour create a complex and nuanced taste that elevates the pumpkin pie experience.
- Ginger: Offers a subtle warmth and complexity to the flavour. Ginger adds a touch of zing and a warming sensation that complements the other spices beautifully.
- Cloves: Used sparingly, cloves add a touch of depth and spice to the blend. Cloves are a powerful spice that should be used with care. A pinch is all you need to add a hint of warmth and complexity to the flavour profile.
Feel free to adjust the quantities according to your preference. Some people prefer a more pronounced cinnamon flavour, while others like a stronger nutmeg kick. Experiment and find your perfect blend! The beauty of baking is that it allows you to customize recipes to suit your taste buds.
3. The Sugar: Balancing Sweetness
The amount of sugar you use will determine how sweet your pie is. I prefer a moderate level of sweetness, so I use a combination of granulated sugar and brown sugar. The brown sugar adds a touch of caramel-like depth to the flavour, making the pie more complex and interesting.
Here's a little secret: the ratio of sugar to pumpkin is crucial for a balanced flavour. Too much sugar will overwhelm the pumpkin, while too little will leave the pie tasting bland. Experiment with different ratios until you find the perfect balance that suits your taste.
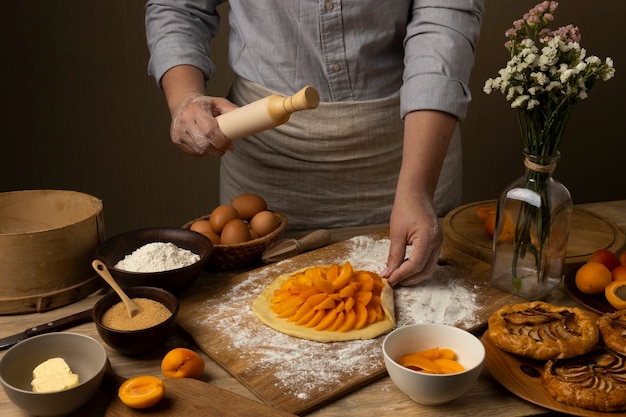
4. The Crust: A Crispy Embrace
A good pie crust is essential for any pie, but especially for pumpkin pie. The crust should be flaky, buttery, and golden brown. It acts as a crispy embrace for the creamy filling, enhancing the overall experience. There are two options: homemade or store-bought.
Personally, I'm a firm believer in homemade crusts. It adds a sense of accomplishment and allows you to control the ingredients. You can use high-quality butter, fresh flour, and just the right amount of salt to create a crust that is truly exceptional. But, let’s be honest, sometimes you just don’t have the time. In that case, a high-quality store-bought crust will do just fine. Look for a crust that is made with real butter and has a flaky texture.
(Part 2) Mastering the Art of the Pumpkin Pie Crust: A Hands-On Guide
Making a homemade pie crust is a rewarding experience, and it’s honestly not as difficult as you might think. Here’s my foolproof method:
1. Ingredients for a Flaky Crust:
Gather these ingredients for a perfectly flaky crust:
- 2 cups all-purpose flour – This provides the structure and texture for the crust.
- 1 teaspoon salt – This enhances the flavour of the crust and balances the sweetness of the pie.
- 1 cup (2 sticks) unsalted butter, chilled and cut into small cubes – The key to a flaky crust is using cold butter. It prevents the butter from melting too quickly, which would make the crust tough.
- 1/4 cup ice water – Ice water helps to keep the dough cold and prevents the gluten from developing too much, which can make the crust tough.
2. The Mixing Process:
The key to a flaky crust is to keep everything cold. It prevents the butter from melting too quickly, which would make the crust tough.
- Whisk the flour and salt in a large bowl. This ensures that the salt is evenly distributed throughout the flour.
- Add the chilled butter cubes and use a pastry blender or your fingertips to work the butter into the flour until the mixture resembles coarse crumbs. This process incorporates the butter into the flour, creating layers that will result in a flaky crust.
- Gradually add the ice water, one tablespoon at a time, mixing with a fork until the dough just comes together. Be careful not to overmix. Overmixing will develop the gluten in the flour, making the crust tough.
- Turn the dough out onto a lightly floured surface and form it into a disc. Wrap it tightly in plastic wrap and chill in the refrigerator for at least 30 minutes. Chilling the dough allows the gluten to relax and the butter to solidify, resulting in a flaky crust.
3. Rolling Out the Dough:
Once the dough is chilled, it's time to roll it out. This is where practice comes in handy, but don’t worry, even if you’re a beginner, you can still create a beautiful crust.
- Sprinkle a lightly floured surface with flour. This will prevent the dough from sticking to the surface.
- Roll out the dough into a 12-inch circle, using a rolling pin. Rotate the dough periodically to ensure even thickness. A consistent thickness is important for even baking.
- Gently transfer the dough to a 9-inch pie plate. Be careful not to stretch the dough too much, as this can make it tough.
- Crimp the edges of the dough, creating a decorative border. You can use a fork to create a simple crimp or get creative with different patterns.
- Prick the bottom of the crust with a fork to prevent air bubbles from forming during baking. Air bubbles can create uneven baking and a soggy crust.
4. blind baking:
Blind baking is a technique used to pre-bake the crust before adding the filling. This helps to prevent a soggy bottom crust.
- Preheat your oven to 375°F (190°C).
- Line the crust with parchment paper and fill it with pie weights or dried beans. This will help to prevent the crust from puffing up during baking.
- Bake the crust for 15 minutes.
- Remove the pie weights and parchment paper.
- Return the crust to the oven and bake for another 5-7 minutes, until it's lightly golden brown.
Let the crust cool completely before filling it with the pumpkin mixture. This will help to prevent the crust from becoming soggy when the hot filling is added.
(Part 3) The Star of the Show: The Pumpkin Pie Filling
Now, it's time to assemble the pumpkin filling that will make your pie truly irresistible.
1. Ingredients:
Here's what you’ll need:
- 1 (15-ounce) can pumpkin purée – This is the foundation of the filling, providing the pumpkin flavour and texture.
- 1 cup granulated sugar – Provides the sweetness for the pie, balancing the spices and pumpkin flavour.
- 1/2 cup packed light brown sugar – Adds a touch of caramel-like depth to the flavour, making the pie more complex and interesting.
- 1 teaspoon ground cinnamon – A classic spice that adds warmth and comforting sweetness to the pie.
- 1/2 teaspoon ground nutmeg – Adds a hint of earthiness and a slightly spicy kick, creating a complex flavour profile.
- 1/4 teaspoon ground ginger – Offers a subtle warmth and complexity to the flavour, complementing the other spices.
- 1/8 teaspoon ground cloves – Used sparingly, cloves add a touch of depth and spice to the blend, enhancing the overall flavour.
- 1/2 teaspoon salt – Enhances the flavour of the filling and balances the sweetness of the sugars.
- 2 large eggs – Bind the filling together and give it a rich texture.
- 1 cup heavy cream – Adds richness and creaminess to the filling, making it smooth and luxurious.
2. Mixing the Filling:
Combining the ingredients is easy, but make sure to follow these steps for the perfect consistency:
- In a large bowl, whisk together the pumpkin purée, granulated sugar, brown sugar, cinnamon, nutmeg, ginger, cloves, and salt until well combined. This ensures that all the ingredients are evenly distributed, creating a harmonious blend of flavours.
- In a separate bowl, whisk together the eggs and heavy cream. This helps to incorporate air into the mixture, making it lighter and fluffier.
- Gradually add the egg mixture to the pumpkin mixture, whisking constantly until everything is smooth. Adding the egg mixture gradually helps to prevent the filling from curdling.
3. Filling the Crust:
Pour the pumpkin mixture into the pre-baked pie crust, spreading it evenly. Be careful not to overfill the crust, as the filling will expand during baking. Leave about a half-inch of space at the top.
(Part 4) Baking the Perfect Pumpkin Pie: A Step-by-Step Guide
Now that your pie is assembled, it's time to bake it to perfection.
1. Oven Settings:
Preheat your oven to 350°F (175°C). This temperature will ensure that the filling cooks evenly and the crust browns beautifully.
2. Baking Time:
Place the pie in the preheated oven and bake for 50-60 minutes, or until the filling is set and the crust is golden brown. The filling should be just slightly jiggly in the center. This is a sign that the pie is cooked through but still retains some moisture.
To check for doneness, insert a toothpick into the center of the pie. If it comes out clean, the pie is done. If the toothpick comes out with filling on it, bake for a few more minutes and check again.
3. Cooling Time:
Once the pie is baked, let it cool completely on a wire rack before slicing and serving. This will allow the filling to set properly and prevent it from becoming runny. Cooling the pie also allows the flavours to meld and intensify.
(Part 5) Flavor Enhancements: Adding a Touch of Extra Deliciousness
While the basic recipe is delicious on its own, adding a few special touches can elevate your pumpkin pie to the next level. These enhancements add a touch of extra flavour, texture, and visual appeal to your pie.
1. Whipped Cream: A Classic Topping
A generous dollop of freshly whipped cream is a classic pumpkin pie topping. It adds a touch of lightness and creaminess, contrasting beautifully with the rich and spiced filling. Whipped cream also adds a visual element, making the pie look even more tempting.
For an extra special touch, try adding a hint of vanilla extract to your whipped cream. This will enhance the creaminess and add a warm, comforting flavour.
2. Pecan Topping: Adding Crunch and Nutty Flavor
To add a satisfying crunch, sprinkle some chopped pecans over the pie before baking. The nutty flavour complements the spices beautifully. The pecans will also toast as the pie bakes, adding a delightful aroma to the kitchen.
You can also add a handful of chopped pecans to the filling before baking. This will distribute the nuts evenly throughout the pie and create a delightful surprise in every bite.
3. A Drizzle of Caramel: Indulgent Sweetness
For a truly decadent touch, drizzle some homemade or store-bought caramel sauce over the cooled pie. The sweetness of the caramel will enhance the pumpkin flavour and create a delightful treat. Caramel adds a touch of luxury and decadence to the pie, making it a perfect dessert for special occasions.
If you're feeling adventurous, you can make your own caramel sauce. It's surprisingly easy and adds a personal touch to your pie.
(Part 6) Serving and Storing: Enjoying Your Pumpkin Pie
After all your hard work, it's time to enjoy the fruits of your labor.
1. Serving:
Serve your pumpkin pie warm or at room temperature. Serving it warm allows the flavours to intensify and the filling to be more fluid. Serving it at room temperature allows the flavours to mellow and the filling to set slightly.
A slice of pumpkin pie is best enjoyed with a dollop of whipped cream, a sprinkle of cinnamon, or a drizzle of caramel sauce.
2. Storing:
If you have leftovers, store the pie in an airtight container in the refrigerator for up to 3 days. Refrigerating the pie will help to prevent the crust from becoming soggy and the filling from separating.
When ready to serve, let the pie come to room temperature for about 30 minutes before slicing. This will allow the flavours to meld and the filling to soften slightly.
(Part 7) Tips and Tricks: A Guide to Pumpkin Pie Success
Here are a few tips and tricks I’ve learned over the years that will help you create a pumpkin pie that’s guaranteed to impress:
1. Don't Overmix:
Overmixing the dough can make the crust tough. Once the flour and butter are combined, mix just until the dough comes together. The goal is to create a dough that is just barely cohesive.
2. Chill the Dough:
Chilling the dough is essential for a flaky crust. It allows the butter to solidify, preventing it from melting too quickly during baking. This ensures that the butter remains in small, separate pieces, creating pockets of air that will puff up during baking, resulting in a flaky crust.
3. Blind Bake for a Perfect Crust:
Blind baking the crust before adding the filling ensures a crispy bottom crust. This is especially important for pumpkin pie, as the filling is quite wet and can make the crust soggy if it's not pre-baked.
4. Don't Overbake:
Overbaking the pie can result in a dry and cracked filling. The pie should be baked until the filling is set but still slightly jiggly in the center. To check for doneness, insert a toothpick into the center of the pie. If it comes out clean, the pie is done. If the toothpick comes out with filling on it, bake for a few more minutes and check again.
5. Let it Cool Completely:
Allow the pie to cool completely before serving. This will give the filling time to set and prevent it from becoming runny. Cooling the pie also allows the flavours to meld and intensify.
6. Use a Pie Shield:
If you're worried about your crust getting too brown, use a pie shield to protect it. A pie shield is a metal or ceramic disc that fits over the pie crust, preventing it from burning while the filling bakes.
7. Experiment with Different Crusts:
While a traditional pie crust is delicious, you can experiment with different crust variations. For example, try a graham cracker crust for a more crumbly texture or a chocolate crust for a decadent touch.
8. Add a Touch of Flavor to the Crust:
You can add a touch of flavor to your pie crust by incorporating spices, herbs, or even citrus zest. For example, try adding a pinch of cinnamon to your crust for a warm and comforting flavor.
9. Use a Baking Stone:
Baking your pie on a baking stone will help to distribute heat more evenly, resulting in a more evenly baked crust.
(Part 8) Pumpkin Pie Variations: A World of Flavor
While the classic pumpkin pie recipe is a timeless favourite, there are endless variations you can explore to add a unique twist to your Thanksgiving table. These variations allow you to experiment with different flavours and textures, creating pies that are both familiar and exciting.
1. Chocolate Pumpkin Pie:
For a decadent twist, add a tablespoon of cocoa powder to the pumpkin filling. The chocolate flavour complements the spices beautifully and creates a rich and indulgent treat. The chocolate also adds a touch of depth and richness to the filling, making it even more satisfying.
2. Maple Pumpkin Pie:
Replace some of the granulated sugar with maple syrup for a subtle sweetness and a hint of autumnal flavour. Maple syrup adds a unique sweetness that complements the pumpkin and spices beautifully. It also adds a touch of richness and complexity to the flavour profile.
3. Spiced Pumpkin Pie:
Experiment with different spices like cardamom, allspice, or even a touch of cayenne pepper for a more complex flavour profile. Cardamom adds a floral and slightly citrusy note, while allspice adds a warm and slightly peppery flavour. Cayenne pepper adds a subtle heat that complements the sweetness of the pumpkin and spices.
4. Cream Cheese Pumpkin Pie:
Add a block of softened cream cheese to the filling for a richer and creamier texture. The cream cheese adds a tangy and slightly salty flavour that contrasts beautifully with the sweetness of the pumpkin and spices.
5. Pumpkin Cheesecake:
Combine your love for pumpkin pie and cheesecake by creating a pumpkin cheesecake. This recipe features a creamy pumpkin cheesecake filling topped with a flaky pie crust. It's a decadent and indulgent dessert that's sure to impress.
(Part 9) FAQs: Your Pumpkin Pie Questions Answered
Here are some frequently asked questions about pumpkin pie, along with my detailed answers:
1. Can I use fresh pumpkin instead of canned?
While using fresh pumpkin is possible, it requires a lot more effort and doesn’t always yield the same consistency as canned pumpkin purée. Canned pumpkin purée is specifically formulated for baking and will give you a smooth, velvety texture that's perfect for pie. If you choose to use fresh pumpkin, you will need to roast and puree it before using it in your recipe.
2. What if my crust is soggy?
A soggy crust is usually a sign that the pie wasn’t blind baked properly. Make sure to bake the crust until it’s lightly golden brown before adding the filling. Blind baking the crust ensures that it is cooked through and will not become soggy when the wet filling is added.
3. Can I freeze pumpkin pie?
Yes, you can freeze pumpkin pie for up to 3 months. Freeze the cooled pie in an airtight container or wrap it tightly in plastic wrap and foil. Thaw it in the refrigerator overnight before serving. Freezing the pie is a great way to make it ahead of time and have it ready for your Thanksgiving gathering.
4. What if my filling is runny?
A runny filling is usually a sign that the pie wasn’t baked long enough. Bake the pie for a few more minutes until the filling is set and just slightly jiggly in the center. If the filling is still runny after baking for the recommended time, it may be necessary to bake it for a few more minutes.
5. How long can I keep pumpkin pie in the refrigerator?
Pumpkin pie will keep in the refrigerator for up to 3 days. Refrigerating the pie will help to prevent the crust from becoming soggy and the filling from separating.
And there you have it! With this comprehensive guide, you’re all set to create a pumpkin pie that will steal the show at your Thanksgiving gathering. Remember, baking is all about experimentation and having fun, so don’t be afraid to get creative and try new things. Happy baking, and enjoy the deliciousness!
Everyone is watching

How to Cook Frozen Lobster Tails Perfectly: A Step-by-Step Guide
RecipesLobster. Just the word conjures up images of lavish meals, special occasions, and a taste of luxury. But let's...

Pigs in a Blanket Cooking Time: How Long to Bake for Perfect Results
RecipesAh, pigs in a blanket. Just the name conjures up images of those delightful little parcels of crispy pastry en...

Pork Fillet Cooking Time: How Long to Cook It Perfectly
RecipesPork fillet, or tenderloin as it's sometimes called, is a real favourite in our house. It's so versatile, and...

The Ultimate Guide to Tender, Juicy Pulled Pork
RecipesRight, let's talk pulled pork. It's one of those dishes that just screams "comfort food," doesn't it? I mean...

The Ultimate Guide to Cooking Sweet Potatoes: From Roasting to Mashing
RecipesSweet potatoes. Just the name conjures up images of warm, comforting dishes, bursts of vibrant color, and a to...