Let's be honest, folks. There's a certain magic to a perfectly cooked over-easy egg. That runny yolk, the perfectly set white, the way it just melts in your mouth – it's a breakfast dream come true. But achieving that culinary nirvana can be a bit of a challenge, especially for those of us who aren't exactly culinary wizards.
I know the feeling. For years, I was stuck in a cycle of rubbery whites, hard yolks, and burnt offerings. I felt like I was doomed to a lifetime of subpar breakfast experiences. But then, something changed. I started digging deeper, experimenting with different techniques, and finally, I cracked the code (pun intended!).
So, buckle up, because I'm about to spill all my secrets. This article is your ultimate guide to cooking the most delicious, picture-perfect over-easy eggs. We'll cover everything from choosing the right pan to mastering the crucial flip, and, of course, a fool-proof cooking time guide that will make your breakfast game stronger than ever.
Let's get cracking!
(Part 1) The Foundations of a Flawless Egg
1. The Pan: A Key Ingredient
Alright, first things first. The pan is your foundation. You need a pan that conducts heat evenly and won't stick, a pan that lets those eggs slide right out, a pan worthy of your egg-cellent aspirations! For over-easy eggs, a non-stick skillet with a flat base is your best bet. It should be a size that's not too big for the number of eggs you're making, otherwise, the heat won't be concentrated enough. My personal favourite is an 8-inch cast iron skillet – it's sturdy, reliable, and distributes heat like a dream.
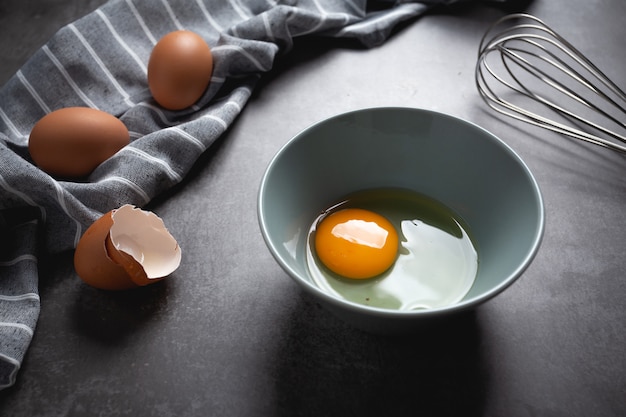
2. The Egg: Fresh is Best
You know how they say, "the fresher the better?" Well, it's true, even when it comes to eggs. fresh eggs have a higher yolk to white ratio, which means a richer, more decadent yolk that'll make your taste buds sing. A simple way to tell if an egg is fresh is to check its shape – the white should be rounded and plump, and the yolk should be more prominent.
3. Temperature Control: The Secret Weapon
Here's the crucial part: temperature control. It's like a delicate dance – too hot, and your whites will burn before the yolks even think about setting. Too low, and your eggs will cook unevenly, resulting in a sad and sorry breakfast. Aim for medium heat, a gentle warmth that lets the whites cook slowly and the yolks remain luxuriously runny.
(Part 2) Cracking the Code: Techniques for a Perfect Over-Easy Egg
1. Greasing the Pan: A Slip-Free Experience
Always, always, always grease your pan. Even with a non-stick skillet, a bit of butter, oil, or a spritz of cooking spray will make all the difference. It's like giving your eggs a warm, welcoming hug, ensuring a smooth, effortless slide out of the pan. I tend to go for a pat of butter – it adds a subtle flavor that's simply divine.
2. Cracking the Eggs: With Care and Precision
Now for the moment of truth – cracking those eggs. Don't just chuck 'em into the pan! Crack them gently into a separate bowl first. This helps to prevent any pesky shell fragments from ending up in your meal, a culinary faux pas that no one wants to experience. Once cracked, give the eggs a quick glance to make sure no shell bits are lurking. If you spot any, gently remove them – you want a smooth, pristine surface.
3. The Flip: A Dance of Timing and Technique
Alright, here we are. The moment you've been waiting for – the flip! This is where things get tricky, requiring a blend of instinct and finesse. You want the whites to be set, but the yolk should still be perfectly runny. I use a thin, flat spatula to gently lift the edge of the egg white, checking if it's firm. If it is, I quickly slide the spatula underneath the egg and flip it over with a smooth, confident motion.
(Part 3) The Cooking Time Guide: Your Egg-cellent Roadmap
Now for the nitty-gritty, the heart of this guide: the cooking time. You're aiming for set whites and a gloriously runny yolk. It's a matter of timing, mate, a careful dance between heat and time. Remember, cooking times can vary slightly depending on the size of your eggs and the heat of your pan, so keep a watchful eye.
Over-Easy egg cooking times
| Cooking Time (Seconds) | Result |
|---|---|
| 30-45 | Whites just set, yolks still very runny. |
| 45-60 | Whites set, yolks slightly more set but still runny. |
| 60-75 | Whites fully set, yolks starting to firm up. |
| 75-90 | Whites fully set, yolks mostly set but still runny in the centre. |
(Part 4) Mastering the Flip: A Symphony of Timing and Technique
Ah, the flip. It's the make-or-break moment, the pivotal point that separates the egg masters from the egg-sperimenters. Don't fret, though! With a little practice and the right technique, you can master this culinary ballet.
1. The Art of the Flip: Precision and Confidence
You'll want to use a thin, flat spatula – it allows for a smooth, controlled lift. The trick is to gently slide the spatula underneath the egg, lifting it ever so slightly, letting the edge of the egg white guide you. Once you feel the egg lift, flip it over with a quick, decisive motion.
2. Timing is Everything: A Dance with Patience
Timing is crucial. If you flip too early, the yolk will be runny, and the whites will be undercooked. Flip too late, and the yolk will be too firm, sacrificing that luscious runny texture. It's all about that sweet spot where the whites are set, but the yolk is still perfectly liquid.
3. Don’t Fear the Cracks: Embrace Imperfection
Don't panic if your whites crack a little when you flip the egg. It's normal. Just be gentle, mate. A little crack adds character, a touch of authenticity to your culinary creation.
(Part 5) Perfecting the Presentation: The Art of the Plate
Remember, presentation matters. You eat with your eyes first, so why not create a breakfast masterpiece that's as pleasing to the eye as it is to the palate?
1. The Plate: Your Culinary Canvas
Start with a simple, clean plate. I tend to go for a white plate – it provides a neutral background, letting the colours of the eggs shine.
2. The Garnish: A Touch of Elegance and Flavor
Now for the finishing touch, the garnish. A sprinkle of fresh herbs, a drizzle of balsamic vinegar, or a pinch of salt and pepper can elevate your over-easy eggs from ordinary to extraordinary. I’m partial to a sprig of parsley – it adds a vibrant splash of colour and a fresh, earthy flavour.
(Part 6) Avoiding Common Mistakes: The Path to Egg-cellence
We've all been there – the burnt whites, the runny yolks, the feeling of culinary defeat. But fear not! These common mistakes are easy to avoid with a little awareness and practice.
1. Overcrowding the Pan: Give Your Eggs Space
Don't cram those eggs together like sardines. Give them some space to breathe, to cook evenly, to become the over-easy stars they deserve to be. If you're cooking multiple eggs, you might need to work in batches.
2. Flipping Too Early: Patience is a Virtue
I've been there, haven't you? That urge to flip too early, to rush the process, to sacrifice a beautiful runny yolk for a sense of urgency. Resist the temptation! Wait until the whites are set but the yolk is still perfectly runny.
3. Using Too High Heat: Low and Slow is the Way to Go
Too high a heat will lead to burnt whites and a disappointing, overly firm yolk. Keep it low and slow, my friend. A gentle warmth, a patient approach – it's the key to egg-cellent results.
4. Not Greasing the Pan: A Slip-Free Guarantee
You know the drill. Grease that pan! Even with a non-stick skillet, a little butter, oil, or a spritz of cooking spray will prevent your eggs from sticking, ensuring a smooth, effortless slide onto your plate.
5. Not Checking the Egg's Temperature: A Hands-On Approach
Don’t rely solely on the timer. Check the temperature of the egg by gently lifting the edge with a spatula. You want the whites to be set, but the yolk should still be runny.
(Part 7) FAQs: Your Egg-perts Answers
1. Can I use a different pan?
Absolutely! While I'm a big fan of cast iron skillets, any good non-stick pan will do. Just make sure it's big enough for your eggs and conducts heat evenly.
2. What kind of eggs should I use?
I recommend using large eggs. They have a nice size and yield a perfectly runny yolk. And, remember, freshness is key! Fresh eggs have a higher yolk to white ratio, making for a richer, creamier flavour.
3. What happens if I overcook the egg?
If you overcook the egg, the yolk will become hard. Remember, we're aiming for that luxurious runny yolk, so keep a close eye on your eggs.
4. Can I add seasonings before cooking?
You can, but I prefer to season the eggs after they're cooked. That way, you can control the amount of salt and pepper and ensure those flavours shine through.
5. Can I reheat the eggs?
You can try, but the best over-easy eggs are cooked fresh. Reheating can make the yolk rubbery. If you really need to reheat them, I recommend gently reheating them in a microwave for a few seconds.
(Part 8) Enjoy Your Perfectly Cooked Over-Easy Eggs!
Congratulations, you've made it to the end! Now it's time to enjoy your perfectly cooked over-easy eggs. Pair them with your favourite toast, bacon, or a fresh salad. You can even add a bit of that runny yolk to your morning smoothie for a boost of protein and flavour.
Remember, practice makes perfect! Don't be afraid to experiment, to make mistakes, to learn from your egg-speriences. Soon, you'll be a master of the over-easy egg, whipping up breakfast masterpieces that will make your taste buds sing. And hey, maybe you'll even start your own egg-cellent breakfast empire!
Everyone is watching

How to Cook Frozen Lobster Tails Perfectly: A Step-by-Step Guide
RecipesLobster. Just the word conjures up images of lavish meals, special occasions, and a taste of luxury. But let's...

Pigs in a Blanket Cooking Time: How Long to Bake for Perfect Results
RecipesAh, pigs in a blanket. Just the name conjures up images of those delightful little parcels of crispy pastry en...

Pork Fillet Cooking Time: How Long to Cook It Perfectly
RecipesPork fillet, or tenderloin as it's sometimes called, is a real favourite in our house. It's so versatile, and...

The Ultimate Guide to Tender, Juicy Pulled Pork
RecipesRight, let's talk pulled pork. It's one of those dishes that just screams "comfort food," doesn't it? I mean...

The Ultimate Guide to Cooking Sweet Potatoes: From Roasting to Mashing
RecipesSweet potatoes. Just the name conjures up images of warm, comforting dishes, bursts of vibrant color, and a to...