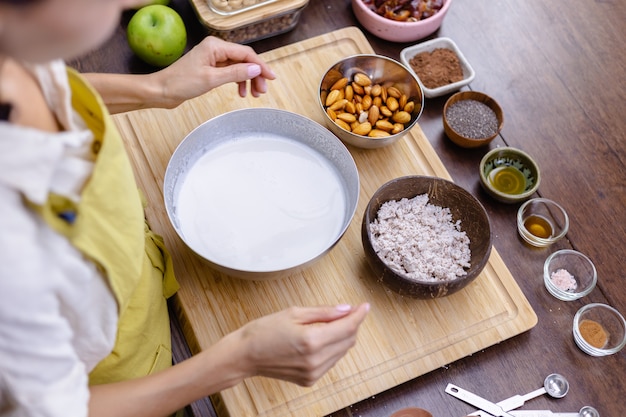
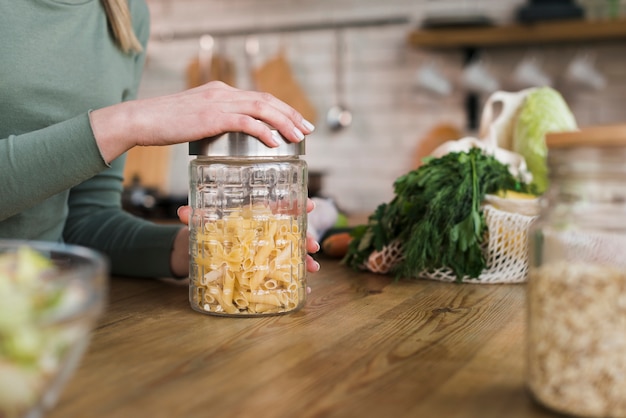
orzo pasta, those adorable little rice-shaped pasta grains, are a constant in my kitchen. They're so versatile, perfect for everything from creamy risottos to hearty salads and even comforting soups. But there's one thing that always seemed to trip me up: finding the perfect orzo water ratio. You know, that sweet spot where the pasta is cooked al dente, not mushy, and the sauce doesn't turn into a watery mess.
Over the years, I’ve experimented with various ratios, from the standard 1:1 recommended on most packaging to more adventurous ratios I've found online. It's been a rollercoaster of overcooked, undercooked, and just plain soggy orzo. But I finally feel like I've cracked the code!
In this article, I'll share my secrets to achieving perfect orzo every single time. We'll delve into different factors that affect the orzo water ratio, including the type of orzo, the recipe you’re making, and even the altitude where you live. You’ll learn how to adjust the ratio for different cooking methods and explore alternative liquids for adding extra flavour to your orzo. Let's get cooking!
(Part 1) The Basics of Orzo Water Ratio
The Standard 1:1 Ratio – A Great Starting Point
The good ol’ 1:1 ratio is what most pasta packages recommend, and for good reason! It’s a reliable starting point for cooking orzo, and it works for a variety of recipes. This means, for every cup of orzo you use, you'll add one cup of water. Now, you might think, “That’s so basic, I knew that already!” But hold your horses, my friend. There are other things to consider that might cause your orzo to be less than perfect.
The Importance of Salt – More Than Just Flavor
Salt, salt, glorious salt! Don’t ever underestimate the power of salt in pasta cooking. It’s not just for flavour; salt actually helps the pasta cook more evenly by raising the boiling point of the water. So, always add a generous pinch of salt to your boiling water before adding the orzo. Think of it as a secret weapon for perfectly cooked pasta.
When I first started cooking, I used to think salt was just for flavor. But over time, I've learned its importance in the cooking process. Now, I always add a generous pinch of salt to my boiling water. It’s like a magic trick—it really makes a difference!
The "Al Dente" Factor - The Perfect Bite
You've probably heard about "al dente" pasta, but do you really know what it means? Al dente is the Italian term for "to the tooth" or "firm to the bite". Basically, your orzo should have a slight resistance when you bite into it, not be soft and mushy. This is a key factor in choosing the perfect orzo water ratio because you want to cook it just enough to reach that al dente state without going overboard.
Think of it like this: If you overcook your orzo, it will become mushy and lose its shape. But if you undercook it, it will be too hard and chewy. Finding that perfect al dente texture is the key to delicious orzo.
Orzo Types Matter – More Than Just a Grain
You might be thinking, "It's just orzo, right?" Well, not exactly. Orzo comes in different shapes and sizes, and that actually affects the cooking time! For example, some orzo is thinner, while other varieties might be slightly wider or more elongated. This will impact how much water it absorbs and how long it takes to cook.
I once made a salad with a thinner orzo, thinking it would cook quickly like the thicker variety I usually use. But it ended up being overcooked and mushy! Now, I always make sure to check the package directions for the specific type of orzo I’m using. It's a small detail, but it can make a big difference!
(Part 2) Orzo Water Ratio for Different Recipes
orzo salads – Firm and Flavorful
For orzo salads, you want to aim for a slightly firmer orzo texture. This ensures that your orzo holds its shape and doesn't become mushy when tossed with the salad dressing. I recommend using a 1:1.25 ratio for orzo salads, which means 1 cup of orzo to 1.25 cups of water. This will help you get that perfect bite.
Think about it: You want your orzo salad to be a medley of textures, with the orzo providing a nice firmness against the other ingredients. I also find that a slightly firmer orzo absorbs the flavors of the dressing better, resulting in a more flavorful salad overall.
orzo soup – Tender and Flavorful
Soup, on the other hand, is a different story. You want the orzo to be tender and absorb the flavours of the soup broth. I use a 1:1.5 ratio for orzo soup, which translates to 1 cup of orzo to 1.5 cups of broth. The extra liquid helps the orzo soften and cook evenly in the soup.
When I make orzo soup, I want the orzo to be a subtle but comforting element. I don't want it to be the star of the show, but rather a supporting character that adds texture and warmth to the soup. The extra liquid helps the orzo cook evenly and absorbs the flavors of the broth, making it a delicious part of the soup without being overpowering.
orzo risotto – A Creamy Delight
Now, here's where it gets tricky. Orzo risotto is like a love child of orzo and risotto. You want the orzo to be tender and creamy but not mushy. I recommend using a 1:1.75 ratio for orzo risotto. This means you’ll add 1 cup of orzo to 1.75 cups of broth or water. This ratio helps create a creamy texture without overcooking the orzo.
Orzo risotto is one of my favourite dishes because it's so versatile and adaptable. You can use different types of broth, add vegetables, or even cheese for a richer flavour. But getting the texture right is key. I’ve found that using a 1:1.75 ratio helps to create a creamy, luscious risotto that's not too heavy.
(Part 3) Factors Affecting Orzo Water Ratio
Altitude – A Higher Altitude, A Longer Cook Time
Here’s a little-known fact: Altitude affects how water boils. The higher the altitude, the lower the boiling point of water. This means that at higher altitudes, you need to add a bit more water to your pasta because it takes longer to cook. A good rule of thumb is to add an extra 1/4 cup of water for every 1000 feet of elevation.
I lived in a mountain town for a few years, and I definitely learned about the impact of altitude on cooking. I was always adding a little extra water to my pasta because it seemed to take forever to cook. It's a good idea to check the altitude and adjust your water ratio accordingly, especially if you're a frequent traveler or live in a mountainous area.
Pot Size – Plenty of Space for Even Cooking
The size of your pot is surprisingly important! If you're using a small pot, the orzo will be more crowded and might not cook evenly. It’s best to use a pot that's large enough to hold the orzo and plenty of water. It’s a good idea to make sure the orzo has plenty of room to move around so it can cook evenly and not stick together.
I've definitely learned this the hard way! I once tried to cook a large batch of orzo in a small pot, and it ended up being a sticky mess. Now, I always make sure to use a pot that's big enough for the job, and it makes a huge difference in the texture and overall quality of the orzo.
Cooking Method – Adjusting for Different Techniques
Different cooking methods require different water ratios. For example, if you’re making orzo in a pressure cooker, you’ll need to use less water because the pressure cooker traps steam and cooks the orzo faster. The same goes for using a slow cooker. You’ll need to adjust the amount of liquid depending on the method you choose.
I've started experimenting with different cooking methods, and it's amazing how the water ratio changes depending on the technique. For instance, I use less water when cooking orzo in a pressure cooker because it cooks so much faster. It's important to be aware of these variations and adjust your water ratio accordingly.
(Part 4) Tips for Perfect Orzo
Don't Overcrowd the Pot – Give Orzo Room to Breathe
Don't be tempted to cram all the orzo into a small pot! Overcrowding the pot will prevent the orzo from cooking evenly and might lead to a sticky mess. Make sure to leave enough space for the orzo to move around freely. If you need to cook a large batch, use a larger pot or cook the orzo in batches.
I've learned the hard way that overcrowding the pot can lead to sticky, unevenly cooked orzo. Now, I always make sure to use a pot that's big enough for the amount of orzo I'm cooking, and I never overstuff it. This helps ensure that the orzo cooks evenly and doesn't stick together.
Stir Regularly – Prevent Sticking and Encourage Starch Release
Stirring your orzo regularly will help it cook evenly and prevent sticking. It also helps the starch release from the orzo, which contributes to a creamy sauce when making risotto or a thicker consistency in soup. Don't be afraid to give it a good stir, especially in the first few minutes of cooking.
Stirring is key to perfectly cooked orzo, especially in the first few minutes when the starch is being released. I always stir my orzo every few minutes, even if it seems like it's not sticking. It's a simple habit that ensures even cooking and prevents sticking, which is a real pain to deal with!
Taste Test – The Ultimate Test for Al Dente
This is a crucial step! Once the orzo is almost cooked, taste it to check if it’s reached al dente. It should be firm to the bite but not too hard. Adjust the cooking time accordingly. Remember, you can always cook it a little longer, but you can't undo overcooking.
I always make sure to taste test my orzo before draining it. It's the best way to ensure that it's cooked to perfection. Don't be afraid to adjust the cooking time if it's not quite al dente yet.
Don't Drain the Pasta Completely – Reserve the Starchy Water
Here's a pro tip! Don't drain the pasta completely. Reserve a little of the pasta water, known as "starchy water", because it’s a secret weapon for creating a creamy sauce for your orzo. The starch in the pasta water helps to bind the ingredients together and create a luscious sauce. Just drain the orzo, then add a cup or two of the starchy water back into the pot, along with your sauce or other ingredients. It's a game changer!
I used to think that draining the pasta completely was the right thing to do, but I've learned that reserving the starchy water is actually a key step to making a creamy sauce. It's like a magic potion that transforms a plain sauce into something luxuriously smooth.
(Part 5) Exploring Alternative Liquids
Broth for Extra Flavour – Beyond Just Water
Beyond just water, you can use broth to elevate your orzo. chicken broth for a chicken-based dish, vegetable broth for a vegetarian meal, and even beef broth for a richer flavour. The broth will infuse your orzo with extra flavour, creating a more complex taste profile. You can even use a homemade broth for a real gourmet touch.
I love using broth when cooking orzo because it adds so much depth of flavour to the dish. It's like a secret ingredient that takes the orzo to the next level. I've even started making my own broth from scratch, which is a great way to add extra flavour and nutrients.
Milk for Creamy Orzo – A Luxurious Touch
If you’re making a creamy orzo dish, using milk instead of water can add a luxurious touch. Milk will create a rich and creamy base for your orzo, perfect for dishes like orzo risotto or a creamy orzo casserole. Just be sure to simmer the milk gently to avoid it from curdling.
Milk is a great alternative to water when you want a creamy, comforting orzo dish. It adds a richness and depth that you just can't get with water. Just be careful not to boil the milk, as it can curdle.
Wine for Flavour and Texture – A Sophisticated Touch
For a truly sophisticated dish, add some white wine to your orzo cooking water. The wine will add a touch of acidity and complexity to the flavour, and it will also help to create a smoother texture. Just be careful not to add too much, as it can make the orzo taste too strong. A splash is all you need!
Adding a splash of white wine to the orzo cooking water is a great way to add a touch of sophistication to the dish. The wine adds a subtle complexity to the flavor and helps to create a smoother texture.
(Part 6) Orzo Water Ratio Chart – Your Handy Guide
Here’s a handy chart summarizing the orzo water ratios we’ve discussed so far. It's a great starting point for experimenting with your own orzo recipes.
| Recipe | Orzo Water Ratio |
|---|---|
| Orzo Salads | 1:1.25 |
| Orzo Soup | 1:1.5 |
| Orzo Risotto | 1:1.75 |
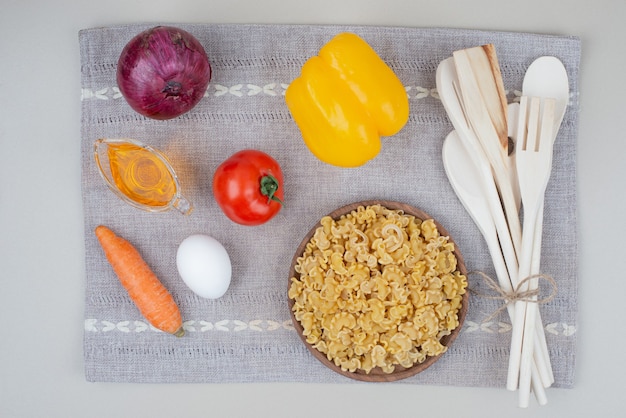
(Part 7) My Favourite Orzo Recipe – Lemon Orzo Salad
Here's my favourite orzo recipe, a simple and flavourful Lemon Orzo Salad that showcases the versatility of orzo and how to achieve that perfect al dente texture. It's a delicious, bright salad that's perfect for potlucks, picnics, or a light summer meal.
Lemon Orzo Salad
Ingredients:
- 1 cup orzo pasta
- 1.25 cups water
- 1 tablespoon olive oil
- 1/4 cup chopped fresh parsley
- 1/4 cup chopped fresh basil
- 1/4 cup chopped red onion
- 1/4 cup chopped sun-dried tomatoes, packed in oil
- Juice of 1 lemon
- Salt and pepper to taste
Instructions:
- Bring the water to a boil in a large pot and add a pinch of salt. Add the orzo and cook according to package directions, or until al dente. Drain the orzo and set aside.
- While the orzo is cooking, combine the olive oil, parsley, basil, red onion, and sun-dried tomatoes in a large bowl.
- Add the cooked orzo to the bowl and toss to coat.
- Add the lemon juice and season with salt and pepper to taste.
- Chill for at least 30 minutes before serving.
This recipe is a great starting point for your own orzo salad creations! Feel free to experiment with different herbs, vegetables, and dressings. Get creative and have fun with it!
(Part 8) FAQs – Your Orzo Questions Answered
What happens if I use too much water?
If you use too much water, the orzo might become overcooked and mushy. The extra water will dilute the flavour of the sauce or broth and make it less concentrated. You can try to drain off some of the excess water, but it's best to avoid overdoing it in the first place. Stick to the recommended ratios, and you'll be good to go!
Can I use less water than recommended?
Using less water than recommended can lead to undercooked orzo. The orzo might not cook evenly and could even stick to the bottom of the pot. It's better to err on the side of caution and use enough water to ensure that the orzo is fully cooked. If you're worried about it being too watery, you can always drain off some of the excess water at the end.
What if I don't have a kitchen scale?
No worries! You can use measuring cups to measure the orzo and water. One cup of orzo is roughly the same as 100 grams. So, you can use the ratios in the chart as a guide, even without a kitchen scale. Just make sure to adjust the amounts accordingly if you're using a smaller or larger pot.
How do I know when orzo is done?
The best way to tell if your orzo is done is to taste it! It should be firm to the bite but not too hard. If it's still too firm, cook it for another minute or two. Once it's reached al dente, you can drain it and toss it with your favourite sauce or ingredients.
What if my orzo is sticking together?
Sticking orzo is usually a sign of overcrowding the pot or not stirring it enough. Make sure to use a pot large enough for the orzo and plenty of water. Stir the orzo regularly throughout the cooking process to prevent it from sticking together. If it does stick, don't worry. You can add a splash of water or broth and stir it gently to loosen it up.
I hope this article has helped you understand the importance of the orzo water ratio and how to achieve perfect orzo every time. Remember, it's all about finding the right balance, and with a little practice, you'll be a pro at cooking delicious orzo dishes. Happy cooking!
Everyone is watching

How to Cook Frozen Lobster Tails Perfectly: A Step-by-Step Guide
RecipesLobster. Just the word conjures up images of lavish meals, special occasions, and a taste of luxury. But let's...

Pigs in a Blanket Cooking Time: How Long to Bake for Perfect Results
RecipesAh, pigs in a blanket. Just the name conjures up images of those delightful little parcels of crispy pastry en...

Pork Fillet Cooking Time: How Long to Cook It Perfectly
RecipesPork fillet, or tenderloin as it's sometimes called, is a real favourite in our house. It's so versatile, and...

The Ultimate Guide to Cooking Delicious Frankfurters
RecipesLet's face it, we all love a good frankfurter. It's a classic, simple, and always satisfying. But let's be rea...

Wolf Meat Recipes: A Guide to Cooking Wild Game
RecipesLet's be honest, you don't see wolf meat at your local butcher shop every day. It's a bit of a wild card, but ...