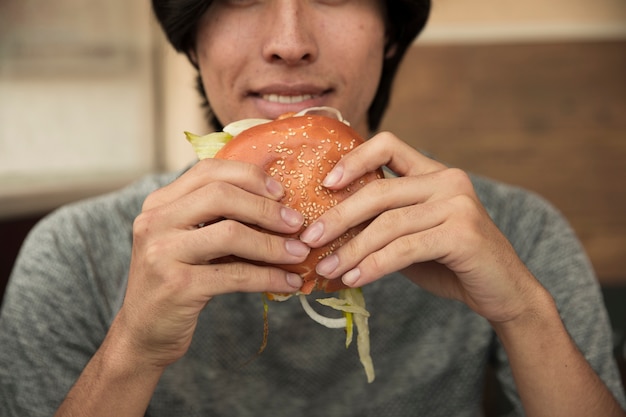
There's a primal satisfaction in sinking your teeth into a juicy, perfectly cooked burger. That vibrant, crimson center, the crisp edges, the irresistible aroma – it's a culinary symphony. But achieving that coveted medium-rare can feel like a tightrope walk, especially if you're not a seasoned grill master. I've been there, staring at a burger on the grill, wrestling with the "is it done yet?" dilemma, ending up with either a dry, disappointing patty or one that was still mooing. So, I embarked on a personal mission to conquer the medium-rare burger, determined to master the art of cooking it to absolute perfection.
My quest started with a pilgrimage to the butcher, where I learned about the best cuts for burgers, the difference between chuck, brisket, and sirloin, and the secrets of achieving that perfect balance of fat and lean. Armed with this newfound knowledge, I started my burger cook-off, experimenting with different techniques and diligently recording my results. This article is a culmination of my trials and triumphs, a roadmap to creating the most mouthwatering medium-rare burger you'll ever experience.
(Part 1) - The Anatomy of a Burger
The Meat: The Foundation of Flavor
You can’t have a great burger without exceptional meat. The best cuts for burgers are those with good marbling – those little streaks of fat that are the key to a burger's juicy texture and irresistible flavor. I prefer a mix of chuck and brisket, a classic blend that delivers both tenderness and rich flavor. But feel free to experiment with other cuts, like sirloin for a leaner option, or even a blend of different cuts, like a mix of chuck and short rib for a richer, more intensely flavored burger.
Here are some key factors to consider when selecting your meat:
- Fat content: Higher fat content usually means a juicier burger. Aim for a blend that offers the best balance of fat and lean. Too much fat can lead to a greasy burger, while too little fat can result in a dry and flavorless patty.
- Ground meat: If you're not grinding your own meat, ask your butcher for freshly ground meat. The fresher the better. Avoid pre-ground meat that has been sitting on the shelf for days, as it can be dry and lack the vibrant flavor of freshly ground meat.
- Texture: You want a meat that's finely ground, but not too smooth. Some small chunks will add a more interesting texture to your burger.
The Shaping: A Gentle Touch
Once you have your meat, it's time to shape it into patties. This may seem like a simple step, but there's a technique involved. You want a patty that's firm enough to hold its shape during cooking, but not so dense that it becomes tough.
Here are my tips for shaping the perfect burger:
- Keep it even: Make sure all your patties are the same thickness. This ensures that they cook evenly. If one patty is thicker than another, it will take longer to cook and could be overcooked on the outside while the inside is still raw.
- Don't overpack: Gently form the patties, but avoid overpacking the meat. You want the burger to have a nice, loose texture. Overpacking can make the burger tough and dry.
- Make a divot: Use your thumb to create a small divot in the center of each patty. This will help prevent the patty from puffing up in the middle during cooking. The divot allows the burger to cook more evenly, preventing a "dome" effect in the middle.
The Seasoning: A Symphony of Flavor
Salt and pepper are the most basic seasonings for a burger, but there's a whole world of flavor possibilities beyond that. I like to add a little garlic powder, onion powder, and paprika for a touch of extra flavor that complements the meat without overpowering it. Don't be afraid to experiment with other seasonings, like smoked paprika for a smoky depth of flavor, cayenne pepper for a spicy kick, or a pinch of dried herbs like thyme or rosemary.
Here are some things to consider when seasoning your burger:
- Seasoning before cooking: It’s important to season your burgers well before cooking. This gives the flavors time to meld and penetrate the meat. I recommend seasoning the patties at least 30 minutes before grilling, allowing the salt to draw out moisture and help develop the burger's flavor.
- Don't overdo it: A little salt and pepper goes a long way. Too much seasoning can overwhelm the natural flavor of the meat. Taste as you season to find the perfect balance.
- Seasoning after cooking: While you can season your burger after cooking, the best approach is to get the seasoning in early to allow for better flavor infusion into the meat.
(Part 2) - The Art of Grilling
Choosing Your Grill: Finding Your Flame
When it comes to grilling burgers, you have a few options. You can use a gas grill, charcoal grill, or even a cast iron skillet. I personally prefer charcoal grilling for the smoky flavor it imparts, a delicious depth that takes a burger to another level. However, any method will work, the key is to make sure that your grill is hot enough to sear the burgers quickly and evenly.
Here's a quick breakdown of the different grill options:
- Gas grill: Gas grills are easy to use and offer precise control over the heat. However, they often lack the smoky flavor of charcoal grilling.
- Charcoal grill: Charcoal grills deliver a delicious smoky flavor, but controlling the heat can be more challenging. They require a bit more attention and experience to master.
- Cast iron skillet: A great option for indoor grilling, especially when you can't or don't want to fire up a grill. However, you won't get that smoky char on a cast iron pan.
Preheating Your Grill: The Key to a perfect sear
It's essential to preheat your grill to high heat before you place the burgers on it. A hot grill sears the outside of the burger quickly, creating a delicious crust while keeping the inside juicy and pink. Aim for a grill temperature of around 450-500°F (232-260°C). You can use a grill thermometer to check the temperature. If you don't have a thermometer, you can use these simple tricks to check if your grill is hot enough:
- Hold your hand above the grill: If you can only hold your hand there for a couple of seconds, the grill is hot enough. If you can hold your hand there comfortably for more than a few seconds, the grill isn't hot enough.
- Water test: Drop a few drops of water onto the grill. If it sizzles and evaporates quickly, the grill is hot enough. If the water takes a while to evaporate, the grill needs to be hotter.
Grilling Time: The Key to Doneness
This is where the magic happens. The duration of your grilling depends on the thickness of your burgers and your desired level of doneness. A medium-rare burger is typically cooked for around 4-5 minutes per side, but you can adjust this based on your preference. It's important to use a meat thermometer to ensure that the burger reaches the correct internal temperature.
Here's a breakdown of how long to grill for different degrees of doneness. Keep in mind that these are approximations, and you may need to adjust the cooking time based on the thickness of your burger and your grill's heat level:
| Doneness | Internal Temperature (°F) | Internal Temperature (°C) | Time Per Side (Approximate) |
|---|---|---|---|
| Rare | 125-130 | 52-54 | 3-4 minutes |
| Medium-Rare | 130-135 | 54-57 | 4-5 minutes |
| Medium | 140-145 | 60-63 | 5-6 minutes |
| Medium-Well | 150-155 | 65-68 | 6-7 minutes |
| Well-Done | 160 | 71 | 8 minutes |
Flipping Technique: A Gentle Touch
Don't flip your burger too often. Resist the urge to constantly peek and flip. The key is to let the burger form a good crust on one side before flipping it. A good rule of thumb is to flip the burger only once, when the bottom is nicely browned and the edges are starting to crisp up. This allows the burger to develop a flavorful crust and prevents the juices from escaping too quickly.
Here are some tips for flipping your burger with confidence:
- Use a spatula: A wide, thin spatula is ideal for lifting and flipping the burger without breaking it.
- Don't press down: Resist the urge to press down on the burger when flipping. This will only force out the juices and make it drier. Let the burger cook naturally.
- Flip with confidence: A quick, decisive flip is better than a hesitant one. Get the burger flipped quickly and efficiently to maintain the heat and prevent the juices from escaping.
(Part 3) - The Finishing Touches: Elevating Your Burger
Resting Time: Let It Breathe
Once your burger is cooked to your desired doneness, it's important to let it rest for a few minutes before serving. This allows the juices to redistribute throughout the patty, resulting in a more tender and flavorful burger. I recommend letting it rest for about 5-10 minutes.
Don't be tempted to cut into it immediately. Just let it sit on a cutting board, covered with foil to keep it warm. This will allow the juices to settle back into the meat, leading to a much more satisfying bite.
The Bun: The Foundation of Your Burger
A good bun is just as important as the burger itself. Choose a bun that's soft and slightly toasted, but not too heavy. You want a bun that can hold up to the juicy burger without falling apart. I recommend a classic brioche bun, which offers a soft, slightly sweet texture that complements the savory flavors of the burger. But there are many other options available, such as sesame seed buns, potato buns, or even pretzel buns, each with its own unique flavor and texture.
Here are some tips for toasting your bun:
- Butter: Brush the inside of the bun with a little melted butter before toasting. This will add flavor and prevent the bun from drying out.
- Grill or pan: You can toast the bun on the grill or in a pan over medium heat. Just watch it closely so it doesn't burn.
- Oven: You can also toast the bun in the oven at a low temperature. This method is less messy but takes a little longer.
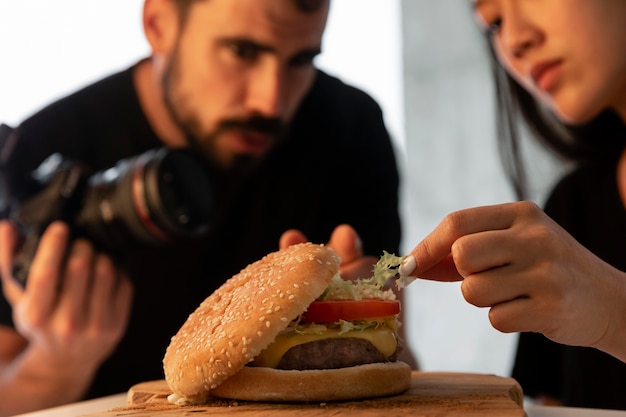
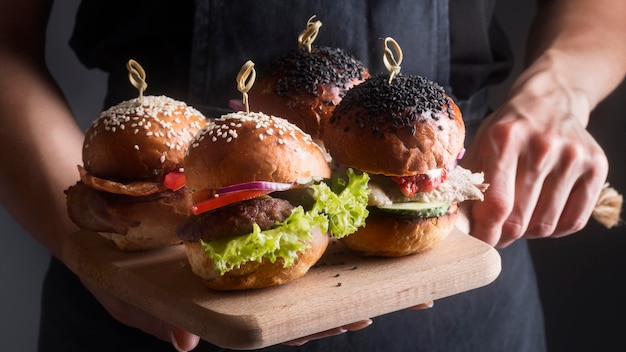
The Toppings: Unleash Your Creativity
Toppings are where you can really personalize your burger. The possibilities are endless, from classic cheese and lettuce to more adventurous options like fried egg, caramelized onions, and avocado. Just remember to keep the balance in mind – you don't want the toppings to overwhelm the flavor of the burger.
Here are a few of my favorite topping combinations, each offering a different flavor profile:
- Classic: Cheddar cheese, lettuce, tomato, onion, and pickles. A timeless combination that delivers a fresh, tangy flavor.
- Spicy: Jalape??o peppers, pepper jack cheese, and a drizzle of hot sauce. This option offers a fiery kick and a touch of heat.
- Gourmet: Goat cheese, caramelized onions, roasted red peppers, and a balsamic glaze. This sophisticated combination adds a touch of sweetness and tanginess to the burger.
(Part 4) - The Perfect Burger: A Recipe
Ingredients:
- 1 pound (450g) ground chuck and brisket blend
- 1 teaspoon salt
- 1/2 teaspoon black pepper
- 1/4 teaspoon garlic powder
- 1/4 teaspoon onion powder
- 1/4 teaspoon smoked paprika
- 4 brioche buns
- 4 slices cheddar cheese
- 1 tomato, sliced
- 1 red onion, sliced
- 4 pickles, sliced
- Lettuce leaves
- Mayonnaise
- Ketchup
- Mustard
Instructions:
- Prepare the meat: Combine the ground chuck and brisket in a large bowl. Season with salt, pepper, garlic powder, onion powder, and smoked paprika. Mix well with your hands, but avoid overmixing. Overmixing can make the burger tough. Divide the mixture into four equal portions and shape them into patties. Make a small divot in the center of each patty to help prevent puffing during cooking.
- Preheat the grill: Preheat your gas or charcoal grill to high heat (450-500°F/232-260°C). A hot grill will sear the burger quickly, creating a flavorful crust.
- Grill the burgers: Place the patties on the hot grill and cook for 4-5 minutes per side, or until they reach an internal temperature of 130-135°F (54-57°C) for medium-rare. Don't press down on the burgers while they cook. This will force out the juices and make the burger dry.
- Add the cheese: About a minute before the burgers are done, place a slice of cheese on top of each patty. Allow the cheese to melt over the hot burger.
- Toast the buns: Brush the inside of the buns with melted butter and toast them on the grill or in a pan over medium heat for a few minutes. This will add a touch of sweetness and prevent the bun from getting soggy from the juicy burger.
- Assemble the burgers: Spread mayonnaise, ketchup, and mustard on the bottom buns, if desired. Layer on the lettuce, tomato, onion, and pickles. Place the cooked burger patty on top and add the top bun. Serve immediately, while the burger is still hot and juicy.
(Part 5) - Beyond the Grill: Alternative Cooking Methods
Cast Iron Pan: Indoor Grilling
For those days when you can't or don't want to fire up the grill, a cast iron pan is a great alternative. It can get incredibly hot, mimicking the searing power of a hot grill. The key is to heat the pan over high heat until it's smoking hot. Then, add a little oil and place the burger patties in the pan. Cook for about 4-5 minutes per side, or until the burgers are browned and cooked to your desired doneness.
Keep in mind that a cast iron pan won’t give you that smoky flavor, but it can still deliver a delicious burger with a crispy crust.
Oven Baking: A Less Messy Option
You can also bake your burgers in the oven. This method is less messy than grilling, and it allows you to cook multiple burgers at once. Preheat your oven to 400°F (204°C). Place the burger patties on a baking sheet lined with parchment paper. Bake for 15-20 minutes, flipping halfway through. You can add the cheese during the last few minutes of baking to allow it to melt.
Keep in mind that oven-baked burgers won't have the same crispy exterior as grilled burgers, but they can still be juicy and delicious.
(Part 6) - The "Doneness" Debate: A Personal Journey
As I delved deeper into the world of burger cooking, I discovered that there's no one-size-fits-all answer to the question of "how done" a burger should be. It's a matter of personal preference, and the debate can get surprisingly heated.
Some people swear by a well-done burger, finding comfort in knowing that the meat is thoroughly cooked. Others wouldn't touch anything less than medium-rare, embracing the juicy texture and vibrant flavor of a less cooked burger. Personally, I'm a firm believer in the medium-rare camp. I love the juicy, flavorful texture of a burger cooked to a perfect pink, a balance of tenderness and richness. But, I also understand that not everyone shares this preference.
The important thing is to respect everyone's choices and cook the burger to the level of doneness they prefer.
(Part 7) - Doneness Check: The Meat Thermometer is Your Best Friend
Don't rely on guessing or color alone to determine doneness. Use a meat thermometer. It's the most reliable way to ensure that your burger is cooked to your desired level of doneness and safe to eat.
Insert the thermometer into the thickest part of the patty, making sure it doesn't touch bone or fat. The temperature should read between 125-130°F (52-54°C) for rare, 130-135°F (54-57°C) for medium-rare, and so on.
Doneness Chart:
Refer to the table in (Part 2) for a more complete breakdown of doneness temperatures.
(Part 8) - FAQs: Common Questions Answered
1. What is the best way to make a juicy burger?
The key to a juicy burger is a combination of factors: choosing meat with good marbling, forming the patties gently to avoid overpacking, not overcooking the burger, and letting it rest for a few minutes after cooking. These steps ensure that the meat retains its moisture and develops a tender, flavorful texture.
2. How do I prevent my burger from drying out?
To prevent your burger from drying out, use meat with good marbling, don't overcook it, and let it rest for a few minutes after cooking. Avoid pressing down on the burger while it's cooking, as this will squeeze out the juices.
3. What happens if I overcook my burger?
Overcooking a burger will make it dry and tough. The juices will be cooked out, leaving a less appealing and flavorful burger. The outside may be charred and crispy, but the inside will be dry and crumbly.
4. Can I cook a burger in the microwave?
Technically, you can cook a burger in the microwave. But, it won't be nearly as good as a burger cooked on a grill or in a pan. The microwave will create a mushy texture and won't give you that delicious, crispy exterior.
5. What are the risks of eating a medium-rare burger?
There is a risk of food poisoning from eating undercooked meat, including burgers. It's important to cook meat to the appropriate temperature to kill harmful bacteria. The risk of food poisoning is greater with ground meat than with whole cuts of meat because the grinding process can spread bacteria throughout the meat. If you're concerned about the risk, you can choose to cook your burger to a higher level of doneness. However, it's important to note that well-done burgers can be dry and less flavorful.
I hope this comprehensive guide has armed you with the knowledge and techniques you need to conquer the art of medium-rare burger perfection. It's a journey of flavor, skill, and a little bit of culinary courage, but with practice, you'll be flipping out perfect medium-rare burgers in no time.
Everyone is watching

How to Cook Frozen Lobster Tails Perfectly: A Step-by-Step Guide
RecipesLobster. Just the word conjures up images of lavish meals, special occasions, and a taste of luxury. But let's...

Pork Fillet Cooking Time: How Long to Cook It Perfectly
RecipesPork fillet, or tenderloin as it's sometimes called, is a real favourite in our house. It's so versatile, and...

Pigs in a Blanket Cooking Time: How Long to Bake for Perfect Results
RecipesAh, pigs in a blanket. Just the name conjures up images of those delightful little parcels of crispy pastry en...

The Ultimate Guide to Cooking Delicious Frankfurters
RecipesLet's face it, we all love a good frankfurter. It's a classic, simple, and always satisfying. But let's be rea...

Wolf Meat Recipes: A Guide to Cooking Wild Game
RecipesLet's be honest, you don't see wolf meat at your local butcher shop every day. It's a bit of a wild card, but ...