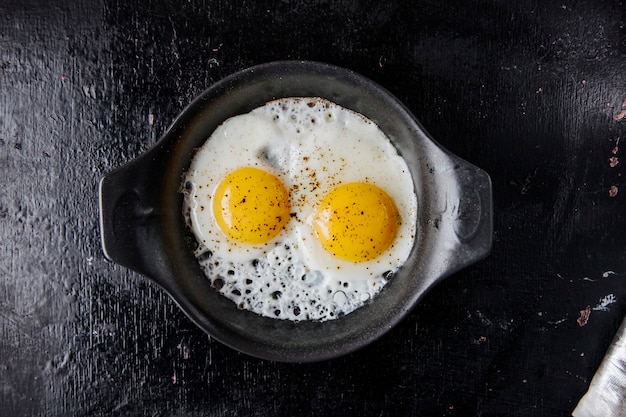
There's a certain kind of magic in a boiled egg. Simple, satisfying, and surprisingly versatile, it's a breakfast staple, a lunchtime hero, and a snack that never fails to please. But achieving that perfect boiled egg, with its creamy yolk and tender white, can feel like a culinary mystery. Too short a boil, and you're left with a runny yolk that's more wobbly than wonderful. Too long, and the yolk turns into a rubbery, overcooked nightmare.
I've been there. I've had my fair share of wobbly, runny yolks and dry, rubbery messes. But over time, I've learned the secrets to crafting the perfect boiled egg. And I'm here to share those secrets with you. We'll dive into the science behind the boiling process, explore different cooking techniques, and uncover the key to achieving the ideal texture for every preference. So grab a pot, gather your eggs, and let's embark on this egg-cellent journey together!
Part 1: Setting the Stage
The Importance of Freshness
Like any good dish, a perfect boiled egg begins with quality ingredients. And when it comes to eggs, freshness is key. A fresh egg has a bright, white shell, a pronounced air pocket (that little bubble at the top), and a plump yolk. I've always believed free-range eggs, with their vibrant yolks and rich flavour, are the best option for boiling. They're also a more ethical choice, which is a bonus in my book.
Speaking of freshness, did you know you can actually test how fresh an egg is by placing it in a bowl of cold water? If it sinks to the bottom and lies flat, it's fresh. If it stands up on its side, it's a bit older. And if it floats, it's time to toss it.
Preparation: A Simple but Crucial Step
Before you even think about boiling, give your eggs a good wash under cold, running water. You want to remove any dirt or debris that might be lingering on the shell. You don't want those pesky bits getting into your perfectly boiled egg. Then, pat them dry with a clean tea towel. This small step ensures a clean, unblemished finish.
Part 2: The Boiling Process: Mastering the Art of Heat
The Science Behind the Boil
The boiling process is all about heat and time, a delicate dance that transforms a raw egg into a culinary masterpiece. As the water heats up, it cooks the egg white, causing it to firm up and turn opaque. The heat gradually reaches the yolk, transforming it from a runny, vibrant orange into a firmer, pale yellow. The longer you boil the egg, the firmer the yolk becomes. The key is to find the perfect balance between a cooked yolk and a tender white.
The Equipment: Simple Tools for a Delicious Outcome
You'll need a medium-sized saucepan and enough water to completely cover the eggs. Don't skimp on the water, as you want to ensure even cooking. A trusty egg timer is also your best friend in this culinary adventure. It's the perfect tool for ensuring you get the timing just right.
For added insurance, especially if you're new to the art of boiling eggs, consider using an egg piercer. This handy gadget helps prevent the eggs from cracking during the boiling process. It gently pokes a small hole in the top of the egg, allowing steam to escape, reducing the pressure that can cause cracking. But don't worry if you don't have one, it's not a deal-breaker.
Part 3: The Perfect soft-boiled egg: A Delicate Dance of Time and Texture
Ah, the soft-boiled egg. A delicate masterpiece, a culinary whisper of perfection. The yolk is soft, almost molten, with a slightly runny texture, a delightful contrast to the firm white. It's a testament to the power of precision.
The Boiling Time: A Matter of Seconds
For a soft-boiled egg, you'll need to boil it for a mere 3-4 minutes, after the water has reached a rolling boil. Keep a close eye on the time – every second counts! The yolk should be soft, almost molten, with a slightly runny texture. It's a delicate dance between firm and runny, a testament to the power of precision.
The Cooling Process: A Crucial Step to Prevent Overcooking
Immediately after boiling, plunge the eggs into a bowl of ice-cold water. This stops the cooking process, preventing the yolk from overcooking, and making peeling much easier. Let the eggs chill for a few minutes before peeling them gently.
Part 4: The Perfect Medium-Boiled Egg: A Happy Medium for All Egg Enthusiasts
This is the gold standard in the world of boiled eggs. The yolk is firm enough to hold its shape but still has a creamy, slightly runny texture. It's the perfect balance between soft and hard, a happy medium for all egg enthusiasts.
The Boiling Time: A Gentle Approach to Achieve the Ideal Texture
For a medium-boiled egg, you'll need to boil it for 6-7 minutes after the water has reached a rolling boil. The yolk should be firm enough to slice cleanly but still have a velvety, slightly runny texture.
The Cooling Process: A Refreshing Touch
As with the soft-boiled egg, plunging the eggs into ice-cold water after boiling is essential. This helps prevent overcooking and makes peeling much easier. Let the eggs chill for a few minutes before peeling them gently.
Part 5: The Perfect Hard-Boiled Egg: A Versatile Culinary Hero
Ah, the hard-boiled egg. A versatile culinary hero. It's a staple in many breakfast and lunch recipes, and of course, who can resist a hard-boiled egg sandwich? But achieving that perfectly hard-boiled egg can be tricky. Too long and you'll be met with a rubbery, overcooked yolk. But fear not, I'll show you the way to egg-cellence!
The Boiling Time: A Firm Hand for a Solid Yolk
For a hard-boiled egg, you'll need to boil it for 8-10 minutes after the water has reached a rolling boil. The yolk should be firm and solid, with no trace of runny texture. It should slice cleanly and hold its shape perfectly.
The Cooling Process: A Necessary Step for a Smooth Peel
As with the soft-boiled and medium-boiled eggs, you need to plunge them into a bowl of ice-cold water immediately after boiling. This stops the cooking process and prevents overcooking. Let the eggs chill for a few minutes before peeling them gently.
Part 6: The Art of Peeling: Mastering the Shell Game
Peeling a boiled egg can be a bit of an art form. Some say it's a test of patience, while others claim it's a matter of skill. I say it's a combination of both.
The Tap Technique: A Gentle Approach to Crack the Shell
This is my go-to technique for peeling boiled eggs. Gently tap the blunt end of the egg on a hard surface like a countertop. This creates a small crack in the shell, making it easier to peel. Then, start peeling from the crack, working your way down the egg.
The Rolling Technique: A Smooth Move to Loosen the Shell
This technique involves gently rolling the egg between your palms. The friction between the shell and your hands will eventually crack the shell, making it easier to peel. Start peeling from the crack, working your way down the egg.
The Water Technique: A Soaking Solution for hard-boiled eggs
This technique works well for hard-boiled eggs. Place the boiled eggs in a bowl of cold water and let them soak for a few minutes. The water will help loosen the shell, making it easier to peel. Then, gently peel the egg under running water.
Part 7: Beyond the Basic Boil: Exploring Egg-cellent Variations
Now that you've mastered the art of the basic boiled egg, let's explore some exciting variations. After all, there's a whole world of egg-cellence waiting to be discovered!
marbled eggs: A Touch of Whimsy for a Colorful Breakfast
Who doesn't love a touch of whimsy? Marbled eggs are a fun and easy way to add a splash of colour to your breakfast. Simply boil the eggs as usual, but add a few drops of food colouring to the water. You can use one colour, or mix and match to create your own unique marbled masterpiece.
Pickled Eggs: A Tangy Delight for a Unique Flavor Experience
For a truly unique flavour experience, try pickling your boiled eggs. It's a simple process that yields a delicious, tangy treat. Simply boil the eggs as usual, then soak them in a brine solution made from vinegar, water, and seasonings. Let them sit for a few hours, or even overnight, to achieve the desired level of tanginess.
deviled eggs: A Classic Favorite for Party Appetizers
Deviled eggs are a beloved party appetizer, and for good reason. They're easy to make, delicious, and always a crowd-pleaser. Simply boil the eggs as usual, peel them, and then scoop out the yolks. Mash the yolks with mayonnaise, mustard, and seasonings, then pipe the mixture back into the egg whites.
Part 8: FAQs
Q: What's the best way to store boiled eggs?
A: Once peeled, boiled eggs should be stored in the refrigerator in a container filled with cold water. This will help keep them moist and prevent them from drying out. You can store them for up to a week this way.
Q: Can I reuse the boiling water for other purposes?
A: While technically you can, I wouldn't recommend it. The water will have absorbed some of the sulphur from the eggs, which can impart an unpleasant odour to other foods. It's best to discard the water.
Q: What happens if I overcook a boiled egg?
A: Overcooked boiled eggs have a rubbery texture and a dry, crumbly yolk. They can be quite unpleasant to eat. However, you can still use them in recipes where texture is not as important, like egg salad or deviled eggs.
Q: How do I know if a boiled egg is fresh?
A: To check the freshness of an egg, place it in a bowl of cold water. If the egg sinks to the bottom and lies flat, it's fresh. If it stands up on its side, it's about a week old. If it floats, it's too old and should be discarded.
Q: What happens if I don't cool the boiled eggs in ice-cold water?
A: The yolk will continue to cook, even after you remove the eggs from the boiling water. This can lead to an overcooked yolk with a rubbery texture. Cooling the eggs in ice-cold water stops the cooking process and prevents overcooking.
Everyone is watching

How to Cook Frozen Lobster Tails Perfectly: A Step-by-Step Guide
RecipesLobster. Just the word conjures up images of lavish meals, special occasions, and a taste of luxury. But let's...

Pigs in a Blanket Cooking Time: How Long to Bake for Perfect Results
RecipesAh, pigs in a blanket. Just the name conjures up images of those delightful little parcels of crispy pastry en...

Pork Fillet Cooking Time: How Long to Cook It Perfectly
RecipesPork fillet, or tenderloin as it's sometimes called, is a real favourite in our house. It's so versatile, and...

The Ultimate Guide to Cooking Delicious Frankfurters
RecipesLet's face it, we all love a good frankfurter. It's a classic, simple, and always satisfying. But let's be rea...

Wolf Meat Recipes: A Guide to Cooking Wild Game
RecipesLet's be honest, you don't see wolf meat at your local butcher shop every day. It's a bit of a wild card, but ...