Let’s talk beef short ribs. You know, those gloriously tender, melt-in-your-mouth beauties that usually take hours to cook? Well, I'm about to blow your mind with a recipe that cuts the cooking time drastically, without sacrificing any of the flavour. You heard me right - faster short ribs, without compromising on that rich, deep, crave-worthy taste. We're talking oven-baked magic, folks, and trust me, it's a game-changer.
Now, I'm not promising a "microwave miracle" here. This is still a method that involves some care and attention, but I've streamlined it to make it a lot more manageable, even on a weeknight. So grab your apron, crank up the tunes, and let's get cooking. I'm going to walk you through each step, from selecting the perfect short ribs to achieving that gorgeous, caramelized glaze. Let's make some magic happen!
Part 1: The Foundation of Flavor: Choosing the Right Short Ribs
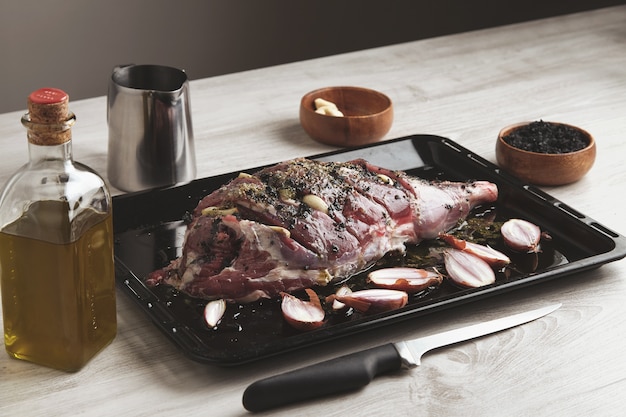
The first thing you need is the star of the show: the beef short ribs. Now, you've got two main choices here: bone-in or boneless. I personally adore bone-in short ribs, because the bone adds an incredible depth of flavour, like a little flavour bomb in your dish. It's a secret weapon for enhancing that beefy essence. However, if you're short on time, boneless short ribs are a perfectly acceptable alternative, just a bit less flavourful.
Selecting Your Beef Short Ribs:
First, go to your local butcher, and get ready to pick out some prime cuts. The key here is to look for ribs that are well-marbled. This means they've got a good amount of fat running through them, which is the secret to juicy, tender, and deeply flavorful short ribs. It's that fat that melts during cooking, creating that incredible melt-in-your-mouth texture. And don't forget the color! You want to see a deep red, indicating freshness and quality.
Trimming Your Short Ribs:
Now, your short ribs are in your hands, but there's a little prep work before we can jump into the oven. You'll need to trim them, but remember: a little fat is our friend! We want to remove any excess fat, but leave a good layer on, that's the key to keeping the ribs moist and succulent while they cook. Now, about those pesky membranes, those tough, white bits that can make the ribs chewy. Those need to go! You can use a sharp knife, but a quicker method is to use a paper towel to gently scrape them off.
Part 2: The Art of Seasoning: A Flavor Symphony
Alright, we've got our short ribs prepped and ready to go. Now, it's time to unleash the flavour! This is where you can get creative, going simple or bold, depending on your personal taste. The key is to create a seasoning mix that complements and elevates the natural flavour of the beef.
My Go-To Seasoning Mix:
I’m going to share my favourite seasoning mix, a simple yet powerful blend that delivers a burst of flavour. It’s a combination of smoked paprika, garlic powder, onion powder, black pepper, salt, and a touch of brown sugar. This basic combination creates a well-rounded flavour profile, enhancing the beef without overwhelming it. You can add other herbs and spices, like thyme or rosemary, but I find this mix works beautifully on its own.
Seasoning Tips:
Now, don't be shy with the seasoning! You want to coat your ribs generously, ensuring that every nook and cranny is covered. I like to use a little olive oil to help the seasoning stick, but don’t overdo it, we want a flavorful coating, not a greasy mess. Rub the seasoning into the ribs, getting into all those crevices, and let the aroma of those spices fill the air.
Part 3: Oven-Baked Magic: The Fastest Route to Tenderness
This is where the magic happens, the moment we unlock the secret to fast, tender short ribs. It’s all about harnessing the power of high heat, which browns the outside beautifully, creating a delicious crust, while still achieving tender, melt-in-your-mouth results. The key is to get the temperature right.
Step 1: Preheat Your Oven to Perfection:
First, crank up your oven. We want it nice and hot, around 450 degrees Fahrenheit (230 degrees Celsius). A good oven thermometer is essential to ensure you achieve the precise temperature. Too low, and the ribs won't brown properly. Too high, and you risk burning them. Find that sweet spot.
Step 2: Set the Stage for Tenderness:
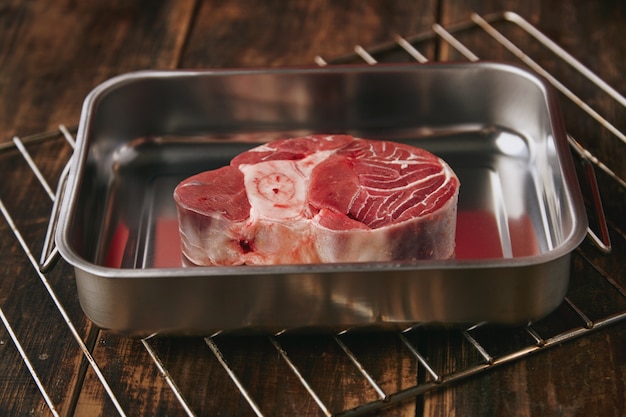
Now, it's time to create a cozy environment for your ribs. I like to use a roasting pan with a rack, lifting the ribs off the bottom, allowing for even heat distribution. This ensures they cook evenly, browning beautifully on all sides. Don’t forget to check the temperature with your trusty oven thermometer!
Step 3: Baking to Perfection:
Alright, let's bake those ribs! You're going to bake them for about 45 minutes, or until they're beautifully browned on the outside. I like to use a meat thermometer to make sure they're cooked through. Aim for an internal temperature of around 145 degrees Fahrenheit (63 degrees Celsius).
Step 4: Rest for Richness:
Your ribs are cooked, but we're not done yet! The next step is crucial for achieving those tender, flavorful results: resting. This allows the juices to redistribute throughout the meat, making it even more succulent and flavorful. I usually let them rest for about 10-15 minutes, covered with foil. While they rest, you can start making your sauce.
Part 4: The Sauce That Makes the Difference: A Flavor Explosion
The ribs are ready, and now it's time to unleash the flavour bomb: the sauce. You can get creative here, but I'm going to share my go-to recipe, a simple yet incredibly flavorful sauce that perfectly complements those tender ribs.
My Go-To Sauce:
This sauce is a combination of ketchup, brown sugar, Worcestershire sauce, and a little bit of vinegar. It's a classic blend that brings together sweet, tangy, and savory notes, creating a harmonious flavour profile.
How to Make the Sauce:
It’s incredibly easy. Combine all the ingredients in a small saucepan and simmer over low heat until thickened. You can adjust the sweetness by adding more or less brown sugar, and a pinch of cayenne pepper adds a little spice if you like.
Part 5: The Finishing Touch: Glazing to Perfection
The ribs have rested, your sauce is simmering, and we're ready to create a masterpiece. This is where we bring it all together, transforming those ribs into a culinary triumph.
Step 1: Glaze Those Ribs:
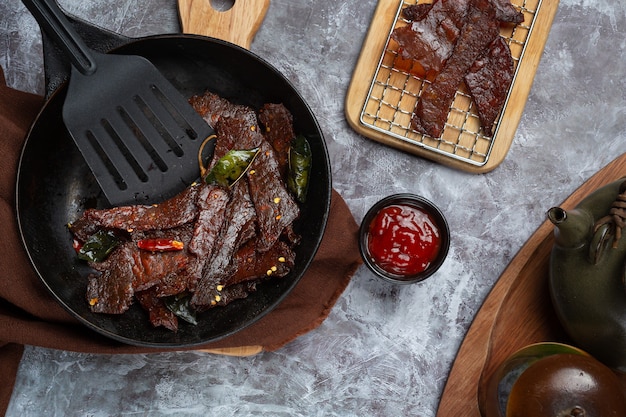
Take your ribs out of the oven, and give them a generous coating of your sauce. Make sure every surface is covered, creating a beautiful, sticky, glossy glaze. It's a bit messy, I know, but that's part of the fun.
Step 2: Back to the Oven:
Now, pop those ribs back into the oven for about 5-10 minutes, or until the sauce is bubbly and caramelized. This creates that gorgeous, glazed finish, adding a touch of sweetness and richness to the ribs.
Step 3: The Big Reveal:
And there you have it! Your short ribs are ready to eat. You can serve them with a side of mashed potatoes, roasted vegetables, or a simple salad. You've earned a delicious reward for your efforts.
Part 6: side dish Inspiration: Completing the Culinary Picture
You've got the main attraction sorted, but what about the supporting cast? What side dishes will complement those amazing short ribs? I've got some ideas to inspire you.
Mashing It Up:
Creamy, comforting mashed potatoes are a classic pairing for those rich, tender ribs. You can go classic with mashed potatoes, or get adventurous with sweet potato mash, or even a creamy cauliflower mash.
Roasted Veggie Delight:
Roasted vegetables add a burst of color and flavour to the table. Think roasted root vegetables, like carrots, parsnips, and sweet potatoes. Or go for a colorful mix of broccoli, cauliflower, and Brussels sprouts. The slight bitterness of the roasted vegetables creates a beautiful contrast with the richness of the short ribs.
Green Goodness:
Don't forget the greens! A simple salad with a light vinaigrette adds a refreshing contrast to the richness of the ribs, balancing the flavours and providing a light and healthy element to the meal.
Part 7: Frequently Asked Questions: Solving Your Culinary Concerns
You've got your recipe, your side dishes, and you're ready to conquer the kitchen. But maybe a few questions are lingering in your mind. Let's address those concerns and clear up any confusion.
1. Can I Make This Ahead?
Absolutely! These ribs are perfect for making ahead. You can prep the ribs and sauce in advance and store them in the fridge until you're ready to bake them. Just make sure you bring them to room temperature before baking, so they cook evenly. This is a great option for busy weeknights or weekends when you want to impress your guests.
2. What If My Ribs Are Too Lean?
If you've got leaner ribs, you can add a bit of extra fat to the roasting pan. I like to use bacon fat, which adds a smoky depth of flavour. Butter or olive oil are also good alternatives. This extra fat will help to keep the ribs moist and tender during cooking.
3. Can I Use a Different Sauce?
Absolutely! You can use any sauce you like, from a simple barbecue sauce to a more elaborate red wine sauce. Just make sure it’s a sauce that will hold up well to the high heat of the oven.
4. What if I Don't Have a Meat Thermometer?
You can still make these ribs without a meat thermometer, but you need to be extra careful. Make sure the ribs are cooked through by poking them with a fork. The juices should run clear, and the meat should be tender. You can also look for signs of doneness, like the ribs pulling back slightly from the bone when poked.
5. Can I Freeze These Ribs?
You can, but I recommend freezing the ribs before they’re cooked. This helps to prevent them from drying out during freezing. Wrap them tightly in plastic wrap and then foil, and freeze for up to 3 months. To thaw, place the ribs in the refrigerator overnight. Then, bake them according to the recipe.
Part 8: Enjoy! A Culinary Victory
You've reached the end of the journey! It's time to fire up that oven, grab your favourite side dishes, and get ready to enjoy a truly delicious meal. It's a bit more involved than your average Tuesday night dinner, but trust me, the effort is well worth it. So crank up the tunes, put on your apron, and let's get cooking! Prepare to impress your friends and family with this showstopping dish. And if you happen to make them yourself, let me know! I love hearing how things turn out.
Part 9: Tips and Tricks: Extra Culinary Wisdom
We've covered the basics, but here are a few extra tips and tricks that might come in handy for taking your short ribs to the next level.
1. The Importance of Patience:
Don’t rush the process. You want to make sure the ribs are cooked through and tender. Patience is key to achieving those melt-in-your-mouth results. You can always add a little extra time if you're not sure.
2. The Power of Beer:
For extra flavour, you can add a cup of beer to the roasting pan. It’ll add a nice depth of flavour and keep the ribs moist. Choose a beer that complements the flavours of your sauce and seasoning.
3. Leftovers:
If you have leftovers, don’t worry. They’re even better the next day. You can reheat them in the oven or microwave. And if you have any leftover sauce, you can use it for a variety of things, like topping a burger or dipping fries. The flavour will only intensify over time.
Part 10: A Final Word: The Power of Home Cooking
There you have it! My take on the fastest oven-baked beef short ribs recipe. I've done all the hard work for you, so all you need to do is gather your ingredients, follow my instructions, and prepare to be amazed. So go on, impress your friends and family with this showstopping dish. And if you happen to make them yourself, let me know! I love hearing how things turn out. Happy cooking!
Everyone is watching

How to Cook Frozen Lobster Tails Perfectly: A Step-by-Step Guide
RecipesLobster. Just the word conjures up images of lavish meals, special occasions, and a taste of luxury. But let's...

Pigs in a Blanket Cooking Time: How Long to Bake for Perfect Results
RecipesAh, pigs in a blanket. Just the name conjures up images of those delightful little parcels of crispy pastry en...

Pork Fillet Cooking Time: How Long to Cook It Perfectly
RecipesPork fillet, or tenderloin as it's sometimes called, is a real favourite in our house. It's so versatile, and...

The Ultimate Guide to Tender, Juicy Pulled Pork
RecipesRight, let's talk pulled pork. It's one of those dishes that just screams "comfort food," doesn't it? I mean...

The Ultimate Guide to Cooking Sweet Potatoes: From Roasting to Mashing
RecipesSweet potatoes. Just the name conjures up images of warm, comforting dishes, bursts of vibrant color, and a to...