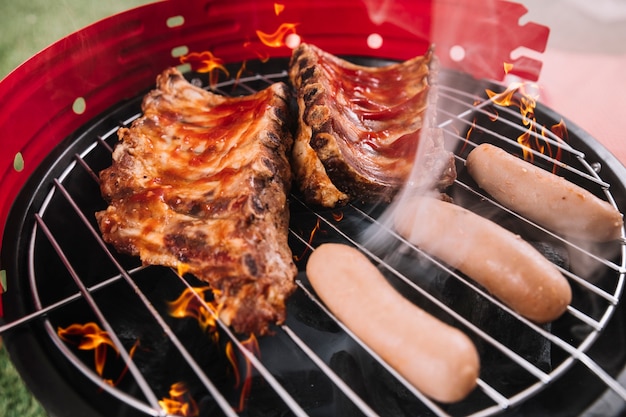
Ah, ribs! The smoky aroma, the tender meat falling off the bone, the sticky sauce...it's a BBQ dream come true. But achieving that perfect rib experience isn't always easy. Ribs are notorious for being tough and tricky to cook evenly. That's where the magic of pre-cooking in the oven comes in. This method, my friends, is the secret weapon for unlocking the ultimate rib experience. It allows you to create those melt-in-your-mouth ribs with a perfectly smoky and crispy exterior, and trust me, it's a game-changer.
Part 1: Why Pre-Cook?

Before we dive into the specifics, let's talk about the "why" behind pre-cooking ribs. Why not just throw them straight on the grill and call it a day? Well, believe me, you'll regret that decision. grilling ribs directly can lead to dryness and toughness, leaving you with a chewy disappointment instead of the tender, juicy experience you crave.
1.1 The Science of Tenderness
Think of it like this: pre-cooking is the key to unlocking the full potential of your ribs. It's like giving them a long, luxurious spa treatment. The gentle, moist heat of the oven works its magic on the tough collagen and connective tissues within the meat, breaking them down and transforming them into tender, succulent goodness. It's the secret to achieving those "fall-off-the-bone" ribs, the kind that practically melts in your mouth.
1.2 Achieving Even Cooking
Another critical aspect of pre-cooking is ensuring even cooking. Ribs are notoriously uneven, with thick sections and thin sections. Grilling them directly can lead to some parts being overcooked and dry while others remain undercooked and tough. Pre-cooking in the oven solves this problem by creating a controlled environment where the heat penetrates every part of the rib, ensuring consistent cooking throughout. This is especially crucial for larger racks of spare ribs, which can be quite challenging to cook evenly.
Part 2: The Pre-Cooking Process: A Step-by-Step Guide

Now, let's get down to the nitty-gritty of pre-cooking. Don't worry, it's not as complicated as it sounds. I'll walk you through my tried-and-true method, which I've perfected over years of rib-roasting adventures.
2.1 Gather Your Ingredients
First things first, gather your essential ingredients:
- One rack of ribs – choose your favorite: baby back ribs for a more tender, smaller experience, or spare ribs for a larger, meatier cut.
- Your go-to barbecue sauce - I'm a sucker for a smoky, tangy blend, but feel free to get creative with your favorites!
- Salt and black pepper - these are the foundation of any good seasoning.
- Optional: a dry rub – this is where you can really amp up the flavor. A good dry rub typically includes paprika, garlic powder, onion powder, brown sugar, and chili powder. Get creative and experiment with your own blends!
- Optional: Apple cider vinegar – this adds a touch of acidity and helps keep the ribs moist during cooking.
2.2 Preparing the Ribs: Get Those Flavors Going
Alright, let's get those ribs ready to shine! Give them a good rinse under cold water and pat them dry with paper towels. Now, it's time to season! Generously rub both sides of the ribs with salt and pepper. If you're using a dry rub, give those ribs a good massage, making sure to get it into all the nooks and crannies. This will create a delicious flavor base for your ribs.
2.3 Oven Time: Let the Magic Happen
Now for the oven pre-cook! Preheat your oven to 300°F (150°C). Place the ribs in a shallow roasting pan, bone side down. If you're using apple cider vinegar, pour about a cup into the bottom of the pan. This will help keep the ribs moist and tender while they simmer.
Cover the roasting pan tightly with aluminum foil, creating a steamy environment that helps break down the tough tissues. Pop those ribs into the oven and let them simmer for 2-3 hours, or until they are incredibly tender. You can check the tenderness by poking the meat with a fork – it should pierce through easily. If you prefer a crispier bark, you can leave the foil off for the last 30 minutes of cooking, giving those ribs a chance to brown beautifully.
Part 3: The Grilling Glory: Bringing Out the Smoky Flavors

Alright, we're almost there! The pre-cooking is done, and now we're ready for the grand finale: grilling. This is where the smoky flavor and that irresistible crispy crust come into play, transforming those already tender ribs into true barbecue magic. So, fire up your grill, grab your tongs, and let's get grilling!
3.1 Prepare Your Grill: Get That Heat Right
First, get your grill nice and hot. Aim for medium-high heat, around 350°F (175°C). If you're using a gas grill, preheat for 10-15 minutes. If you're using a charcoal grill, get those coals glowing red hot and spread them evenly across the grill surface. We want that heat to penetrate those ribs and create a delicious sear.
3.2 Grilling Time: A Smoky Kiss
Carefully transfer those pre-cooked ribs to the hot grill, bone side down. Close the grill lid and let them cook for about 30 minutes, or until they develop a beautiful, caramelized crust. Remember, we're just looking for a touch of smoky goodness, not to overcook them.
3.3 The Sauce Game: Amping Up the Flavor
While those ribs are sizzling, let's unleash the power of barbecue sauce! Brush both sides of the ribs liberally with your favorite sauce. For an extra layer of deliciousness, you can add a touch of brown sugar or molasses to your sauce for a thicker, more intense flavor. If you're feeling daring, you can even brush on more sauce during the last 10 minutes of grilling to create a caramelized crust that's simply irresistible.
Part 4: The Grand Finale: Rest and Serve
The pre-cooking is done, the grilling is complete, and the ribs are coated in a symphony of flavors. Now, it's time to give those ribs a chance to rest and for those delicious flavors to really meld together.
4.1 Resting Time: Letting the Flavors Mingle
Before diving in, let those ribs rest for 10 minutes. This allows the juices to redistribute throughout the meat, ensuring that every bite is tender and bursting with flavor. Cover the ribs with foil and let them rest on a cutting board or platter while you prepare your side dishes.
4.2 Serving Suggestions: A Feast for the Senses
Now for the moment of truth – serving time! These ribs are best served piping hot, straight off the grill. I like to pair them with a side of creamy coleslaw, crispy potato salad, and a tangy barbecue sauce for dipping. But feel free to get creative and create your own perfect rib feast!
Part 5: Tips for Rib Success: Mastering the Craft
You've got the basics down, but here are a few insider tips to elevate your rib game to the next level. These are the tricks I've learned over the years, so listen up!
5.1 Embrace Experimentation: Finding Your Rib Style
The beauty of barbecue is its flexibility. Don't be afraid to experiment with different dry rubs, sauces, and grilling techniques. Try adding a dash of smoked paprika to your dry rub for a smoky depth of flavor, or swap out your classic barbecue sauce for a sweet and spicy mango habanero sauce. The world is your oyster, so get creative and have fun!
5.2 Keep an Eye on the Heat: Preventing Burned Ribs
When grilling, keep a close eye on the heat. Too much heat can quickly turn those ribs into burnt offerings. Adjust the grill vents as needed. If you're using a gas grill, turn the burners down or use the "low" setting. If you're using a charcoal grill, add more charcoal or move the ribs to a cooler part of the grill. You want a nice even heat, not a raging inferno!
5.3 Don't Overcook: The Key to Tenderness
It's tempting to keep grilling those ribs until they're charred to a crisp, but resist the urge! Overcooked ribs can be dry and tough, so grill them just long enough to get a nice caramelized crust. Remember, the pre-cooking has already done the heavy lifting, so just a few minutes on the grill is all you need to complete the magic.
Part 6: FAQs: Answers to Your Rib-Burning Questions
I know you're probably buzzing with questions after all this rib talk, so let's tackle some frequently asked questions to clear up any lingering doubts.
6.1 Can I use any type of ribs for this method?
Absolutely! This method works beautifully with both baby back ribs and spare ribs. Baby back ribs are typically more tender and have a smaller bone structure, making them a good choice for beginners. Spare ribs are larger and meatier, but they require a bit more cooking time. Experiment and see which type you prefer!
6.2 How do I know if the ribs are done?
You can tell the ribs are done by using the "poke test" – gently pierce the meat with a fork. If the meat easily pulls apart and the bone is visible, then the ribs are cooked through. You can also check the internal temperature of the ribs with a meat thermometer – the internal temperature should be 145°F (63°C). Once they pass the "poke test" and reach the right temperature, you know they're ready to shine!
6.3 Can I make this recipe in advance?
Yes, you can absolutely make these ribs in advance! The beauty of this method is that it allows for a lot of flexibility. You can pre-cook the ribs and store them in the fridge for up to 3 days. Then, when you're ready to grill, simply reheat them in the oven for about 30 minutes before grilling. Just make sure to keep the ribs covered with foil while they're in the fridge to prevent them from drying out.
6.4 What if I don't have a grill?
No worries! If you don't have a grill, you can still achieve a delicious, smoky flavor by using a smoker or an oven-safe smoker box. Simply follow the pre-cooking instructions and then place the ribs in the smoker or smoker box for 2-3 hours, or until they reach the desired level of smokiness. You'll be amazed at how much flavor you can get from this method, even without a grill.
6.5 What are some other good side dishes to serve with ribs?
There are countless delicious side dishes you can serve with ribs, but here are a few of my personal favorites that create a perfect rib feast:
- Mac and cheese – classic comfort food that always pairs perfectly with ribs.
- corn on the cob – a summery and sweet addition to any barbecue spread.
- Baked beans – a hearty and flavorful side that complements the smoky flavors of ribs.
- Potato salad – a creamy and tangy side that adds a touch of richness to your meal.
- Cole slaw – a refreshing and crunchy side that provides a delightful contrast to the rich ribs.
- green bean casserole – a classic side dish that adds a touch of elegance to any barbecue.
- Garlic bread – the perfect accompaniment for dipping into that delicious barbecue sauce.
Part 7: Conclusion: Time to Get Grilling!
There you have it! The ultimate guide to pre-cooking ribs in the oven before grilling. This method is a true game-changer, allowing you to create tender, juicy, and flavorful ribs that will impress your friends and family. So, get your aprons on, fire up the grill, and get ready to experience barbecue bliss. Happy grilling, everyone!
Everyone is watching

How to Cook Frozen Lobster Tails Perfectly: A Step-by-Step Guide
RecipesLobster. Just the word conjures up images of lavish meals, special occasions, and a taste of luxury. But let's...

Pigs in a Blanket Cooking Time: How Long to Bake for Perfect Results
RecipesAh, pigs in a blanket. Just the name conjures up images of those delightful little parcels of crispy pastry en...

Pork Fillet Cooking Time: How Long to Cook It Perfectly
RecipesPork fillet, or tenderloin as it's sometimes called, is a real favourite in our house. It's so versatile, and...

The Ultimate Guide to Cooking Delicious Frankfurters
RecipesLet's face it, we all love a good frankfurter. It's a classic, simple, and always satisfying. But let's be rea...

Wolf Meat Recipes: A Guide to Cooking Wild Game
RecipesLet's be honest, you don't see wolf meat at your local butcher shop every day. It's a bit of a wild card, but ...
