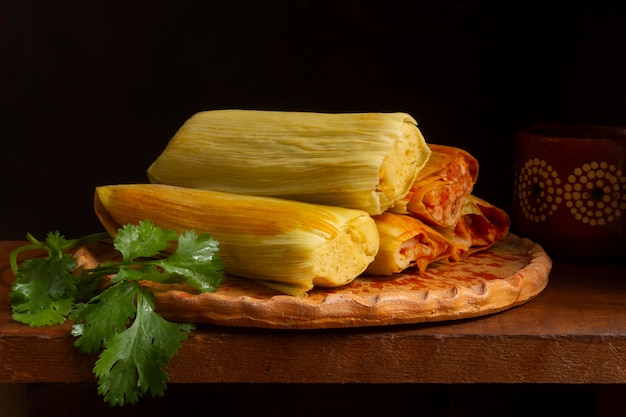
Let's talk tamales, those little bundles of joy that are filled with deliciousness, wrapped in fragrant corn husks, and steamed to perfection. Now, I love tamales, but I'll admit, the whole steaming process can be a bit of a chore. You need a dedicated steamer, it takes ages, and let's face it, finding the right-sized pot can be a challenge. So, I started thinking, there must be a simpler way, right? And guess what? There is! It's all about embracing the magic of the oven, my friends. Let me show you how it's done.
Part 1: Why Oven-Baked Tamales?

A Steam-Free Solution
I'm all about making life easier, and that includes ditching the steamer. It's a game-changer, trust me. No more hauling out that bulky steamer, no more fiddling with lids, and no more worrying about it overflowing. Oven-baked tamales are a breeze. They're simpler, and let me tell you, they taste just as good, if not better!
Beyond the Basics: Steam Without the Steamer
Now, I know what you're thinking: "Oven-baked tamales? But what about the steam? Won't they dry out?" Well, that's where the magic comes in. We're going to use a clever trick to create a steamy oasis inside the oven, and it's surprisingly easy. We're going to wrap our tamales in a clever little foil package, creating a mini-steamer right in our oven. It's pure magic!
Part 2: Getting Started: The Essential Ingredients

Before we begin our tamale adventure, let's gather our essential ingredients:
- Corn Husks: The heart and soul of your tamale. I always soak them in hot water for at least 30 minutes before I start. This makes them nice and pliable, perfect for wrapping.
- Masa: This is the corn dough that forms the base of your tamale. You can use store-bought masa or make your own. Making your own is a fun experience, but let's stick to store-bought for now. It's a great starting point.
- Filling: Now we're getting to the fun part! You can use traditional fillings like pork, chicken, or cheese. But feel free to get creative with vegetarian options like beans, vegetables, or even sweet fillings like fruit. The world is your tamale, folks!
- Heavy-Duty Aluminum Foil: This is our secret weapon, the key to creating that steamy environment. Get a good quality foil, you don't want it tearing halfway through the process.
- Baking Sheet: You'll need a trusty baking sheet to hold all those lovely tamales as they transform in the oven.
Alright, now that we have our ingredients, let's get this tamale party started!
Part 3: Mastering the Masa: The Heart of the Tamale

The Perfect Dough
A good masa is the foundation of a delicious tamale. Now, making masa from scratch is a whole other adventure, but we're going to focus on using store-bought masa for now. You'll find packages of pre-made masa in the Mexican food aisle of most grocery stores. Follow the instructions on the package for preparing the masa, but I’ll tell you, you want it smooth and easy to work with. It should have the consistency of thick pancake batter.
The Secret Ingredient: Lard
I'm a big believer in adding a touch of lard to my masa. It adds a richness and depth of flavour that you just can't get from anything else. Just a tablespoon or two will do the trick. Don't worry, it's not as unhealthy as you might think. Lard has a higher smoke point than butter, meaning it can withstand higher temperatures better. It's a win-win!
Part 4: The Filling Frenzy: Where the Flavour Begins
Traditional or Modern?
This is where you get to let your culinary creativity shine. Do you go for a classic pork filling? A spicy chicken option? Or maybe you want to get adventurous with vegetarian fillings? I'm all about trying new things, so I've had my fair share of fun tamale fillings.
My Favourite Fillings
Here are a few of my favourite fillings that always get rave reviews:
- Spicy Chicken Tamales: I love a little heat, so I always add some chili powder and cumin to my chicken filling. It gives it a kick that's hard to resist.
- Black Bean and Corn Tamales: This is a vegetarian classic, and it's always a crowd-pleaser. It's hearty, flavorful, and satisfying.
- sweet corn and Cheese Tamales: For something lighter and sweeter, I like to use fresh corn kernels and cheddar cheese. It's a delicious combination that’s both comforting and delightful.
Part 5: The Tamale Assembly: Bringing it All Together
Preparing the Husks
Now, we're getting to the fun part: putting it all together. First, take those soaked corn husks and pat them dry with a clean towel. We want them to be nice and moist, but not dripping wet. Then, lay a husk flat on your work surface, with the wider end facing you. You're ready to start building your tamale masterpiece!
Layering the Flavour
Next, spread a thin layer of masa on the husk, leaving a small border on all sides. You want enough masa to hold your filling securely. Now, this is where the magic really happens. Spread a generous portion of your favourite filling along the center of the masa. Be careful not to overfill; otherwise, your tamale might burst.
Folding the Magic
Now, fold the sides of the husk over the filling and roll it up, tucking the pointed end underneath. You want to make sure it's tightly rolled, but not so tight that you squash the filling. You’ll end up with a nice neat tamale, ready for its oven transformation.
Part 6: The Oven-Baked Transformation: From Raw to Ready
Foiling the Future
Now we're going to use our heavy-duty aluminum foil to create that magical steamy environment. Take a large sheet of foil, fold it in half, and place your tamales on it. You can arrange them side by side or stack them on top of each other. Now, fold the foil over the tamales to create a sealed package.
The Oven's Embrace
Preheat your oven to 375°F (190°C). Place your foil-wrapped tamales on a baking sheet and bake them for 45-60 minutes. I find that they're usually done around 50 minutes, but you can always check them with a toothpick. If it comes out clean, they're ready to eat.
Part 7: The Moment of Truth: Unveiling the Delights
The Unveiling
Once the tamales are cooked, take them out of the oven and let them cool for a few minutes. Now, this is the moment you've been waiting for. Carefully open your foil packets and reveal those steaming tamales. The smell alone will make your mouth water.
The Finishing Touches
To give your tamales that extra oomph, I like to brush them with a little bit of melted butter. You can also add some garnishes like chopped cilantro or onions, or a dollop of salsa. I'm a big fan of a spicy salsa myself.
Part 8: Serving Up the Goodness: Time to Enjoy
Your oven-baked tamales are ready to be devoured! Serve them hot or warm. I love to enjoy them with a side of rice and beans, or a refreshing salad. They're also great as part of a larger meal.
A Feast for the Senses
Each bite of a homemade tamale is an explosion of flavour and texture. The tender masa, the juicy filling, and the slight sweetness of the corn husk combine to create a culinary symphony. It's a meal that brings people together, whether it's a family gathering or a casual dinner party.
Part 9: Tips and Tricks: Mastering the Art
Making it a Family Affair
I love making tamales with my family. It's a great way to spend time together, and it's always a fun experience. The whole process is a bit messy, but that's part of the fun!
Freezing for Later
If you're making a large batch of tamales, you can freeze them for later. Just wrap them tightly in plastic wrap and then in aluminum foil. When you're ready to eat them, just thaw them in the refrigerator overnight and then reheat them in the oven.
Get Creative
Don't be afraid to experiment with your fillings. Try using different types of meats, vegetables, cheeses, or even fruits. You can also add different spices and herbs to your masa. The possibilities are endless!
FAQs: Your Tamale Questions Answered
1. Why do I need to soak the corn husks?
Soaking the corn husks softens them and makes them more pliable, so they're easier to work with. You also want to make sure they're fully hydrated, so they don't dry out in the oven.
2. Can I use other types of dough for tamales?
While corn masa is the traditional base for tamales, you can use other types of dough, such as wheat flour dough or even rice dough. It's really up to your personal preference!
3. Can I use parchment paper instead of aluminum foil?
While parchment paper can be used, it is best to use heavy-duty aluminum foil for oven-baked tamales. Aluminum foil creates a better seal and traps in the steam, which helps the tamales cook evenly.
4. How long can I store leftover tamales?
Leftover tamales can be stored in the refrigerator for up to 3 days. You can also freeze them for up to 3 months. Just make sure to wrap them tightly in plastic wrap and aluminum foil.
5. Can I make tamales in advance?
You can definitely make tamales in advance. In fact, many people prefer to assemble their tamales a day or two ahead of time. You can wrap them in plastic wrap and store them in the refrigerator until you're ready to bake them.
So, there you have it! Oven-baked tamale magic. It's easier than you think, and it's absolutely delicious. Go ahead, give it a go and let me know how it turns out. Happy tamale-making, folks!
Everyone is watching

How to Cook Frozen Lobster Tails Perfectly: A Step-by-Step Guide
RecipesLobster. Just the word conjures up images of lavish meals, special occasions, and a taste of luxury. But let's...

Pigs in a Blanket Cooking Time: How Long to Bake for Perfect Results
RecipesAh, pigs in a blanket. Just the name conjures up images of those delightful little parcels of crispy pastry en...

Pork Fillet Cooking Time: How Long to Cook It Perfectly
RecipesPork fillet, or tenderloin as it's sometimes called, is a real favourite in our house. It's so versatile, and...

The Ultimate Guide to Cooking Delicious Frankfurters
RecipesLet's face it, we all love a good frankfurter. It's a classic, simple, and always satisfying. But let's be rea...

Wolf Meat Recipes: A Guide to Cooking Wild Game
RecipesLet's be honest, you don't see wolf meat at your local butcher shop every day. It's a bit of a wild card, but ...
