Let’s be honest, there’s nothing quite like a perfectly cooked burger. The aroma of sizzling meat, the anticipation as you assemble your masterpiece, and that first delicious bite… pure bliss! But achieving that ultimate, juicy burger can feel like a culinary quest. Fear not, burger enthusiasts! I’m here to guide you on your journey to stovetop burger perfection, sharing my years of experience and some insider tips that’ll transform your cooking game.
This guide isn’t just about throwing some meat on a pan. It’s about understanding the nuances of each step, from selecting the right meat to mastering the art of grilling and building the ultimate flavour bomb. We’ll explore the science behind a juicy burger, delve into the secrets of achieving that crispy exterior, and even tackle those common burger-making woes. So grab your apron, sharpen your spatula, and get ready to create burgers that’ll leave your friends speechless (and maybe a little jealous).
(Part 1) The Meat: Your Burger’s Foundation

Forget fancy cuts and expensive imports. A good quality 80/20 ground beef mix is the foundation for a truly great burger. That 80/20 ratio, meaning 80% lean meat and 20% fat, is the sweet spot. It’s the fat that gives your burgers that irresistible juiciness, flavour, and tender texture. Trust me, a burger made with this blend will be far more satisfying than something overly lean, which can end up dry and flavourless.
Choosing the right ground beef can be a bit overwhelming, so here’s a little advice from a seasoned burger pro:
Choosing Your Meat
- Freshness is Key: Always look for bright red meat with a fresh appearance. Avoid any discoloration or signs of spoilage. You’ll be able to tell by the smell too. Fresh meat shouldn't have a strong odor. If you’re unsure, ask your butcher – they’re the experts!
- Fat Matters: Stick to that 80/20 ratio. It’s the ideal balance for a juicy, flavorful burger. You don’t need to go overboard with fat; it’ll only make your burger greasy.
- Marbling Makes a Difference: Look for some marbling in the ground beef, those tiny white streaks of fat distributed throughout the meat. These little bits of fat melt during cooking, adding moisture and richness to your burger.
If you can, get your meat from a local butcher. They often have a wider selection of fresh, high-quality cuts, and they’re usually happy to answer any questions you have. They can even help you choose the best ground beef for your burger needs.
(Part 2) The Patties: Shaping Your Masterpiece

With your ground beef ready to go, it’s time to shape those patties. This isn’t just about making them look good, it’s about creating a patty that cooks evenly and holds its shape during grilling.
Forming the Patties
- Portioning is Key: Divide your meat into equal portions for each burger. I usually aim for 4 ounces per patty, which makes a satisfying burger without being overwhelming. Feel free to adjust the size based on your appetite, and remember, you can always double up if you’re feeling extra hungry.
- Gentle Touch is Essential: Don’t overwork the meat! Gently form each portion into a round patty, about ??-inch thick. Use a light touch to avoid compressing the meat too much. A tightly packed patty can become tough and dry. You want to preserve those air pockets that will contribute to a juicy, tender burger.
- Indentation for Perfection: Make a slight indentation in the center of each patty. This little trick helps prevent the burger from puffing up too much during cooking, resulting in a more evenly cooked patty.
- Refrigeration for Stability: Once your patties are formed, pop them in the fridge for about 30 minutes. This allows the meat to firm up, making it easier to handle and preventing them from falling apart while cooking. This step also ensures that your burgers cook more evenly.
Remember, the key is to handle the meat with a light touch. You want to maintain the natural texture and moisture of the beef. With a little practice, you’ll become a pro at shaping perfect patties.
(Part 3) Prepping Your Stovetop

Now comes the fun part: getting your stovetop sizzling! The right cookware is crucial for achieving that perfect sear and crispy exterior. But before we talk about pans, let's discuss the importance of high heat.
Why High Heat is Your Best Friend
grilling burgers over high heat is essential for achieving that beautiful, crispy exterior. The intense heat creates a caramelized crust, locking in juices and developing a rich, flavorful surface. Remember, we want juicy burgers, but we also want that satisfying crunch!
Choosing the Right Pan
Now let’s talk about the pan. A good quality cast iron skillet is your best bet for achieving burger perfection. Its heavy construction ensures even heat distribution, which is vital for consistent browning. Plus, seasoned cast iron adds a hint of flavor to your burgers, making them even more irresistible.
If you don’t have a cast iron skillet, a good quality non-stick pan is a great alternative. Just make sure it's oven-safe in case you need to finish the burgers in the oven.
Heating Up the Pan
Set your stovetop burner to high heat and let the pan get screaming hot. It should be so hot that a drop of water sizzles immediately when added. Don't be shy with the heat! A hot pan sears the burger quickly, creating that beautiful, crispy crust and preventing it from sticking.
(Part 4) The Art of Grilling
Okay, here’s where things get exciting. Time to put those perfectly shaped patties on the sizzling hot pan and watch the magic unfold. Remember, we’re aiming for juicy and flavorful burgers, so medium-rare is usually the way to go. Don't worry, we’ll dive deeper into doneness levels later.
Grilling Techniques for Success
- No Touching Rule: Once the patties are in the pan, let them be! Resist the urge to flip them too early. Allow them to sit undisturbed for about 3-4 minutes on each side. This gives the meat time to develop that beautiful sear and caramelize. Flipping them too soon can cause them to stick and break apart. Patience is key here!
- Flip Time: After about 3-4 minutes, it’s time to flip! Use a sturdy spatula, one that won't bend under the weight of a juicy burger. Gently flip the patties, ensuring they cook evenly on both sides.
- cooking time Varies: Continue cooking the second side for another 3-4 minutes, or until your desired level of doneness is reached. Remember, cooking times can vary depending on the thickness of the patties and the heat of the pan. Keep a close eye on your burgers and adjust the cooking time as needed.
The key is to cook your burgers over high heat for a short period to achieve that perfect combination of juicy interior and crispy exterior.
(Part 5) Doneness and Temperature
Now, everyone has their preferred level of doneness when it comes to burgers. Some like them well-done, while others prefer a juicy, medium-rare. It’s a matter of taste, but understanding how to achieve different doneness levels is important for safety and flavour.
Doneness Levels: A Handy Guide
| Doneness | internal temperature (°F) | Internal Temperature (°C) | Description |
|---|---|---|---|
| Rare | 125-130 | 52-54 | Very red center, cool to the touch |
| Medium-Rare | 130-135 | 54-57 | Pink center, warm to the touch |
| Medium | 140-145 | 60-63 | Slightly pink center, hot to the touch |
| Medium-Well | 150-155 | 65-68 | Very little pink center, very hot to the touch |
| Well-Done | 160-165 | 71-74 | No pink center, very hot to the touch |
Using a meat thermometer is the most reliable way to ensure your burgers are cooked to your liking and safe to eat. It's a small investment that'll pay off in delicious, perfectly cooked burgers every time. You can find them at most supermarkets or online.
If you’re unsure about how to use a meat thermometer, most come with instructions. Simply insert the probe into the thickest part of the patty, making sure it doesn’t touch the pan, and wait for the temperature to stabilize.
Remember, safety first! The USDA recommends cooking burgers to an internal temperature of 160°F (71°C) to kill any harmful bacteria. However, for optimal juiciness and flavour, aim for medium-rare or medium doneness.
(Part 6) Adding Flavour: The Toppings
Your burgers are cooked to perfection, now it’s time to turn them into culinary masterpieces! The toppings are where your creativity comes in. This is your chance to add your personal touch and create a burger that’s as unique as you are.
Classic Toppings: The Tried and True
Here are some classic toppings that always go down a treat. These are the tried and true, the staples of burger perfection:
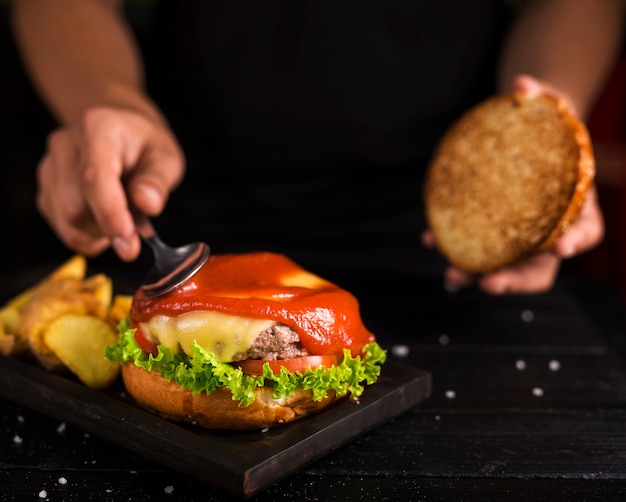
- Cheese: A melted slice of cheddar, swiss, or Monterey Jack is a classic. For a bolder flavour, try blue cheese. It adds a wonderful tangy kick. But honestly, the cheese choice is up to you.
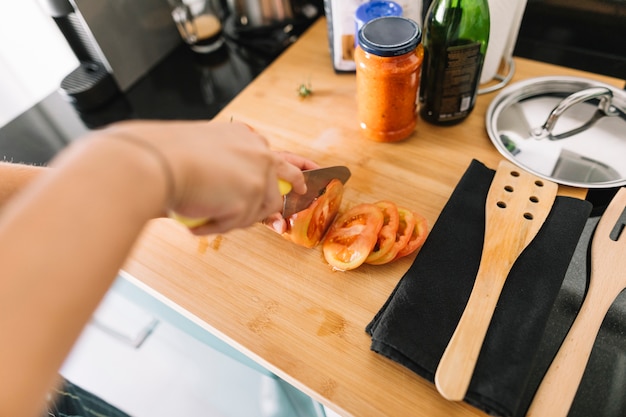
- Lettuce and Tomato: Fresh and crisp, these add a refreshing crunch and a vibrant colour contrast.
- Onion: Pickled red onions add a tangy sweetness, sliced raw onions provide a sharp bite, and caramelized onions offer a rich, sweet flavour.
- Pickles: Dill pickles or sweet gherkins. It doesn’t matter which, just make sure you have a good pickle! They bring that essential tangy contrast to your burger.
Getting Creative with Toppings: Beyond the Basics
Feeling adventurous? Don’t be afraid to step outside the box and create your own burger utopia. Here are some ideas that will elevate your burger game:
- Avocado: Smooth, creamy, and full of healthy fats, avocado adds a luxurious touch and a hint of richness.
- Bacon: crispy bacon is a classic for a reason. Who can resist that salty, crunchy goodness?
- Guacamole: A delicious way to incorporate avocado, adding spice and freshness to your burger.
- Jalape??os: For those who like a kick, jalape??os add a fiery punch that’ll wake up your taste buds.
Remember, the beauty of burger toppings is that you can mix and match to your heart's content. Experiment and see what combinations you like best. There’s no wrong way to create a burger that’s uniquely yours!
(Part 7) The Bun: Your Burger’s Cradle
Your burger is almost complete, but don’t forget the bun! The bun is the cradle that holds your masterpiece together, so it’s just as important as the patty itself. Choose wisely, because the right bun can elevate your burger experience.
Choosing the Right Bun
- Freshness: Look for buns that are soft and pliable, not dry or crumbly. They should have a nice, fresh aroma. Avoid any buns that show signs of mold or discoloration.
- Size Matters: Select a bun that’s large enough to accommodate your patty and toppings without spilling over the sides. You want a well-balanced burger, not a messy explosion of ingredients.
- Type of Bun: There’s a wide variety of bun options, from classic sesame seed buns to brioche buns. Each type offers a different texture and flavour. Experiment and see which one suits your taste best. Some people prefer the fluffy softness of brioche, while others love the classic crunch of a sesame seed bun.
Toasting Your Bun: The Finishing Touch
Toasting your buns is a crucial step in creating the ultimate burger experience. It adds a wonderful texture and a bit of crispiness. Plus, it helps absorb the burger juices, preventing your bun from getting soggy. You can toast them in a pan on the stovetop or in the oven. Just make sure they’re golden brown and slightly crispy on the outside.
(Part 8) Assembling Your Burger: The Grand Finale
You’ve got your perfectly cooked patty, your chosen toppings, and your toasted buns. Now, it’s time to assemble your burger masterpiece. Take a deep breath, you’ve come this far, and this is the moment you’ve been waiting for.
The Perfect Assembly
- Bottom Bun: Start with the bottom bun, toast side up. This is the foundation of your burger creation.
- Toppings: Add your toppings, layering them in a way that will create a balanced and delicious flavour profile. I usually start with lettuce and tomato, followed by cheese, and finish with pickles and onions. It’s all about personal preference, so experiment to find the perfect combination for you.
- Patty: Gently place your juicy patty on top of the toppings. This is the star of the show!
- Top Bun: Carefully place the top bun, toast side down, on top of the patty. This will help keep everything in place and create a nice, secure sandwich.
Now, take a moment to admire your creation. You’ve just assembled a burger that’s a testament to your culinary skills. Take a bite and savor the moment. You’ve earned it!
(Part 9) Tips and Tricks for Success
You’ve learned a lot about the art of stovetop burger perfection, but here are a few extra tips and tricks to help you avoid common pitfalls and take your burger skills to the next level.
- Seasoning is Key: Don’t forget to season your patties! A generous pinch of salt and pepper will enhance the natural flavour of the beef, making your burgers taste even more delicious.
- Don't Overcrowd the Pan: When grilling your burgers, make sure you don’t overcrowd the pan. This will prevent the temperature from dropping too much, which can result in uneven cooking. Give your burgers space to breathe and cook evenly.
- Rest Time is Crucial: Once your burgers are cooked, let them rest for a few minutes before assembling. This allows the juices to redistribute, making for a juicier, more flavorful burger.
- Condiments are your Friends: Don’t be afraid to experiment with different condiments. Try adding a dollop of mayonnaise, a sprinkle of hot sauce, or even a spoonful of your favorite bbq sauce. There are endless possibilities when it comes to burger condiments.
FAQs
Now, you might have some questions about stovetop burger perfection, so let’s address some of the most common ones.
1. How do I know if my burgers are cooked through?
Using a meat thermometer is the most accurate way to determine if your burgers are cooked to your liking. Insert the probe into the thickest part of the patty, making sure it doesn’t touch the bottom of the pan, and wait for the temperature to stabilize.
If you don’t have a thermometer, you can also check the doneness by pressing gently on the center of the patty. A well-cooked burger will be firm to the touch, while a rare burger will feel soft and squishy.
Remember, the USDA recommends cooking burgers to an internal temperature of 160°F (71°C) to kill any harmful bacteria. But for optimal juiciness and flavor, aim for medium-rare or medium doneness.
2. What if my burgers stick to the pan?
If your burgers are sticking to the pan, it’s likely that your pan isn’t hot enough. Try increasing the heat or using a little bit of cooking spray or oil to prevent them from sticking. You can also gently lift the edges of the patty with a spatula to make sure it’s not stuck.
Another tip: Make sure your pan is completely dry before adding the patties. Any moisture can cause them to stick.
3. Can I make burgers ahead of time?
Absolutely! You can form your patties and store them in the fridge for up to a day before cooking. Just make sure they're well-wrapped in plastic wrap or aluminum foil. To reheat, you can simply grill them on the stovetop or in the oven until they’re heated through.
4. How can I make my burgers extra juicy?
One of the secrets to juicy burgers is to not overcook them. Aim for medium-rare or medium doneness to keep them moist. You can also add a little bit of butter or olive oil to the pan while you’re cooking, which will help to keep the burgers from drying out.
Remember, those little bits of fat in the 80/20 ground beef blend will melt during cooking, adding moisture and flavor to your burger.
5. What are some other ways to cook burgers?
While stovetop grilling is a popular and efficient method, there are other ways to cook burgers. You can grill them on a barbecue, cook them in the oven, or even pan-fry them in a cast iron skillet. Each method offers a different flavour profile and texture.
Experiment and find the method that works best for you. The world of burger cooking is your oyster!
So, there you have it! Your comprehensive guide to stovetop burger perfection. Go forth and create some delicious, juicy burgers that will leave your friends begging for more. You’ve got this!
Everyone is watching

How to Cook Frozen Lobster Tails Perfectly: A Step-by-Step Guide
RecipesLobster. Just the word conjures up images of lavish meals, special occasions, and a taste of luxury. But let's...

Pigs in a Blanket Cooking Time: How Long to Bake for Perfect Results
RecipesAh, pigs in a blanket. Just the name conjures up images of those delightful little parcels of crispy pastry en...

Pork Fillet Cooking Time: How Long to Cook It Perfectly
RecipesPork fillet, or tenderloin as it's sometimes called, is a real favourite in our house. It's so versatile, and...

The Ultimate Guide to Tender, Juicy Pulled Pork
RecipesRight, let's talk pulled pork. It's one of those dishes that just screams "comfort food," doesn't it? I mean...

The Ultimate Guide to Cooking Sweet Potatoes: From Roasting to Mashing
RecipesSweet potatoes. Just the name conjures up images of warm, comforting dishes, bursts of vibrant color, and a to...
