Part 1: The Magic of Spatchcocking

The Basics Explained
Spatchcocking, for those unfamiliar, is basically a fancy way of saying "flattening out a whole chicken." It involves removing the backbone of the chicken and laying it flat. This turns the bird into a giant chicken breast, ensuring even cooking and a much faster roasting time. It's a technique that takes about 5 minutes to master and transforms your roast chicken game completely.Why Spatchcocking is a Total Game Changer
Let's face it, a whole chicken can be a bit of a pain. It takes ages to cook, the breast often dries out before the legs are done, and let's not even mention the struggle of stuffing it into a roasting pan. Spatchcocking solves all these problems. Here’s why it's such a brilliant idea:- Even Cooking: With the backbone removed and the chicken flattened, heat penetrates evenly, ensuring every bit of chicken cooks perfectly. No more dry breasts or undercooked legs! Goodbye uneven cooking, hello culinary bliss!
- Faster Cooking Time: You're essentially cutting the cooking time in half, making it a perfect option for weeknight dinners. Plus, who doesn't love a speedy roast? Less time in the kitchen, more time to enjoy!
- More Flavor: The skin gets nice and crispy because it's directly exposed to the heat. You also get more surface area for seasoning, meaning more flavor! More crispy skin, more flavor, more happiness!
- Easier to Carve: No more struggling with awkward cuts! A spatchcocked chicken is a breeze to carve, making it perfect for casual family dinners. Easy carving means more time to enjoy the delicious chicken and less time wrestling with a stubborn bird!
Part 2: The Step-by-Step Guide to Spatchcocking

What You'll Need
- One whole chicken (about 1.5 kg): The star of the show!
- Sharp kitchen shears or a good quality chef's knife: This is your weapon of choice for removing the backbone.
- Cutting board: Your battleground! Make sure it's sturdy and big enough for your chicken.
The Spatchcocking Process: Step by Step
- Get Your Chicken Ready: Pat the chicken dry with paper towels. If you're feeling fancy, you can even give it a good rinse under cold water. This helps remove any excess moisture and ensures a crispy skin.
- Remove the Backbone: Place the chicken breast-side down on the cutting board. Using your shears or knife, carefully cut along both sides of the backbone. You're basically cutting the backbone out, separating it from the rest of the chicken. Don't worry about getting it perfectly clean, just get most of it removed.
- Flip and Flatten: Flip the chicken over so it's breast-side up. Press down on the breastbone with the palm of your hand to flatten the chicken. You can also use a meat mallet to help with this. Flatten the chicken out so it lies flat, and you've got a nice even surface for cooking.
- Season and Roast: You're good to go! Season the chicken liberally with salt, pepper, and any other herbs or spices you fancy. Then pop it into your roasting pan and cook it up. Get ready for a delicious journey!
Part 3: The Golden Rules of Spatchcock Chicken

1. The Temperature is Key
Roast your chicken at a high temperature (around 200°C/400°F) for the first 20 minutes. This helps get the skin nice and crispy. Then, reduce the temperature to 180°C/350°F for the rest of the cooking time. This will ensure the chicken cooks evenly without drying out. It's all about a balance between a crispy exterior and a juicy interior!
2. Don't Overcrowd the Pan
Give your chicken some breathing room. Don't overcrowd the roasting pan. Make sure there's enough space for the heat to circulate evenly around the chicken. This will ensure even cooking and a crispy skin all around.
3. Basting is Your Friend
Basting is crucial for a moist and flavorful chicken. Every 20 minutes or so, use a spoon to baste the chicken with its own juices. This helps keep it moist and prevents the skin from drying out. You're essentially creating a delicious self-made sauce that enhances the flavor and keeps the chicken moist.
4. The Resting Period
Don't be tempted to dig in right away! Let your chicken rest for 10-15 minutes after it comes out of the oven. This allows the juices to redistribute throughout the meat, resulting in a more succulent chicken. Patience is key for a perfect roast chicken!
Part 4: The Art of Roasting
Now, let's talk roasting. This is where the real magic happens. You've got your spatchcocked chicken, you've seasoned it, and you're ready to go. Here's a breakdown of the roasting process, with some tips and tricks along the way.1. Choose Your Roasting Pan
A good roasting pan is essential. I prefer a shallow roasting pan with a rack. This allows the fat to drain and helps the chicken cook evenly. You can also use a baking sheet if you don't have a roasting pan. Just make sure to place the chicken on a wire rack so it doesn't sit in its own juices. This allows for air circulation and helps achieve that crispy skin we all crave.
2. The Secret to Crispy Skin
Want that golden-brown, crispy skin? Here's my secret weapon: a good old-fashioned roasting rack. Place the chicken on the rack, allowing air to circulate underneath, leading to even browning and crispier skin. The key is to elevate the chicken off the bottom of the pan so the heat can circulate around it.
3. Don't Forget the Veggies
Why not roast some vegetables alongside your chicken? Simply toss them with olive oil, herbs, and seasoning, and spread them around the chicken in the roasting pan. This creates a delicious one-pan meal with minimal effort. It's a perfect way to add flavor and variety to your meal, and it's incredibly easy.
Part 5: Mastering the Timing
Let's talk about timing. Knowing how long to cook your spatchcock chicken is crucial. Here's a guide to help you:How Long to Cook
A spatchcocked chicken will typically take 45-60 minutes to cook. This time can vary depending on the size of the chicken and your oven. The best way to check for doneness is to use a meat thermometer. Insert it into the thickest part of the thigh, avoiding the bone. It's done when the internal temperature reaches 74°C/165°F.
Signs of Doneness
Here are some other signs that your chicken is cooked through:
- The juices run clear when you pierce the thickest part of the thigh with a fork. This indicates that the chicken is cooked through and safe to eat.
- The skin is a beautiful golden brown color. This means the skin is crispy and delicious.
- The meat is no longer pink. This is another sign that the chicken is fully cooked.
Part 6: The Art of Seasoning
Now, let's get creative. Spatchcocking is great, but the real magic happens when you start seasoning your chicken.Basic Seasoning
A good quality salt and pepper is all you really need for a flavorful roast chicken. But feel free to experiment with different herbs and spices. A simple salt and pepper rub can create a truly delicious chicken, but don't be afraid to get creative!
Herbs and Spices
Here are some of my favorite herbs and spices for spatchcock chicken:
- Rosemary: A classic pairing with chicken, it adds a savory, aromatic flavor. The combination of rosemary and chicken is a timeless classic.
- Thyme: A subtle, earthy flavor that complements chicken beautifully. Thyme adds a delicate, complex flavor to your chicken.
- Garlic: Fresh or powdered, garlic adds a pungent, savory depth to your roast. Garlic adds a touch of richness and warmth to the chicken.
- Paprika: A touch of paprika adds a sweet, smoky flavor and beautiful color to the skin. Paprika adds a vibrant color and a hint of smoky sweetness.
- Lemon: A squeeze of lemon juice or a sprinkle of zest adds a bright, citrusy flavor. Lemon balances out the savory flavors and adds a fresh, bright note.
Flavors to Experiment With
Don't be afraid to experiment with different flavor combinations. Here are some ideas to get you started:
- Mediterranean: Lemon, garlic, oregano, and thyme. This combination brings the flavors of the Mediterranean to your table.
- Asian Inspired: Ginger, garlic, soy sauce, and sesame oil. This combination will add a touch of Asian flair to your roast.
- Cajun: Paprika, cayenne pepper, garlic powder, and onion powder. For a spicy kick, this combination will satisfy your tastebuds.
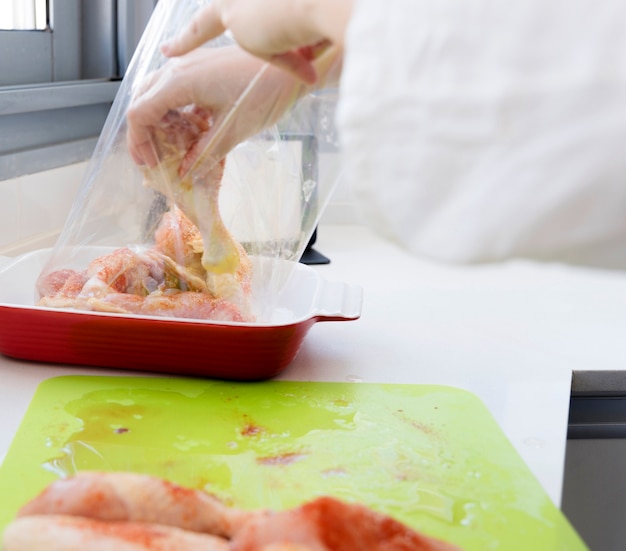
- Herbed Butter: Mix softened butter with herbs like rosemary, thyme, and parsley, and spread it under the skin of the chicken before roasting. This will create a succulent, juicy chicken with a burst of flavor.
Part 7: Delicious Spatchcock chicken recipes
Ready to get your roast on? Here are a few of my favorite spatchcock chicken recipes that are sure to impress:1. Classic Roast Chicken with Lemon and Herbs
This is a simple and timeless recipe that will never fail to please. It's perfect for a Sunday roast or a weeknight dinner.
Ingredients
- 1 whole chicken (about 1.5 kg): The star of the show!
- 2 tbsp olive oil: For a touch of richness and moisture.
- 1 lemon, cut into wedges: For a bright citrusy flavor.
- 2 tbsp fresh thyme leaves: For a delicate, earthy flavor.
- 1 tbsp fresh rosemary leaves: For a savory, aromatic flavor.
- Salt and pepper to taste: To enhance the flavor.
Instructions
- Spatchcock the chicken: Follow the steps in Part 2.
- In a small bowl, combine olive oil, lemon wedges, thyme, rosemary, salt, and pepper. This is your flavor bomb!
- Rub the mixture all over the chicken. Ensure every inch of the chicken is coated with the delicious seasoning.
- Place the chicken on a roasting rack in a roasting pan. This allows for even cooking and crispy skin.
- Roast at 200°C/400°F for 20 minutes, then reduce the temperature to 180°C/350°F and continue roasting for another 40-50 minutes, or until the internal temperature reaches 74°C/165°F. This ensures a crispy exterior and a perfectly cooked interior.
- Let the chicken rest for 10-15 minutes before carving and serving. This allows the juices to redistribute, resulting in a more succulent chicken.
2. Spatchcock Chicken with Honey Garlic Glaze
This recipe features a sweet and savory glaze that will make your chicken irresistible.
Ingredients
- 1 whole chicken (about 1.5 kg): The base of your culinary masterpiece.
- 2 tbsp olive oil: For a touch of richness.
- 2 cloves garlic, minced: For a pungent, savory flavor.
- 1 tbsp honey: For a touch of sweetness and a beautiful glaze.
- 1 tbsp soy sauce: For a salty, savory flavor.
- 1 tsp sesame oil: For a nutty, aromatic flavor.
- Salt and pepper to taste: To enhance the flavor.
Instructions
- Spatchcock the chicken: Follow the steps in Part 2.
- In a small bowl, combine olive oil, garlic, honey, soy sauce, sesame oil, salt, and pepper. This is your flavorful glaze.
- Rub the mixture all over the chicken. Ensure the chicken is thoroughly coated with the delicious glaze.
- Place the chicken on a roasting rack in a roasting pan. This allows for even cooking and a crispy skin.
- Roast at 200°C/400°F for 20 minutes, then reduce the temperature to 180°C/350°F and continue roasting for another 40-50 minutes, or until the internal temperature reaches 74°C/165°F. This ensures a perfectly cooked chicken with a crispy skin.
- While the chicken is roasting, whisk together the remaining glaze ingredients in a small bowl. This is your finishing touch for a delicious and sticky glaze.
- During the last 10 minutes of cooking, baste the chicken with the glaze every few minutes. This creates a beautiful and flavorful glaze that will make your chicken irresistible.
- Let the chicken rest for 10-15 minutes before carving and serving. This allows the juices to redistribute, resulting in a more succulent chicken.
3. Spicy Spatchcock Chicken with Roasted Vegetables
This recipe combines the flavors of spice and roasted vegetables for a truly satisfying meal.
Ingredients
- 1 whole chicken (about 1.5 kg): The foundation of your delicious meal.
- 2 tbsp olive oil: For a touch of richness and moisture.
- 1 tsp paprika: For a sweet, smoky flavor and vibrant color.
- 1/2 tsp cayenne pepper: For a spicy kick.
- 1/2 tsp garlic powder: For a pungent, savory flavor.
- 1/4 tsp onion powder: For a subtle onion flavor.
- Salt and pepper to taste: To enhance the flavor.
- 1 cup chopped carrots: For a sweet and colorful addition.
- 1 cup chopped potatoes: For a starchy and satisfying addition.
- 1 cup chopped broccoli florets: For a healthy and flavorful addition.
Instructions
- Spatchcock the chicken: Follow the steps in Part 2.
- In a small bowl, combine olive oil, paprika, cayenne pepper, garlic powder, onion powder, salt, and pepper. This is your spicy rub.
- Rub the mixture all over the chicken. Make sure every inch of the chicken is coated with the spicy rub.
- In a large bowl, toss the carrots, potatoes, and broccoli with olive oil, salt, and pepper. This will give your vegetables a delicious flavor.
- Place the chicken on a roasting rack in a roasting pan. This allows for even cooking and crispy skin.
- Spread the vegetables around the chicken. This creates a delicious one-pan meal with minimal effort.
- Roast at 200°C/400°F for 20 minutes, then reduce the temperature to 180°C/350°F and continue roasting for another 40-50 minutes, or until the internal temperature of the chicken reaches 74°C/165°F and the vegetables are tender. This ensures a perfectly cooked meal with delicious, tender vegetables.
- Let the chicken and vegetables rest for 10-15 minutes before serving. This allows the juices to redistribute, resulting in a more succulent chicken and flavorful vegetables.
Part 8: Beyond the Roast
Spatchcock chicken isn't just for roasting! It's incredibly versatile and can be used for a variety of other dishes. Here are some ideas to get your creative juices flowing:
1. Spatchcock Chicken for Grilling
Want to grill your chicken? Spatchcocking is perfect for grilling. It ensures even cooking and beautiful grill marks. Just preheat your grill, brush the chicken with olive oil and seasonings, and grill for about 10-15 minutes per side, or until cooked through.
2. Spatchcock Chicken for Smoking
If you're a smoker enthusiast, spatchcocking your chicken is the way to go. The flattened shape allows for more smoke penetration, resulting in a smoky, flavorful chicken. You can smoke your spatchcock chicken for about 2-3 hours at low temperature, until the internal temperature reaches 74°C/165°F.
3. Spatchcock Chicken for Air Frying
Air frying is a great way to get crispy skin without all the extra fat. You can spatchcock your chicken and air fry it for about 20-25 minutes at 200°C/400°F, or until cooked through.
Part 9: Spatchcock chicken faqs
1. Can I spatchcock a frozen chicken?
It's best to avoid spatchcocking a frozen chicken. It's much easier and safer to spatchcock a thawed chicken. The bones will be more pliable, making it easier to remove the backbone.
2. Can I reuse the backbone for stock?
Absolutely! Don't throw away the backbone! It's a great base for making chicken stock. Roast the backbone along with some chopped vegetables in a roasting pan, then use it to make a delicious and flavorful stock.
3. How do I store leftover spatchcock chicken?
Leftover spatchcock chicken can be stored in an airtight container in the refrigerator for up to 3 days. You can also freeze it for up to 3 months.
4. Can I use spatchcocking for other poultry?
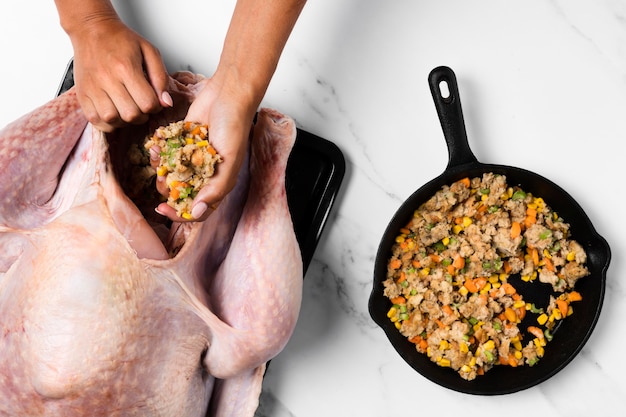
You can definitely spatchcock other poultry, like ducks and turkeys. The process is similar, but you may need to use a larger chef's knife or heavy-duty kitchen shears.
5. How can I tell if my spatchcock chicken is overcooked?
Overcooked chicken will be dry and rubbery. The skin may be too crispy, and the meat will have a dull, grayish color. If you suspect your chicken is overcooked, there's not much you can do, unfortunately. However, you can try to salvage the situation by using the chicken in a dish that requires shredding, like a chicken salad or soup. It will be fine, just not as tender as it could have been.
There you have it! Spatchcocking is a simple, genius technique that will revolutionize your roast chicken game. So next time you're craving a juicy, crispy-skinned chicken, remember to spatchcock it. It's the secret to perfect roast chicken, every time!
Everyone is watching

How to Cook Frozen Lobster Tails Perfectly: A Step-by-Step Guide
RecipesLobster. Just the word conjures up images of lavish meals, special occasions, and a taste of luxury. But let's...

Pigs in a Blanket Cooking Time: How Long to Bake for Perfect Results
RecipesAh, pigs in a blanket. Just the name conjures up images of those delightful little parcels of crispy pastry en...

Pork Fillet Cooking Time: How Long to Cook It Perfectly
RecipesPork fillet, or tenderloin as it's sometimes called, is a real favourite in our house. It's so versatile, and...

The Ultimate Guide to Cooking Delicious Frankfurters
RecipesLet's face it, we all love a good frankfurter. It's a classic, simple, and always satisfying. But let's be rea...

Wolf Meat Recipes: A Guide to Cooking Wild Game
RecipesLet's be honest, you don't see wolf meat at your local butcher shop every day. It's a bit of a wild card, but ...
