Growing up in the South, the aroma of simmering turnip greens was as familiar as the scent of honeysuckle on a summer night. It was a comforting, earthy smell that permeated our home, a reminder of family gatherings, hearty meals, and the simple joy of good food. Even now, miles away from that Southern kitchen, the memory of that scent instantly transports me back to those warm, bustling spaces, filled with laughter and the comforting clatter of pots and pans.
For me, turnip greens are more than just a dish. They're a nostalgic journey, a taste of heritage, and a testament to the powerful connection between food and family. Each bite evokes a sense of belonging, a connection to generations past, and the comforting familiarity of a cherished tradition.
Over the years, I've had the privilege of learning from some of the most seasoned Southern cooks, each with their own unique twist on this classic dish. From my grandmother's smoky, bacon-infused greens to my aunt's tangy, vinegar-based recipe, I've absorbed a wealth of knowledge that I'm eager to share with you. This isn't just any recipe for turnip greens; it's a culmination of years of experience, a love for Southern cuisine, and a desire to pass on this culinary tradition, so it can continue to nourish and delight future generations.
(Part 1) The Importance of Choosing the Right Greens
Picking the Perfect Turnip Greens
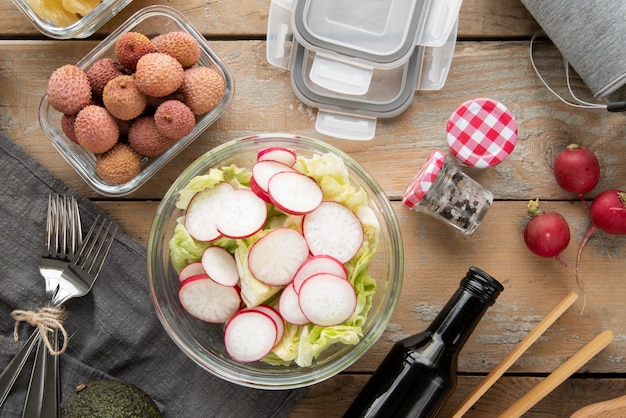
The secret to truly delicious turnip greens lies in selecting the freshest, most vibrant greens you can find. Forget those limp, wilted bundles hiding in the back of the produce aisle. We're looking for leaves that are a deep, rich green, with a slightly crinkled texture, like they've been kissed by the sun. Don't be afraid to ask your local grocer for help – they often have insider tips on what's freshest and best for cooking. They may even have a few stories about their own family recipes for turnip greens!
When I'm choosing turnip greens, I pay attention to these key factors:
- Color: The greens should be a vibrant, deep green, not pale or yellowed. The color should be consistent throughout the bunch, indicating that they haven't been sitting around for too long.
- Texture: Look for leaves that are slightly crinkled and firm, not limp or wilted. They should feel like they have some resilience, not like they're about to crumble in your hand.
- Stems: The stems should be crisp and firm, not soft or mushy. This indicates that the greens are fresh and haven't started to deteriorate.
- Smell: Fresh turnip greens should have a fresh, earthy aroma. If they smell musty or sour, they're likely past their prime. Think of the smell of freshly turned soil – that's the kind of aroma you want.
The Magic of Freshness
There's a significant difference between fresh greens and older greens, and it's noticeable the moment you take a bite. Fresh greens have a bright, vegetal flavor that's not bitter or overly pungent. They have a clean, fresh taste that's truly satisfying. They're also much easier to cook, as they don't require as much time to soften. You'll be able to enjoy your delicious greens sooner! It's worth the extra effort to find the freshest greens you can.
When Freshness Isn't an Option
Life gets busy, and sometimes fresh greens aren't readily available. Don't despair! frozen greens can be a good alternative, though they often lack the depth of flavor of fresh greens. Frozen greens can be a good option if you're short on time or if fresh greens are unavailable. When using frozen greens, be sure to give them a good rinse to remove any excess ice crystals. They might also need a slightly longer cooking time to soften.
(Part 2) Preparing the Greens

Washing Away the Dirt
Before you even think about cooking, give those greens a good scrub. First, remove any wilted or damaged leaves. Then, rinse the greens thoroughly under cold running water. Use your hands to gently separate the leaves and make sure all the dirt and grit is gone. You can even soak the greens in a large bowl of cold water for a few minutes to loosen any stubborn dirt. This is a crucial step, as you don't want any unwanted grit to end up in your delicious meal.
The Importance of Trimming
Now, here's where the real work begins. Those tough, thick stems need to go! They're not exactly known for their tender texture. You'll notice that the stems are generally thicker at the base of the greens, and they gradually become thinner as you move towards the tips of the leaves. The easiest way to trim the stems is to simply pull them off the leaves. If you find that the stems are too stubborn, you can use a sharp knife to slice them off. This process will help ensure that your greens are tender and enjoyable to eat.
If you're feeling adventurous, you can use the stems to make a flavorful stock. Just remember to simmer them in water for a good hour or so to extract all that delicious flavor. The resulting stock can be used as a base for soups, stews, or even just as a simple broth. This is a great way to make the most of every part of the greens, reducing food waste and adding extra flavor to your meals.
The Chop Chop
Now, it's time to chop those greens. The size of the chop is up to you, but I prefer to chop them into strips about 1 inch wide. This allows the greens to cook evenly and ensures that they retain their texture. Plus, it just looks more aesthetically pleasing! If you're short on time, you can even use a food processor to chop the greens. Just be careful not to over-process them, as this can make them too fine and mushy.
(Part 3) The Simmer of a Lifetime
Choosing Your Pot
For this recipe, you'll need a large, heavy-bottomed pot. This will help to ensure that the greens cook evenly and don't stick to the bottom. The weight of the pot helps to distribute heat evenly, preventing hot spots that could burn the greens. And don't forget to choose a pot that's big enough to accommodate all those glorious greens. You don't want them to be crammed in, as this can hinder proper cooking.
The Flavor Foundations: Salt, Bacon, and Onion
Now, here's where the magic really happens. Start by adding a generous amount of salt to the pot. I use about 1 tablespoon per pound of greens, but feel free to adjust to your taste. Salt is a crucial ingredient in this recipe, as it helps to draw out the moisture from the greens and enhances their natural flavors. Next, add a few slices of thick-cut bacon to the pot. I prefer thick-cut bacon for a richer flavor, but any bacon will do. As the bacon cooks, it will release its flavorful fat, which will infuse the greens with a savory richness that's truly addictive.
While the bacon is sizzling, chop a large onion into chunks and add it to the pot. You can use any type of onion you like, but I prefer yellow onions for their mild flavor and versatility. They'll add a sweet and savory base to the greens, complementing the bacon perfectly. Let the onions cook until they're softened and slightly translucent. This will enhance their sweetness and create a delicious foundation for the greens.
Introducing the Greens
Once the bacon and onions are ready, add the chopped greens to the pot. Stir them gently to coat them in the bacon fat and onion juices. The bacon fat will add a richness and depth of flavor, while the onion juices will bring a touch of sweetness. Now, pour in enough water to cover the greens. The amount of water you use will determine the consistency of your greens. If you prefer a thicker, more robust texture, use less water. If you want a lighter, more broth-like consistency, use more water. It's all about personal preference!
The Art of Simmering
Bring the pot to a boil, then reduce the heat to a simmer. Cover the pot and let the greens simmer for at least an hour, or until they are tender and have reduced in volume by about half. Stir occasionally to prevent the greens from sticking to the bottom of the pot. This is a crucial step, as it allows the greens to soften and develop their deep, earthy flavor. It's a transformative process that brings out the best of the greens. It's also the perfect time to step back, relax, and enjoy the comforting aroma that's filling your kitchen. The scent of simmering turnip greens is truly irresistible.
The Flavor Boost: Vinegar and Hot Sauce
Just before serving, stir in a tablespoon or two of vinegar. I prefer apple cider vinegar for its subtle sweetness, but you can use any type you like. The vinegar adds a tangy brightness to the greens, cutting through the richness of the bacon and onions. It's a crucial element that balances out the flavors, creating a harmonious blend. Finally, add a generous dash of hot sauce. This is where you can really personalize the dish. I use a combination of Tabasco and Louisiana hot sauce for a kick that's both spicy and flavorful. But feel free to experiment with your favorite hot sauce brands and find the perfect level of heat for your taste buds.
(Part 4) Variations on a Classic
Beyond the Basics
While the classic Southern-style turnip greens recipe is a masterpiece in itself, there's always room for creativity. There's no one "right" way to make this dish, so experiment with different flavors and textures to find what you love best. Here are a few variations that will add a touch of excitement to your greens:
A Smoky Touch: Smoked Pork
For a smoky flavor that will transport you straight to the heart of the South, replace the bacon with smoked pork. I like to use a combination of smoked ham hocks and smoked sausage for a deep, rich flavor that complements the greens perfectly. Just simmer the smoked pork with the greens, ensuring that the meat is cooked through before serving. The smoky flavor will infuse the greens, creating a truly unforgettable dish. The combination of smoked pork and turnip greens is a match made in Southern heaven.
A Spicy Kick: Jalape??o Peppers
If you like a little heat, add a chopped jalape??o pepper to the pot along with the onions. The heat from the jalape??o will add a bold, fiery dimension to the dish, balancing the sweetness of the onions and the savory richness of the bacon. Adjust the amount of jalape??o based on your heat tolerance. A little goes a long way! Start with a small amount and add more to your taste. You can also remove the seeds from the jalape??o before chopping it to reduce the heat level.
A Sweet and Savory Twist: Apples
For a surprising twist that will delight your taste buds, add a diced apple to the pot along with the onions. The sweetness of the apple will complement the savory flavors of the bacon and onions, creating a harmonious blend that's both satisfying and refreshing. I like to use Granny Smith apples for their tartness, but any variety will work. This unexpected combination of sweet and savory is a delightful surprise that will have your guests asking for more.
A Touch of Herb: Thyme
For a hint of earthy freshness, add a sprig or two of thyme to the pot along with the greens. Thyme complements the earthy flavor of the greens and adds a subtle complexity that will elevate your dish to new heights. You can also use other herbs like rosemary or sage, depending on your preference. A little fresh thyme is a perfect way to add a touch of sophistication to your turnip greens.
A Creamy Delight: Butter and Cream
For a truly decadent experience, stir in a tablespoon or two of butter and a splash of heavy cream just before serving. The butter and cream will add a creamy richness to the greens, creating a luxurious dish that's perfect for a special occasion. This is a great way to add some richness to your greens while still maintaining the traditional Southern flavors. It's a touch of indulgence that takes this classic dish to a whole new level.
(Part 5) Serving Up the Goodness
The Perfect Pairing
Turnip greens are a versatile dish that can be enjoyed in many ways. They are delicious as a side dish alongside other Southern staples like fried chicken, cornbread, and collard greens. They can also be served as a main course, topped with a fried egg or a dollop of sour cream. Turnip greens are incredibly adaptable and can fit into a variety of meal plans.
A Hearty Meal
For a hearty meal, try serving your turnip greens with a side of black-eyed peas, rice, and a slice of cornbread. This is a classic Southern combination that's both comforting and satisfying. You can also add a sprinkle of chopped bacon or a drizzle of hot sauce to your greens for an extra kick. This is a meal that will leave you feeling full and content.
A Lighter Option
If you're looking for a lighter option, try serving your turnip greens with a salad and a grilled chicken breast. This is a refreshing and healthy meal that's perfect for a warm summer day. You can also add a side of roasted vegetables or a piece of fruit for an even more balanced meal. This is a great choice for those who are watching their calorie intake, while still enjoying the delicious flavors of Southern cuisine.
The Importance of Presentation
Don't underestimate the power of presentation! Even the simplest dish can look stunning with a little creativity. I like to serve my turnip greens in a large, shallow bowl, garnished with a sprinkle of chopped fresh parsley or a dollop of sour cream. A simple garnish can elevate the appearance of your dish, making it more appealing and inviting. You can also use a small ladle to create a decorative swirl on top of the greens. A little effort in presentation can make your meal feel more special.
(Part 6) Beyond the Dinner Table
The Goodness of Greens
Turnip greens are not only delicious, but they're also packed with nutrients. They're a good source of vitamins A, C, and K, as well as fiber and calcium. They are a nutritional powerhouse! So, not only are you treating yourself to a comforting and flavorful meal, you're also giving your body a dose of good nutrition. This makes turnip greens a guilt-free pleasure.
The Culinary Versatility of Greens
The uses for turnip greens don't stop at the dinner table. They can be used in a variety of other dishes, from soups and stews to stir-fries and salads. Here are a few ideas to get your culinary juices flowing:
Soups and Stews
Add chopped turnip greens to your favorite soup or stew for a hearty and flavorful twist. They work particularly well with chicken, beef, and vegetable soups. You can also use turnip greens to make a delicious green soup. Their earthy flavor blends beautifully with a variety of other ingredients, adding depth and complexity to your soups and stews.
Stir-Fries
Add chopped turnip greens to your stir-fries for a burst of flavor and texture. They pair well with other vegetables, tofu, and meat. You can also use them to make a delicious turnip green stir-fry with your favorite sauce. Their slightly bitter flavor provides a nice counterpoint to the sweetness of other stir-fry ingredients.
Salads
Add chopped turnip greens to your salads for a unique and healthy touch. They provide a slightly bitter counterpoint to the sweetness of other salad ingredients, like fruit and nuts. They're a great way to add a touch of green and nutritional value to your salads. You can also use them to make a delicious turnip green salad with a vinaigrette dressing. For a truly unique and refreshing salad, try using chopped turnip greens as the base and topping them with your favorite ingredients.
(Part 7) FAQs
1. How long can I store turnip greens in the refrigerator?
Fresh turnip greens will last for about 3-5 days in the refrigerator if stored properly. Wrap them tightly in plastic wrap or store them in a resealable plastic bag. Make sure to remove any wilted or damaged leaves before storing. To ensure freshness, store the greens in the crisper drawer of your refrigerator. Avoid storing them near strong-smelling foods, such as onions and garlic, as this can affect their flavor.
2. Can I freeze turnip greens?
Yes, you can freeze turnip greens, but they will lose some of their texture and flavor. To freeze turnip greens, blanch them first by simmering them in boiling water for 1-2 minutes. Then, drain them well and pat them dry. Place the blanched greens in freezer-safe bags or containers and freeze for up to 6 months. When ready to use, thaw the greens overnight in the refrigerator and cook as directed. Frozen greens are a great option if you want to stock up on this nutritious ingredient for later use.
3. Can I use collard greens instead of turnip greens?
Yes, you can use collard greens instead of turnip greens, but the flavor will be slightly different. Collard greens are generally considered to be milder in flavor than turnip greens. They are also tougher and require a longer cooking time. If using collard greens, be sure to trim the stems and chop them into smaller pieces. Adjust the cooking time accordingly, as they will need to simmer for a longer period to become tender. Both collard greens and turnip greens are excellent choices, offering different flavor profiles and textures.
4. What is the best way to reheat turnip greens?
To reheat turnip greens, place them in a saucepan over low heat and stir until they are warmed through. You can also reheat them in the microwave, but they may become slightly mushy. If you have leftover greens that are too thick, add a little water or broth to thin them out before reheating. You want to reheat the greens gently to preserve their flavor and texture.
5. How can I tell if turnip greens are cooked through?
Turnip greens are cooked through when they are tender and have reduced in volume by about half. They should no longer be tough or stringy. To check for doneness, pierce a leaf with a fork. If it goes through easily, the greens are done. If you find that the greens are still too tough, continue to simmer them for a few more minutes. Doneness is all about achieving a tender, yet still slightly firm texture. It should be easy to eat, but not mushy.
(Part 8) A Legacy of Flavor
There's something deeply satisfying about sharing a plate of Southern-style turnip greens with loved ones. It's a dish that brings people together, fostering connection and conversation. It's more than just food; it's a shared experience that strengthens bonds and creates memories. It's a reminder of the simple joys of home-cooked meals, the comfort of tradition, and the enduring power of family recipes. Each generation adds its own unique touch to the recipe, making it a living testament to the evolution of family and culture.
So, the next time you find yourself craving a taste of the South, grab a pot, some fresh turnip greens, and a handful of good memories. Let the aroma of simmering greens fill your kitchen, and let the flavors of your heritage transport you to a place of warmth, comfort, and pure culinary delight.
More than just a dish, Southern-style turnip greens are a journey through time, a celebration of heritage, and a delicious reminder of the powerful connection between food and family. Enjoy the journey, and savor every delicious bite!
Everyone is watching

How to Cook Frozen Lobster Tails Perfectly: A Step-by-Step Guide
RecipesLobster. Just the word conjures up images of lavish meals, special occasions, and a taste of luxury. But let's...

Pigs in a Blanket Cooking Time: How Long to Bake for Perfect Results
RecipesAh, pigs in a blanket. Just the name conjures up images of those delightful little parcels of crispy pastry en...

Pork Fillet Cooking Time: How Long to Cook It Perfectly
RecipesPork fillet, or tenderloin as it's sometimes called, is a real favourite in our house. It's so versatile, and...

The Ultimate Guide to Cooking Delicious Frankfurters
RecipesLet's face it, we all love a good frankfurter. It's a classic, simple, and always satisfying. But let's be rea...

Wolf Meat Recipes: A Guide to Cooking Wild Game
RecipesLet's be honest, you don't see wolf meat at your local butcher shop every day. It's a bit of a wild card, but ...