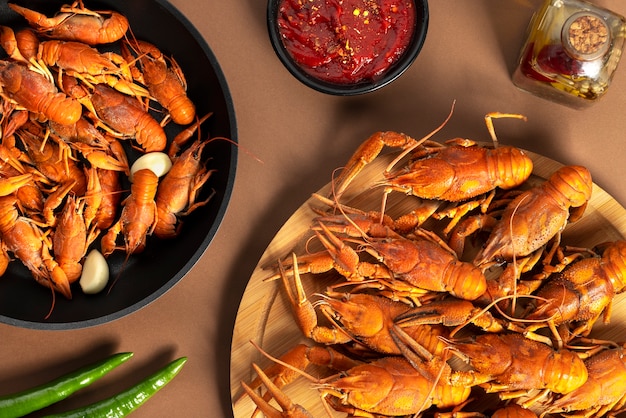
Ah, snow crab legs. Just the thought of those succulent, sweet, and slightly salty chunks of meat makes my mouth water. But let's be honest, cooking them perfectly can feel like a bit of a culinary gamble. I've been there – overcooked, rubbery crab legs are a real downer. So, I've spent countless hours experimenting, and I'm here to share my hard-earned wisdom with you.
This guide is your ultimate resource for mastering the art of cooking snow crab legs, from choosing the perfect ones to achieving the perfect texture and flavor. We'll dive into different cooking methods, discuss the crucial element of timing, and reveal essential tips and tricks for flawless results. Buckle up, because we're about to embark on a delicious journey!
(Part 1) Choosing the Perfect Snow Crab Legs: The Foundation of Flavor
The quality of your crab legs sets the stage for an unforgettable meal. You wouldn't build a house on shaky foundations, and the same applies to your snow crab feast. So, let's start by choosing the right ingredients.
1. Freshness is King: Spotting Quality Crab Legs
Freshness is paramount. Think of it like this: you want your crab legs to be as close to their natural state as possible. You should be able to see that bright, slightly reddish-orange color, which is a sign of freshness. Look for legs that are firm to the touch, not mushy or discolored. Avoid any legs with a strong fishy smell - that's a sign they've been sitting around a bit too long. And remember, always check the expiration date - it’s a good habit to get into.
2. Size Matters: Picking the Perfect Size for Your Needs
Whether you're hosting a dinner party or indulging in a solo feast, the size of the crab legs matters. For a single serving, smaller to medium-sized legs are just right. But if you're planning on sharing, larger legs are your best bet. Remember, bigger isn't always better - sometimes those smaller legs offer just as much flavour.
3. Frozen or Fresh? The Great Debate
While fresh crab legs are always my first choice (they're simply divine!), frozen ones are a perfectly viable option, especially if you can't get fresh ones. Just make sure they're frozen solid and have never been thawed and refrozen.
Freezing is a bit like putting your crab legs into a culinary time capsule, preserving their freshness. Just keep them in the freezer until you’re ready to unleash their deliciousness.
4. The Price Tag: Getting Value for Your Delicious Dollars
Let's be honest, snow crab legs can be a bit pricey. But there are ways to get the best value for your money. Keep an eye out for deals and promotions, especially when buying in bulk. And remember, don’t always go for the biggest legs. Sometimes smaller legs offer great flavour at a more affordable price.
(Part 2) Steaming: The Gentle Art of Cooking Snow Crab Legs

Steaming is my go-to method for cooking snow crab legs. It’s a gentle approach that locks in moisture and allows the natural flavour of the crab to shine through. It’s like giving your crab legs a luxurious spa treatment.
1. Setting the Stage: The Essentials for Steaming
You’ll need a large steamer basket and a pot with a tight-fitting lid. Fill the pot with about two inches of water and bring it to a rolling boil. Think of it like a steamy spa for your crab legs.
To elevate the flavour, add a couple of tablespoons of salt to the water. Salt is a magic ingredient – it helps to enhance the flavour of the crab and prevent it from becoming bland. A few bay leaves also add a subtle depth of flavour.
2. Timing is Key: The Perfect Steaming Time for Snow Crab Legs
Once the water is boiling, carefully place the crab legs in the steamer basket. Make sure they’re not overcrowded; they need room to breathe and steam evenly.
Now, here's where the timing comes in. Steaming time depends on the size of your crab legs:
- Small legs: 8-10 minutes
- Medium legs: 10-12 minutes
- Large legs: 12-15 minutes
These are just guidelines, though. You'll know your crab legs are perfectly steamed when the meat is opaque and easily pulls away from the shell. It’s like the crab meat is saying, “I'm ready!”
3. Flavorful Steaming: Enhancing the Experience
Don't stop at basic steaming - elevate your snow crab game! Add some fresh herbs like thyme, rosemary, or dill to the steaming water for an extra burst of flavour. A squeeze of lemon juice or a splash of white wine can also add a touch of brightness.
For a truly decadent experience, add a knob of butter to the top of the crab legs before steaming. The butter will melt gently and infuse the crab meat with rich, buttery flavour. It's a luxurious touch that your taste buds will thank you for.
(Part 3) Boiling: The Simple and Speedy Method
For those busy weeknights when you need a quick and easy meal, boiling is your best friend. It’s a straightforward method that requires minimal fuss, and it delivers delicious results every time.
1. The Boiling Essentials: Setting the Stage for Success
Gather a large pot with a lid and fill it with enough water to cover the crab legs. Think of it as a delicious seafood bath. Add salt, peppercorns, a few bay leaves, and some lemon slices for a flavour boost. Bring the water to a rolling boil – let those bubbles dance!
2. The Perfect Boil: Timing for Tender Crab Legs
Once the water is at a vigorous boil, gently lower the crab legs into the pot. Make sure the water remains at a full boil for the entire cooking time.
Here's the timing you need to know:
- Small legs: 5-7 minutes
- Medium legs: 7-9 minutes
- Large legs: 9-12 minutes
As with steaming, these are guidelines. The key is to check the meat: it should be opaque and easily pull away from the shell.
3. Boiling with Flavour: Adding Depth to Your Dish
Boiling is a blank canvas for flavour! Experiment with different combinations of fresh herbs, spices, and a splash of white wine or beer. I've found that a mix of fresh parsley, garlic, and a splash of dry white wine adds a beautiful complexity.
(Part 4) Grilling: Embracing Smoky Flavors
If you're a fan of that smoky, charred flavour, grilling is the way to go. It’s a bolder approach that adds a delightful depth to your crab legs. Just be careful not to overcook them, as they can dry out quickly.
1. Prepping the Grill: Getting Ready for a Smoky Adventure
Preheat your grill to medium heat. If you're using a gas grill, give it about 10 minutes to heat up properly. For a charcoal grill, let the coals turn to ash before adding the crab legs - you want those beautiful embers, not direct flames.
2. Grilling Time: The Perfect Balance of Heat and Time
Place the crab legs on the grill and cook for about 5-7 minutes per side, or until the meat is opaque and easily pulls away from the shell.
Keep a close eye on your crab legs during the grilling process. They can cook quickly, and overcooking can lead to dry, rubbery meat.
3. Grilling Goodness: Amplifying Flavor with Marinades
For an extra flavour boost, marinate the crab legs before grilling. A simple marinade of olive oil, lemon juice, garlic, and fresh herbs is a classic. Allow the crab legs to soak in the marinade for at least 30 minutes before grilling.
Before you grill, pat the legs dry with paper towels. This helps prevent steaming, allowing them to get that delicious char.
(Part 5) Baking: A Simple and Versatile Option
Baking is a convenient method that's perfect for smaller kitchens or when you need a hands-off approach. It's easy to do, and the results are always delicious.
1. Oven-Ready: Getting Your Oven Prepped
Preheat your oven to 375 degrees Fahrenheit (190 degrees Celsius). Line a baking sheet with parchment paper or aluminium foil – this will make cleanup a breeze.
2. Bake It Until It’s Done: The Timing for Baked Crab Legs
Place the crab legs on the prepared baking sheet and bake for 10-12 minutes, or until the meat is opaque and easily pulls away from the shell.
For even cooking, you can baste the crab legs with melted butter halfway through the baking time. And to ensure even browning, flip the crab legs halfway through the baking process.
3. Flavorful Baking: Adding a Touch of Zest
To add a touch of extra flavour, sprinkle the crab legs with herbs, spices, or lemon zest before baking. I often use a combination of paprika, garlic powder, and a pinch of cayenne pepper for a touch of heat.
(Part 6) Deciphering the Signs: Knowing When Your Crab Legs are Cooked to Perfection
You've chosen your crab legs, you've chosen your cooking method, and now it's time to make sure they're cooked perfectly. Don't worry, it's not as complicated as it sounds. Here’s how to know your crab legs are ready to eat:
1. The Meat Test: Checking the Opacity and Texture
The most reliable way to know if your crab legs are cooked is to check the meat. It should be opaque and have a firm, slightly springy texture.
If the meat is still translucent or sticks to the shell, it needs more time. If it's stringy or rubbery, it's overcooked.
2. The Shell Test: A Sign of Doneness
The shell of a cooked crab leg should be firm and not easily bendable. If it's still soft, it needs more time.
3. The Colour Test: Observing the Colour Changes
The shell of a cooked crab leg should be a reddish-orange color. If it’s still pale, it needs more time in the heat.
(Part 7) Presenting Your Feast: Serving Up Delicious Snow Crab Legs
Your crab legs are cooked to perfection. Now, let’s make sure they look as good as they taste.
1. The Serving Essentials: Setting the Scene for Your Meal
Gather a serving platter or individual plates, depending on how you’re serving your crab legs. For cracking those legs, you'll need a crab cracker and a crab fork.
2. A Touch of Elegance: Adding a Garnish
Elevate the presentation with a simple garnish. A sprig of fresh parsley or dill adds a vibrant touch of colour. A squeeze of lemon juice or a drizzle of melted butter adds an extra layer of flavour and visual appeal.
3. The Perfect Accompaniments: Completing the Experience
Serve your crab legs with a selection of accompaniments. Melted butter, lemon wedges, drawn butter, cocktail sauce, or horseradish sauce all make excellent companions.
I like to serve my crab legs with a side of crusty bread or rice to soak up the delicious juices.
(Part 8) FAQs: Your Snow Crab Questions Answered
So, your crab legs are cooked, your table is set, and you're ready to enjoy. But maybe you have a few questions. Don’t worry, I'm here to help!
1. Can I Reheat Cooked Crab Legs?
Yes, you can reheat cooked crab legs. The best method is to steam them gently for a few minutes. You can also reheat them in the oven, but be careful not to overcook them.
2. How Long Can I Store Cooked Crab Legs?
Cooked crab legs can be stored in the refrigerator for up to 3 days. Make sure to store them in an airtight container to preserve their freshness.
3. Can I Freeze Cooked Crab Legs?
While it's best to freeze crab legs before cooking, you can freeze them after cooking. Do it as soon as possible after cooking to maintain the best quality.
4. How Do I Crack a Crab Leg?
Using a crab cracker, place the leg on a cutting board. Crack the shell at the joint. Then, use a crab fork to remove the delicious meat inside.
5. Can I Eat the Shell of a Snow Crab Leg?
No, you shouldn’t eat the shell. It’s inedible and can be a choking hazard.
(Part 9) The Final Bite: Savoring the Deliciousness
There you have it: your complete guide to cooking snow crab legs. From selecting the perfect legs to mastering different cooking methods, you're now equipped to create a truly delicious and memorable meal.
Remember, the key to cooking snow crab legs is to keep them moist and flavourful. Whether you steam, boil, grill, or bake, you’ll be able to create a feast that will have everyone asking for seconds.
So go ahead, grab some fresh snow crab legs and let your culinary journey begin! Enjoy!
Everyone is watching

How to Cook Frozen Lobster Tails Perfectly: A Step-by-Step Guide
RecipesLobster. Just the word conjures up images of lavish meals, special occasions, and a taste of luxury. But let's...

Pigs in a Blanket Cooking Time: How Long to Bake for Perfect Results
RecipesAh, pigs in a blanket. Just the name conjures up images of those delightful little parcels of crispy pastry en...

Pork Fillet Cooking Time: How Long to Cook It Perfectly
RecipesPork fillet, or tenderloin as it's sometimes called, is a real favourite in our house. It's so versatile, and...

The Ultimate Guide to Cooking Delicious Frankfurters
RecipesLet's face it, we all love a good frankfurter. It's a classic, simple, and always satisfying. But let's be rea...

The Ultimate Guide to Tender, Juicy Pulled Pork
RecipesRight, let's talk pulled pork. It's one of those dishes that just screams "comfort food," doesn't it? I mean...