You’ve decided to wow your guests with a show-stopping prime rib roast – fantastic choice! It’s a true culinary masterpiece, a crowd-pleaser guaranteed to impress. But, let’s be honest, cooking a prime rib isn't always a breeze. It takes some planning and a touch of know-how to achieve the perfect roast: juicy, tender, and boasting a gloriously crisp exterior. Fear not, I’m here to guide you through this culinary adventure, sharing my hard-earned wisdom and making you a prime rib master in no time.
I've spent years perfecting my prime rib technique, and trust me, I've learned from my fair share of mistakes. Overcooked, dry, or undercooked roasts? I've been there, done that. But through countless trials and errors, I've finally cracked the code to consistently delicious prime rib. So, grab a comfy seat, maybe a cuppa, and let's delve into the world of prime rib perfection together.
(Part 1) Choosing the perfect prime rib
The journey to a mouthwatering prime rib starts with selecting the right cut. You want a prime rib that will be juicy, tender, and brimming with flavor – the kind that will leave everyone wanting seconds. It’s the foundation for a truly memorable meal.
Choosing the Cut: The standing rib roast
The "Standing Rib Roast" is the star of the show, coming from the primal rib section of the cow. You'll find them in various weights, but generally, a 3-4 pound roast is perfect for a smaller gathering, while a 6-8 pounder will comfortably feed a crowd. Personally, I favor a 5-6 pound roast – it's the ideal size for my family and guests. Don't be afraid to ask your butcher for advice; they're experts in this field and can guide you to the perfect cut for your needs.
Rib Bones: The Bone-In Debate
prime rib roasts come in two main variations: bone-in or boneless. The bones add a wonderful depth of flavor, creating a rich, savory broth as the roast cooks. However, they can make carving a bit more challenging. If you're a seasoned chef and enjoy the challenge, go for the bone-in version! For a more beginner-friendly option, a boneless roast is a great choice. It's easier to handle and cooks a bit faster, making it a good choice for those new to prime rib cooking.
Bone-In vs. Boneless: The Breakdown
The bone-in prime rib is a classic for a reason. Those rib bones contribute a phenomenal depth of flavor, rendering some gorgeous, rich, melt-in-your-mouth fat. The downside is that they require slightly longer cooking times.
A boneless prime rib roast is the convenient choice. It roasts a bit faster, and slicing and carving are a breeze. However, you lose the rich flavor and visual appeal of the bone-in version.
Ultimately, the choice is yours! Consider your cooking skills, your preferred cooking time, and your guests' preferences. There’s no right or wrong choice, just different ways to enjoy prime rib.
Fat Marbling: The Secret to Juiciness
Here’s the real secret to a melt-in-your-mouth prime rib: marbling. You want a roast with a good amount of marbling, those little streaks of fat interwoven throughout the meat. This fat renders during cooking, adding flavor and ensuring the roast stays succulent. When you're at the butcher, don’t hesitate to ask to see the roast and check out the marbling. It's the key to a truly delicious prime rib.
(Part 2) Prep Time: Getting Ready for Roast-tasticness
You've got your prime rib chosen, and now it's time to get it prepped for its star turn. This is a crucial step in the process, so don’t skip it! It’s all about getting that roast ready to shine. Think of it as the essential makeup routine before the big show.
The Salt Cure: A Game-Changer for Tenderness
You've likely heard of dry brining, but have you tried salt curing? It's a technique that takes a bit longer than a traditional brine, but trust me, it's worth the effort. You salt the meat for a longer period, anywhere from a day to several days, which draws out moisture and then helps retain it during cooking. This results in a stunningly tender and juicy roast – a true revelation for larger cuts.
Salt Curing: A Step-by-Step Guide
Here's what you need to know about salt curing:
- You'll need kosher salt for this. It's a must-have for any serious home cook and is readily available at most supermarkets.
- Salt cure the prime rib for at least 24 hours, but up to three days, in the fridge.
- You can use a simple technique: Rub the salt liberally all over the roast and place it in a shallow pan, uncovered, in the fridge.
- Make sure to rotate the roast every 12 hours to ensure even salting.
- After the cure, pat the roast dry with paper towels and let it come to room temperature before cooking.
If you're short on time or simply prefer to get straight to the roasting, you can skip the salt cure and just season your prime rib with salt and pepper before cooking. But I strongly encourage you to give the cure a try! The difference in texture and flavor is remarkable.
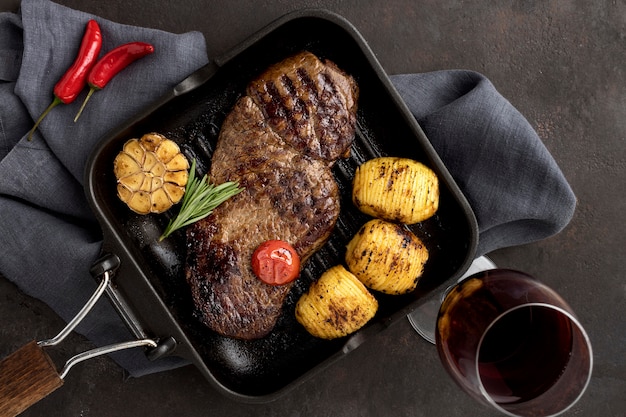
(Part 3) Roasting: The Big Moment
Alright, it's time for the main event! You've got your perfectly prepped prime rib, the oven is preheated, and you're ready to unleash your inner culinary master.
Preheat Your Oven: Setting the Stage for Success
First things first, preheat your oven to 450°F (232°C). This high temperature is essential for creating that beautiful, crispy crust on the roast. Don't skip this step! It makes a huge difference in the final presentation and flavor.
Seasoning: The Flavor Booster
Now, it’s time to season your prime rib. Salt and pepper are the classic choices, but feel free to get creative here.
I love to add some garlic powder and onion powder to my rub. You can also add a pinch of paprika or cayenne for a bit of heat. And don't forget a generous amount of freshly ground black pepper! It adds a lovely depth of flavor.
Into the Oven: It’s Show Time!
Once your oven is preheated, place the prime rib on a roasting rack in a roasting pan. This allows the hot air to circulate evenly around the roast, resulting in even cooking.
Here's the key: Roast the prime rib for 15 minutes per pound for the first hour. This high-heat sear is crucial for achieving that impressive crust.
(Part 4) The Importance of Resting: Patience is a Virtue
The moment of truth is about to arrive, but before you dig in, you need to let your prime rib rest. You've come this far, so don’t rush the final stage! Resting is key to unlocking the full potential of your prime rib.
After the roast is done, remove it from the oven and let it rest for at least 15-20 minutes, covered with aluminium foil. This allows the juices to redistribute throughout the roast, resulting in a much more tender and flavorful piece of meat.
Why Resting Matters: Unlocking Juiciness
Think of it this way: while the meat is cooking, the juices are pushed to the surface. If you cut into it straight away, those precious juices run out, leaving you with a dry piece of meat. Resting allows those juices to settle back into the meat, resulting in a succulent and juicy final product. Patience is key!
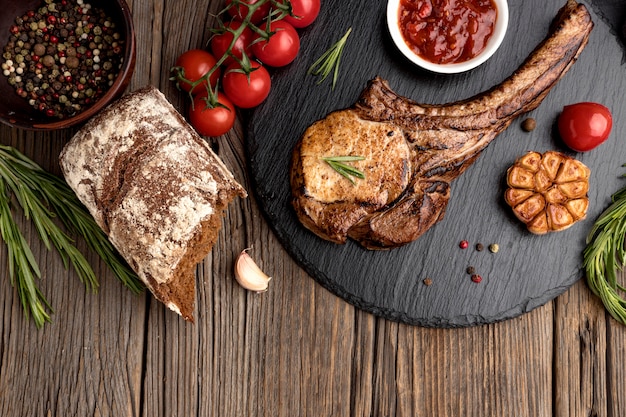
(Part 5) The Art of Carving: A Symphony of Skill
The big moment has arrived – time to carve that magnificent prime rib! But before you grab the carving knife, there are a few tips to make sure you carve it like a pro.
The Tools of the Trade: What You’ll Need
You’ll need a sharp carving knife and a carving fork to make this a smooth operation. It’s also helpful to have a cutting board large enough to accommodate the roast. If you’re using a bone-in roast, you’ll need a meat cleaver or a heavy butcher knife to cut through the bones.
Carving Techniques: Getting It Right
Start by carefully slicing along the bone, separating the roast into individual ribs. If you’re working with a boneless roast, slice the meat into thin, even slices. The goal is to make it easy for your guests to enjoy their portions.
The Finishing Touch: Presentation Matters
You’ve worked hard on this roast, so don't forget the presentation! Arrange the carved prime rib on a serving platter and garnish with fresh herbs, such as rosemary or thyme. This adds a touch of elegance and enhances the flavour of the roast. It’s the final touch that transforms your prime rib from a delicious meal to a culinary masterpiece.
(Part 6) Temperature Check: Getting it Right
You might be wondering, “How do I know when my prime rib is done?” A meat thermometer is your best friend in this situation. It’s the only way to make sure your roast is cooked to perfection, ensuring juicy, tender meat every time.
internal temperatures: The Magic Numbers
Use a meat thermometer to check the internal temperature of the roast. Here’s a quick guide to the ideal internal temperatures for different levels of doneness:
| Doneness | Internal Temperature (°F) | Internal Temperature (°C) |
|---|---|---|
| Rare | 125-130 | 52-54 |
| Medium-Rare | 130-135 | 54-57 |
| Medium | 140-145 | 60-63 |
| Medium-Well | 150-155 | 65-68 |
| Well Done | 160 | 71 |
Cooking Times: A Rough Guide
Remember, cooking times are estimates, as every oven is different. Always use a meat thermometer to ensure your prime rib is cooked to your desired doneness. It's the only way to guarantee a perfectly cooked roast.
(Part 7) Leftovers: Don’t Toss Them Out!
You’ve cooked a magnificent prime rib, and the thought of leftovers might be disheartening. But fear not, prime rib leftovers are a delicious way to stretch your culinary masterpiece. Think prime rib sandwiches, prime rib salads, or even prime rib hash. The possibilities are endless!
Leftover Love: A Culinary Treasure
Prime rib leftovers are a real culinary treasure! They’re perfect for sandwiches, salads, or even a hearty hash. Just slice the leftover prime rib into thin strips and use them in your favourite recipes. You can even freeze leftovers for future use. Don't let that deliciousness go to waste!
(Part 8) FAQs: Answering Your Prime Rib Queries
1. Can I use a different cut of meat for prime rib?
While the Standing Rib Roast is the classic choice for prime rib, you can use other cuts of meat, like the Rib Eye Roast or the chuck roast. However, you’ll need to adjust cooking times and temperatures accordingly. The butcher can guide you on the best cooking methods for each cut.
2. What can I serve with prime rib?
The possibilities are endless! Classic sides include roasted potatoes, asparagus, creamed spinach, and Yorkshire pudding. But you can also get creative and serve your prime rib with a variety of other dishes, such as a green salad or a light pasta salad. Consider the overall theme and your guests’ preferences when choosing your sides.
3. How long can I store prime rib in the fridge?
You can store cooked prime rib in the fridge for up to 3-4 days. It’s best to wrap it tightly in plastic wrap or aluminium foil to prevent freezer burn. This will help keep the prime rib fresh and flavorful.
4. What if I overcook my prime rib?
Overcooked prime rib will be drier than a well-cooked roast. But don’t worry, you can still salvage it! Try slicing the roast very thinly and using it in a sandwich or salad. The thin slices will help to mask the dryness. You can also use it in a stew or casserole, where the extra cooking time will be less noticeable.
5. Can I cook a prime rib on the grill?
Absolutely! You can grill a prime rib roast, but it requires a bit more finesse and a special grill setup. Make sure to use a charcoal grill with a strong heat source and a consistent temperature. You can also use a gas grill, but you’ll need to adjust the cooking times accordingly.
Cooking a prime rib on the grill will impart a unique smoky flavor to the roast and create a delicious crust. But be sure to keep an eye on the temperature and adjust accordingly. It’s a bit more challenging, but the rewards are worth it!
Everyone is watching

How to Cook Frozen Lobster Tails Perfectly: A Step-by-Step Guide
RecipesLobster. Just the word conjures up images of lavish meals, special occasions, and a taste of luxury. But let's...

Pigs in a Blanket Cooking Time: How Long to Bake for Perfect Results
RecipesAh, pigs in a blanket. Just the name conjures up images of those delightful little parcels of crispy pastry en...

Pork Fillet Cooking Time: How Long to Cook It Perfectly
RecipesPork fillet, or tenderloin as it's sometimes called, is a real favourite in our house. It's so versatile, and...

The Ultimate Guide to Cooking Delicious Frankfurters
RecipesLet's face it, we all love a good frankfurter. It's a classic, simple, and always satisfying. But let's be rea...

Wolf Meat Recipes: A Guide to Cooking Wild Game
RecipesLet's be honest, you don't see wolf meat at your local butcher shop every day. It's a bit of a wild card, but ...