Let's be honest, the thought of spending hours in the kitchen tending to ribs isn't exactly appealing. Especially during a busy week. But, what if I told you could have those fall-off-the-bone, melt-in-your-mouth ribs ready in a fraction of the time? I'm talking about a world of juicy, flavorful ribs made possible by the magic of a pressure cooker.
Now, I'll admit, I was a bit of a pressure cooker skeptic for a while. I always felt like they were just for making stews and beans. But let me tell you, when I discovered how amazing they were for ribs, my world changed. It's like a whole new level of cooking was unlocked! It's a game changer, really. You get that same melt-in-your-mouth tenderness in a fraction of the time.
So, if you're ready to ditch the oven and embrace the speed and ease of the pressure cooker, read on! This comprehensive guide will walk you through everything you need to know to create the most delicious, fall-off-the-bone ribs right in your kitchen.
(Part 1) Why Pressure Cooker Ribs?
Why You Should Consider Pressure Cooking Ribs
Let's face it, the thought of spending hours in the kitchen tending to ribs is not exactly appealing. Especially during a busy week. But, with a pressure cooker, you can have those delicious ribs ready in a fraction of the time. That's right - you're not sacrificing flavour or tenderness, just time. I'll admit, I was a bit of a sceptic at first. I thought they might be tough or dry. But honestly, once I tried it, I was blown away.
Here's why pressure cooking ribs is a total win:
- Faster cooking time: Let's get real, who has hours to spare on a Sunday? Pressure cookers cook ribs in a fraction of the time compared to traditional methods. We're talking minutes, not hours!
- Tender, juicy results: This is the real deal! The pressure cooker breaks down the tough connective tissues in the ribs, resulting in melt-in-your-mouth tenderness. I mean, seriously, it's like magic.
- Minimal effort: You just toss the ribs in the cooker with some seasoning, set the timer, and voila! While the pressure cooker works its magic, you can relax and do other things.
- Easy clean-up: Unlike traditional oven roasting, which can leave your oven greasy, pressure cookers are relatively easy to clean. Just wipe them down, and you're good to go.
- Versatility: You're not limited to one type of rib! You can use a pressure cooker to make pork, beef, lamb, or even chicken ribs. The options are endless!
(Part 2) The Essential Equipment
Pressure Cooker
You'll need a pressure cooker. I know, I know, it might seem like an investment. But let me tell you, it's one of the best kitchen tools you can buy.
Now, there are a few different types of pressure cookers out there. You've got your electric pressure cookers, which are super convenient and easy to use. They usually come with a ton of other functions like slow cooking and steaming, which is great. Then you've got your stovetop pressure cookers, which are a bit more traditional. Personally, I use an electric pressure cooker, and I can't recommend them enough.
When choosing a pressure cooker, consider the following factors:
- Size: Think about how many people you usually cook for. A smaller pressure cooker might be sufficient for a family of two or three, while a larger one is ideal for larger gatherings.
- Features: Some pressure cookers offer additional features like slow cooking, yogurt making, or rice cooking. Decide which features are essential for your needs.
- Safety Features: Look for safety features like automatic pressure release and a locking lid to ensure a safe cooking experience.
- Ease of Use: Consider the user interface and how easy the pressure cooker is to operate.
meat thermometer
A meat thermometer is essential for ensuring that your ribs are cooked to perfection. You don't want to risk undercooking them, right? So, grab yourself a good quality meat thermometer.
There are two main types of meat thermometers: instant-read and leave-in.
- Instant-read thermometers: These provide a quick temperature reading and are ideal for checking the internal temperature of ribs after cooking.
- Leave-in thermometers: These are inserted into the meat during cooking and monitor the temperature continuously. They are great for ensuring that the ribs stay within the safe temperature range throughout the cooking process.
Cutting Board
A sturdy cutting board is essential for prepping your ribs. You'll be chopping up some veggies and trimming the ribs, so make sure you have a good one that won't slip around on the counter.
Choose a cutting board made from a durable material like wood or plastic. A larger cutting board will provide more space for working with ribs. Consider getting a cutting board with a juice groove to catch any drips.
Sharp Knife
You'll need a sharp knife for trimming the ribs and slicing them for serving. A good quality chef's knife is ideal.
A sharp knife makes all the difference when prepping ribs. Look for a knife with a comfortable handle and a sturdy blade that can easily slice through the connective tissue and bone. Consider investing in a good quality knife sharpener to keep your knife sharp.
(Part 3) The Secret to Pressure Cooker Ribs: choosing the right cut
Baby back ribs vs. spare ribs
Now, you've probably heard the terms "baby back ribs" and "spare ribs". They're both delicious, but there are some key differences.
Baby back ribs, as the name suggests, come from the baby back section of the pig. They tend to be smaller and more tender than spare ribs. They're also a bit more expensive, but worth it if you're looking for a premium cut.
Spare ribs, on the other hand, come from the belly of the pig. They're usually larger and meatier than baby back ribs. They're also more likely to have a thicker layer of fat.
So, which ones should you choose? It really depends on your preferences. If you're looking for the most tender and flavourful ribs, I'd go for baby back ribs. But if you're on a budget or prefer a meatier cut, spare ribs are a great option. I'll usually go with baby back ribs, because I like that really tender texture and the delicious flavour.
St. Louis Ribs
You might also see "St. Louis ribs" at the butcher. These are spare ribs that have been trimmed down to create a more consistent shape. They're usually a bit thinner than traditional spare ribs and have a higher meat-to-bone ratio.
What to Look for When Choosing Ribs
No matter what type of ribs you choose, there are a few things to look for when you're at the butcher:
- Good marbling: You want to see a good amount of marbling throughout the ribs. This means that the meat has a good amount of fat, which will make it more tender and flavourful.
- Thick ribs: Thicker ribs will hold up better to pressure cooking and will be more tender.
- No discolouration: The ribs should be a uniform colour with no discolouration. This means that the meat is fresh and hasn't gone bad.
- No bones sticking out: Check that the ribs are intact and that there aren't any bones sticking out. You want a nice, uniform rack of ribs.
(Part 4) Prepping Your Ribs: A Few Essential Steps
1. Trim the Membrane
The membrane is a thin, tough layer of skin that covers the underside of the rib rack. It's important to remove this before cooking, otherwise, it will make the ribs tough.
Here's how to do it:
- Use a sharp knife: Place the rib rack on a cutting board with the bone side down. Use your sharp knife to loosen the membrane from the bone.
- Grab and pull: Once the membrane is loosened, use a paper towel or your fingers to grip it and pull it off in one piece. You can also use a small tool like a butter knife to help you pull it off.
Removing the membrane is crucial for achieving tender ribs. If you leave it on, it will create a barrier that prevents the seasoning and moisture from penetrating the meat.
2. Pat the Ribs Dry
After you've trimmed the membrane, pat the ribs dry with paper towels. This will help the ribs brown nicely during cooking and prevent them from steaming in the pressure cooker.
Patting the ribs dry is a simple yet essential step. Moisture on the surface of the ribs can hinder browning and create a less desirable texture.
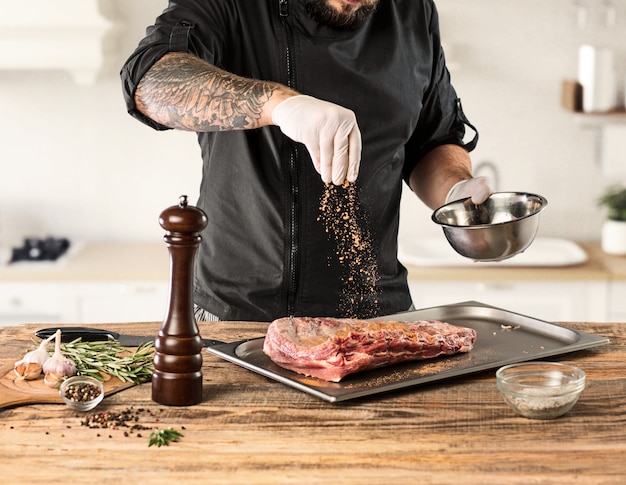
3. Season the Ribs
This is where you get to be creative! There are so many different ways to season ribs, so don't be afraid to experiment.
Here are some classic options:
- Simple salt and pepper: You can never go wrong with the classics. Season the ribs generously with salt and pepper.
- dry rub: This is a great way to add more flavour to your ribs. You can make your own dry rub or buy one from the store. Some popular ingredients for dry rubs include paprika, garlic powder, onion powder, chili powder, cumin, and brown sugar.
- bbq sauce: If you're a fan of BBQ sauce, you can apply it to the ribs before cooking. There are endless varieties of BBQ sauces available, so choose one that you enjoy.
I love to use a dry rub for my ribs. It adds a ton of flavour and makes them extra crispy. For my rub, I typically use paprika, garlic powder, onion powder, chili powder, cumin, brown sugar, and a bit of cayenne pepper for a little heat.
Experimenting with different seasonings can lead to some truly unique and flavorful ribs. Don't be afraid to try new combinations and find what you like best.
4. Cut the Ribs
Before you cook the ribs, it's a good idea to cut them into smaller portions. This will help them cook more evenly and make them easier to eat.
Here's how to do it:
- Cut between the bones: Place the rib rack on a cutting board with the bone side up. Use your sharp knife to cut between the bones, creating individual rib sections.
- Cut into smaller pieces: If you want, you can cut the individual rib sections into smaller pieces. This will make them easier to eat.
Cutting the ribs into smaller portions ensures that they cook evenly and makes them easier to handle. This is especially important for larger racks of ribs.
(Part 5) Cooking Your Ribs: A Simple Pressure Cooker Recipe
Ingredients
- 2 racks of baby back ribs (or your favourite cut)
- 1/2 cup BBQ sauce
- 1/2 cup chicken broth
- 1 onion, chopped
- 2 cloves garlic, minced
- 1 teaspoon salt
- 1 teaspoon black pepper
- 1/2 teaspoon paprika
- 1/4 teaspoon cayenne pepper
Instructions
- Prep the ribs: Trim the membrane from the ribs, pat them dry, and season them with your favourite dry rub.
- Brown the ribs: Heat a tablespoon of oil in your pressure cooker over medium heat. Add the ribs and brown them on all sides. This will help them get a nice crispy crust.
- Add the remaining ingredients: Add the BBQ sauce, chicken broth, onion, garlic, salt, pepper, paprika, and cayenne pepper to the pressure cooker.
- Cook the ribs: Secure the pressure cooker lid and cook on high pressure for 45-60 minutes, depending on the thickness of your ribs.
- Natural release: Let the pressure release naturally for 10 minutes. This will help the ribs stay juicy and tender.
- Remove the ribs: Carefully remove the ribs from the pressure cooker and place them on a serving platter.
- Serve: Serve the ribs with your favourite sides.
This recipe is a simple and straightforward way to achieve delicious pressure cooker ribs. You can adjust the seasonings and ingredients to suit your preferences.
(Part 6) The Finishing Touches: Making Your Ribs Even More Delicious
1. Glazing with BBQ Sauce
Once the ribs are cooked, you can glaze them with BBQ sauce to add extra flavour and shine.
Here's how to do it:
- Combine BBQ sauce and butter: In a small saucepan, combine 1/2 cup of your favourite BBQ sauce with 2 tablespoons of butter.
- Simmer until thickened: Bring the mixture to a simmer and cook until it has thickened slightly. This should take about 5-10 minutes.
- Baste the ribs: Brush the glaze over the ribs.
- Broil for a few minutes: If you want to get those ribs extra crispy, you can broil them for a few minutes under the broiler until the glaze is bubbly and caramelized. Just watch them carefully to prevent them from burning.
Glazing the ribs with BBQ sauce adds a beautiful shine and enhances the flavor. You can also experiment with different glazes using different types of BBQ sauces or even honey.
2. Serving Your Ribs: The Perfect side dishes
Now that your ribs are cooked to perfection, it's time to think about the sides. I love serving ribs with classic sides that complement the sweet and savory flavours.
Here are some of my favourite side dishes for ribs:
- Coleslaw: The creamy coolness of coleslaw is the perfect contrast to the richness of the ribs.
- Macaroni and cheese: This comfort food classic is always a hit with ribs.
- Baked beans: A tangy and sweet baked bean side dish adds another dimension of flavour to your meal.
- potato salad: Potato salad is another classic side dish that goes well with ribs.
- corn on the cob: A simple and delicious side dish that adds a touch of sweetness to your meal.
The right side dishes can elevate your ribs meal to a whole new level. Experiment with different options and find your favorites.
3. Storing Leftovers: Keeping Your Ribs Fresh
Leftover ribs are a real treat! But to ensure they stay fresh and delicious, it's important to store them properly.
- Refrigerate within two hours: Make sure to refrigerate the ribs within two hours of cooking. This will help prevent bacteria from growing.
- Use airtight containers: Store the ribs in airtight containers. This will help them stay moist and prevent them from drying out.
- Enjoy within 3-4 days: Ribs are best eaten within 3-4 days of being cooked. After that, they can start to dry out.
- Reheat gently: When you're ready to reheat the ribs, you can do so in the oven, microwave, or on the stovetop. Just make sure to reheat them gently to prevent them from drying out.
Storing leftovers properly ensures that you can enjoy those delicious ribs for days to come. Reheating them gently will help retain their tenderness and flavor.
(Part 7) FAQ: Answering Your Most Burning Questions
1. What if my ribs are still a bit tough after pressure cooking?
Sometimes, even with pressure cooking, ribs can be a bit tough. Don't worry! This is easily fixed. You can try the following:
- Cook them a little longer: If the ribs are still tough, cook them for an additional 15 minutes in the pressure cooker.
- Shred them: If you're not concerned about keeping the ribs in one piece, you can shred them. This will make them easier to eat and more tender.
Don't fret if your ribs are a bit tough after pressure cooking. There are simple solutions to get that melt-in-your-mouth texture.
2. Can I use bone-in or boneless ribs?
You can use bone-in or boneless ribs, but I recommend bone-in for the best flavour and tenderness. If you use boneless ribs, you'll need to adjust the cooking time to prevent them from drying out.
Bone-in ribs offer a more traditional and flavorful experience. If you opt for boneless ribs, keep a close eye on cooking time to prevent them from drying out.
3. How do I know when my ribs are cooked through?
A meat thermometer is the best way to determine if your ribs are cooked through. They should reach an internal temperature of 145°F (63°C) for safe consumption.
Using a meat thermometer is the most accurate way to ensure that your ribs are cooked to a safe internal temperature.
4. How can I prevent my ribs from drying out?
Here are some tips to help prevent your ribs from drying out:
- Don't overcook them: Ribs are best cooked to an internal temperature of 145°F (63°C). Overcooking them can make them dry.
- Use a meat thermometer: A meat thermometer will help you ensure that your ribs are cooked through without overcooking them.
- Baste them with liquid: During cooking, you can baste the ribs with BBQ sauce or chicken broth to help keep them moist.
- Let them rest: After cooking, let the ribs rest for 10 minutes before serving. This will allow the juices to redistribute, resulting in more tender and juicy ribs.
Following these tips will help you avoid dry ribs and achieve the perfect tenderness and juiciness.
5. What are some other ways I can cook ribs?
There are several other ways to cook ribs, including:
- Oven roasting: This is a classic method for cooking ribs. It typically takes longer than pressure cooking, but it can produce delicious results.
- Smoking: smoking ribs is a popular method that gives them a smoky flavour. It can be done with a smoker or even a grill.
- Slow cooking: You can also cook ribs in a slow cooker. This method produces tender and juicy ribs, but it takes a long time to cook.
(Part 8) A Final Word: Embracing the Pressure Cooker
So, there you have it - the ultimate guide to pressure cooker ribs. Now, I know, you might be wondering, "Is it really worth it? Is the pressure cooker going to change my life?" And to that, I say, absolutely! It's one of the best things I've done for my cooking!
It's not just about the speed, though, it's about the consistency and the ease. I can confidently say that every time I make ribs in the pressure cooker, they come out perfectly tender and juicy. And that's a feeling of satisfaction that you just can't beat!
So, what are you waiting for? Go out, get yourself a pressure cooker, and get ready to experience a whole new world of delicious ribs!
I encourage you to try this recipe and see for yourself how easy and delicious pressure cooker ribs can be. You'll be amazed at how much time you save and how impressed your family and friends will be with the results. Happy cooking!
Everyone is watching

How to Cook Frozen Lobster Tails Perfectly: A Step-by-Step Guide
RecipesLobster. Just the word conjures up images of lavish meals, special occasions, and a taste of luxury. But let's...

Pigs in a Blanket Cooking Time: How Long to Bake for Perfect Results
RecipesAh, pigs in a blanket. Just the name conjures up images of those delightful little parcels of crispy pastry en...

Pork Fillet Cooking Time: How Long to Cook It Perfectly
RecipesPork fillet, or tenderloin as it's sometimes called, is a real favourite in our house. It's so versatile, and...

The Ultimate Guide to Tender, Juicy Pulled Pork
RecipesRight, let's talk pulled pork. It's one of those dishes that just screams "comfort food," doesn't it? I mean...

The Ultimate Guide to Cooking Sweet Potatoes: From Roasting to Mashing
RecipesSweet potatoes. Just the name conjures up images of warm, comforting dishes, bursts of vibrant color, and a to...