Choosing the Right Cut

First things first, you need the right cut of meat. When I say pot roast, I'm talking about a cut that's tough but gets tender with slow cooking. Think chuck, brisket, or even shoulder. These cuts have more connective tissue, which breaks down during the cooking process, giving you that melt-in-your-mouth texture. You know, the kind that just falls apart with a gentle fork poke.
Personally, I find chuck roast to be a good all-rounder. It's readily available, not too expensive, and cooks up beautifully. It's my go-to choice for a classic pot roast. But don't shy away from other cuts – they all have their own unique flavour and texture. Brisket, for instance, is known for its rich, deep flavour, while shoulder roast offers a more robust, hearty taste.
beef cuts for Pot Roast: A Breakdown
Here's a quick rundown of some common beef cuts that are perfect for pot roast, along with their unique characteristics:
- Chuck Roast: This is a classic choice for pot roast. It's relatively inexpensive and has a good amount of marbling, which adds flavour. It's a versatile cut, working well in both slow cooker and oven methods.
- Brisket: This cut is known for its rich flavour and melt-in-your-mouth texture. It can be a bit tougher than chuck roast, so it needs a longer cooking time. However, the reward is worth it – the flavour is simply amazing. It's a cut that shines in slow cooker recipes, where it really has time to develop its deep, smoky flavour.
- Shoulder Roast: Similar to chuck roast, shoulder roast is a good budget-friendly option. It's also quite versatile and can be used in a variety of recipes. Shoulder roast can be a little unpredictable, with some cuts being leaner than others, but when you get a good one, it's a real treat. It's best for slow-cooking methods, giving you the most tender and flavorful results.
- Rump Roast: This cut is leaner than chuck or brisket, but it still produces a tender and flavorful pot roast. Rump roast is a great choice for a faster cooking time, making it a good option for a weeknight meal.
Don't Forget About Lamb and Pork
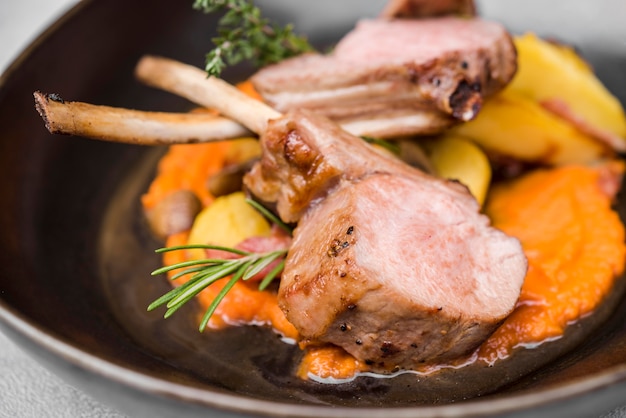
Now, while beef is the usual suspect for pot roast, you can also use lamb and pork. I love making a slow-cooked lamb shoulder or a pork shoulder roast for a special occasion. They’re both absolutely delicious and cook up beautifully, offering a change of pace from traditional beef pot roast. Lamb shoulder, in particular, has a rich, savory flavor that's simply irresistible, while pork shoulder is tender and juicy.(Part 2)
Prepping Your Pot Roast: A Simple Guide

Right, so you’ve got your cut of meat – now it’s time to prep it. This is pretty straightforward, but there are a few key steps to make sure your pot roast turns out amazing.
Seasoning: The Secret Weapon
Don't underestimate the power of a good seasoning. A basic salt and pepper rub will do the trick, but I like to add a few more things for extra flavour. I’ll usually toss in some dried herbs like thyme, rosemary, and oregano. They complement the rich, savory flavors of beef beautifully. You can also use garlic powder, onion powder, or even a pinch of paprika for a touch of warmth. Experiment with different combinations to find your perfect seasoning blend.
Browning for Deep Flavour
This is a step you don't want to skip – browning the meat creates a deep, rich flavour that takes your pot roast to the next level. Imagine a beautiful, golden-brown crust, a symphony of caramelized aromas, and a depth of flavour that's simply unforgettable. Heat some oil in a large pot or dutch oven over medium-high heat. Then, add the meat and cook it for about 5 minutes on each side until it's nicely browned. This helps seal in the juices and creates a lovely crust. It's a bit of a commitment, but trust me, it's worth the extra effort. (Part 3)
Cooking Your Pot Roast: Methods and Tips

Now for the main event – the cooking process. You can cook pot roast in a couple of ways, each with its own benefits. Here's a rundown:
1. Slow Cooker: The Easy Way
I'll admit it, the slow cooker is my go-to method for pot roast. It's incredibly easy and hands-off. Just imagine, you put everything in the pot in the morning and come home to a perfectly tender, flavorful roast, ready to be devoured. Brown the meat first, then add it to your slow cooker along with your chosen vegetables and liquid. Cook on low for 6 to 8 hours or on high for 4 to 6 hours. It's that simple! The slow cooker does all the work, allowing you to relax and focus on other things.
2. Oven: Classic and Versatile
The oven is a classic method for cooking pot roast. It's a tried-and-true technique that produces consistently delicious results. Preheat your oven to 325°F (165°C), then place the browned meat in a large pot or Dutch oven. Add your veggies and liquid, cover the pot, and cook for 2 to 3 hours, or until the meat is fork-tender. This method allows you to create a beautiful, rich sauce that coats the meat and vegetables.
3. instant pot: Speed and Convenience
Want a quick and easy pot roast? The Instant Pot is your best friend. You can cook a pot roast in the Instant Pot in under an hour! It's a lifesaver for those busy weeknights when you need a delicious meal on the table quickly. It works by building up pressure, which tenderizes the meat quickly. You'll need to sear the meat first, then add it to the pot along with your ingredients and cook according to the manufacturer's instructions.
Important Tips for Success
- Liquid is Key: The liquid you use in your pot roast is crucial for tenderizing the meat and creating a delicious sauce. I recommend using beef broth, chicken broth, or even red wine. The liquid adds moisture and flavor, creating a rich, flavorful broth that you'll want to mop up with crusty bread.
- Don’t Overcrowd the Pot: Make sure you have enough space for the meat to cook evenly. If you’re using a slow cooker or oven, you might need to cook the meat in two batches if it doesn’t all fit comfortably. You want to ensure the heat can circulate properly, so the roast cooks evenly.
- Check the Temperature: To be sure your pot roast is cooked through, use a meat thermometer. The internal temperature should reach at least 145°F (63°C) for medium-rare. This ensures that the meat is cooked to a safe temperature and is tender and juicy.
- Let It Rest: After cooking, let your pot roast rest for 10 to 15 minutes before slicing. This allows the juices to redistribute, making it even more tender and flavorful. It's a crucial step, so don't skip it!
Pot Roast Cooking Times: A Guide
Alright, now for the big question – how long do you cook it? This really depends on a few factors, like:
- The Cut of Meat: A tougher cut like chuck roast will need a longer cooking time than a leaner cut like rump roast. The tougher the cut, the more time it needs to break down and become tender.
- The Size of the Roast: A larger roast will naturally take longer to cook than a smaller one. It's all about the ratio of surface area to volume.
- The Cooking Method: A slow cooker or Instant Pot will cook a pot roast faster than an oven. The slow cooker uses gentle, low heat, while the Instant Pot uses high pressure to cook quickly.
Approximate Cooking Times: A Practical Guide
Here are some general guidelines for pot roast cooking times, based on common cuts and cooking methods:
| Cut of Meat | Size | Slow Cooker (Low) | Oven (325°F) | Instant Pot (High Pressure) |
|---|---|---|---|---|
| Chuck Roast | 3-4 lbs | 8-10 hours | 2.5-3 hours | 45-60 minutes |
| Brisket | 4-6 lbs | 10-12 hours | 3-4 hours | 60-90 minutes |
| Shoulder Roast | 3-5 lbs | 7-9 hours | 2-3 hours | 40-50 minutes |
| Rump Roast | 3-4 lbs | 6-8 hours | 1.5-2 hours | 30-40 minutes |
Remember, these are just guidelines. It’s always best to check the internal temperature of your meat with a thermometer to make sure it’s cooked through. Don't rely solely on the timer – use a thermometer to ensure the meat is safe to eat. (Part 5)
Veggies: The Perfect Complement
Now, let's talk veggies. They're not just for adding colour to the plate; they also add flavour and nutrients to your pot roast. I like to use a mix of root vegetables like carrots, potatoes, and onions. They add a sweetness and heartiness that complements the rich flavor of the meat. But you can get creative with other veggies like parsnips, turnips, or even sweet potatoes. Experiment with different combinations and find your favorite veggie pairing.
How to Prep Vegetables: Enhancing Flavour
For a more rustic look, leave your veggies whole or cut them into large pieces. This gives you a nice, chunky texture that's satisfying to eat. For a smoother sauce, you can chop them smaller. This creates a more velvety texture and allows the veggies to meld more seamlessly with the sauce. You can add the veggies directly to the pot roast, but I find that browning them first enhances their flavour. Browning brings out their natural sweetness and adds a depth of flavor that elevates the whole dish.
Adding Veggies: Timing is Key
When it comes to adding your veggies, you have a few options, each resulting in a different texture and flavor profile:
- Early Entry: Add them directly to the pot along with the meat. They’ll cook with the roast and absorb all the delicious flavours, creating a tender, flavorful vegetable that's perfectly cooked.
- Mid-Game: Add them about halfway through the cooking time for a bit of a firmer texture. This is a good option if you want your vegetables to have a little more bite.
- Late Arrival: Add them in the last 30 minutes of cooking for a brighter colour and crispness. This is perfect for vegetables like green beans or asparagus, which you want to keep slightly crunchy.
Making a Delicious Gravy: The Finishing Touch
Let’s talk gravy! It’s the crowning glory of any pot roast. To be honest, a good gravy can make or break the dish. It's the magic sauce that pulls everything together, adding a layer of richness and flavor that's simply irresistible. Here’s how I make mine:
1. Skim the Fat: A Clean Slate
After you’ve cooked your pot roast, carefully skim off any excess fat from the pot. You want to leave a good amount of the cooking juices behind for your gravy, but too much fat can make the gravy greasy. Skimming the fat creates a cleaner, lighter gravy that allows the other flavors to shine through.
2. Whisk in Flour: Thickening the Sauce
Add a couple of tablespoons of flour to the pot and whisk it in with the cooking juices until it’s completely combined. This will thicken your gravy, creating a velvety sauce that coats the meat and vegetables beautifully. Use a good quality flour, such as all-purpose or a gluten-free blend, for a smooth and flavorful gravy.
3. Add Liquid: Creating Depth
Pour in some of the broth you used for cooking the meat, and simmer for a few minutes, stirring constantly, until the gravy reaches your desired consistency. The broth adds a wonderful depth of flavor and helps to achieve the perfect consistency. You can also use red wine or even water if you don't have enough broth.
4. Season to Taste: The Final Touch
Finally, taste the gravy and season it with salt and pepper to your liking. You can also add a pinch of sugar to balance out the acidity, adding a touch of sweetness that enhances the overall flavor. (Part 7)
Serving Your Masterpiece: A Feast for the Senses
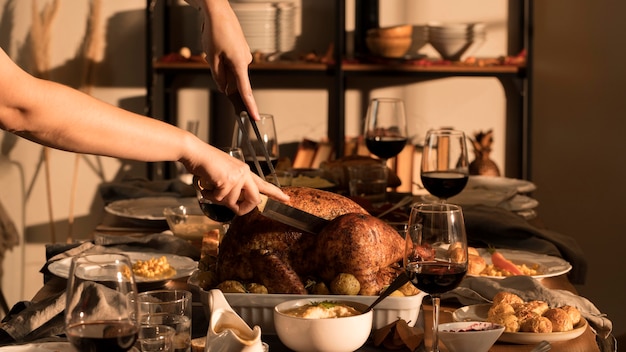
The moment of truth – serving time! I like to pile the tender pot roast onto a plate, surrounded by the flavourful veggies and topped with a generous dollop of gravy. It's a visually appealing and satisfying dish that's sure to please everyone at the table.
side dishes: Elevate the Meal
Here are a few side dish ideas that pair perfectly with your pot roast, adding variety and texture to the meal:
- mashed potatoes: A classic side dish that complements the rich flavour of pot roast. Creamy, buttery mashed potatoes are the perfect accompaniment to the hearty, flavorful roast.
- Roasted Vegetables: Add some extra colour and flavour with a side of roasted vegetables like Brussels sprouts or asparagus. Roasted vegetables offer a contrasting texture and a burst of freshness that balances the richness of the roast.
- Green Salad: A refreshing contrast to the hearty pot roast. A simple green salad with a light vinaigrette adds a touch of acidity and lightness to the meal.
- Crusty Bread: For soaking up all that delicious gravy! Crusty bread is the perfect vehicle for capturing the rich, flavorful gravy, making it an essential part of the meal.
FAQs: Your Pot Roast Questions Answered
Now, let’s tackle some of the most common questions about pot roast, so you can feel confident in your cooking endeavors:
1. Can I Cook Pot Roast in a pressure cooker?
Absolutely! Pressure cooking is a great way to tenderize tough cuts of meat quickly. It's a great option for those who want a faster cooking time or who prefer a more hands-off approach. Just make sure you follow the manufacturer's instructions carefully, as pressure cookers can vary in their settings and cooking times.
2. How Long Can I Keep Pot Roast in the Fridge?
You can keep cooked pot roast in the fridge for up to 3 days. Make sure you store it in an airtight container to prevent any unwanted flavors from contaminating the roast. It's a great way to have leftovers for a quick and easy meal.
3. Can I Freeze Pot Roast?
You can freeze cooked pot roast for up to 3 months. Freezing is a great way to preserve your pot roast and have it ready for a quick meal later. Just let it cool completely before freezing. Thaw it in the refrigerator overnight before reheating. You can reheat it in the oven, slow cooker, or even in the microwave.
4. What Should I Do With Leftover Pot Roast?
Don't let those leftovers go to waste! There are plenty of delicious things you can make with leftover pot roast. You can create delicious sandwiches, add it to salads, or even make a hearty pot roast soup. Get creative and let your imagination run wild!
5. Why is My Pot Roast Tough?
If your pot roast is tough, it might be because you didn’t cook it long enough. Make sure you cook it until it’s fork-tender, which usually takes at least 2 hours for a chuck roast. Also, check that you’re using a tough cut of meat, not a lean one. Lean cuts of meat can sometimes be tougher than fattier cuts, so it's important to choose the right cut for the cooking method.(Part 9)
The Final Word: Embrace the Joy of Pot Roast
There you have it – your ultimate guide to pot roast! Don’t be intimidated by the process – it's actually quite simple. And remember, the most important thing is to have fun with it. Experiment with different cuts, seasonings, and vegetables. You might be surprised at the delicious creations you can come up with.
So, go on, gather your ingredients and get cooking! Let your creativity shine, and enjoy the process of creating a warm, comforting meal that everyone will love. Pot roast is a dish that brings people together, fostering a sense of community and shared joy. Embrace the joy of pot roast!
Everyone is watching

How to Cook Frozen Lobster Tails Perfectly: A Step-by-Step Guide
RecipesLobster. Just the word conjures up images of lavish meals, special occasions, and a taste of luxury. But let's...

Pigs in a Blanket Cooking Time: How Long to Bake for Perfect Results
RecipesAh, pigs in a blanket. Just the name conjures up images of those delightful little parcels of crispy pastry en...

Pork Fillet Cooking Time: How Long to Cook It Perfectly
RecipesPork fillet, or tenderloin as it's sometimes called, is a real favourite in our house. It's so versatile, and...

The Ultimate Guide to Cooking Sweet Potatoes: From Roasting to Mashing
RecipesSweet potatoes. Just the name conjures up images of warm, comforting dishes, bursts of vibrant color, and a to...

The Ultimate Guide to Tender, Juicy Pulled Pork
RecipesRight, let's talk pulled pork. It's one of those dishes that just screams "comfort food," doesn't it? I mean...
