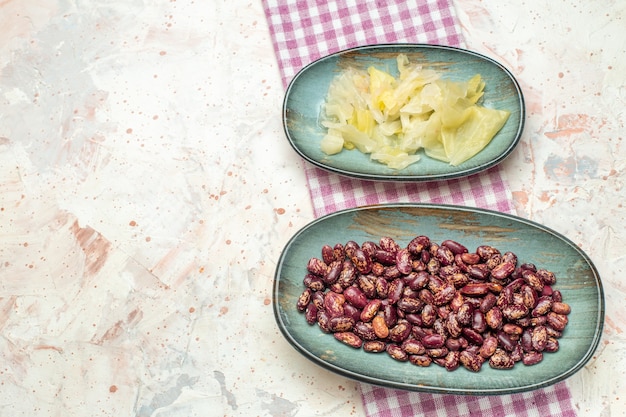
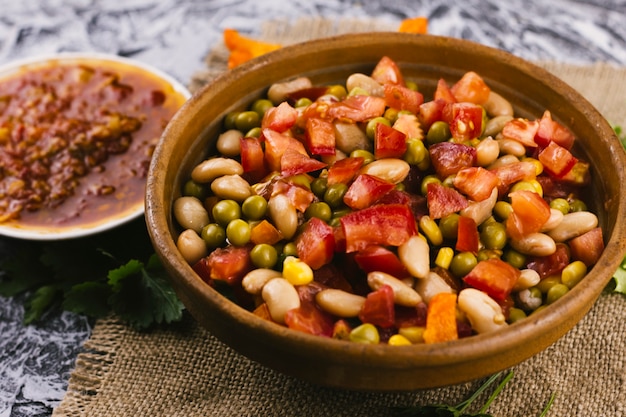
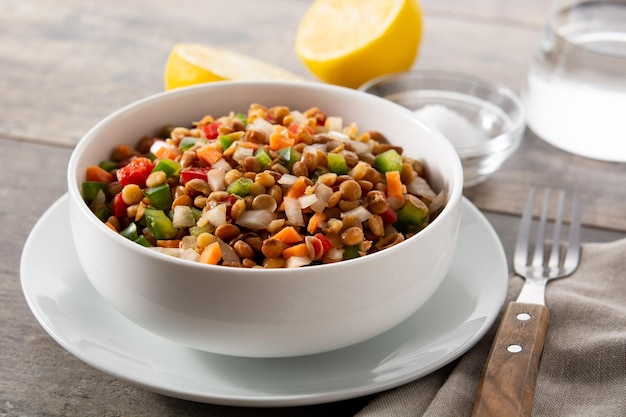
pinto beans are a staple in my kitchen. They're so versatile, I use them in everything from salads and soups to burritos and chili. But I'll admit, cooking them can be a bit of a challenge. You can't just toss them in a pot and expect them to be perfect. Trust me, I've learned that the hard way! It's all about getting that timing just right. Too short, and they'll be hard as rocks. Too long, and they'll turn into mush. But, fear not! I've done my homework, and I'm here to share all the secrets to cooking perfect pinto beans, from soaking to cooking to everything in between.
(Part 1) The Importance of Soaking

Let's start with the first step: soaking. It’s not just something you do to keep your beans company. It’s crucial! Think of it as giving your beans a little spa treatment before their big culinary debut. Soaking helps break down the tough outer layer of the bean, making them easier to digest and cook. It also helps remove some of the sugars that can cause, well, let’s just say, digestive discomfort. We've all been there, right?
Why Soak Your Pinto Beans?
- Tenderizes Them: Soaking helps break down the tough outer layer of the bean, making them more digestible and easier to cook. It’s like giving them a good soak in the bath, leaving them relaxed and ready to get cooking!
- Shortens cooking time: Soaking pre-hydrates the beans, meaning they cook much faster. No one wants to spend hours staring at a pot. You have better things to do, like catching up on your favourite TV show, right?
- Reduces Gas: Soaking helps remove some of the sugars that can cause gas. This is a real game-changer, especially if you're prone to those post-bean tummy troubles.
How to Soak Pinto Beans
soaking beans is as easy as pie.
- Rinse: Give your beans a good rinse under cold water. Think of it as a little pre-bath scrub!
- Soak: Place the beans in a large bowl, cover them with cold water, and add a teaspoon of salt. The salt helps them retain their flavour and texture. The amount of water is important – you want them submerged by about an inch. Remember, you’re giving them a relaxing bath, not a swimming lesson.
- Refrigerate: Cover the bowl and pop it in the fridge for at least 8 hours or overnight. This is when the magic happens! The beans soak up all that water and get nice and plump.
(Part 2) cooking techniques for Perfect Pinto Beans

Now, we’re ready for the main event: cooking! There are a few different ways to cook pinto beans, each with its own set of pros and cons. You can simmer them on the stovetop, pressure cook them, or even cook them in a slow cooker. It all depends on your time and preference. I'll walk you through each method, so you can choose the best one for you.
Stovetop Method
This is the classic way to cook pinto beans, and it’s pretty straightforward. You basically simmer them in water with a little salt until they’re tender. Just like a good old-fashioned roast, it’s all about slow and steady.
- Drain and Rinse: After soaking, drain the beans and rinse them with fresh water. Get rid of those soaking bath leftovers!
- Bring to a Boil: Place the beans in a large pot, cover them with fresh water, and add a teaspoon of salt. Bring it to a boil, then reduce the heat to a simmer. We want a gentle, bubbling simmer, not a wild, raging boil.
- Simmer: Simmer for 1-2 hours, or until the beans are tender. You’ll know they’re ready when you can easily mash them with a fork. Now we’re talking!
- Seasoning: Taste and adjust seasoning. Maybe add a little more salt, or perhaps a pinch of garlic powder or onion powder for extra flavour.
pressure cooker Method
If you’re short on time, the pressure cooker is your best friend. It cooks beans incredibly quickly and efficiently. Remember, the pressure cooker is a magical device that can turn a long cooking session into a quick and easy one.
- Drain and Rinse: After soaking, drain the beans and rinse them with fresh water.
- Pressure Cook: Add the beans to your pressure cooker, along with fresh water. Remember, we’re aiming for a ratio of 1:3 (beans to water). Add a teaspoon of salt and any other seasonings you like. Lock the lid and cook according to your pressure cooker's instructions. For most pressure cookers, it'll take about 30-40 minutes. We’re talking about a super-fast cooking session!
- Natural Release: Allow the pressure to release naturally for 10-15 minutes. This is important to prevent the beans from becoming mushy. Let the steam do its thing, it’s like a little steam spa for your beans.
slow cooker method
The slow cooker is another great option for cooking beans. It’s super easy and hands-off, making it perfect for busy weeknights. You can set it and forget it, letting the slow cooker do all the work. This is the perfect method for when you’re busy and want to come home to a delicious meal!
- Drain and Rinse: After soaking, drain the beans and rinse them with fresh water.
- Slow Cook: Add the beans to your slow cooker, along with fresh water. Remember, we’re aiming for a ratio of 1:3 (beans to water). Add a teaspoon of salt and any other seasonings you like. Cook on low for 6-8 hours, or on high for 3-4 hours, until the beans are tender. This is the time to relax and let the slow cooker do its magic.
(Part 3) The Science Behind Perfect Pinto Beans

Now, let's talk science! It’s not just about timing, it's about understanding what's actually happening to those beans as they cook. The starch inside the beans absorbs water and transforms into a gel. The gel expands and softens the beans, giving them that creamy texture. But it's a delicate balance. Cook them too long and the gel will break down, leading to mushy beans. Not good!
Factors Affecting bean texture
- Bean Variety: Some bean varieties are naturally harder than others. You’ll need to adjust cooking times accordingly. Some beans are just born to be tougher!
- Water Amount: Too little water and the beans will be dry and tough. Too much water and the beans will be watery and mushy. It's all about finding that sweet spot. Think of it like Goldilocks and the three bears, but for beans!
- Cooking Time: Overcooked beans will be mushy. Undercooked beans will be hard. This is where practice and patience come in. You’ll get a feel for it over time. It’s a little like learning to ride a bike – it takes a few tries to get it right.
(Part 4) Tips for Cooking Perfect Pinto Beans
We've covered the basics. Now let’s get into some practical tips for nailing that perfect texture every time.
Avoid Overcrowding the Pot
This is crucial! If you overcrowd the pot, the beans won’t cook evenly and they’ll stick together. Give them room to breathe! Think of it like a crowded party – everyone needs their own space to move and groove!
Add Salt at the End
Adding salt at the beginning can actually toughen the beans. Wait until the very end to season, when they’re cooked to perfection. Think of it as a finishing touch, like a sprinkle of salt on a delicious cake!
Use Cold Water
Using cold water helps the beans cook evenly and prevents them from getting tough. It’s all about slow and steady, remember? Think of it like building a foundation – slow and steady wins the race!
Don’t Stir Too Much
Over-stirring can break down the beans and make them mushy. Give them a gentle stir every now and then, but don’t be too aggressive. Think of it as a gentle massage for your beans.
Use a Bean Pot
If you're serious about your bean game, invest in a bean pot. It's designed specifically for cooking beans and will give you the best results. It’s a real game-changer if you're looking to up your bean game!
(Part 5) The Art of Bean Texture
We're getting into the nitty-gritty now! It’s not just about cooking the beans, it's about achieving the right texture. Do you want them creamy and smooth for dips and spreads, or firm and whole for salads and burritos? It’s all about knowing what you want and how to get there.
Creamy and Smooth
For a creamy and smooth texture, cook the beans until they’re very tender, almost falling apart. You can then mash them with a fork or blend them in a food processor. This is perfect for making dips, spreads, or even bean-based desserts.
Firm and Whole
For firm and whole beans, cook them until they’re tender but still hold their shape. This is ideal for salads, burritos, or chili. You want them to have a good bite to them.
(Part 6) How to Store and Reheat Cooked Pinto Beans
Once your beans are cooked, you can store them in the refrigerator for up to 5 days. You can also freeze them for up to 3 months. Just be sure to label and date them.
Refrigerator Storage
Simply store the cooked beans in an airtight container in the refrigerator. They’ll keep well for up to 5 days. I often cook a big batch and have them on hand for easy meals throughout the week.
Freezing Cooked Pinto Beans
To freeze, simply transfer the cooked beans to a freezer-safe container or bag. They’ll keep well for up to 3 months. To use them, simply thaw them in the refrigerator overnight or reheat them in a saucepan on the stovetop.
(Part 7) Delicious bean recipes
Now that you’re a pinto bean pro, it's time to put those skills to the test. Here are a few of my favourite bean recipes to get you started. You’ll be whipping up delicious bean dishes in no time.
Simple black bean salsa
Ingredients:
- 1 can (15 ounces) black beans, drained and rinsed
- 1/2 cup chopped red onion
- 1/2 cup chopped bell pepper
- 1/4 cup chopped cilantro
- 2 tablespoons lime juice
- 1 teaspoon salt
- 1/2 teaspoon black pepper
Instructions:
- Combine all ingredients in a bowl.
- Stir well to combine.
- Chill in the refrigerator for at least 30 minutes before serving.
Classic Chili
Ingredients:
- 1 tablespoon olive oil
- 1 onion, chopped
- 2 cloves garlic, minced
- 1 green bell pepper, chopped
- 1 (15 ounce) can kidney beans, drained and rinsed
- 1 (15 ounce) can pinto beans, drained and rinsed
- 1 (15 ounce) can diced tomatoes, undrained
- 1 (15 ounce) can tomato sauce
- 1 (1 ounce) package chili seasoning mix
- 1/2 cup water
- Salt and pepper to taste
Instructions:
- Heat the olive oil in a large pot over medium heat.
- Add the onion, garlic, and green bell pepper and cook until softened.
- Add the kidney beans, pinto beans, diced tomatoes, tomato sauce, chili seasoning mix, and water.
- Bring to a boil, then reduce heat and simmer for 30 minutes, stirring occasionally.
- Season with salt and pepper to taste.
Delicious bean salad
Ingredients:
- 1 (15 ounce) can pinto beans, drained and rinsed
- 1 (15 ounce) can corn, drained
- 1 cup chopped tomatoes
- 1/2 cup chopped red onion
- 1/4 cup chopped cilantro
- 2 tablespoons lime juice
- 1 tablespoon olive oil
- 1/2 teaspoon salt
- 1/4 teaspoon black pepper
Instructions:
- Combine all ingredients in a bowl.
- Stir well to combine.
- Chill in the refrigerator for at least 30 minutes before serving.
(Part 8) FAQs About Pinto Beans
I get asked lots of questions about pinto beans, so here are some of the most common ones.
What happens if I don’t soak my pinto beans?
While you don’t have to soak them, it’s highly recommended. Not soaking them will increase cooking time by about an hour or two. They will also be more likely to be tough and require longer cooking to soften.
Can I use canned pinto beans instead of dried?
Yes, you can definitely use canned pinto beans. They’re already cooked, so you can just drain and rinse them and add them to your recipe. However, canned beans are usually saltier than dried beans, so you may need to adjust the seasoning in your recipe.
What can I do with leftover pinto beans?
Leftover beans are great for making salads, soups, stews, and dips. They can also be added to burritos, tacos, or enchiladas. You can even freeze them for later use.
Can I add salt to the water when soaking pinto beans?
Adding salt to the soaking water is not necessary, but it can help retain some of the beans’ natural flavour. If you decide to add salt, use about 1 teaspoon per cup of beans.
Are pinto beans good for you?
Pinto beans are packed with nutrients, including fibre, protein, and iron. They’re also a good source of vitamins and minerals. They can be part of a healthy diet.
So there you have it! Everything you need to know about cooking perfect pinto beans. Remember, it's a journey, not a race. Experiment with different cooking methods, try out different recipes, and most importantly, enjoy the process. Happy bean cooking!
Everyone is watching

How to Cook Frozen Lobster Tails Perfectly: A Step-by-Step Guide
RecipesLobster. Just the word conjures up images of lavish meals, special occasions, and a taste of luxury. But let's...

Pigs in a Blanket Cooking Time: How Long to Bake for Perfect Results
RecipesAh, pigs in a blanket. Just the name conjures up images of those delightful little parcels of crispy pastry en...

Pork Fillet Cooking Time: How Long to Cook It Perfectly
RecipesPork fillet, or tenderloin as it's sometimes called, is a real favourite in our house. It's so versatile, and...

The Ultimate Guide to Tender, Juicy Pulled Pork
RecipesRight, let's talk pulled pork. It's one of those dishes that just screams "comfort food," doesn't it? I mean...

The Ultimate Guide to Cooking Sweet Potatoes: From Roasting to Mashing
RecipesSweet potatoes. Just the name conjures up images of warm, comforting dishes, bursts of vibrant color, and a to...
