There's something truly magical about a good pumpkin pie, isn't there? That warm, spiced filling, the buttery, flaky crust… it's the epitome of autumn comfort food. But baking a pie can feel intimidating, especially if you're not a seasoned baker. Fear not, my fellow pie enthusiasts! I'm here to guide you through the process, step by step, and with a few tips and tricks, you'll be baking pie pumpkin perfection in no time.
I've been making pumpkin pie for years, and over time, I've learned a few things that make all the difference. I'm not just going to share the recipes; I'm going to walk you through the whole process, from picking the perfect pumpkin to achieving that beautiful golden-brown crust and making sure the filling is smooth and creamy.
(Part 1) The Pumpkin: Choosing Your Star

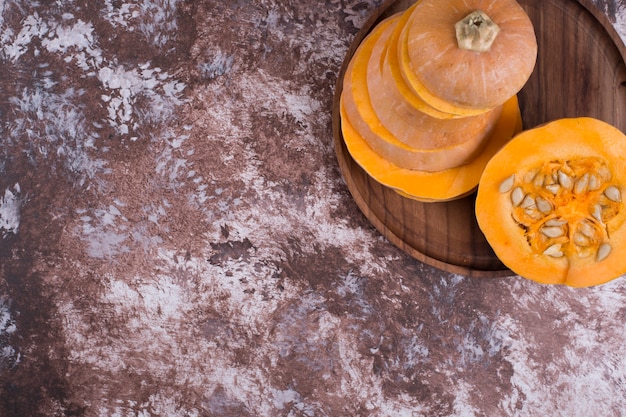
It all starts with the pumpkin, the heart of the matter. Believe it or not, not all pumpkins are created equal when it comes to pie making. You want a pie pumpkin, specifically a variety known for its sweet, dense flesh that will transform into a delicious filling.
The Best Pie Pumpkins
Now, I've tried a lot of pumpkin pies in my day, and let me tell you, the right pumpkin makes a world of difference. For a classic, reliable pumpkin pie, I always go for Sugar Pie pumpkins. They're readily available and have a fantastic sweetness. But if you're feeling adventurous, try a Fairytale pumpkin. It's a bit harder to find, but it has a unique, almost nutty flavour that's truly special. And don’t be afraid to ask at your local market for their recommendations. They usually have a great selection and can point you towards the best pie pumpkins they have.
Size Matters
Don't be fooled by the biggest pumpkins in the patch, though. You don't need a giant to make a delicious pie. For a standard pie, a pumpkin around 6-8 inches in diameter is perfect. It provides the perfect amount of flesh for your filling, without being overly bulky and making it hard to handle.
Choosing the Right Pumpkin
When picking out your pumpkin, keep an eye out for these key features:
- A firm pumpkin with a deep orange hue. You want it to feel heavy for its size, indicating it's full of moisture and flavour.
- A smooth, unblemished exterior with no soft spots or signs of rot. This ensures the pumpkin is fresh and hasn't been damaged.
- A stem that's firmly attached and shows no signs of cracking or drying. This is a sign that the pumpkin has been well-handled and hasn't been sitting around for too long.
(Part 2) The Prep: Getting Ready for Baking

Now that you've got your perfect pumpkin, it's time to get your hands dirty! Don't worry, it's not as complicated as it sounds. This is where the transformation from raw pumpkin to delicious filling begins.
Step 1: Cutting and Scooping
Grab a sharp knife (I like to use a chef's knife for this, it gives me better control) and carefully cut your pumpkin in half. You don't need to be perfectly precise, just make sure you get a clean cut through the middle. Next, scoop out the seeds and stringy bits with a spoon. I find a sturdy spoon works best for this job. It's a great way to get rid of all those little bits of pumpkin that can be a bit annoying later.
Step 2: Roasting Your Pumpkin
Now for the magic: roasting! This step is crucial for bringing out the pumpkin's natural sweetness and softening it for easy scooping. Place your pumpkin halves, cut side down, on a baking sheet lined with parchment paper. This will make cleaning up a breeze later. Pour a bit of water into the bottom of the pan to create some steam while roasting. This helps to soften the pumpkin and makes it easier to scoop out later. Pop your pumpkin into a preheated oven at 350°F (175°C) and let it roast for about 45-60 minutes, or until it's tender enough to pierce with a fork.
Step 3: Scooping Out the Flesh
Once your pumpkin is roasted, let it cool a bit before scooping out the flesh. The flesh should be soft and easily scooped out. This is the part I love – it's so satisfying to scoop out that beautifully roasted pumpkin. Use a spoon or a sturdy spatula to scoop out the flesh. You can scrape the flesh directly into a bowl or use a fine-mesh strainer to remove any large chunks. This is where I prefer the strainer, it makes for a smoother filling, which is perfect for a silky pie.
(Part 3) The Crust: The Foundation of Perfection

The crust is the foundation of any pie, and it's a crucial part of the pumpkin pie experience. A good crust is flaky, buttery, and adds a delightful texture contrast to the creamy filling. It's the perfect balance of sweet and savoury.
Homemade or Store-Bought?
Now, I love the satisfaction of making my own pie crust. There's something really rewarding about creating that beautiful, flaky crust from scratch. But let's be real, sometimes life gets busy. There's absolutely no shame in using a store-bought crust. Many supermarkets have excellent quality pre-made crusts. Just ensure you choose one that's specifically made for pie, as these are typically a bit thicker and more stable than the ones for tarts.
Making Your Own Pie Crust
If you’re feeling ambitious, making your own crust is a rewarding experience. Here's a simple recipe I often use:
Classic pie crust recipe
| Ingredients | Quantity |
|---|---|
| All-purpose flour | 2 cups |
| Salt | 1/2 teaspoon |
| Unsalted butter, cold and cubed | 1 cup |
| Ice water | 4-6 tablespoons |
Instructions:
- In a large bowl, whisk together the flour and salt.
- Add the cubed butter and use a pastry cutter or your fingers to work the butter into the flour until it resembles coarse crumbs. This is where you want to be careful not to overwork the dough. The colder the butter, the flakier the crust will be.
- Gradually add the ice water, 1 tablespoon at a time, mixing with a fork until the dough just comes together. You want to add just enough water to bring the dough together, but not so much that it becomes wet and sticky.
- Divide the dough in half, shape each half into a disc, wrap in plastic wrap, and refrigerate for at least 30 minutes. This allows the gluten in the flour to relax and prevents the dough from becoming tough.
- Roll out one disc of dough on a lightly floured surface to a 12-inch circle. Transfer the dough to a 9-inch pie plate. Trim the edges and crimp as desired.
- Prick the bottom of the crust with a fork to prevent air bubbles from forming during baking. This helps the crust bake evenly and prevents it from puffing up in the middle.
- Bake the crust in a preheated oven at 375°F (190°C) for 10-12 minutes. This pre-baking step helps to prevent a soggy bottom crust.
Once the crust is pre-baked, it's ready to be filled with the delicious pumpkin filling.
(Part 4) The Filling: The Heart of the Pie
Now, we’re getting to the heart of the matter: the pumpkin filling. This is where the magic of spices and textures comes together. It's the essence of pumpkin pie, and it needs to be perfect.
Pumpkin Filling Essentials
You’ll need the following ingredients for a classic pumpkin pie filling:
- Roasted pumpkin purée: We already got this sorted!
- Condensed milk: This adds sweetness and creaminess to the filling.
- Eggs: These provide structure and richness.
- Spices: This is where you can experiment and add your own personal touch. Classic spices include cinnamon, nutmeg, ginger, and cloves.
- Salt: A pinch of salt enhances the sweetness of the filling.
My Favourite Pumpkin Pie Filling Recipe
This recipe is tried and true, and it consistently yields a perfect pumpkin pie:
| Ingredients | Quantity |
|---|---|
| Roasted pumpkin purée | 1 1/2 cups |
| Sweetened condensed milk | 1 (14-ounce) can |
| Large eggs | 2 |
| Ground cinnamon | 1 1/2 teaspoons |
| Ground nutmeg | 1/2 teaspoon |
| Ground ginger | 1/4 teaspoon |
| Ground cloves | 1/8 teaspoon |
| Salt | 1/4 teaspoon |
Instructions:
- Preheat oven to 350°F (175°C).
- In a large bowl, whisk together the pumpkin purée, condensed milk, eggs, cinnamon, nutmeg, ginger, cloves, and salt until smooth.
- Pour the filling into the pre-baked pie crust.
- Bake for 50-60 minutes, or until the filling is set and the edges are slightly browned.
- Let the pie cool completely before serving. This is crucial for allowing the filling to set properly and prevent cracking.
(Part 5) Baking: The Crucial Stage
Now, let's talk about baking the pie. This is where patience and a watchful eye come in. It’s a crucial stage in achieving that perfectly set, golden-brown pie.
Baking Time and Temperature
The recommended baking time for pumpkin pie is around 50-60 minutes. However, every oven is different, so it's crucial to check the pie's progress. Start checking the pie after 45 minutes, as the baking time might be shorter for your oven.
Signs of a Well-Baked Pie
Here are some signs that your pie is baked through:
- The filling is set and no longer jiggles when you gently shake the pie.
- The edges of the pie crust are golden brown.
- A toothpick inserted into the center of the pie comes out clean.
Preventing a Soggy Bottom Crust
One common problem with pumpkin pie is a soggy bottom crust. To prevent this, I like to use a pie shield, which is a metal shield that sits on top of the pie crust to protect it from direct heat. This helps the crust bake evenly and prevents it from getting too soggy. You can also bake the crust for a few minutes before adding the filling, which helps create a sturdier crust.
(Part 6) Cooling: Patience is Key
The moment of truth has arrived – your pie is baked! But don’t rush to cut into it just yet. Patience is key in the cooling process.
The Importance of Cooling
Allowing the pie to cool completely helps the filling to set properly, ensuring a smooth, creamy texture. I usually let my pie cool on the counter for at least two hours before refrigerating it. This allows the pie to cool gradually and prevents the filling from cracking as it cools too quickly.
Preventing Cracks
To further prevent cracking, you can wrap the pie loosely in plastic wrap after it's cooled on the counter. This will help keep the filling moist and prevent it from drying out.
Cooling Time
As a rule of thumb, let the pie cool on the counter for at least two hours, then refrigerate it for at least 4 hours before serving. This ensures the filling is fully set and the pie is perfectly chilled.
(Part 7) Serving: The Moment of Truth
Finally, it's time to savour the fruits of your labour. The anticipation is almost unbearable! Let's make sure you serve your masterpiece with the same care you put into making it.
Cutting and Serving
When cutting the pie, use a sharp knife, and try to cut through the center of the pie to ensure even slices. I like to use a pie server to lift each slice and prevent it from crumbling.
Garnish and Enjoy
There's no need to overdo it with garnishes; a simple dusting of cinnamon or a sprinkle of whipped cream is all you need. Let the pie's flavour speak for itself. And enjoy! You've earned it.
(Part 8) Variations: Exploring New Flavours
Now that you've mastered the classic pumpkin pie, let’s explore some exciting variations to tantalize your taste buds.
Spiced Up Pumpkin Pie
For a touch of heat, add a pinch of cayenne pepper to your filling. You can also experiment with different spices like cardamom, allspice, or even a hint of orange zest.
Chocolate Pumpkin Pie
This decadent twist combines the rich flavours of chocolate and pumpkin. Add a tablespoon or two of unsweetened cocoa powder to your filling and stir until well combined. You can even add a layer of chocolate ganache on top for an extra indulgence.
Salted Caramel Pumpkin Pie
This combination is a match made in heaven! Add a drizzle of salted caramel sauce to your pie after it's cooled. You can even make a salted caramel filling by adding a tablespoon or two of salted caramel syrup to the pumpkin filling before baking.
Other Delicious Variations
There are so many other ways to put your own spin on pumpkin pie. Think about adding a bit of maple syrup for a touch of sweetness, or a handful of chopped pecans or walnuts for some texture and crunch. You can even incorporate pumpkin spice into the crust for a double dose of pumpkin goodness. The possibilities are endless!
(Part 9) FAQs: Your Pie Pumpkin Questions Answered
I know you might have some questions, so I’ve compiled a list of the most common ones. Let's get those answered so you can confidently bake your own masterpiece.
1. Can I use canned pumpkin puree for pumpkin pie?
While you can use canned pumpkin puree for pumpkin pie, I highly recommend roasting your own pumpkin. The flavour is richer and more intense, and it's well worth the effort. If you're pressed for time, canned pumpkin puree will do, but be sure to choose a brand that's specifically labelled as "pumpkin puree," not "pumpkin pie mix," which often contains added sugar and spices.
2. How do I store leftover pumpkin pie?
Store leftover pumpkin pie in an airtight container in the refrigerator for up to 4 days. The filling will firm up as it chills, but it will soften back to its original texture at room temperature.
3. Can I freeze pumpkin pie?
Yes, you can freeze pumpkin pie. Wrap the pie tightly in plastic wrap and then in aluminum foil. Freeze for up to 2 months. To thaw, place the pie in the refrigerator overnight.
4. What if my pie crust is too soggy?
If you find that your pie crust is too soggy, you can try baking it for a few extra minutes. You can also try using a pie shield to prevent the crust from getting too much direct heat.
5. What can I do with leftover pumpkin purée?
Don't let leftover pumpkin purée go to waste! You can use it in a variety of recipes, such as pumpkin bread, muffins, cookies, or even smoothies. It adds a lovely, subtle pumpkin flavour to almost anything.
Now that you've got all the information you need, I encourage you to get into the kitchen and start baking. You'll be amazed at how easy and rewarding it can be to make a delicious pumpkin pie. Remember, it's all about enjoying the process and creating something special that you and your loved ones will cherish. Happy baking!
Everyone is watching

How to Cook Frozen Lobster Tails Perfectly: A Step-by-Step Guide
RecipesLobster. Just the word conjures up images of lavish meals, special occasions, and a taste of luxury. But let's...

Pigs in a Blanket Cooking Time: How Long to Bake for Perfect Results
RecipesAh, pigs in a blanket. Just the name conjures up images of those delightful little parcels of crispy pastry en...

Pork Fillet Cooking Time: How Long to Cook It Perfectly
RecipesPork fillet, or tenderloin as it's sometimes called, is a real favourite in our house. It's so versatile, and...

The Ultimate Guide to Cooking Delicious Frankfurters
RecipesLet's face it, we all love a good frankfurter. It's a classic, simple, and always satisfying. But let's be rea...

Wolf Meat Recipes: A Guide to Cooking Wild Game
RecipesLet's be honest, you don't see wolf meat at your local butcher shop every day. It's a bit of a wild card, but ...
