(Part 1) Understanding the Rib Roast
A 10lb rib roast, or prime rib as it's often called, is a glorious thing. It's a big cut of beef, usually taken from the rib section, and it's packed with flavour. But like any culinary hero, it needs to be treated with respect, and that starts with understanding it.
What Makes a Rib Roast Special?
First off, let's talk about why rib roast is so special. It's marbled with fat, which adds flavour and tenderness. This fat helps to keep the meat moist while cooking, so it's less likely to dry out. Plus, it's packed with flavour, making it a real crowd-pleaser.
Imagine this: You slice into the roast, the aroma fills the air, and the juices run clear. It’s a moment of pure culinary satisfaction. That’s the magic of a perfectly cooked rib roast.
Types of Rib Roast: Bone-in vs. Boneless
You'll find two main types of rib roast: bone-in and boneless. Bone-in roasts are often considered the classic, giving you those beautiful rib bones to display. They also cook a bit slower due to the bones, which helps to keep the meat moist. Boneless roasts are a bit more convenient, and they cook faster, but they might not have that same wow factor. I personally prefer bone-in, it's just more traditional and visually appealing.
If you’re going for a more rustic, traditional look, bone-in is the way to go. But if convenience is your priority, boneless might be a better choice. It really comes down to personal preference.
The Importance of Resting
One thing that's often overlooked is resting the roast after cooking. It’s tempting to carve it right away, but resist the urge! Allowing the roast to rest for at least 15 minutes helps the juices redistribute throughout the meat. This results in a much more tender and succulent roast.
Think of it as giving the roast a chance to relax and regain its composure after all that heat. It’s a crucial step, even though it might seem like a small detail.
(Part 2) Choosing the Right Roast
Choosing the right rib roast is crucial for a successful outcome. You want a good quality cut, one that’s marbled with fat and has a good amount of meat. It’s also important to consider the size based on the number of guests you’re feeding.
What to Look for When Choosing
When you’re selecting a rib roast, it’s important to look for the following:
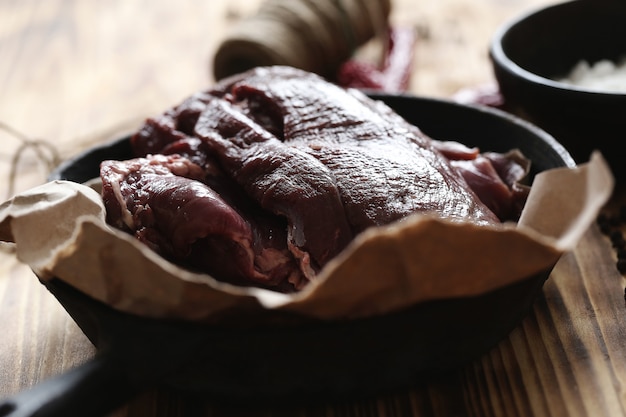
- Marbling: Look for good marbling throughout the meat, indicating a good balance of fat and lean meat. The fat will melt during cooking, adding flavour and keeping the meat moist.
- Colour: The meat should have a bright, cherry-red colour, not brown or purple. A good colour is a sign of freshness.
- Smell: There should be a pleasant, slightly sweet aroma from the meat. Avoid any meat that has an off odour. A fresh cut of meat should have a clean, inviting aroma.
Take your time, don’t rush the process. You want a roast that’s going to impress everyone, so make sure you’re happy with your choice.
Sizing Up the Roast
Think about how many people you’re serving, as you’ll want to make sure there’s enough to go around. For a 10lb rib roast, you can comfortably feed around 10-12 people.
You can always go for a smaller or larger roast depending on your needs. Just make sure to adjust the cooking time accordingly.
(Part 3) Getting Ready to Cook: Preparation is Key
Before you even fire up the oven, it’s essential to prep your rib roast properly. This includes seasoning and tying, techniques that ensure even cooking and a beautifully browned exterior.
Seasoning Your Roast
Seasoning is key for enhancing the flavour of your rib roast. Here’s my go-to approach:
- Salt: Start with a generous amount of salt. I recommend kosher salt for its larger grain size and less salty taste. Salt draws out moisture, but it also adds flavour.
- Pepper: Freshly ground black pepper adds a bit of bite. Don’t be afraid to add a generous amount.
- Herbs: I like to use a simple combination of rosemary, thyme, and garlic powder. These herbs complement the flavour of beef beautifully.
- Other Spices: Feel free to get creative! You can add paprika, onion powder, or even a little cayenne pepper for a kick. Experiment with different spices to find your perfect blend.
Remember, it’s all about balance. You don’t want to overwhelm the natural flavour of the beef with too many spices.
Tying the Roast
Tying your rib roast helps to maintain its shape during cooking and ensures even cooking. This is especially important for bone-in roasts. I recommend using butcher’s twine for the best results:
- Lay out twine: Spread out about 3-4 feet of butcher’s twine.
- Place the roast: Center the roast on the twine, lengthwise.
- Tie the ends: Tie the twine tightly at each end, making sure the roast is secure.
- Tie the middle: Tie a knot in the middle of the twine to create a secure bundle.
Tying the roast helps to keep it from unraveling during cooking, and it also ensures that the meat cooks evenly. It’s a simple step, but it makes a big difference in the final result.
(Part 4) Mastering the Oven Technique
Now we’re getting into the nitty-gritty of cooking the rib roast. It’s all about low and slow, allowing the meat to cook evenly and retain its moisture. Here’s how I do it:
Preheating the Oven
Preheat your oven to 325°F (160°C). This is a moderate temperature that allows the roast to cook evenly without burning. It’s important to give the oven plenty of time to heat up properly.
Placing the Roast
Place the roast in a roasting pan that’s large enough to hold it comfortably. You can add a little bit of water to the bottom of the pan to create some moisture, but it’s not strictly necessary.
I like to use a roasting pan with a rack, as this allows the air to circulate around the roast, helping it to cook evenly.
The Importance of Patience: Cooking Time
Now, here’s where it gets interesting. Cooking times for a 10lb rib roast can vary depending on your preferred level of doneness. Here’s a general guide for rare, medium-rare, and medium:
| Doneness | internal temperature | Cooking Time |
|---|---|---|
| Rare | 125°F (52°C) | 2.5-3 hours |
| Medium-Rare | 135°F (57°C) | 3-3.5 hours |
| Medium | 145°F (63°C) | 3.5-4 hours |
Remember, these are just estimates. It’s best to use a meat thermometer to ensure your roast is cooked to your liking.
Don’t be tempted to rush the cooking process. Patience is key for a juicy, tender rib roast.
(Part 5) Reaching the Perfect Temperature
Using a meat thermometer is absolutely essential for getting the perfect doneness. It’s the only way to know when the roast is cooked through without overcooking it.
The Power of the Thermometer
Insert the thermometer into the thickest part of the roast, making sure it doesn’t touch any bone. If you’re using a probe thermometer, you can leave it in place during cooking.
A probe thermometer is a great investment for any serious cook. It allows you to monitor the internal temperature of the roast throughout the cooking process, so you can be sure it’s cooked to perfection.
The Importance of Resting
Once the roast reaches your desired internal temperature, remove it from the oven and allow it to rest for at least 15 minutes before carving. During this resting time, the juices redistribute throughout the meat, making it even more tender and succulent.
This is a crucial step, don’t skip it! It might seem like a small detail, but it makes a big difference in the final result.
(Part 6) Carving and Serving
Now that your rib roast has rested, it’s time to carve and serve this culinary masterpiece. This is your moment to shine, and to present your work of art beautifully.
Carving Techniques
Using a sharp carving knife, cut slices across the grain of the meat. For bone-in roasts, remove the rib bones and carve the meat off the bone in slices.
It’s all about presentation, so take your time and carve those beautiful slices. Make it look as impressive as it tastes!
Serving Suggestions
Serve your rib roast with a variety of sides, from roasted vegetables to creamy mashed potatoes. Don’t forget the gravy, a perfect companion to the juicy meat.
I like to serve my rib roast with a simple green salad and a side of roasted vegetables. It’s a classic combination that never fails to impress.
(Part 7) Tips for Success: Making the Most of Your Roast
Now, let's talk about those little tricks that take your rib roast from good to exceptional.
Basting for Added Moisture
Basting the roast with its own juices or with butter during cooking helps to keep it moist and flavorful. You can baste every 30-45 minutes, using a spoon or a baster to drizzle the juices over the roast.
Basting helps to create a beautiful, golden-brown crust and keeps the meat from drying out. It’s a simple technique, but it makes a big difference in the final result.
Adding Herbs and Garlic
For extra flavour, you can add a sprig of rosemary or a few cloves of garlic to the roasting pan. The heat will infuse the meat with even more deliciousness.
You can also add a few tablespoons of red wine or beef broth to the roasting pan for extra flavour.
The Importance of Resting
Again, let’s talk about resting. It’s vital for a succulent roast, and it makes carving easier.
Resting allows the juices to redistribute throughout the meat, resulting in a much more tender and succulent roast. It’s a simple step, but it’s crucial for a perfect rib roast.
(Part 8) FAQs: Your Rib Roast Questions Answered
You know, I’ve been asked a ton of questions about rib roasts over the years. Here are some of the most common ones, with my advice:
1. Can I Cook a Rib Roast on the Stovetop?
While you can technically cook a rib roast on the stovetop, it’s not the best method. It’s difficult to achieve even cooking, and there’s a higher risk of overcooking. oven roasting is by far the best way to cook a large rib roast.
Stick to the oven for best results. It’s the most reliable method for cooking a rib roast evenly and to perfection.
2. Can I Freeze a Rib Roast?
You can freeze a rib roast, but it’s best to do it before it’s been seasoned or cooked. Wrap the roast tightly in freezer-safe plastic wrap and aluminum foil. It can be frozen for up to 3 months.
Freezing a rib roast is a great way to have it on hand for a special occasion. Just remember to thaw it properly in the refrigerator before cooking.
3. Can I Reheat a Rib Roast?
Yes, you can reheat a rib roast, but it’s best to do it gently to avoid drying it out. You can reheat it in the oven at a low temperature (around 300°F/150°C) for about 15 minutes.
Reheating a rib roast is a great way to use leftovers. Just make sure to reheat it slowly and evenly to avoid drying it out.
4. How Long Should I Let a Rib Roast Rest Before Carving?
Allow the roast to rest for at least 15 minutes before carving. This allows the juices to redistribute throughout the meat, resulting in a much more tender and succulent roast.
Resting is a crucial step for a juicy, tender rib roast. It’s a small detail, but it makes a big difference in the final result.
5. What Kind of Gravy Should I Serve with Rib Roast?
Any gravy goes well with rib roast! Some popular choices include classic pan gravy, horseradish gravy, and mushroom gravy. The key is to use the juices from the roast to make the gravy, which will enhance the flavor.
The gravy is an important part of the rib roast experience. It adds moisture and flavour, and it’s a great way to use the delicious juices from the roast.
(Part 9) The Final Word: Your Rib Roast Mastery Awaits
Well, there you have it! You’ve got all the secrets, the tips, the tricks, and the confidence to create a truly magnificent rib roast. Go forth and impress your guests with your culinary masterpiece.
And remember, rib roast is a journey, not a race. Enjoy the process, embrace the aromas, and savour every moment of this delicious adventure. Happy cooking!
Everyone is watching

How to Cook Frozen Lobster Tails Perfectly: A Step-by-Step Guide
RecipesLobster. Just the word conjures up images of lavish meals, special occasions, and a taste of luxury. But let's...

Pigs in a Blanket Cooking Time: How Long to Bake for Perfect Results
RecipesAh, pigs in a blanket. Just the name conjures up images of those delightful little parcels of crispy pastry en...

Pork Fillet Cooking Time: How Long to Cook It Perfectly
RecipesPork fillet, or tenderloin as it's sometimes called, is a real favourite in our house. It's so versatile, and...

The Ultimate Guide to Tender, Juicy Pulled Pork
RecipesRight, let's talk pulled pork. It's one of those dishes that just screams "comfort food," doesn't it? I mean...

The Ultimate Guide to Cooking Sweet Potatoes: From Roasting to Mashing
RecipesSweet potatoes. Just the name conjures up images of warm, comforting dishes, bursts of vibrant color, and a to...