There's a certain magic to cooking a T-bone steak. The sizzle of the meat hitting a hot pan, the intoxicating aroma filling the kitchen, and the anticipation of that first, juicy bite – it's a culinary experience that never gets old. Over the years, I've honed my stovetop T-bone steak technique to perfection, and I'm thrilled to share my secrets with you. Whether you're a seasoned grill master or a kitchen newbie, this guide will walk you through every step, from choosing the right steak to achieving that coveted crust.
(Part 1) steak selection: The Foundation of a Great Meal

The first step in crafting a truly perfect T-bone steak is choosing the right cut. And believe me, this is where the real fun begins. Imagine yourself in a bustling butcher shop, surrounded by the aroma of fresh meat, carefully selecting your steak. It's an art form, my friend, and one that deserves your full attention.
Choosing the Right Cut: A Feast for the Senses
You want a T-bone steak with a good marbling of fat. Don't be afraid of the fat, it's your friend! It's the fat that renders and adds flavour and juiciness to the steak, making it incredibly tender. Look for a steak that's about 1.5 inches thick. This thickness will allow for even cooking and create that delicious crispy crust. I always go for a USDA Prime or Choice grade – trust me, it makes a real difference in flavour and texture.
The Butcher's Expertise: Your Culinary Ally
Don't be shy! Ask your butcher for their recommendations. They're the experts, after all. They'll know which cuts are freshest, the best marbling, and might even suggest a specific seasoning blend that would complement your steak perfectly. Embrace their knowledge and elevate your culinary game.
(Part 2) Preparing for Perfection: Getting the Steak Ready

Now that you've got your perfect T-bone, it's time to get it ready for its star turn on the stovetop. This stage is crucial, so don't rush it. It's all about setting the stage for a truly amazing steak. Remember, a little patience goes a long way.
Patting Dry: Removing Excess Moisture
Once you've brought your steak home, remove it from the packaging and pat it dry with paper towels. This step is essential for achieving a crispy crust. You don't want any excess moisture getting in the way of that gorgeous brown sear.
The Salt Game: Enhancing Flavor and Tenderness
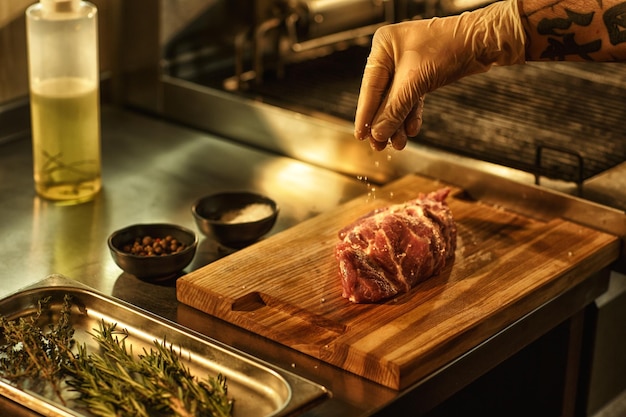
Now, here's where my philosophy on salt comes into play. I'm a firm believer in seasoning the steak generously with salt at least 30 minutes before cooking. This allows the salt to penetrate the meat, drawing out some of the moisture, resulting in a more flavorful and tender steak. It's a simple trick that makes a world of difference.
Bringing it to Room Temperature: A Crucial Step for Even Cooking
This might seem like a minor detail, but bringing the steak to room temperature before cooking is a game changer. It allows the steak to cook more evenly, as the core temperature rises more gradually. Think of it as giving the steak a little warm-up before the big show. The result? A perfectly cooked steak, from edge to center.
(Part 3) The Stovetop Showdown: Mastering the Technique

Alright, now it's time for the grand finale – the actual cooking. This is where all the preparation comes together, so let's get our game faces on and create some culinary magic. Even a seasoned cook can appreciate a perfectly executed stovetop steak. It's a simple but beautiful thing.
Choosing the Right Pan: The Foundation of a Great Sear
We're talking about a good quality, heavy-bottomed pan here. Cast iron is my absolute go-to. It heats evenly and retains heat beautifully, which is perfect for creating that perfect crust. If you're not a fan of cast iron, a good quality stainless steel pan will work just as well. Just make sure it's heavy-bottomed and can handle high heat.
The Hot Pan Technique: Searing to Perfection
The key to a good sear is heat, and lots of it. Get your pan smoking hot – I'm talking searing hot! Heat your pan over high heat for about 5 minutes, until it's good and hot. Don't even think about putting the steak on until the pan is screaming hot! The heat will sear the outside of the steak, creating that delicious crust while leaving the inside juicy and tender.
Laying Down the Law: Searing the Steak to Perfection
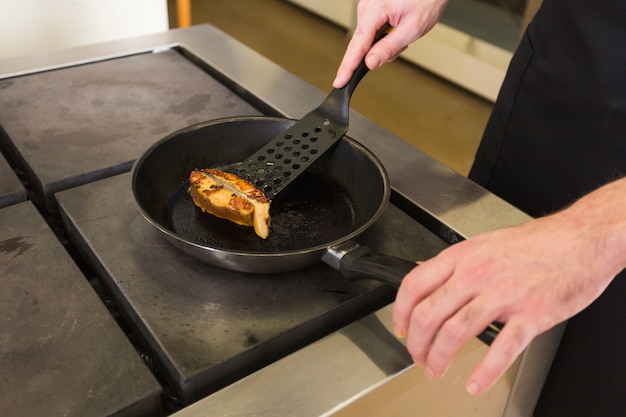
Now, carefully place the steak in the hot pan. You should hear a satisfying sizzle as the steak hits the pan. Don't overcrowd the pan. If you're cooking two steaks, it's best to do them in batches. The pan needs space to maintain its heat and ensure even cooking.
The Flip: Creating a Beautiful Crust
This is where things get exciting! Leave the steak undisturbed for about 3-4 minutes on each side, until it develops a beautiful, crispy crust. Don't touch it too much, let it do its thing! After you've seared both sides, you can reduce the heat to medium-high and continue cooking to your desired doneness.
Time for Butter: Adding Flavor and a Glossy Finish
Once the steak is almost cooked, add some butter to the pan. This will infuse the steak with extra flavour and create a beautiful, glossy finish. The butter will melt and sizzle, creating a delicious sauce that will coat the steak. I like to add a sprig of fresh rosemary or thyme to the pan as the butter melts. The herbs infuse the butter with their aroma and flavour, creating an extra layer of deliciousness.
(Part 4) Mastering the Doneness: A Guide to steak perfection
So, you've got your sizzling steak in the pan, and the aroma is filling your kitchen. But how do you know when it's cooked to your liking? Don't worry, it's not rocket science. There are a few fool-proof methods you can use to ensure your steak is cooked to perfection. Remember, each person has their preference, so find the method that works best for you.
The Finger Test: A Classic Method for Gauging Doneness
This is a classic method that seasoned cooks love. Press your finger on the palm of your hand just below your thumb, that fleshy area. You’re feeling the firmness of your muscle there. Now, compare that feeling to the firmness of the steak. If it feels like the fleshy area below your thumb, your steak is medium-rare. If it feels like your thumb muscle, it’s medium. If it feels like the fleshy part of your hand, it’s medium-well. And if it’s super firm like your whole hand, it's well-done. It’s a little weird, but trust me, it works!
The Thermometer Method: A Scientific Approach to Steak Perfection
For those who prefer a more scientific approach, a meat thermometer is your best friend. Insert the thermometer into the thickest part of the steak, avoiding the bone. Here's a general guide for T-bone steak temperatures:
- Rare: 125-130°F (52-54°C)
- Medium-Rare: 130-135°F (54-57°C)
- Medium: 135-140°F (57-60°C)
- Medium-Well: 140-145°F (60-63°C)
- Well-Done: 145°F and above (63°C and above)
Resting is Key: Allowing the Juices to Redistribute
Once the steak is cooked to your desired doneness, resist the urge to slice into it right away! Give it a good 5-10 minutes of rest. Why? Because the heat from cooking continues to cook the steak even after you take it off the stove. Resting allows the juices to redistribute, resulting in a tender and flavorful steak. Wrap the steak loosely in foil to keep it warm while it rests.
(Part 5) Finishing Touches: Elevate Your Steak Game
Your steak is almost ready to shine! Now, it's time to add those final touches that will make it truly unforgettable. Let's give it that last little bit of love and make it truly special.
The Herb and Garlic Advantage: Adding Depth of Flavor
As the steak rests, you can get creative with your finishing touches. I love adding some fresh herbs like rosemary, thyme, or oregano to the pan while the butter is sizzling. A few cloves of garlic, crushed and tossed in the pan, also add a beautiful aroma and flavour. The herbs and garlic will infuse the butter, creating a delicious sauce that will coat the steak and enhance its flavour.
The Sauce Factor: A Culinary Symphony of Flavor
If you want to add a sauce, now's the time. You can use a simple pan sauce, made by scraping the browned bits from the pan with some wine or stock. Or, go for a classic red wine sauce, or even a creamy blue cheese sauce. The possibilities are endless!
(Part 6) Serving Up Success: The Final Act
The moment we've all been waiting for has arrived! Your perfectly cooked T-bone steak is ready to be devoured. Take your time and let’s create a memorable dining experience.
The Plating Prowess: Creating a Visual Masterpiece
When plating, start with a nice warm plate. You don’t want that beautiful, juicy steak to cool down too quickly. Slice the steak against the grain, creating thin, even slices. Arrange the slices on the plate with a small amount of the pan sauce, if desired.
The Sides that Shine: Complementary Flavors
Choose sides that complement your steak. I’m a big fan of roasted vegetables, creamy mashed potatoes, or a simple green salad. You can also go for something more adventurous, like grilled asparagus, sauteed mushrooms, or a hearty potato gratin. The choice is yours!
The Wine Pairing Game: Elevating the Dining Experience
For the perfect wine pairing, a full-bodied red like Cabernet Sauvignon, Merlot, or Zinfandel will complement the steak beautifully. If you prefer a lighter wine, try a Pinot Noir or a Beaujolais.
(Part 7) From the Kitchen to the Table: Enjoying the Rewards
Now, take a deep breath, relax, and enjoy the fruits of your labor. You've worked hard to create a masterpiece, so let’s savor every bite.
The Culinary Conversation: Sharing the Joy of Cooking
The best part of cooking a good steak is sharing it with loved ones. So gather around the table, raise your glasses, and let the conversation flow. Share stories, laugh, and revel in the satisfaction of a meal well-made.
(Part 8) FAQs: Solving the Steak Mysteries
You’ve worked hard, you’ve learned, and you’re ready to conquer the T-bone steak. But, if you’re still wondering about a few things, don’t worry. Here are some frequently asked questions that might help shed light on any lingering mysteries.
1. What if I don't have a cast iron pan?
Don't worry, a good quality stainless steel pan will work just fine. The key is to make sure the pan is screaming hot before you add the steak. You might need to increase the heat a little to get it as hot as a cast iron pan.
2. How long should I cook the steak on each side?
For a thick T-bone steak, I recommend about 3-4 minutes per side for a good sear. Then, reduce the heat and cook to your desired doneness. It’s best to use a meat thermometer for accuracy, especially if you're aiming for a specific level of doneness.
3. What happens if I overcook the steak?
Overcooked steak will be tough and dry. It’s important to cook the steak to your desired doneness, but don’t overcook it! Using a meat thermometer can help you avoid this. Remember, a little pink is a good thing when it comes to a T-bone steak.
4. Can I cook the steak with the bone in?
Absolutely! Cooking a T-bone steak with the bone in is a classic method. The bone helps to protect the steak from overcooking and contributes to a more flavorful result. Just make sure to cook the steak longer to reach the desired doneness. The bone will also add a rustic and elegant touch to your presentation.
5. What are some other delicious ways to enjoy T-bone steak?
Besides stovetop cooking, you can also grill your T-bone steak, bake it in the oven, or even try reverse searing. Each method has its own unique benefits. Experiment and see what you prefer!
Now, go forth and conquer the world of T-bone steak! With a little practice and the right techniques, you’ll be creating culinary magic in your own kitchen. Enjoy every bite!
Everyone is watching

How to Cook Frozen Lobster Tails Perfectly: A Step-by-Step Guide
RecipesLobster. Just the word conjures up images of lavish meals, special occasions, and a taste of luxury. But let's...

Pigs in a Blanket Cooking Time: How Long to Bake for Perfect Results
RecipesAh, pigs in a blanket. Just the name conjures up images of those delightful little parcels of crispy pastry en...

Pork Fillet Cooking Time: How Long to Cook It Perfectly
RecipesPork fillet, or tenderloin as it's sometimes called, is a real favourite in our house. It's so versatile, and...

The Ultimate Guide to Cooking Delicious Frankfurters
RecipesLet's face it, we all love a good frankfurter. It's a classic, simple, and always satisfying. But let's be rea...

Wolf Meat Recipes: A Guide to Cooking Wild Game
RecipesLet's be honest, you don't see wolf meat at your local butcher shop every day. It's a bit of a wild card, but ...
