Let's be honest, there's nothing quite like a perfectly cooked steak. The satisfying sizzle, the irresistible aroma, and that melt-in-your-mouth tenderness – it's a culinary experience that's hard to beat. But let's face it, not everyone can consistently nail a steak. I know I've had my fair share of tough, dry, or even slightly burnt disasters. But after years of trial and error, I’ve learned a few tricks, and now I can whip up a juicy, flavorful strip loin that even the most discerning steak connoisseur would approve of.
It’s not magic, though. It's all about understanding the fundamentals and paying attention to a few key details. So grab a notepad, put on your favorite cooking playlist, and let's embark on this delicious journey together!
(Part 1) The Steak: Choosing Your Weapon
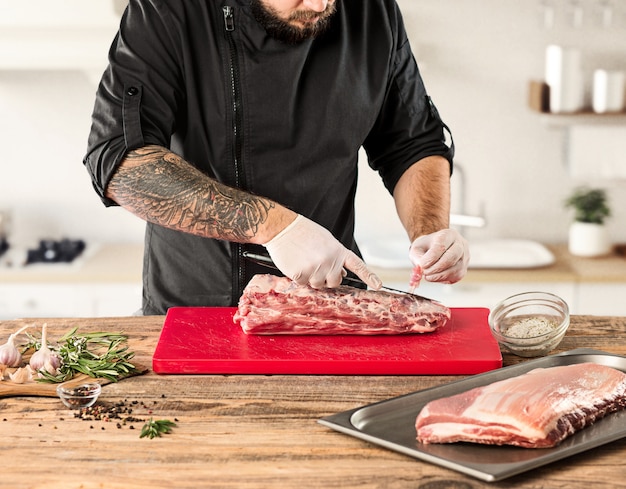
Before we even think about turning on the stove, we need the right tool for the job. And in this case, that tool is the steak itself. Now, I have a confession to make – I’m a sucker for strip loin. That beautiful, even fat distribution makes for a wonderfully juicy, flavorful bite. But hey, you do you! If you’re feeling adventurous, go for a ribeye or a new york strip – the world of steak is your oyster!
1.1 The Meat: Don't Settle for Anything Less Than Prime
Let's talk quality. When it comes to steak, I'm not one to cut corners. Yes, prime cuts can be pricey, but trust me, it's an investment you won't regret. You want to look for that gorgeous marbling, those little streaks of fat that give the steak its incredible juiciness and flavor. Imagine it as an investment in a truly memorable dining experience. You'll thank yourself later when you sink your teeth into that melt-in-your-mouth goodness.
1.2 The Thickness: Aim for 1-1.5 inches
Now, let’s talk about thickness. You need a steak that's substantial enough to hold its shape and cook evenly without drying out. My ideal thickness is between 1 and 1.5 inches. Any thinner, and you risk overcooking it, leaving you with a dry, tough piece of meat. On the other hand, too thick, and you'll be wrestling with a steak that's challenging to cook evenly.
(Part 2) Preparing the Battlefield: Getting Your Equipment Ready
Alright, we've got our weapon – now let's prepare the battlefield. This means gathering your essential equipment. You don’t need a Michelin-star kitchen to cook a perfect steak, but there are a few crucial items you’ll need to make it happen.
2.1 The Cast Iron: The Unsung Hero
My go-to for stovetop steak cooking is a cast iron skillet. It’s a workhorse in the kitchen, holding heat like a champ and reaching those high temperatures you need for a beautiful sear. The even heat distribution is another major advantage, ensuring your steak cooks evenly throughout. If you haven’t already, invest in a cast iron skillet. It's a kitchen staple that will serve you well for years to come.
2.2 The Thermometer: Your Trusted Sidekick
Here’s a tip from someone who’s learned the hard way: invest in a meat thermometer. This handy tool is your best friend when cooking steak. You want to make sure it reaches your desired internal temperature without overcooking. I’ve lost countless steaks to the perils of eyeballing it. Don't be like me, embrace the thermometer!
(Part 3) The Battle Plan: Getting Your Steak Battle-Ready
Your weapon is selected, the battlefield is prepped, now it's time to get your steak ready for battle! This means prepping your steak for the heat it’s about to encounter.
3.1 The Salt: The Unsung Hero
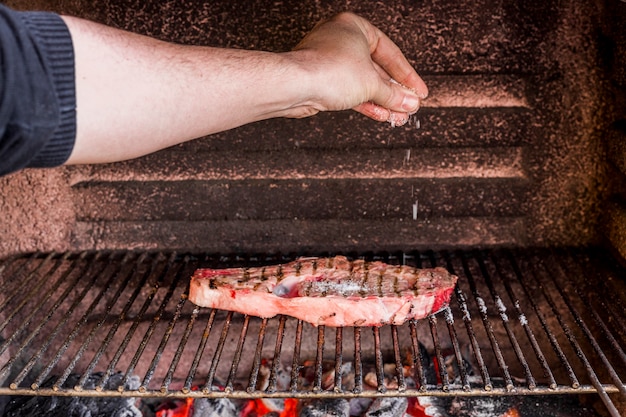
First, the salt. Salt is not just about adding flavor; it's a crucial ingredient in creating a beautiful crust. Salt draws moisture out from the surface of the steak, which helps create that delicious, crispy exterior we all crave. So, don’t be shy – salt your steak liberally about 30 minutes before you start cooking. You can even sprinkle on a little bit of pepper if you like.
3.2 The Oil: The Lubricant for the Battle
Next, we need a little bit of oil. I like to use something with a high smoke point, like avocado oil or grapeseed oil. This will help create a nice, even sear and won't burn at those high temperatures. Add about a tablespoon to your hot skillet and let it get nice and shimmery before adding the steak.
(Part 4) The Battle Begins: The First Steps
Alright, the stage is set. It's time to begin the battle, the moment when the real magic happens.
4.1 The Sear: The Critical First Move
Carefully place your steak in the hot skillet. You’ll hear that satisfying sizzle, a sign that the battle has begun! Now, let it cook undisturbed for about 2-3 minutes per side. Resist the urge to move it around, or you risk sticking it. The goal here is to let the steak develop a nice, crispy crust. It's like building a protective armor for your steak, essential for locking in all that juicy goodness.
4.2 The Flip: The Moment of Truth
After you've seared both sides, it's time to flip. Flip it over and let it cook for another 2-3 minutes on each side. The key is to build a beautiful, even crust all around. Remember, patience is key! Don't move it too much, let it cook undisturbed.
(Part 5) The Heat Adjustment: Don't Get Too Carried Away
This is where things can get a little tricky. You need to adjust the heat based on how well-done you want your steak.
5.1 The Rare Stage: The Gentle Approach
For a rare steak, you're looking for an internal temperature of 125-130°F. Lower the heat to medium-low and let the steak cook for another 2-3 minutes on each side. You want to cook it through but still maintain that lovely pink center.
5.2 The Medium Rare Stage: Finding the Perfect Balance
For a medium-rare steak, you want an internal temperature of 130-135°F. Keep the heat at medium-low and let the steak cook for another 2-3 minutes on each side. You're aiming for a slightly more cooked center, but still with that beautiful pink hue.
5.3 The Medium Stage: The More Well-Done Approach
For a medium steak, you want an internal temperature of 135-140°F. You can keep the heat at medium-low, or you can crank it up to medium, depending on your preference. Let it cook for another 2-3 minutes on each side, but keep a close eye on it, as it can go from medium to well-done very quickly.
5.4 The Well-Done Stage: The Thoroughly Cooked Option
And finally, for a well-done steak, you're looking for an internal temperature of 140-145°F. This is the most cooked stage, and you'll want to keep the heat at medium-high and let the steak cook for another 2-3 minutes on each side. It will be a more brown color throughout.
(Part 6) The Rest: The Crucial Cooling-Down Period
Once your steak has reached your desired doneness, take it off the heat. But don't slice into it immediately! It's crucial to let your steak rest for about 5-10 minutes before slicing. This will allow the juices to redistribute throughout the steak, resulting in a juicier, more flavorful final product.
(Part 7) The Aftermath: The Moment of Truth
Alright, the battle is over, and the steak has emerged victorious! Now, it's time to slice and enjoy.
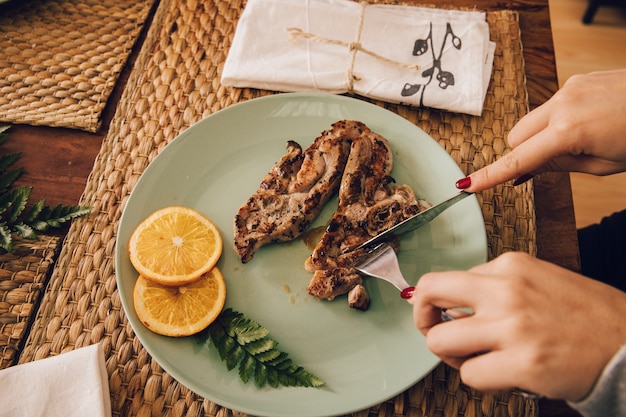
7.1 The Slicing: The Final Touch
Use a sharp knife to slice your steak against the grain. This will ensure that the steak is tender and easy to chew. Slice it to your desired thickness and get ready to savor the deliciousness.
7.2 The Presentation: Making It a Feast for the Eyes
Presentation is everything, right? A perfectly cooked steak deserves a beautiful stage. Place your sliced steak on a plate and add a few garnishes, like a sprig of rosemary or a drizzle of olive oil.
7.3 The Accompaniments: The Supporting Cast
No steak is complete without the perfect accompaniments. I'm talking about the sides that truly complement the steak's flavor. My favorites include:
- mashed potatoes – creamy and comforting
- Roasted vegetables – a burst of fresh flavors
- Asparagus – a simple, elegant side
- Garlic bread – a classic combination
- A salad – a refreshing contrast
It's all about finding the perfect balance of textures and flavors.
(Part 8) The Aftermath: The Aftermath: The Time for Reflection
So, there you have it. You've conquered the stovetop strip loin steak! But don't stop there. Experiment with different seasonings, marinades, and accompaniments. There's no one right way to cook a steak. It's all about finding what you love.
And remember, the most important thing is to enjoy the process. Cooking a steak shouldn't feel like a chore – it should be a fun and rewarding experience. So, put on your favorite music, grab a glass of wine, and get cooking!
FAQs
I know, I know, you're probably thinking, "But what about..."
Q1: How do I know when my steak is done?
The most reliable way to determine doneness is by using a meat thermometer. You want to check the internal temperature of the steak to ensure it's cooked to your liking. You can also use the "touch test" – gently press the center of the steak with your finger. If it feels firm and bouncy, it's rare. If it feels slightly firm, it's medium-rare. If it feels springy and firm, it's medium. And if it feels solid and hard, it's well-done.
Q2: What if I overcook my steak?
Don't panic! Even if you overcook your steak, you can still salvage it. Just slice it up and add some sauce or gravy to help mask the dryness. You can also try adding some moisture back in by wrapping it in foil and letting it rest for a few minutes.
Q3: What if my steak is too thin?
If your steak is too thin, you can try cooking it over medium-low heat to prevent it from overcooking. You can also try searing it quickly on both sides and then finishing it in the oven at a lower temperature.
Q4: What if my steak is too thick?
If your steak is too thick, you can try searing it on both sides and then finishing it in the oven at a lower temperature. This will help to cook the steak evenly without overcooking the outside.
Q5: What are some other ways to cook steak?
There are many other ways to cook steak, such as grilling, broiling, and pan-frying. Experiment with different methods to find your favorite!
Everyone is watching

How to Cook Frozen Lobster Tails Perfectly: A Step-by-Step Guide
RecipesLobster. Just the word conjures up images of lavish meals, special occasions, and a taste of luxury. But let's...

Pork Fillet Cooking Time: How Long to Cook It Perfectly
RecipesPork fillet, or tenderloin as it's sometimes called, is a real favourite in our house. It's so versatile, and...

Pigs in a Blanket Cooking Time: How Long to Bake for Perfect Results
RecipesAh, pigs in a blanket. Just the name conjures up images of those delightful little parcels of crispy pastry en...

The Ultimate Guide to Cooking Delicious Frankfurters
RecipesLet's face it, we all love a good frankfurter. It's a classic, simple, and always satisfying. But let's be rea...

Wolf Meat Recipes: A Guide to Cooking Wild Game
RecipesLet's be honest, you don't see wolf meat at your local butcher shop every day. It's a bit of a wild card, but ...