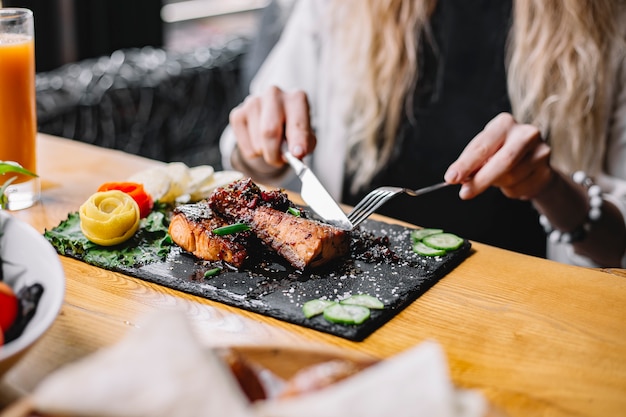
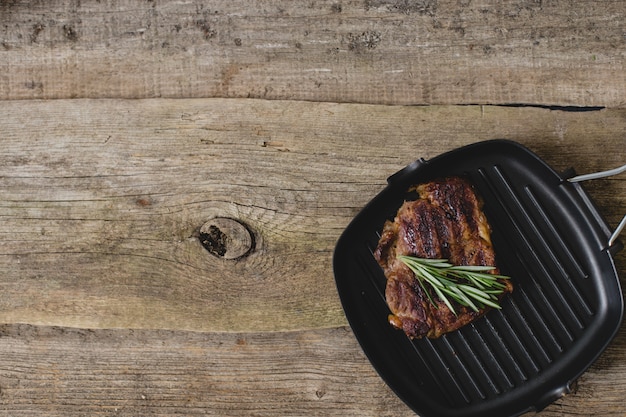
There’s something magical about a perfectly cooked steak. That beautiful sear, the juicy pink centre, and the satisfying chew – it's a culinary triumph that makes you feel like a champion. But let's be honest, nailing a steak on the stovetop isn’t always a walk in the park. I've had my fair share of overcooked, tough, or just plain bland steaks – it's not a good look. But after countless experiments (and a few burnt offerings), I've finally cracked the code to consistently delicious stovetop steak. This isn't just a recipe, it's a journey, packed with tips, tricks, and my own personal experiences to help you become a steak master in your own kitchen.
Part 1: Choosing Your Weapon: The Perfect Cut

The first step to a stellar steak is choosing the right cut. This is where the fun really begins! It's all about knowing your cuts and understanding what each brings to the table.
1.1: A Quick Guide to steak cuts
- Rib-Eye: Ah, the king of the grill! This cut boasts incredible marbling, which means it has streaks of fat throughout, making it incredibly tender and flavorful. Think of it like a butter-rich steak that melts in your mouth. It’s my personal favorite for its rich, buttery flavor and satisfying chew. Just be prepared to shell out a bit more for this premium cut. You get what you pay for, my friend!
- new york strip: A classic choice for a reason, this cut is a beautiful balance of flavour and tenderness. It has a leaner profile than the Rib-Eye, making it perfect for a juicy but lean steak. This one's a crowd-pleaser, and my go-to for a quick and easy weeknight dinner.
- Sirloin: A solid workhorse, this cut is known for its affordability and good flavour. It can be a bit tougher than other cuts, but it’s perfect for those who prefer a more intense chew. It's a great option for a quick and easy steak dinner when you’re on a budget.
- filet mignon: The ultimate indulgence! This cut is incredibly tender and buttery, with a delicate flavour that melts in your mouth. It’s a special occasion cut, perfect for a romantic dinner or when you want to impress. Be warned, it can be quite pricey, so save it for those special occasions.
- flank steak: This leaner cut is perfect for slicing against the grain after cooking. It's a great choice for fajitas or grilling, but it also works well on the stovetop. Think of it as a versatile cut that's perfect for a variety of dishes.
1.2: Getting the Right Thickness
Don’t underestimate the power of thickness! For stovetop cooking, you want a steak that’s at least 1 inch thick, preferably 1.5 inches. This thickness allows for a beautiful sear on the outside and a juicy, pink centre. Thin steaks are more likely to overcook quickly, so stick to thicker cuts for the best results. Think of it as a steak's built-in insulation, helping to keep the heat in and cook it evenly.
Part 2: Preparing for Battle: The Pre-Game

You’ve chosen your perfect cut, now it’s time to prep your steak for battle. This is where you set the stage for a delicious outcome, my friend. Trust me, these steps are crucial for a juicy and flavorful steak.
2.1: Let It Rest: Bringing the Steak to Room Temperature
Alright, let’s talk about the controversial topic – bringing your steak to room temperature. Some chefs swear by it, some scoff. I'm in the "bring it to room temp" camp, and here’s why: It allows the steak to cook more evenly. When you cook a cold steak, the outside cooks faster than the inside, leading to uneven cooking. Bringing it to room temperature helps the internal temperature rise gradually, ensuring more consistent cooking. You'll get a steak that's cooked perfectly from edge to centre. 30 minutes to an hour before cooking is ideal. Just remember to keep it covered in the fridge until you're ready to start!
2.2: The Art of Seasoning: Don’t Hold Back
Seasoning is your secret weapon. It's all about creating a delicious crust and infusing the steak with flavour. I keep it simple but effective: salt and freshly ground black pepper. It’s the classic combination for a reason. Generously season both sides of the steak, and don’t be shy! You want to taste those seasonings with every bite. You can also add a touch of garlic powder or onion powder for extra oomph, but start with the basics and work your way up.
2.3: The Oil of Choice: The Foundation of Flavor
A good oil is the foundation for a perfect sear. I prefer avocado oil because of its high smoke point, which allows it to heat up without burning. Olive oil is also a good choice, but be mindful of its lower smoke point. You want to make sure the oil is hot enough to create a beautiful sear without burning the steak. If the oil starts to smoke, it's too hot, and you risk burning your steak.
Part 3: The Battle Begins: Stovetop Mastery

Now, the moment of truth! This is where your stovetop skills are put to the test. Remember, patience is key, and trust the process.
3.1: Heating Your Weapon: The Cast Iron Advantage
For the best sear and heat distribution, I always reach for my trusty cast iron skillet. It heats up quickly and retains heat beautifully, creating that perfect crust. If you don’t have a cast iron skillet, a heavy-bottomed skillet will work just fine. But seriously, a cast iron skillet is a game changer for any steak lover. It's a culinary investment that will last you a lifetime.
3.2: The Art of the Sear: Building the Foundation of Flavor
Let's get that beautiful sear going! Heat your skillet over high heat until it’s smoking hot. You'll know it's ready when a drop of water dances and sizzles on the surface. Add your oil and let it heat for a minute or two. Carefully place your steak in the skillet, and don’t move it for at least 3 minutes. This allows the steak to develop a beautiful, crispy crust. You're essentially locking in those delicious juices and creating a barrier against overcooking.
3.3: The Flip: A Calculated Move
After 3 minutes, flip the steak carefully using tongs. You want to hear that satisfying sizzle as it hits the pan. Cook the other side for another 3 minutes. The key here is to cook each side undisturbed, to get a nice, even sear. Resist the urge to keep flipping the steak, as this can hinder the crust formation and make the steak unevenly cooked.
3.4: The Finish Line: Reaching Your Desired Doneness
You’re almost there! Now it’s time to adjust your heat and cook the steak to your desired doneness. Everyone has their perfect level of doneness, so it’s a personal preference. Here's a guide to help you navigate the world of steak doneness:
- Rare: The steak should have a cool red centre, and the outside will be lightly browned. Cook for 2-3 minutes per side, for a total of 4-6 minutes. This is a delicate doneness, perfect for those who appreciate a slightly cool centre.
- Medium-Rare: The steak should have a warm red centre, and the outside will be brown. Cook for 3-4 minutes per side, for a total of 6-8 minutes. This is a classic choice, with a nice balance of tenderness and flavour.
- Medium: The steak should have a pink centre, and the outside will be brown. Cook for 4-5 minutes per side, for a total of 8-10 minutes. This is a good option for those who like a bit more cooked steak but still want some pink.
- Medium-Well: The steak should have a slightly pink centre, and the outside will be brown. Cook for 5-6 minutes per side, for a total of 10-12 minutes. This is a good choice for those who prefer a steak with less pink.
- Well-Done: The steak should be brown throughout, with no pink in the centre. Cook for 6-7 minutes per side, for a total of 12-14 minutes. This is the most cooked option, for those who prefer a well-done steak.
3.5: The Resting Period: Letting the Steak Relax
Once the steak is cooked to your liking, it’s time to let it rest. Remove it from the skillet and place it on a cutting board. Cover it loosely with foil and let it sit for 5-10 minutes. This allows the juices to redistribute, resulting in a more tender and flavorful steak. Think of it as giving your steak a moment to unwind after its intense cooking experience.
Part 4: Beyond the Basics: Adding a Touch of Finesse
Alright, we've mastered the basic stovetop steak, but let's take things up a notch. These techniques can elevate your steak from good to truly exceptional.
4.1: The Magic of Butter: Adding a Creamy Kiss
I’m a big believer in the power of butter! As the steak rests, add a knob of butter to the hot skillet, along with a few sprigs of fresh thyme or rosemary. Let the butter melt and infuse with the herbs, then spoon the fragrant butter over the steak as it rests. This creates a luscious, flavorful sauce that elevates the entire experience. It's a little touch of decadence that makes all the difference.
4.2: The Pan Sauce: A Symphony of Flavors
Don’t throw away all those flavorful bits in the skillet! This is where the pan sauce comes in. Deglaze the skillet with a splash of red wine or beef broth. Scrape up all the delicious browned bits, and simmer for a minute or two until the sauce thickens slightly. This is an instant and flavorful sauce that perfectly complements your steak. Serve it over the steak for a truly delicious finish. You'll be amazed at how much flavour you can extract from those seemingly simple ingredients.
4.3: A Touch of Spice: Embracing Global Flavors
Don't be afraid to experiment with different spices! A pinch of smoked paprika or cumin can add depth and complexity to your steak. A sprinkle of chili flakes can give it a little kick. Experiment and discover what works best for your taste buds. You might find a new favourite flavour combination that you never knew you loved!
Part 5: The Sidekick: Choosing the Perfect Accompaniment
No steak is complete without a delicious sidekick. The perfect side dish enhances the flavour and texture of your steak, creating a symphony of tastes. I love pairing my steaks with classic sides that complement the rich flavours and tender texture.
5.1: The Classic: Creamy mashed potatoes
A staple for a reason, mashed potatoes are the ultimate comfort food. They offer a creamy, comforting counterpoint to the juicy steak. Add a sprinkle of fresh herbs or a drizzle of truffle oil for an extra touch of elegance.
5.2: The Green Companion: roasted asparagus
Roasted asparagus is a light and refreshing accompaniment that balances the richness of the steak. A sprinkle of sea salt and a drizzle of olive oil are all it takes to bring out the natural sweetness of this seasonal vegetable.
5.3: The Savory Twist: Garlic Roasted Mushrooms
Garlic roasted mushrooms are a flavourful and satisfying side dish that elevates the savoury notes of the steak. The earthy mushrooms and pungent garlic create a delicious combination that will tantalize your taste buds.
5.4: The Bold Choice: Roasted Root Vegetables
Roasted root vegetables, like carrots, parsnips, and potatoes, offer a hearty and satisfying side dish. Toss them with olive oil, salt, pepper, and herbs, then roast them until tender and caramelized. The sweetness of the vegetables perfectly complements the rich flavour of the steak.
5.5: The Fresh & Light Option: Salad
A simple salad with a light vinaigrette can provide a refreshing contrast to the richness of the steak. Choose leafy greens, such as arugula or spinach, and add some fresh vegetables, like tomatoes, cucumbers, or onions.
Part 6: The Art of Presentation: A Culinary Masterpiece
Now, we're entering the realm of culinary artistry. The way you present your steak can make all the difference. It's about creating a visually appealing dish that not only looks good but also excites the senses.
6.1: The Sliced Symphony: A Slice of Elegance
For a more refined presentation, slice your steak against the grain. This creates visually appealing slices that showcase the beautiful sear and the juicy pink centre. Arrange the slices artfully on a platter, alongside your chosen side dish, for a truly elegant presentation. It's all about creating a harmonious composition on your plate.
6.2: The Rustic Appeal: A Simple and Satisfying Option
If you're going for a more rustic and casual look, simply place the steak on a cutting board, alongside your side dish. This creates a simple and satisfying presentation that is perfect for a casual dinner or a weekend barbecue.
6.3: The Finishing Touches: A Sprinkle of Magic
Add a few finishing touches to elevate your presentation. A sprinkle of fresh parsley or a drizzle of olive oil can add a touch of freshness and colour. A sprig of rosemary or thyme placed beside the steak adds a touch of elegance and aroma. It's those little details that make a big difference.
Part 7: The Verdict: A Culinary Triumph
As you savor each juicy bite, let the symphony of flavours dance on your palate. You've mastered the art of the perfect stovetop steak. It's not just about the cooking, but also about the experience. The anticipation, the aroma, the visual delight, and ultimately, the satisfaction of a culinary triumph. You've created a dish that not only satisfies the hunger but also nourishes the soul. It’s a testament to your culinary journey, a celebration of good food, and a reminder that even in the simplest of kitchens, magic can happen.
Part 8: FAQs: Answering Your Burning Questions
Let's address those lingering questions that may be bubbling up. After all, you want to conquer your next steak adventure with confidence.
8.1: Can I use a thermometer to check the doneness?
Absolutely! A meat thermometer is a handy tool for ensuring your steak is cooked to your desired doneness. Insert the thermometer into the thickest part of the steak, avoiding the bone. Here are some general temperature guidelines:
| Doneness | Internal Temperature (°F) |
|---|---|
| Rare | 125-130°F |
| Medium-Rare | 130-135°F |
| Medium | 140-145°F |
| Medium-Well | 150-155°F |
| Well-Done | 160°F and above |
8.2: Can I cook a steak in a non-stick pan?
You can, but a cast iron skillet is still the best option for a beautiful sear. If you use a non-stick pan, make sure it’s oven-safe and heat it over high heat. You’ll still get a nice sear, but it might not be as intense as with a cast iron skillet.
8.3: How long should I rest the steak?
Ideally, you should rest the steak for at least 5 minutes, but 10 minutes is even better. This allows the juices to redistribute and prevents the steak from being dry. It's a crucial step, so don’t skip it!
8.4: What if my steak is too thick?
If you have a very thick steak, you might want to consider searing it in the skillet and then finishing it in the oven. This will ensure that the steak cooks evenly throughout. Just transfer the seared steak to a preheated oven (350°F) and bake until it reaches your desired doneness.
8.5: What if I overcook my steak?
It happens! If you accidentally overcook your steak, don’t despair. You can still salvage the situation. Try slicing the steak thinly and adding it to a stir-fry or pasta dish. The overcooked steak will still have flavour and can be incorporated into another delicious meal. Remember, every culinary journey has its ups and downs, and even a little overcooked steak can lead to new and exciting culinary adventures.
Everyone is watching

How to Cook Frozen Lobster Tails Perfectly: A Step-by-Step Guide
RecipesLobster. Just the word conjures up images of lavish meals, special occasions, and a taste of luxury. But let's...

Pigs in a Blanket Cooking Time: How Long to Bake for Perfect Results
RecipesAh, pigs in a blanket. Just the name conjures up images of those delightful little parcels of crispy pastry en...

Pork Fillet Cooking Time: How Long to Cook It Perfectly
RecipesPork fillet, or tenderloin as it's sometimes called, is a real favourite in our house. It's so versatile, and...

The Ultimate Guide to Cooking Delicious Frankfurters
RecipesLet's face it, we all love a good frankfurter. It's a classic, simple, and always satisfying. But let's be rea...

Wolf Meat Recipes: A Guide to Cooking Wild Game
RecipesLet's be honest, you don't see wolf meat at your local butcher shop every day. It's a bit of a wild card, but ...
