There's something undeniably satisfying about a perfectly cooked ny strip steak. It's a dish that screams indulgence, a symphony of rich flavor and tender texture that's best enjoyed with a glass of your favorite red wine. And while the idea of a restaurant-quality steak might seem daunting, I’m here to tell you that achieving that perfect sear and juicy center is within your reach, even on your humble stovetop. Through years of trial and error (and quite a few delicious mistakes), I've cracked the code to a truly stellar NY strip steak, and I'm excited to share my secrets with you.
(Part 1) choosing the right cut
Let's start with the star of the show – the NY strip steak. This cut is renowned for its rich, beefy flavor and beautiful marbling, which translates to incredibly tender and juicy results. But, not all NY strip steaks are created equal. Trust me, I've learned this the hard way! Choosing the right cut is the foundation of a perfect steak, and it's a decision that shouldn't be taken lightly.
The Importance of Thickness
First, let’s talk thickness. For a steak that cooks evenly and develops a fantastic crust, you need a cut that’s at least 1.5 inches thick. Anything thinner risks overcooking and drying out before the interior reaches the right temperature. Imagine trying to cook a thin pancake in a hot pan – it'll end up crispy on the outside and raw in the middle. Same principle with steak! A nice, thick cut gives you the time to achieve that perfect balance of tenderness and char.
Marbling: The Key to Juiciness
Next, we’ve got marbling, the streaks of fat that run through the meat. These little veins of fat are the secret to a juicy, flavorful steak. As the fat renders during cooking, it adds richness and moisture, making each bite a delicious experience. When shopping, look for cuts with a good amount of marbling. Personally, I gravitate towards "Choice" or "Prime" grades, as they have a higher fat content. But if you're looking for a leaner option, a "Select" grade can still be delicious, and you can always add a bit of extra fat to the pan to compensate.
The Butcher's Expertise
My advice? Head to a local butcher shop. Butchers are true experts when it comes to meat, and they're usually thrilled to help you find the perfect cut for your needs. Ask them for a steak that's at least 1.5 inches thick, well-marbled, and free of any visible cracks or bruises. And don't hesitate to ask them to trim any excess fat – we want a clean, even surface for searing.
(Part 2) Preparing the Steak for its Close-up
Now that you have your perfect NY strip steak, it's time to prep it for its starring role on your stovetop. This might seem like a simple step, but it's crucial for achieving that beautiful crust and juicy interior. It's like giving your steak a little spa treatment before the big reveal!
Patting It Dry: The Moisture-Free Zone
First, grab some paper towels and give your steak a good pat dry. You want to remove any excess moisture, as it can hinder a proper sear. Moisture turns into steam when heated, which prevents a nice crust from forming. Pat it dry on both sides and the edges to ensure a perfectly even sear.
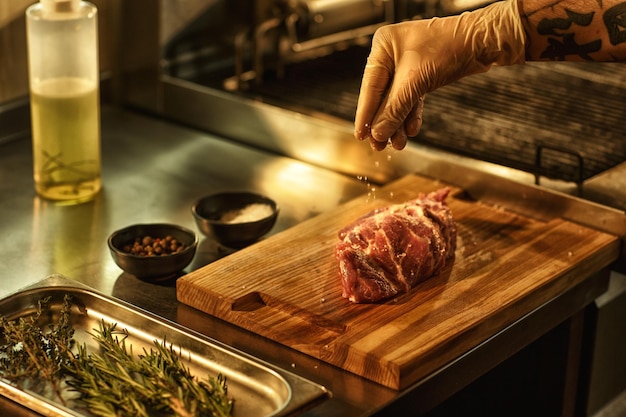
Seasoning: The Flavor Booster
Now for the flavor! Seasoning is where you can add your personal touch. For a classic approach, I go with a simple blend of kosher salt and freshly ground black pepper. Use a generous amount of kosher salt – it coats the steak evenly and draws out moisture, helping it cook more evenly. Plus, it adds a nice, crunchy texture to the crust. Don't worry about over-salting, you can always adjust later.
The Art of Resting
Once your steak is seasoned, let it rest at room temperature for about 30 minutes. This allows the meat to come to room temperature, ensuring that it cooks evenly. You'll notice a difference in the final result – a perfectly cooked steak that's juicy throughout.
(Part 3) The Grand Entrance: The Sear
Alright, the moment you've been waiting for – the sear! This is where we create that beautiful, golden-brown crust that locks in the juices and enhances the flavor. Think of it as the first act of your steak's culinary performance.
Heating Up the Stage: The Hot Pan
Grab your favorite cast iron skillet (or a heavy-bottomed stainless steel pan) and place it over medium-high heat. Let it heat up for about 5-7 minutes – we want that pan scorching hot! If you're using a gas stove, you'll know it's ready when the pan starts to smoke. For an electric stovetop, use the highest setting and keep a close eye on it. Safety first! Use a heat-resistant glove when handling the hot pan.
A Touch of Fat: The Lubricant
Now, add a generous amount of fat to your hot pan. A combination of olive oil and butter is my go-to. The olive oil has a high smoking point, which is essential for a good sear. The butter adds richness and a delightful aroma. Once the fat is shimmering and almost smoking, you’re ready for the grand finale.
Searing the Steak: A Dance of Heat
Carefully place your steak in the hot pan. You'll hear a satisfying sizzle as it hits the pan. Let it cook undisturbed for about 3-4 minutes per side. Resist the urge to move it around! We want to give the steak a chance to develop a beautiful crust. You'll know it's time to flip when the edges start to brown and the steak releases easily from the pan. If it sticks, give it another minute or two.
Don't Forget the Sides: A Complete Transformation
Once you’ve seared the top and bottom, use tongs to gently rotate the steak by 90 degrees and sear the sides for another minute on each. This ensures even cooking and adds another layer of delicious flavor.
(Part 4) Reaching Peak Doneness: The Thermometer's Role
Now you have a beautifully seared steak, but we're not quite there yet! It's time to cook the steak to your desired doneness. This is where the meat thermometer comes in handy – it eliminates the guesswork and ensures a perfectly cooked steak every time.
internal temperature: A Guide to Perfection
Here's a handy guide for internal temperatures, a must-have for any steak enthusiast:
| Doneness | Internal Temperature (°F) | Internal Temperature (°C) |
|---|---|---|
| Rare | 125-130 | 52-54 |
| Medium Rare | 130-135 | 54-57 |
| Medium | 140-145 | 60-63 |
| Medium Well | 150-155 | 66-68 |
| Well Done | 160 | 71 |
Even Cooking: The Stovetop's Continued Role
Reduce the heat to medium-low and continue cooking the steak, flipping it every 2-3 minutes. Use your meat thermometer to check the internal temperature every couple of minutes. When the steak reaches your desired temperature, remove it from the pan and let it rest.
Resting: A Moment of Relaxation
Now, the most important step – resting. Resist the urge to dig in right away. Let your steak rest for 5-10 minutes before slicing and serving. This allows the juices to redistribute throughout the steak, resulting in a more tender and juicy piece of meat. You'll be amazed at the difference it makes!
(Part 5) Serving Up Your Masterpiece: A Feast for the Senses
Your steak is cooked to perfection, it's rested, and now it's time to enjoy your culinary masterpiece. But before you dig in, let's add a few finishing touches to elevate this dish from good to extraordinary.
The Pan Sauce: Liquid Gold
While your steak is resting, make a delicious pan sauce. This is the secret to unlocking the full potential of your steak. Simply add a splash of red wine or beef broth to the pan and scrape up all the tasty bits from the bottom of the pan. These browned bits are packed with flavor. Bring the liquid to a simmer and let it reduce for a few minutes, until it thickens slightly. Season with salt and pepper to taste. The result is a rich, flavorful sauce that will take your steak to a whole new level.
Garnish and Presentation: A Visual Delight
Slice your steak against the grain for easier chewing and to release those flavorful juices. Serve it with your favorite sides – roasted potatoes, grilled asparagus, mashed potatoes, creamed spinach, or a side salad are all excellent choices. But don't be afraid to experiment! And finally, drizzle that delectable pan sauce over your steak for a final touch of culinary magic.
(Part 6) Navigating Challenges: Troubleshooting Common Issues
Cooking a steak can be a bit of a learning curve, especially for beginners. But don't worry, I've been there, and I'm here to guide you through some common problems. Remember, practice makes perfect, and even experienced cooks can encounter occasional hiccups.
Steak Stuck to the Pan: The Temperature Check
If your steak is sticking to the pan, it's probably because the pan isn't hot enough or you're overcrowding the pan. Reduce the heat, let the pan heat up again before adding the steak, and cook one steak at a time.
Steak is Too Tough: The Overcooking Mistake
If your steak is tough, it's likely that you overcooked it. To avoid this, use a meat thermometer and stick to the recommended internal temperatures. And remember, that resting period is key for tenderizing the steak.
Steak is Not Seared Properly: The Heat Factor
If your steak isn't properly seared, the pan might not be hot enough, or you might not be letting the steak cook long enough on each side. Make sure your pan is smoking hot and let the steak cook undisturbed for 3-4 minutes per side.
(Part 7) Beyond the Basics: Advanced Techniques
Now that you’ve mastered the fundamentals of cooking a perfect stovetop NY strip steak, let's delve into some advanced techniques to take your steak game to the next level. These techniques add another layer of complexity and sophistication to your culinary repertoire.
reverse searing: Slow and Steady
For an extra juicy and tender steak, try reverse searing. This technique involves cooking the steak in a low oven (around 250°F) until it reaches an internal temperature just below your desired doneness. Then, you sear the steak over high heat for a few minutes to create a beautiful crust. This method ensures the steak cooks evenly without overcooking and results in a steak that's exceptionally tender and juicy.
Brining: A Moisture Boost
Brining is another technique that can dramatically improve the tenderness and juiciness of your steak. Simply soak your steak in a salt water solution for several hours before cooking. The salt draws out moisture and then redistributes it throughout the meat, making it more tender and flavorful.
Herbs and Spices: Flavorful Enhancements
Don't be afraid to get creative with herbs and spices! A simple garlic rub, a sprinkle of smoked paprika, or a dash of dried thyme can add a whole new dimension of flavor to your steak. Experiment and find your favorite combinations!
(Part 8) The Personal Touch: Your culinary journey
Cooking a perfect stovetop NY strip steak is an art form – it's about finding what works best for you, and it's about enjoying the process. Don't be afraid to experiment and adjust the recipe to your own preferences. Add a dash of your favorite spice, try a different fat for searing, or experiment with different sides. The beauty of cooking is that it allows you to express your creativity and put your own personal touch on every dish. It's about embracing the journey of learning and creating in the kitchen.
I've always loved the simplicity and satisfaction of cooking a perfect steak on the stovetop. It's a reminder that sometimes, the best things in life are the simplest. So, next time you're craving a good steak, ditch the takeout and try your hand at this easy and delicious recipe. You might just surprise yourself with how easy it is to create a culinary masterpiece right in your own kitchen. And who knows, you might even impress yourself (and a few others) along the way.
FAQs
- Q: What temperature should I cook my NY strip steak to?
- A: The internal temperature of your steak depends on your desired doneness. Rare: 125-130°F (52-54°C), Medium Rare: 130-135°F (54-57°C), Medium: 140-145°F (60-63°C), Medium Well: 150-155°F (66-68°C), Well Done: 160 °F (71 °C).
- Q: Can I cook my NY strip steak in the oven instead of on the stovetop?
- A: Yes, you can cook your NY strip steak in the oven. Preheat your oven to 400°F (200°C), place your steak on a baking sheet, and cook for about 10-15 minutes, depending on the thickness of the steak and your desired doneness. However, you won't get the same beautiful sear you get on the stovetop.
- Q: What are some good sides to serve with NY strip steak?
- A: There are endless possibilities for sides to serve with NY strip steak. Some classic options include roasted potatoes, grilled asparagus, mashed potatoes, creamed spinach, and a side salad.
- Q: What kind of wine should I pair with NY strip steak?
- A: NY strip steak pairs well with a variety of red wines, such as Cabernet Sauvignon, Merlot, Pinot Noir, and Zinfandel. You can also try a full-bodied white wine, like a Chardonnay or Sauvignon Blanc.
Everyone is watching

How to Cook Frozen Lobster Tails Perfectly: A Step-by-Step Guide
RecipesLobster. Just the word conjures up images of lavish meals, special occasions, and a taste of luxury. But let's...

Pork Fillet Cooking Time: How Long to Cook It Perfectly
RecipesPork fillet, or tenderloin as it's sometimes called, is a real favourite in our house. It's so versatile, and...

Pigs in a Blanket Cooking Time: How Long to Bake for Perfect Results
RecipesAh, pigs in a blanket. Just the name conjures up images of those delightful little parcels of crispy pastry en...

The Ultimate Guide to Cooking Delicious Frankfurters
RecipesLet's face it, we all love a good frankfurter. It's a classic, simple, and always satisfying. But let's be rea...

Wolf Meat Recipes: A Guide to Cooking Wild Game
RecipesLet's be honest, you don't see wolf meat at your local butcher shop every day. It's a bit of a wild card, but ...