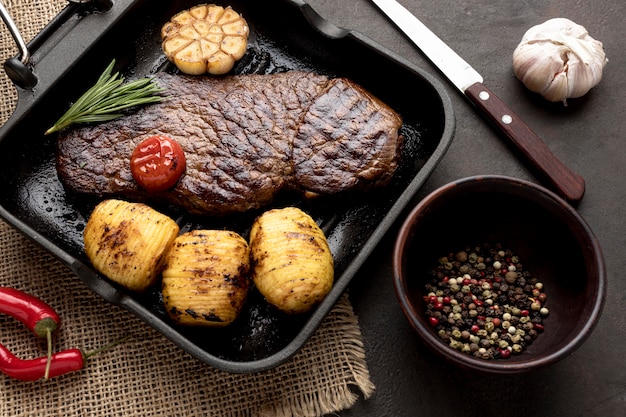
You know that feeling, don’t you? The one where you're picturing a perfectly cooked steak, the kind that melts in your mouth with every bite. It’s got a beautiful sear, the crust is perfectly crisp, and the inside is juicy and pink. It's the kind of steak that makes you close your eyes and sigh in pure contentment. You’ve dreamt of this for ages, and you’re finally ready to tackle it. But then the doubts creep in. How can you get that perfect sear without overcooking the inside? What’s the secret to getting that juicy, flavorful result? Believe me, I’ve been there. I’ve had my fair share of dry, tough steaks in the past. But after years of trial and error, I’ve cracked the code. This is your one-stop guide to cooking the perfect steak in a frying pan, and I promise, it’s easier than you think. So grab your favourite cut of beef, a good quality frying pan, and let’s get started.
(Part 1) choosing the right steak

The first step to cooking a perfect steak is choosing the right cut. It’s all about knowing your beef. I’ve learned that different cuts are better suited for different cooking methods, and for a frying pan, you want a cut that’s relatively thin and has a good amount of marbling. This ensures a steak that cooks quickly and evenly, resulting in that perfect balance of a crispy exterior and a juicy, tender interior.
1. The Classic Choice: Ribeye
Let’s be honest, the ribeye is a classic for a reason. It’s got a rich, buttery flavour, and the marbling makes it incredibly juicy and tender. Imagine the perfect blend of succulent fat and lean meat, delivering a symphony of flavour with every bite. Plus, it holds its shape beautifully when you sear it, resulting in those gorgeous grill marks. If you’re looking for a crowd-pleasing steak, ribeye is definitely the way to go. It's a showstopper, guaranteed to impress even the most discerning palate. You’ll often see this referred to as a "rib roast" in butcher shops, and it's a wonderful option for a larger gathering.
2. The Affordable Choice: Sirloin
If you're on a tighter budget, sirloin is a fantastic alternative. It’s leaner than ribeye, but still has a good amount of flavour. Just make sure to choose a sirloin that’s well-marbled, as this will help to keep it juicy. It’s perfect for a quick weeknight meal, and it’s often available in smaller sizes, making it ideal for solo dinners or couples. Plus, you can often find it at a more affordable price point without sacrificing quality.
3. The Unexpected Choice: skirt steak
Now, this one might surprise you. Skirt steak is known for its incredible flavour and tenderness, but it’s also known for being a bit tougher. Think of it as a delicious challenge, a hidden gem waiting to be discovered. The trick is to slice it thinly against the grain before cooking. This makes it easier to cook quickly and evenly, resulting in a steak that’s tender and juicy. It’s a great option for stir-fries, tacos, or even just a quick and easy dinner. And the flavour is something truly special.
(Part 2) Getting Your Steak Ready

Once you’ve chosen your steak, it's time to get it ready for cooking. Here's where the magic happens. You want to create a steak that's begging to be devoured!
1. The Art of Patting Dry
First things first: pat your steak dry with paper towels. This is a crucial step, as it helps to create a crispy sear. If you leave the steak wet, it will steam instead of sear, resulting in a soggy crust. Think of it like a wet sponge - it just won't brown as well! So, give it a good pat down, ensuring that it's as dry as possible.
2. Seasoning with Care
Now, this is where you get to be creative. I always start with salt and pepper, as they’re the basics for a good steak. But you can also add other seasonings like garlic powder, onion powder, or even paprika. The key is to use a generous amount of seasoning, ensuring that every surface of the steak is coated. It's like giving it a warm embrace of flavour!
3. The Magic of Olive Oil
Remember that beautiful sear we talked about earlier? Well, olive oil is your secret weapon for achieving that. But here’s the thing: you don’t want to drown the steak in oil. Just a light drizzle will do the trick. Too much oil will create a greasy steak, and we’re aiming for a perfectly balanced flavour. Imagine a beautiful, crisp crust that doesn't feel heavy or oily. That's the goal!
4. The Resting Time
Once your steak is seasoned and oiled, let it rest at room temperature for about 30 minutes. This allows the steak to come to room temperature, which makes it cook more evenly. It’s like letting the steak relax before its big moment! This will prevent the steak from being shocked by the sudden change in temperature when you place it in the hot pan, which can lead to uneven cooking.
(Part 3) Choosing the Right Pan

You’ve got your steak ready, but now it’s time to choose the right pan. This isn’t just about any old pan; you want something that can handle the heat and give your steak that perfect sear.
1. Cast Iron: The Classic Choice
Cast iron is a classic for a reason. It’s incredibly durable and heats up evenly, making it perfect for achieving a crispy sear. Plus, it gets seasoned over time, which adds a delicious flavour to your steak. Think of it like a patina, a beautiful layer of seasoning that enhances the flavour of your steak. Just make sure to use a well-seasoned cast iron pan, as a rusty one won’t give you the best results.
2. Stainless Steel: The Versatile Option
Stainless steel is a great all-around pan that’s perfect for both searing and sautéing. It’s less prone to rust than cast iron, making it easier to clean. Just make sure to choose a pan with a thick base, as this will help to prevent hot spots. This ensures that your steak cooks evenly, without any areas becoming overly cooked.
3. Carbon Steel: The Pro’s Choice
This one is for the more experienced cooks. Carbon steel is lightweight and heats up quickly, making it great for searing. But it’s also more reactive than other pans, so it requires a bit more care. If you’re willing to learn the ropes, carbon steel can be a fantastic investment. It's a pan that rewards the chef with incredible results, but it does require a bit more attention.
(Part 4) Getting Your Pan Hot
You’ve got your pan chosen, now it’s time to get it blazing hot. This is crucial for achieving that perfect sear.
1. The High Heat Trick
I know it might sound intimidating, but you really want to crank up the heat on your stove. The goal is to get the pan so hot that it almost starts to smoke. This will create a crispy crust and seal in the juices. It's like creating a barrier, preventing the precious juices from escaping and keeping your steak tender and juicy.
2. The Oil Test
To make sure your pan is hot enough, add a drop of oil to it. If it starts to sizzle and smoke almost immediately, you’re ready to go. If it doesn’t, then your pan needs a bit more heat. It's like a little test, ensuring that your pan is ready to handle the heat of your steak.
(Part 5) The Art of Searing
We've reached the moment of truth, the crucial step in making your steak absolutely perfect. This is where the real skill comes in. Remember that beautiful sear we've been talking about? It's time to make it happen!
1. Laying Down the Steak
Carefully place your steak in the hot pan, making sure not to overcrowd it. The goal is to give your steak plenty of room to breathe and cook evenly. If you crowd the pan, the steak will steam instead of sear, and we don’t want that! Think of it like giving your steak a little space to shine.
2. The Time to Shine
Now, resist the urge to move the steak around too much. The key is to leave it undisturbed for about 3-4 minutes on each side. This will allow the steak to develop a beautiful, crispy crust. Don't worry about it sticking to the pan at first. Just let it do its thing. It will come loose eventually! The longer you leave it alone, the more beautiful and delicious that crust will become.
3. The Flip
After about 3-4 minutes, use tongs to flip the steak over to the other side. Again, resist the urge to touch it too much. Let it cook for another 3-4 minutes until it develops a nice crust. Remember, patience is key here! You're creating a work of art, and it takes time to perfect.
4. The Sides
If you want to add some extra flavour and grill marks, you can sear the sides of the steak for a minute or two. Just make sure to use your tongs to carefully rotate the steak, ensuring that it doesn’t fall apart. Think of it like adding a little extra touch of flavour and artistry to your steak.
(Part 6) Achieving the Perfect Doneness
We’re almost there! Now we’re talking about the desired level of doneness, a crucial step in creating that perfect steak experience.
1. The Temperature Check
I always recommend using a meat thermometer to get the most accurate reading. There are different doneness levels for steak, so here’s a guide for your reference:
| Doneness | internal temperature |
|---|---|
| Rare | 125°F (52°C) |
| Medium-Rare | 130-135°F (54-57°C) |
| Medium | 140-145°F (60-63°C) |
| Medium-Well | 150-155°F (66-68°C) |
| Well Done | 160°F (71°C) |
2. The Finger Test
If you don’t have a meat thermometer, you can use the finger test to estimate the doneness. Simply press on the middle of the steak and compare the firmness to your finger. Rare will feel soft, medium-rare will feel slightly firm, and well-done will feel very firm. This is a great option if you don't have a meat thermometer, but remember, it's just an estimate.
3. The Rest Time
Once your steak is cooked to your desired doneness, remove it from the pan and let it rest for 5-10 minutes before slicing. This allows the juices to redistribute throughout the steak, resulting in a more tender and flavorful result. It's like a little timeout for the steak to relax and regain its composure.
(Part 7) The Ultimate Sauce
What’s a perfect steak without a perfect sauce? Think of the sauce as the finishing touch, the cherry on top, or the sprinkles on a cupcake. It's the element that elevates your steak from good to extraordinary.
1. The Simple Approach: Butter and Herbs
You don't need to get fancy. A simple pan sauce can be just as delicious. Just add a knob of butter to the hot pan, and let it melt. Then add your favorite herbs, like thyme, rosemary, or sage. Once the butter is melted and fragrant, pour it over your steak. Think of it as a warm, herby embrace that intensifies the flavours of your steak.
2. The Savory Twist: Red Wine Sauce
For a more complex flavor, try a red wine sauce. Add a splash of red wine to the hot pan and let it reduce until it’s thick and syrupy. Then add a knob of butter and stir until it’s melted and emulsified. This will create a rich, savory sauce that complements the steak beautifully. It's a touch of sophistication that elevates your steak to new heights.
3. The Creamy Option: Blue Cheese Sauce
If you’re feeling adventurous, try a blue cheese sauce. Just crumble some blue cheese into the hot pan and let it melt. Then add a splash of cream and stir until it’s smooth and creamy. This will create a tangy, flavorful sauce that’s perfect for steak lovers. It's a bold choice, a flavour explosion that will surprise and delight your taste buds.
(Part 8) Serving and Enjoying
The moment we’ve all been waiting for is finally here! Time to enjoy the fruits of your labour.
1. The Ultimate Presentation
Now that your steak is cooked to perfection and has rested, it's time to slice it and plate it beautifully. I love to use a sharp knife to slice it thinly against the grain. This helps to ensure that the steak is tender and easy to chew. Then, I like to arrange the slices on a plate, perhaps with a sprinkle of fresh herbs or a drizzle of sauce. It’s time to turn your masterpiece into art.
2. The Perfect Sides
No steak is complete without a few delicious sides. I like to keep things simple and pair my steak with roasted vegetables, a side salad, or a creamy mashed potato. But you can get as creative as you like! Remember, the sides should complement your steak, not overpower it.
3. The Time to Indulge
It’s time to savor every bite! Take a moment to appreciate the beautiful sear, the juicy center, and the delicious flavors. Let the steak melt in your mouth, and enjoy the sense of accomplishment that comes with cooking a perfect steak. You’ve earned it!
FAQs
You’ve made it this far, but you may have some lingering questions. Here are answers to some of the most common questions I get:
- What if my steak is too thick? If your steak is too thick, you can always use a meat mallet to tenderize it before cooking. This will help to ensure that the steak cooks evenly. It's like giving your steak a little massage, making it more tender and ensuring that it cooks evenly.
- What if my steak is sticking to the pan? If your steak is sticking to the pan, it’s likely because the pan isn’t hot enough. Increase the heat and try again. You can also try to use a little more oil. It's like giving your pan a little more encouragement, letting it know that it's time to get to work!
- Can I cook a steak in a cast iron skillet? Absolutely! A cast iron skillet is perfect for cooking steak. Just make sure to preheat it over medium-high heat before adding the steak. It's a classic combination, a timeless duo that delivers incredible results.
- How long should I let my steak rest? It’s best to let your steak rest for 5-10 minutes before slicing. This will allow the juices to redistribute throughout the steak, resulting in a more tender and flavorful result. Think of it as a little break for your steak to recover from its culinary journey.
- Can I use a different type of oil? You can use a different type of oil, but I recommend using a high-heat oil, such as avocado oil or grapeseed oil. These oils have a higher smoke point, which means they won’t burn as easily. Think of it like choosing the right tool for the job, ensuring that your oil can handle the heat without burning.
Everyone is watching

How to Cook Frozen Lobster Tails Perfectly: A Step-by-Step Guide
RecipesLobster. Just the word conjures up images of lavish meals, special occasions, and a taste of luxury. But let's...

Pigs in a Blanket Cooking Time: How Long to Bake for Perfect Results
RecipesAh, pigs in a blanket. Just the name conjures up images of those delightful little parcels of crispy pastry en...

Pork Fillet Cooking Time: How Long to Cook It Perfectly
RecipesPork fillet, or tenderloin as it's sometimes called, is a real favourite in our house. It's so versatile, and...

The Ultimate Guide to Tender, Juicy Pulled Pork
RecipesRight, let's talk pulled pork. It's one of those dishes that just screams "comfort food," doesn't it? I mean...

The Ultimate Guide to Cooking Sweet Potatoes: From Roasting to Mashing
RecipesSweet potatoes. Just the name conjures up images of warm, comforting dishes, bursts of vibrant color, and a to...
