Let's talk steak, the kind that makes your mouth water just thinking about it. The kind that melts in your mouth, leaving you wanting more. That's what I'm aiming for, and I'm here to share my secrets with you. I've been grilling, pan-frying, and even oven-roasting steaks for years now, and I've learned a thing or two along the way. From choosing the perfect cut to mastering the sear, I've got you covered. So, grab your apron, put on some good tunes, and let's get cooking!
(Part 1) choosing the right cut
The first step to a perfect steak is choosing the right cut. You wouldn't use a cheap chuck roast for a tenderloin, would you? It's all about understanding the different cuts and their unique qualities. Let's break it down:
1.1. The Classics: steak cuts You Know and Love
There are a few cuts that are always a good bet for steak. These are the ones you'll find at most butchers and supermarkets, and they're all incredibly delicious:
- Rib-Eye: The king of steaks, the ribeye boasts a beautiful marbling of fat, which melts during cooking, making it incredibly juicy and flavorful. It's also got a nice, thick cut, which makes it great for grilling or pan-frying. Think of a ribeye as the steak that can do no wrong - it's a crowd-pleaser for a reason.
- Sirloin: Another popular choice, sirloin is a leaner cut than ribeye, but it still packs a punch in terms of flavor. It's a bit more affordable too, making it a great option for a weeknight dinner. The sirloin is a versatile steak, perfect for grilling, pan-frying, or even oven roasting.
- new york strip: This cut is known for its bold flavor and tender texture, and it's a classic choice for steak lovers. It's long and thin, making it perfect for grilling or pan-frying. You can dress it up or down with a variety of sauces and sides. The New York Strip is perfect for those who appreciate a steak with a bit more bite.
- Tenderloin (filet mignon): This is the most tender cut of beef, and for a reason. It's a real treat, but it's also the leanest, so it can be a bit more expensive. But trust me, it's worth it for the melt-in-your-mouth texture. If you're looking for a steak that's all about tenderness, the filet mignon is the one for you.
1.2. Beyond the Classics: Exploring Other steak cuts
If you're feeling adventurous, there are a few other cuts worth exploring:
- flank steak: Flank steak is known for its strong flavor and chewy texture. It's best cooked to medium-rare and sliced thin for sandwiches or stir-fries. It's a fantastic option for a quick and easy meal, especially if you're looking for something with a bolder flavor.
- skirt steak: Similar to flank steak, skirt steak is also flavorful and chewy. It's often marinated before grilling or pan-frying, and it can be served with a variety of sauces and sides. It's a great choice for those who like a bit of a challenge, as it requires some skill to cook properly.
- Top Sirloin: This is a more affordable cut of sirloin, making it a great option for those on a budget. It's still a delicious steak, with a good amount of flavor. It's leaner than ribeye, but it's a great choice for grilling, pan-frying, or even oven roasting. It's a good option for those who want a more affordable yet delicious steak.
1.3. Getting the Right Thickness: Finding the Perfect Steak Size
You don't want a steak that's so thin it cooks in a flash, do you? And you don't want a steak that's so thick you end up with a raw centre, either. Ideally, you're aiming for a steak that's about 1 to 1.5 inches thick. This will allow you to get a nice sear on the outside while still cooking the inside to your desired level of doneness. A good thickness ensures even cooking and a perfect balance of texture and flavor.
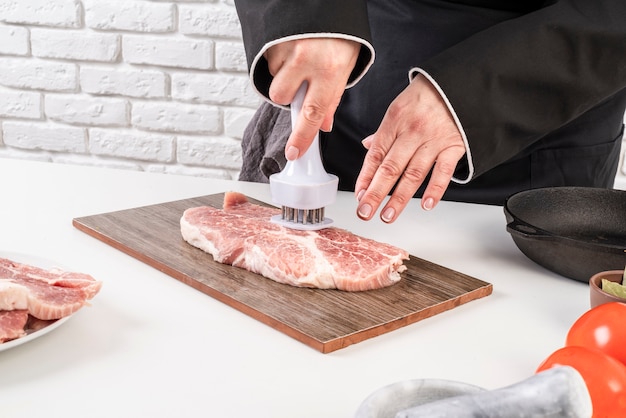
(Part 2) Getting Ready to Cook: Prepping for Steak Success

Right, now you've got your perfect steak, but before you even think about firing up the grill or pan, you've got to give it some love. Preparation is key to unlocking the full potential of your steak.
2.1. The Power of Rest: Allowing Your Steak to Relax
Don't just throw your steak in the pan right away! Let it rest at room temperature for about 30 minutes. This allows the steak to come to a more even temperature, which means it'll cook more evenly and you'll have a better chance of achieving that juicy, perfectly pink interior. Think of it as giving your steak a chance to breathe and get ready for its starring role.
2.2. The Magic of Seasoning: Enriching Your Steak with Flavor
Salt is your best friend, trust me. Don't be shy with it! Season your steak generously with kosher salt about 30 minutes before you cook it. This will draw out moisture from the surface of the steak, which helps to create a better crust. And don't forget about pepper! Freshly cracked black pepper adds a lovely burst of flavor. Salt and pepper are the foundation of a great steak, but don't be afraid to experiment with other spices like garlic powder, onion powder, or paprika.
2.3. Oil Up for Success: Creating a Non-Stick Barrier
Before you hit the heat, give your steak a good coat of oil. This will help to prevent sticking and ensure that your steak gets a nice, even sear. You can use any neutral oil like vegetable oil or canola oil. A light coating of oil is all you need to create a perfect sear and prevent your steak from sticking.
(Part 3) Grilling for Glory: The Ultimate Steak Experience
Alright, let's talk about grilling. This is where things get really fun! Grilling adds a unique smoky flavor and beautiful grill marks to your steak, taking it to the next level.
3.1. Prepping Your Grill: Setting the Stage for a Perfect Sear
First things first, you need to make sure your grill is super hot. I'm talking about high heat, like around 500°F. If you have a gas grill, preheat it for about 15 minutes. If you have a charcoal grill, get those coals nice and white hot. A hot grill is essential for creating a beautiful crust and locking in the juices of your steak. Don't be afraid to let the grill get really hot - it's worth it for that perfect sear.
3.2. Direct Heat for a Perfect Sear: Sizzling Steak Success
When you're ready to grill, place your steak directly over the heat. You want to hear that beautiful sizzle, and you want to see those grill marks start to form. Don't move the steak around too much, let it get a good sear on each side. This initial sear is crucial for creating a flavorful crust and preventing the steak from drying out.
3.3. Flip, Flip, Flip: Creating Those Beautiful Grill Marks
After about 3 to 4 minutes per side, flip your steak. You want to create those lovely crosshatch grill marks, so rotate your steak by 90 degrees before you flip it. Now, you can start to reduce the heat a little bit, if you like. You want to finish cooking your steak over medium heat to get it to your desired doneness. Those grill marks are not just for show - they help to distribute the heat evenly and create a more flavorful steak.
3.4. The Art of Patience: Watching Your Steak Cook
Remember, this isn't a race. The best steaks are cooked slowly and carefully. Keep an eye on your steak and adjust the heat accordingly. Use a meat thermometer to check the internal temperature. Here's a handy guide:
| Doneness | Internal Temperature (°F) |
|---|---|
| Rare | 125-130°F |
| Medium-Rare | 130-135°F |
| Medium | 140-145°F |
| Medium-Well | 150-155°F |
| Well-Done | 160°F and above |
3.5. Resting Time: Allowing Your Steak to Recover
Once your steak is cooked to your liking, don't be tempted to dive in right away! Let it rest for 5 to 10 minutes before slicing. This will allow the juices to redistribute, resulting in a more tender and flavorful steak. Think of this as the steak's cooldown period, allowing the juices to settle and the meat to relax after its grilling ordeal.
(Part 4) Pan-Frying for Perfection: A Simple Yet Delicious Method
If you don't have a grill or you just prefer the convenience of pan-frying, no problem. Here's how to achieve a perfect steak in a pan:
4.1. The Right Pan: Choosing the Right Equipment for Steak Success
You want a heavy-bottomed pan that will distribute heat evenly. Cast iron or stainless steel pans are ideal. Make sure your pan is nice and hot before you add your steak. You want to hear that sizzling sound. The right pan is essential for creating a beautiful sear and ensuring your steak cooks evenly.
4.2. Searing Like a Pro: Mastering the Art of the Sear
Place your steak in the hot pan and let it sear for about 3 to 4 minutes per side. You want to create a beautiful crust on the outside. Don't move the steak around too much, let it get a good sear. The sear is what gives your steak that amazing crust and locks in the juices.
4.3. The Flip is Key: Adding Butter for Flavor
After you've seared both sides, reduce the heat to medium and flip your steak. You can also add a knob of butter to the pan at this point, which will add extra flavor and moisture. Continue cooking the steak for a few more minutes, depending on your desired level of doneness. Adding butter is a classic technique for enhancing the flavor and tenderness of your steak.
4.4. Temperature is Key: Checking Your Steak's Doneness
Just like with grilling, use a meat thermometer to check the internal temperature of your steak. You want to make sure it's cooked to your liking. Once it's reached your desired doneness, remove the steak from the pan and let it rest for 5 to 10 minutes before slicing. A meat thermometer is your best friend for achieving the perfect level of doneness.
(Part 5) Oven-Roasted Steak: The Simple Option for Delicious Results
Let's face it, sometimes you just want a fuss-free way to cook steak. Enter, the oven! Oven-roasting is a great option for those who want a hands-off approach to cooking a delicious steak.
5.1. The Oven Advantage: Easy and Versatile
The great thing about oven-roasting is that it's easy and it allows you to cook multiple steaks at once. It's also a great option if you're worried about burning your steak on the grill. It's a great way to cook steak if you're short on time or don't have a grill.
5.2. Setting the Stage: Prepping Your Oven for Steak Success
Preheat your oven to 400°F. Place a rack in the middle of your oven and make sure it's nice and hot. A hot oven is key to cooking a steak evenly and achieving a beautiful crust.
5.3. The Roast Process: Cooking Your Steak to Perfection
Place your steak on a baking sheet and roast for about 10 to 15 minutes per side, depending on your desired level of doneness. Use a meat thermometer to check the internal temperature. Once it's reached your desired doneness, remove the steak from the oven and let it rest for 5 to 10 minutes before slicing. The oven is a great tool for cooking steak consistently to the perfect level of doneness.
5.4. Adding Flavor: Elevate Your Oven-Roasted Steak
While oven-roasting might seem basic, you can still add some flavor to your steak. Try adding some herbs and spices to the baking sheet before you add your steak, or even use a marinade. You can also add some vegetables to the baking sheet for a complete meal. There's no need to settle for a boring oven-roasted steak. Experiment with herbs, spices, and vegetables to add flavor and depth.
(Part 6) The Art of Resting: Giving Your Steak a Moment to Relax
We've talked about resting your steak before slicing, but what does this really do? It's not just about letting the steak cool down. It's about allowing the juices to redistribute, making your steak more tender and flavorful. You can do this by:
- Transferring it to a cutting board: Place the cooked steak on a cutting board and let it rest for 5 to 10 minutes. Cover loosely with foil to keep it warm. This is the most common method for resting a steak, allowing the juices to settle back into the meat.
- Leaving it in the pan: If you're pan-frying, you can leave the steak in the pan while it rests. Just turn off the heat and cover the pan with a lid or foil. This is a good option if you don't have a cutting board handy.
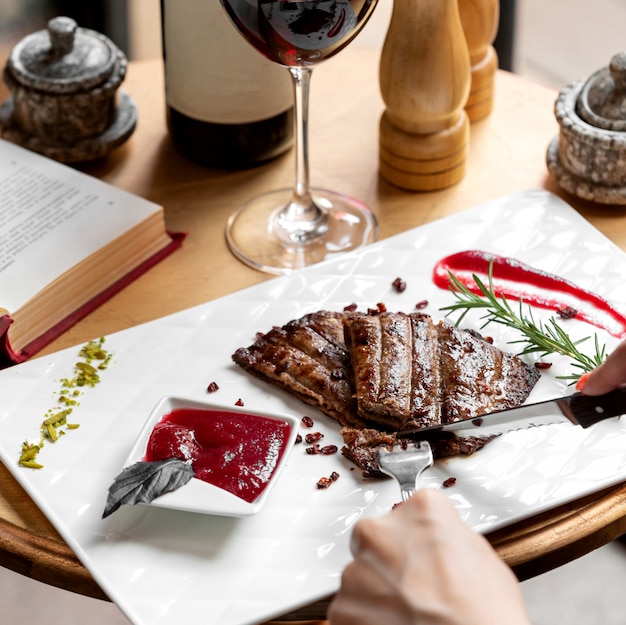
(Part 7) Slicing and Serving: Presenting Your Perfect Steak
The final step! You've cooked your steak to perfection, you've let it rest, now it's time to enjoy. Slicing is an art in itself, and it can really affect the flavour of your steak.
7.1. Against the Grain: Slicing for Optimal Tenderness
This is the key to a tender, juicy steak. When you slice, go against the direction of the muscle fibres. You'll notice that the steak has a grain, running across it. Slice perpendicular to this grain. The steak will be easier to chew and the flavours will be more evenly distributed. Slicing against the grain is essential for creating a tender and flavorful steak.
7.2. The Right Knife: Choosing the Perfect Tool for the Job
Invest in a good quality, sharp knife. You want something that's going to cut cleanly through the steak without tearing it. A chef's knife or a serrated bread knife will do the trick. A sharp knife will make slicing your steak a breeze, ensuring clean cuts and a professional presentation.
7.3. The Finishing Touches: Adding Flavor and Style
Once your steak is sliced, it's time to get creative! You can serve it with a variety of sides, sauces, and toppings. Here are a few ideas:
- Sides: Roasted vegetables, mashed potatoes, fries, salad. These are classic steak sides that complement the flavor of the steak and offer a balanced meal.
- Sauces: Béarnaise sauce, chimichurri sauce, red wine sauce. Sauces can add a burst of flavor and complexity to your steak, enhancing the overall dining experience.
- Toppings: Blue cheese, garlic butter, grilled onions. Toppings can add a touch of excitement and unique flavor to your steak.
(Part 8) Mastering the Doneness: Understanding the Different Levels of Doneness
I've mentioned checking the temperature of your steak, but how do you really know what you're looking for? Here's a quick guide to the different levels of doneness, based on the colour and texture of the inside of the steak:
- Rare: Red throughout, with a cool, slightly firm centre. A rare steak is for those who like their steak on the less cooked side, with a cool center.
- Medium-Rare: Mostly red, with a warm, slightly pink centre. Medium-rare is a popular choice for steak lovers, with a warm, pink center and a tender texture.
- Medium: Mostly pink, with a warm, slightly brown centre. Medium steak is a good balance of pink and brown, offering a slightly firmer texture than medium-rare.
- Medium-Well: Mostly brown, with a small amount of pink in the centre. A medium-well steak has a mostly brown interior with a touch of pink, providing a firmer texture and a less juicy bite.
- Well-Done: Completely brown throughout, with no pink. A well-done steak is for those who prefer their steak fully cooked, with a brown interior and a firmer texture.
(Part 9) Beyond the Basics: Elevate Your Steak Skills
Now you've got the basics down, let's talk about taking your steak skills to the next level. These techniques will help you unlock the full potential of your steak and create a truly unforgettable dining experience.
9.1. Mastering Marinades: Adding Flavor and Tenderness
Marinades can add amazing flavor to your steak, tenderise it, and even give it a nice colour. There are endless possibilities, but here are a few basic ingredients to consider:
- Acids: Lemon juice, lime juice, vinegar. These help to tenderise the meat and add a bright flavour. Acids like lemon juice or vinegar help to break down the tough muscle fibers in the steak, making it more tender.
- Oils: Olive oil, vegetable oil. These help to keep the meat moist and add richness. Oils provide lubrication and help to prevent the steak from drying out during the cooking process.
- Herbs and Spices: Garlic, onion, oregano, rosemary, pepper. These add flavour and aroma. Experiment with different herbs and spices to create unique and flavorful marinades.
9.2. The Art of Rubs: Adding Flavor Without Marinating
Rubs are a great way to add flavour to your steak without having to marinate it for a long time. You can simply rub the steak with a blend of herbs and spices before cooking. Rubs are a quick and easy way to add depth of flavor to your steak without the need for lengthy marinating.
9.3. The Perfect steak sauce: Enhancing the Flavor Profile
A good steak sauce can really elevate the flavour of your steak. Here are a few things to consider:
- Balance: A good steak sauce should have a balance of sweet, salty, and savory flavours. The perfect steak sauce should have a balance of flavors to complement the steak, without overwhelming it.
- Thickness: You want a sauce that's thick enough to coat the steak, but not so thick that it's overpowering. The sauce should be thick enough to cling to the steak but not so thick that it masks the flavor of the meat.
- Ingredients: Consider using high-quality ingredients, such as fresh herbs, spices, and vinegar. Using high-quality ingredients will make a huge difference in the flavor of your steak sauce.
(Part 10) FAQs: Addressing Your Steak-Related Questions
Okay, you've read through my guide, but you're still wondering about a few things? No problem, I've got you covered. Here are some frequently asked questions about cooking steak:
10.1. What is the best type of steak for grilling?
Rib-eye, New York Strip, and Sirloin are all excellent choices for grilling. They have a good amount of marbling, which makes them juicy and flavorful, and they hold up well to high heat. You can also grill a thicker cut, like a porterhouse or a T-bone. These cuts have a good balance of fat and lean meat, making them ideal for grilling.
10.2. How do I know when my steak is done?
The best way to determine doneness is to use a meat thermometer. But, if you don't have one, you can also use the touch method. Press on the centre of the steak. If it feels soft, it's rare. If it feels springy, it's medium-rare. If it feels firm, it's medium. If it feels hard, it's well-done. A meat thermometer is the most accurate way to check doneness, but the touch method can be helpful if you're in a pinch.
10.3. What should I do if my steak is overcooked?
Don't worry, it happens to the best of us! If your steak is overcooked, it's still edible, but it won't be as tender or juicy. You can try slicing it thinly and serving it with a sauce to add moisture. If you're really adventurous, you can try to make a steak tartare with it. Overcooked steak can still be salvaged - try slicing it thinly and serving it with a sauce to add moisture.
10.4. Can I freeze steak?
Yes, you can freeze steak, but it's best to freeze it in a sealed, airtight container or vacuum-sealed bag. This will help to prevent freezer burn. When you're ready to use it, defrost it in the refrigerator overnight. And remember, freezing can affect the texture of the meat, so it's best to use frozen steak for dishes like stews or ground meat. Freezing steak is a great way to preserve it, but it can affect the texture, so it's best to use it for dishes that don't require a tender texture.
10.5. How long can I keep steak in the fridge?
You can keep steak in the refrigerator for 3 to 5 days. Make sure to store it in the coldest part of your fridge, and don't let it sit out at room temperature for more than two hours. Properly storing steak in the refrigerator will help to maintain its freshness and quality.
Everyone is watching

How to Cook Frozen Lobster Tails Perfectly: A Step-by-Step Guide
RecipesLobster. Just the word conjures up images of lavish meals, special occasions, and a taste of luxury. But let's...

Pigs in a Blanket Cooking Time: How Long to Bake for Perfect Results
RecipesAh, pigs in a blanket. Just the name conjures up images of those delightful little parcels of crispy pastry en...

Pork Fillet Cooking Time: How Long to Cook It Perfectly
RecipesPork fillet, or tenderloin as it's sometimes called, is a real favourite in our house. It's so versatile, and...

The Ultimate Guide to Cooking Delicious Frankfurters
RecipesLet's face it, we all love a good frankfurter. It's a classic, simple, and always satisfying. But let's be rea...

Wolf Meat Recipes: A Guide to Cooking Wild Game
RecipesLet's be honest, you don't see wolf meat at your local butcher shop every day. It's a bit of a wild card, but ...