A Personal Journey with Rice Pilaf
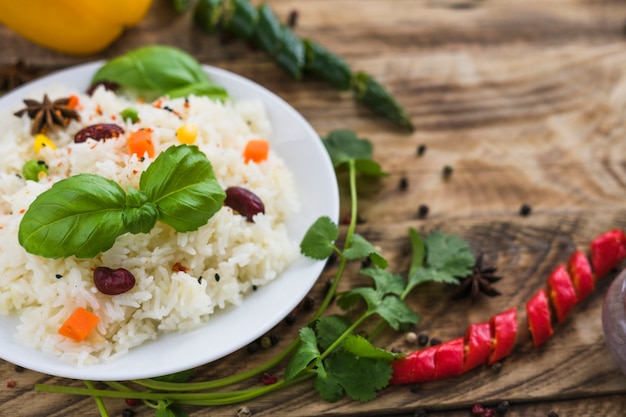
My love affair with rice pilaf started way back in university. Back then, I was a student living on a shoestring budget. I remember one cold evening, when I was craving something warm and comforting, I decided to try my hand at making rice pilaf. I had just a few basic ingredients in my tiny kitchen, but with a little bit of experimentation, I managed to create a dish that was both delicious and satisfying. That first success sparked my passion for creating this simple yet elegant dish. It's a dish that's evolved with me, reflecting my culinary growth and allowing me to explore different flavours and textures.
Over the years, I've perfected my rice pilaf recipe and have learned a few tricks along the way. I've experimented with different flavour combinations, trying out exotic spices, herbs, and even a touch of citrus. I've also learned the importance of proper rice-to-liquid ratio, the art of toasting the rice, and the secret to achieving that perfect fluffy texture. I've even taken a few cooking classes to deepen my understanding of the subtleties involved in creating a truly exceptional pilaf.
(Part 2)choosing the right rice
The first step to a perfect rice pilaf is choosing the right rice. Now, I know what you're thinking – isn't all rice the same? Well, not quite! Different types of rice have different cooking properties and lend themselves to different dishes. Some are best for sticky rice dishes, others for fluffy and separate pilafs.
The Best Rice for Pilaf
For a pilaf, you want a rice that will cook up fluffy and separate, not mushy and sticky. I've tried a fair few over the years, but these are my top picks:
- basmati rice: This long-grained rice is my absolute favourite for pilaf. It has a delicate flavour and a beautiful fluffy texture. It's also relatively easy to find in most supermarkets. The grains cook up beautifully with a slight separation, which is perfect for a pilaf. It has a slightly nutty flavour and a delicate aroma, which makes it a lovely addition to any dish.
- jasmine rice: This fragrant rice is another good choice. It has a slightly sweet flavour and cooks up with a lovely, slightly sticky texture. It's perfect for pilaf recipes that call for a more flavourful rice, like those with citrus or aromatic spices. It's a little more sticky than basmati, but still cooks up nicely.
- Calrose rice: This medium-grain rice is a good option if you're looking for a rice that cooks up a little more sticky. It's a bit less fluffy than basmati or jasmine, but it's still a good choice for pilaf, especially if you're using a lot of vegetables or meat in your dish. This rice can absorb a lot of flavour, and it's a good option if you're looking for a more hearty pilaf.
When selecting your rice, be sure to check the date on the package and choose a fresh bag for the best results. Stale rice won't cook up as evenly or have the same flavour as fresh rice.
(Part 3)Toasting the Rice: A Secret to Flavor
Toasting the rice is a crucial step in making a truly flavourful pilaf. It brings out the inherent nuttiness of the rice and gives it a beautiful, toasted aroma. It's a simple step, but it makes a world of difference in the final dish.
How to Toast Rice
- Heat a large pan over medium heat: I usually use a heavy-bottomed pot or skillet. Make sure it's nice and hot. The heat needs to be evenly distributed for the rice to toast properly.
- Add the rice: Pour in the rice and cook, stirring frequently, for about 2-3 minutes. You'll want the rice to turn a slightly opaque colour and have a nutty aroma. Be careful not to burn it!
- Be careful not to burn the rice: Keep a close eye on it, and if it starts to brown too quickly, reduce the heat a bit. You want a golden colour, not black! Burnt rice will ruin the flavour of your pilaf.
Toasted rice takes your pilaf to another level. You'll be amazed at the difference it makes! It's a simple step, but it adds a depth of flavour and complexity that will have your guests asking for seconds.
(Part 4)The Perfect Rice-to-Liquid Ratio
The key to fluffy, perfectly cooked rice is getting the rice-to-liquid ratio right. This might seem like a simple thing, but it's actually quite important. Too much liquid, and your rice will be mushy. Too little, and it will be dry and undercooked. You want a balance to achieve that perfect, fluffy texture.
The Golden Ratio
For a basic rice pilaf, I use a 1:1.5 ratio of rice to liquid. So, for every cup of rice, I use 1.5 cups of liquid. This works perfectly for most types of rice, but you might need to adjust it slightly depending on the type of rice you're using.
For example, basmati rice tends to absorb more liquid than other types of rice, so you might need to use a slightly higher liquid-to-rice ratio. If you're using a more starchy rice like Calrose, you might need to use a slightly lower liquid-to-rice ratio.
(Part 5)The Magic of Stock
Here's a little secret that takes your rice pilaf to the next level: use stock instead of plain water. Stock adds an incredible depth of flavour that you won't get with just water. It's like magic!
Stock Options
You can use any type of stock you like, but my favourites are:
- Chicken stock: It adds a rich, savoury flavour to the rice. It's a classic choice for a reason.
- Vegetable stock: It's a great option for vegetarians or anyone who prefers a lighter flavour. It's also a good choice if you're making a pilaf with lots of vegetables.
- Beef stock: This is great for a heartier pilaf, especially if you're serving it with a meat dish. It adds a deep, umami flavour to the rice.
You can even get fancy and use a homemade stock. It's definitely worth the effort if you have the time. Homemade stock adds a level of depth and complexity that you can't get with store-bought stock.
(Part 6)Flavorful Touches: Herbs, Spices, and More
Now it's time to get creative and add some flavour to your rice pilaf. The beauty of this dish is that you can add whatever you like. It's like a blank canvas, just waiting for your culinary imagination to run wild!
My Go-To flavor combinations
Here are some of my favourite flavour combinations that I've discovered over the years:
| Flavor Profile | Ingredients |
|---|---|
| Mediterranean | Chopped onion, garlic, diced tomatoes, dried oregano, and a pinch of saffron. The saffron adds a subtle floral note that complements the other flavours perfectly. |
| Indian | Sliced onions, diced tomatoes, ginger-garlic paste, ground cumin, turmeric, garam masala, and coriander. You can adjust the amount of spice to your taste. |
| Persian | Chopped onion, garlic, barberries, pistachios, and saffron. Barberries add a tart, tangy note, and the pistachios add a nice crunch. |
| Classic | Chopped onion, minced garlic, fresh parsley, and a squeeze of lemon juice. This simple combination is surprisingly delicious and adds a bright, fresh flavour to the rice. |
Don't be afraid to experiment and come up with your own unique flavour combinations. That's the fun part of cooking, right?
(Part 7)Cooking the Rice: Mastering the Technique
Okay, so you've got your rice, your stock, and your flavourful additions. Now it's time to bring it all together and cook up a storm!
Cooking Steps
- Heat the stock in a large pot: Bring the stock to a simmer. Don't let it boil too hard, as this will evaporate too much of the liquid.
- Add the rice and other ingredients: Pour in the toasted rice, along with any onions, garlic, spices, or vegetables you're using. Stir gently to combine everything.
- Bring the mixture to a boil, then reduce heat and simmer: Cover the pot and simmer for about 15-20 minutes, or until the rice is tender and most of the liquid has been absorbed. You want to cook the rice until it's al dente, meaning it's slightly firm to the bite.
- Let the rice rest: Once the rice is cooked, remove it from the heat and let it rest, covered, for about 10 minutes. This will allow the rice to steam and become even more fluffy. The resting period is crucial for achieving that perfect texture.
Don't lift the lid while the rice is cooking! You want the steam to help the rice cook evenly. And resist the temptation to stir it, as this will break the rice grains and make it mushy. Just be patient and let it do its thing.
(Part 8)Fluffing the Rice
After the rice has rested, it's time to fluff it up. This is the final step in creating that perfect texture.
Fluffing Technique
- Use a fork: Gently fluff the rice with a fork. Be careful not to overwork it. You want to gently separate the grains without crushing them.
- Add a bit of butter or oil: For extra richness and shine, add a knob of butter or a drizzle of olive oil to the rice. This will also help to keep the rice moist and prevent it from sticking together.
Now you have a beautiful, fluffy rice pilaf, ready to be served. It's almost too pretty to eat!
(Part 9)Serving Suggestions
Rice pilaf is incredibly versatile. It can be served with almost anything. It's a perfect accompaniment to roasted chicken, grilled fish, curries, stews, and even salads. I love serving it with a simple, bright salad for a satisfying and healthy meal.
Here are a few of my favourite serving ideas:
- Chicken and Rice Pilaf: A classic combination, perfect for a comforting weeknight dinner. You can use roasted chicken, grilled chicken, or even leftover rotisserie chicken.
- grilled salmon and Rice Pilaf: The delicate flavour of the salmon pairs perfectly with the fluffy rice. You can add a squeeze of lemon juice to the pilaf for an extra burst of flavour.
- lentil soup and Rice Pilaf: A hearty and satisfying meal for a cold winter day. The lentil soup provides a warm and comforting base, while the rice adds a nice contrast in texture.
- Shrimp and Rice Pilaf with Lemon and Herbs: A bright and flavourful dish that's perfect for a summer evening. You can use fresh herbs like dill, parsley, and tarragon for a lovely, fresh flavour.
The possibilities are endless! Get creative and have fun with it.
(Part 10)FAQs
Here are some frequently asked questions about rice pilaf:
1. Can I use leftover rice for a rice pilaf?
I wouldn't recommend using leftover rice for a rice pilaf. Leftover rice tends to be dry and clumpy, and it won't cook up as fluffy as fresh rice. It's best to use fresh rice for a pilaf.
2. How can I make my rice pilaf more flavourful?
There are so many ways to add extra flavour to your rice pilaf. You can try adding different spices, herbs, vegetables, citrus, or even nuts and dried fruit. Don't be afraid to experiment and find what you like best!
Here are a few ideas for adding extra flavour:
- Use a flavorful stock, like chicken, vegetable, or beef stock.
- Add a pinch of saffron for a subtle floral note.
- Stir in some chopped herbs, like parsley, cilantro, or dill.
- Toss in some chopped vegetables, like peas, carrots, or bell peppers.
- Add a squeeze of lemon juice or a splash of vinegar for a bright, tangy flavour.
- Incorporate toasted nuts or seeds for a crunchy texture.
- Add some dried fruit, like raisins or cranberries, for a touch of sweetness.
3. Can I make rice pilaf ahead of time?
Yes, you can definitely make rice pilaf ahead of time. Just let it cool completely and store it in an airtight container in the fridge for up to 3 days. To reheat, simply microwave it until it's warm.
You can also freeze cooked rice pilaf. To freeze, let it cool completely, then transfer it to a freezer-safe container or bag. Thaw in the fridge overnight before reheating.
4. What if my rice is too mushy?
If your rice is too mushy, it's likely because you used too much liquid. There's not much you can do to fix it, but you can try fluffing it up with a fork and adding some butter or oil to help improve the texture.
5. What if my rice is too dry?
If your rice is too dry, you can try adding a little more liquid and simmering it for a few more minutes. Just be careful not to overcook it. You can also add a knob of butter or a drizzle of oil to help moisten the rice.
I hope this guide has inspired you to try making your own rice pilaf. It's a simple dish that is incredibly versatile and rewarding to make. Have fun experimenting, and remember, there's no such thing as a perfect rice pilaf, only your own personal favourite!
Everyone is watching

How to Cook Frozen Lobster Tails Perfectly: A Step-by-Step Guide
RecipesLobster. Just the word conjures up images of lavish meals, special occasions, and a taste of luxury. But let's...

Pigs in a Blanket Cooking Time: How Long to Bake for Perfect Results
RecipesAh, pigs in a blanket. Just the name conjures up images of those delightful little parcels of crispy pastry en...

Pork Fillet Cooking Time: How Long to Cook It Perfectly
RecipesPork fillet, or tenderloin as it's sometimes called, is a real favourite in our house. It's so versatile, and...

The Ultimate Guide to Tender, Juicy Pulled Pork
RecipesRight, let's talk pulled pork. It's one of those dishes that just screams "comfort food," doesn't it? I mean...

The Ultimate Guide to Cooking Delicious Frankfurters
RecipesLet's face it, we all love a good frankfurter. It's a classic, simple, and always satisfying. But let's be rea...