Ah, the rib eye. Just the name conjures up images of those beautiful, marbled cuts, glistening with juicy potential. It’s a classic for a reason, isn’t it? That rich, buttery flavour, the melt-in-your-mouth texture… it’s truly irresistible. But grilling a perfect rib eye, well, that’s a whole other story. You don’t want to end up with a dry, tough piece of meat, do you? No, we're aiming for that juicy, tender steak that makes your taste buds sing. So, grab your tongs, get your grill hot, and let’s dive into my ultimate guide to grilling the absolute best rib eye you've ever tasted.
(Part 1) choosing the right cut: The Foundation of a Great Steak

Remember, a great steak starts with a great cut. And when it comes to rib eye, not all are created equal. You want that beautifully marbled cut, the one that promises a symphony of flavor in every bite. It's the key to achieving that succulent, juicy texture we’re aiming for. You want marbling throughout, not just in a few spots. When I'm at the butcher, I'll often ask for their recommendation - they're the experts, after all, and they’re always happy to point you in the right direction.
Understanding the Different Grades of Beef
You'll often see terms like "Select," "Choice," and "Prime" used to describe the quality of beef. Here's the lowdown:
- Select: This is the most affordable grade, but it has less marbling, resulting in a leaner, less flavorful steak.
- Choice: A step up from Select, Choice has more marbling, resulting in a more flavorful and tender steak. This is usually the grade you'll find at most grocery stores.
- Prime: This is the top-of-the-line grade, known for its abundant marbling and rich flavor. Prime cuts are typically found at specialty butchers or upscale supermarkets.
So, when choosing your rib eye, consider your budget and desired level of flavor. If you're looking for a truly exceptional experience, go for a Prime cut. But for everyday grilling, Choice will do just fine.
Choosing the Right Thickness
Next, consider thickness. I'm a firm believer in the “thicker the better” philosophy when it comes to rib eye. A thicker cut allows for even heat distribution, resulting in a more evenly cooked steak. You want that beautiful sear on the outside, but you want the inside to be perfectly medium-rare, not overcooked and dry. A thicker cut gives you that balance. I usually aim for a steak that's at least 1.5 inches thick, but if you can find one that's even thicker, go for it! It's worth the extra bit of grilling time, trust me.
(Part 2) Preparing the Steak: Getting Ready to Grill

You've got your beautiful piece of rib eye, now it's time to get it ready for the grill. This isn’t just about throwing it on the grill and hoping for the best. You need to prep it properly to ensure a delicious, juicy steak.
Bringing the Steak to Room Temperature
First things first, take your steak out of the fridge and let it sit at room temperature for at least 30 minutes. This might seem like a small detail, but it makes a huge difference. When you take a cold steak straight from the fridge and put it on the grill, the outside cooks faster than the inside, leading to an unevenly cooked steak. By letting it warm up to room temperature, you ensure that the entire steak cooks evenly. Plus, a warmer steak sears better on the grill, resulting in a beautiful crust.
Seasoning the Steak: Simple and Effective
Now, for the seasoning. Don’t overthink it. Salt and pepper are your best friends here. They really allow the flavour of the meat to shine through. You can use other seasonings, but I find that a simple salt and pepper rub is all you need. A good rule of thumb is to season liberally, but don't overdo it. You want the seasoning to enhance the natural flavour of the steak, not overwhelm it.
For a more flavorful rub, consider adding a pinch of garlic powder, onion powder, or paprika. But remember, the key is to let the natural flavour of the steak shine through.
(Part 3) Grilling the Steak: The Art of the Cook

Alright, it's showtime! This is where the real magic happens. You've chosen the right cut, you've prepped it properly, now it's time to get that rib eye onto the grill. Remember, this is a process, not a race. Take your time, relax, and enjoy the grilling experience.
Getting Your Grill Ready: Hot and Ready
First, get your grill nice and hot. You want a high heat, around 450-500 degrees Fahrenheit (232-260 degrees Celsius). Gas grills are great because you can control the temperature easily, but if you're using a charcoal grill, get those coals hot and glowing red. A hot grill will give you a beautiful sear on the outside of your steak, which helps to lock in the juices.
The Two-Zone Grilling Method: Mastering Heat Control
Now, here's where things get interesting. The secret to a perfect rib eye is to use the two-zone grilling method. What does that mean? You divide your grill into two zones: a hot zone and a cool zone. The hot zone is where you'll sear your steak, and the cool zone is where you'll finish cooking it. This allows for a perfect sear on the outside and a juicy, tender interior.
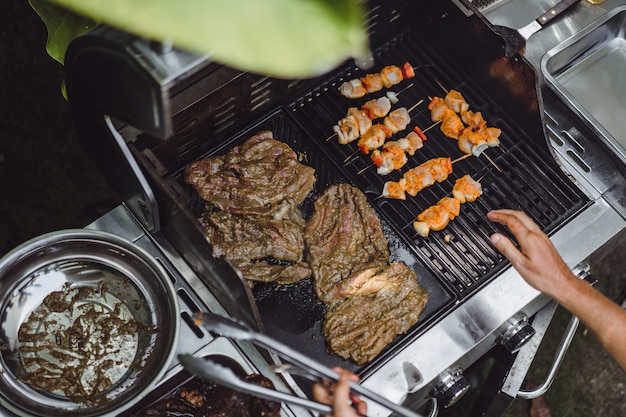
If you're using a gas grill, simply turn off the burners on one side to create the cool zone. For charcoal grills, push the hot coals to one side, creating a cooler area on the other side of the grill.
Searing the Steak: The Art of the Crust
Place your steak on the hot zone of the grill. You'll hear that beautiful sizzle as the steak hits the grill. Now, don't move it! Let it sit for a good 3-4 minutes per side. This will create a beautiful crust on the outside of the steak. You want that crust to be crispy and flavorful. Don't be tempted to flip it too early; patience is key!
During this searing process, avoid poking or prodding the steak. You want to give it a chance to develop that beautiful crust without disrupting the cooking process.
(Part 4) Finishing the Steak: Getting That Perfect Doneness
Okay, the steak is beautifully seared, now it's time to finish cooking it to your desired level of doneness. This is where you'll use the cool zone of your grill. You want to move the steak off the hot zone and onto the cool zone to avoid overcooking it.
Understanding Doneness: A Personal Preference
Before we continue, let's talk about doneness. This is a personal preference, but I prefer my rib eye to be cooked medium-rare, which is 130-135 degrees Fahrenheit (54-57 degrees Celsius). Here's a quick guide to different doneness levels:
| Doneness | internal temperature (°F) | Internal Temperature (°C) |
|---|---|---|
| Rare | 120-125 | 49-52 |
| Medium-Rare | 130-135 | 54-57 |
| Medium | 140-145 | 60-63 |
| Medium-Well | 150-155 | 65-68 |
| Well-Done | 160 | 71 |
Remember, these are just guidelines. You can adjust the internal temperature based on your own taste preferences.
Checking for Doneness: The Finger Test and meat thermometer
You can check for doneness using a meat thermometer or the finger test. For the finger test, press on the thickest part of the steak. If it feels similar to the texture of your palm, it's rare. If it feels like your thumb, it's medium-rare. If it feels like the tip of your finger, it's medium.
While the finger test can be helpful, a meat thermometer provides a more accurate measurement of internal temperature, ensuring that your steak is cooked to your precise liking.
Finishing the Cooking Process: Patience is Key
Once the steak is on the cool zone, let it cook for another 5-7 minutes per side, flipping it once, until it reaches your desired level of doneness. This slow and gentle cooking process ensures that the steak cooks evenly without drying out.
Avoid flipping the steak too frequently during this stage. This can disrupt the cooking process and lead to uneven cooking.
(Part 5) Resting the Steak: Letting It Relax
Right, your steak is cooked to perfection. But before you dig in, it needs to rest for a few minutes. This is crucial for a juicy, tender steak. Think of it like letting the steak catch its breath after its grilling adventure.
Why Resting is Important: Trapping Those Juices
Resting allows the juices to redistribute throughout the steak. When you cut into a steak that hasn't rested, the juices run out, leaving you with a dry, disappointing piece of meat. But by letting it rest, you trap those delicious juices in the meat, resulting in a more flavorful, tender steak. I usually let my steak rest for 10-15 minutes before slicing and serving.
While the steak is resting, you can prepare your sides and get ready to enjoy your masterpiece.
(Part 6) Serving the Steak: Bringing It All Together
Okay, the moment of truth! Your perfectly grilled rib eye is ready to be enjoyed. This is where you get to put your creativity and culinary skills to work. There are endless possibilities, but I like to keep it simple and let the flavour of the steak shine through.
Sides for a perfect steak: Complementing Flavors
What are your favourite sides to serve with a rib eye? I'm a big fan of roasted vegetables, a simple salad, or creamy mashed potatoes. But you can get creative and add your own flair. The key is to find sides that complement the steak, not overpower it.
For example, asparagus, grilled corn on the cob, and a light vinaigrette salad can create a beautiful balance of flavors and textures alongside the rich, savory steak.
The Finishing Touches: Elevating the Flavor
For the finishing touches, I love a drizzle of olive oil and a sprinkle of fresh herbs. This adds a touch of brightness and freshness to the steak. You can also add a squeeze of lemon juice for a bit of acidity. But remember, keep it simple and let the steak be the star of the show.
Some other finishing touches to consider include a pat of butter, a sprinkle of sea salt, or a drizzle of balsamic glaze. Just be sure to keep it simple and let the natural flavors of the steak shine through.
(Part 7) FAQs: Answering Your Grilling Questions
I know what you're thinking. You've got questions about grilling the perfect rib eye. That's why I've compiled some common questions and answers to help you on your grilling journey.
1. Can I grill a rib eye on a gas grill?
Absolutely! Gas grills are a great option for grilling rib eye. You have more control over the temperature, which is key for achieving that perfect sear and even doneness.
2. How do I know when my rib eye is cooked to medium-rare?
The best way to check for doneness is by using a meat thermometer. You want the internal temperature to be between 130-135 degrees Fahrenheit (54-57 degrees Celsius) for medium-rare. You can also use the finger test, but that's more of a guideline.
3. What happens if I overcook my rib eye?
If you overcook your rib eye, it will be dry and tough. The juices will be lost, and the texture will be less enjoyable. So, pay attention to the cooking time and use a meat thermometer to ensure that your steak is cooked to your desired level of doneness.
4. Can I use a marinade for my rib eye?
Yes, you can absolutely marinate your rib eye. A marinade can add flavor and tenderness to the steak. Just be sure to marinate it for at least 4 hours, or even overnight for best results.
A simple marinade of olive oil, lemon juice, garlic, and herbs can enhance the flavor and tenderness of your rib eye.
5. What's the best way to store leftover rib eye?
Leftover rib eye can be stored in the refrigerator for up to 3-4 days. Wrap it tightly in plastic wrap or aluminum foil to prevent freezer burn. You can also freeze it for up to 2-3 months. Just be sure to thaw it properly in the refrigerator before cooking.
When reheating leftover rib eye, avoid using the microwave, as it can dry out the meat. Instead, reheat it in a low oven or on the stovetop.
(Part 8) Conclusion: Grilling Confidence Unlocked
There you have it, my friends! The ultimate guide to grilling the perfect rib eye. It's all about choosing the right cut, prepping it properly, and grilling it with confidence. Remember, it's a journey, not a destination. Don't be afraid to experiment and find what works best for you. With a little practice and a lot of passion, you'll be grilling the most delicious rib eye in no time. Now, go out there and impress your friends and family with your newfound grilling skills!
I’m sure you’ll be the envy of your neighborhood with your perfect rib eye, and maybe even have a few grilling tips to share of your own. Happy grilling!
Everyone is watching

How to Cook Frozen Lobster Tails Perfectly: A Step-by-Step Guide
RecipesLobster. Just the word conjures up images of lavish meals, special occasions, and a taste of luxury. But let's...

Pigs in a Blanket Cooking Time: How Long to Bake for Perfect Results
RecipesAh, pigs in a blanket. Just the name conjures up images of those delightful little parcels of crispy pastry en...

Pork Fillet Cooking Time: How Long to Cook It Perfectly
RecipesPork fillet, or tenderloin as it's sometimes called, is a real favourite in our house. It's so versatile, and...

The Ultimate Guide to Cooking Delicious Frankfurters
RecipesLet's face it, we all love a good frankfurter. It's a classic, simple, and always satisfying. But let's be rea...

Wolf Meat Recipes: A Guide to Cooking Wild Game
RecipesLet's be honest, you don't see wolf meat at your local butcher shop every day. It's a bit of a wild card, but ...
