For years, baking a pie felt like a culinary mystery to me. The kind of thing that seemed easy enough in theory, but always ended up with a crumbly mess in practice. Those picture-perfect flaky, golden pie crusts in cookbooks felt like a distant dream. Until, finally, I decided to conquer this baking challenge head-on. And guess what? I actually managed to bake a pie crust that didn't crumble into a million pieces the moment I touched it! It was a revelation! So, if you’re a fellow baking novice, let me share my secrets to a perfect pie crust every time, and finally banish those baking frustrations for good.
(Part 1) The Importance of Ingredients
You can’t build a house without strong bricks, and you can't bake a fantastic pie crust without the right ingredients. This isn't just about throwing random stuff into a bowl – it's about quality and precision.
Flour: The Foundation of a Good Crust
I used to think flour was just flour, but oh boy, was I wrong! There's a huge difference between the generic stuff and a good quality all-purpose flour. You need one that'll give you a crust that's both tender and flaky. I’ve found that using a high-protein flour, like King Arthur Flour, is the way to go. It gives the structure for a sturdy crust without being overly tough.
Fat: The Secret to Flaky Goodness
Here's where things get really interesting. You've probably heard that butter is the key to a flaky pie crust. It's true! But it’s not just about using butter; it's also about how you use it. Keep those butter cubes nice and cold, because that's what will give you those beautiful layers and flakiness.
I've tried using shortening as well, and while it does contribute to a flakier crust, it also tends to make it a bit tougher. But if you prefer a more sturdy crust, shortening can be a good option. Ultimately, it's about finding what works best for you.
Salt: Don't Underestimate Its Power
You might be thinking, "Salt? Really?" Yes, really! Salt enhances the flavors of your ingredients, making your pie crust taste even better. I use kosher salt because it has a larger grain size and a less salty flavour, which is important to prevent the crust from being too salty.
Water: The Binding Agent
Just a splash of ice-cold water is all you need to bring the ingredients together. The water should be just cold enough to keep the butter nice and solid. This is crucial because if the butter gets too warm, it'll melt into the flour, and you won't get those beautiful flaky layers.
(Part 2) The Art of Pie Crust Making
Now that your ingredients are ready, it's time to get your hands dirty! The key here is to be gentle, almost like you're handling a delicate piece of silk. The less you work the dough, the flakier the crust will be.
Method 1: The Classic Method
This is my go-to method. It’s simple, straightforward, and always gives me great results. Here's how it works:
- Combine the flour and salt in a large bowl. I use a large bowl to make sure I have enough room to work with.
- Cut in the butter using a pastry blender or two forks. This involves working the butter into the flour until it resembles coarse crumbs. It's a bit of a workout, but it's worth it for the final result.
- Gradually add ice water, one tablespoon at a time, while tossing the mixture with a fork to form a dough.
- Shape the dough into a disk, wrap it tightly in plastic wrap, and chill it in the refrigerator for at least 30 minutes.
Method 2: The Food Processor Method
This method is a bit faster, but it can be tricky to get right. The idea is to use the food processor to combine the ingredients quickly and evenly. Just be careful not to over-process the dough, or you’ll end up with a tough crust.
- Combine the flour and salt in a food processor.
- Add the butter in chunks, and pulse until the mixture resembles coarse crumbs.
- Gradually add ice water, pulsing until the dough comes together.
- Shape the dough into a disk, wrap it tightly in plastic wrap, and chill it in the refrigerator for at least 30 minutes.
Method 3: The Hand Mixing Method
This method involves using your hands to work the butter into the flour. While it takes a bit longer than using a food processor, it gives you more control over the dough. If you prefer a hands-on approach, this is a great option.
- Combine the flour and salt in a bowl.
- Rub the butter into the flour with your fingertips until the mixture resembles coarse crumbs.
- Gradually add ice water, stirring with a fork until the dough comes together.
- Shape the dough into a disk, wrap it tightly in plastic wrap, and chill it in the refrigerator for at least 30 minutes.
(Part 3) Shaping Your Pie Crust
After chilling your dough, it’s time to give it its final form. This is where things can get a bit tricky, but with a little practice, you’ll be a pro in no time.
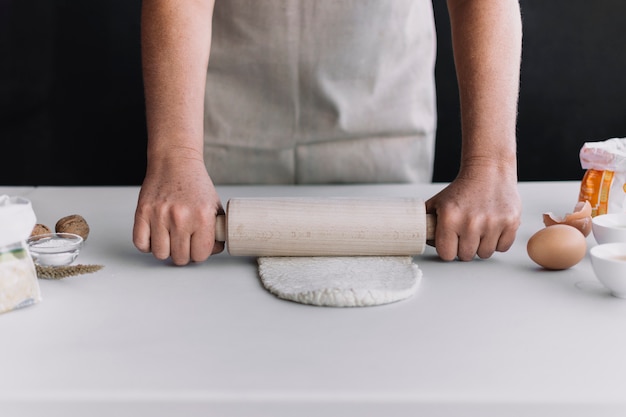
Rolling Out the Dough
Take the dough out of the refrigerator and place it on a lightly floured surface. I find it helpful to use a rolling pin with handles on either end. Roll out the dough until it’s about 1/8 inch thick. Be sure to rotate the dough as you roll it out to prevent it from sticking to the surface. If it does start to stick, simply add a little more flour.
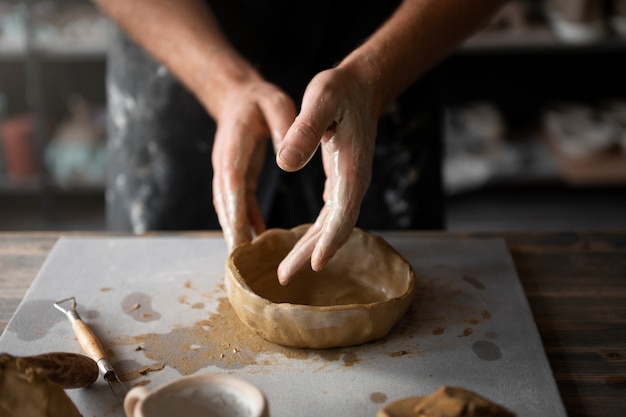
Transferring the Dough to the Pie Plate
Gently lift the rolled-out dough and place it in the pie plate. Make sure to ease the dough into the corners and trim any excess. I find that using a sharp knife works best for trimming the crust. It gives you a nice clean cut, and it helps to prevent the edges from becoming jagged. Once the dough is in place, you can crimp the edges to create a decorative finish. I like to use a fork to crimp the edges, but you can also use your fingers or a pie crimper.
(Part 4) The Baking Process
Now for the moment of truth! You’ve prepared the crust, filled it with your favorite ingredients, and it’s ready to be baked to golden perfection. But there are a few things you need to keep in mind.
blind baking: The Key to a Crispy Crust
Blind baking is the process of baking the pie crust before adding the filling. This is crucial for preventing a soggy bottom crust. To blind bake the crust, you’ll need to prick the bottom of the crust with a fork to prevent air bubbles from forming. Then, cover the crust with parchment paper or foil, and weigh it down with pie weights or dry beans. This will help to keep the crust from shrinking while it bakes.
Bake the crust for 15-20 minutes at 375°F (190°C). Once the crust is lightly golden brown, remove it from the oven and remove the weights and parchment paper. Then, bake it for an additional 5-10 minutes until it's fully cooked.
Filling the Crust
Now, here’s where you get to have some fun. You can use your favorite pie filling recipe, or try something new and exciting. Just remember to make sure that the filling is cooked properly. If you’re using a custard-based filling, be sure to bake it at a lower temperature to prevent it from curdling.
(Part 5) Tips for a Perfect Pie Crust
Okay, you've got the basics down, but let me share a few tips to help you get those perfect pie crusts every single time.
Chill the Dough Thoroughly
As I mentioned before, chilling the dough is crucial for a flaky crust. The colder the butter, the less it will melt during the baking process, which helps to create those flaky layers. I usually chill the dough for at least 30 minutes, but you can chill it for up to 24 hours. Just make sure to take it out of the refrigerator about 30 minutes before you're ready to roll it out.
Don't Overwork the Dough
Remember, the less you work the dough, the flakier the crust will be. So, try to use the least amount of kneading and handling as possible. And if you do find that the dough is a bit too dry, just add a teaspoon or two of ice water at a time. But be careful not to add too much, or the dough will become sticky.
Don’t Forget to Prick the Crust
Pricking the bottom of the crust with a fork is an essential step for preventing air bubbles from forming. This is especially important when blind baking the crust. And if you’re using a pie crust recipe that calls for a lattice top, make sure to prick the top of the crust as well. This will allow steam to escape during the baking process, which will help to prevent the crust from becoming soggy.
Use a Pie Crust Shield
A pie crust shield is a handy tool for preventing the crust from burning during the baking process. It’s basically a metal shield that goes around the edge of the pie plate to protect the crust from the heat. If you don’t have a pie crust shield, you can improvise by covering the edges of the crust with foil.
Let the Pie Rest Before Serving
Once the pie is out of the oven, let it rest for at least 30 minutes before slicing and serving. This will give the filling time to cool and set, which will make it easier to slice and will prevent it from spilling out when you cut into it.
(Part 6) Troubleshooting Common Problems
Baking is a bit like a science experiment. Things don’t always go as planned, and sometimes you might encounter some problems. But don’t panic! Here are a few common problems and how to fix them.
The Pie Crust is Too Tough
The most common reason for a tough pie crust is overworking the dough. Remember to be gentle and use as little kneading and handling as possible. If you find that your dough is already tough, try adding a tablespoon or two of ice water to soften it.
The Pie Crust is Too Dry
If the dough is too dry, it will crumble when you try to roll it out. Just add a teaspoon or two of ice water at a time until the dough comes together. Don’t add too much water, or the dough will become sticky.
The Pie Crust is Soggy
A soggy pie crust is often the result of not blind baking it properly. Make sure to prick the bottom of the crust with a fork, cover it with parchment paper and pie weights, and bake it for 15-20 minutes before adding the filling. If the filling is particularly wet, you may need to bake the crust for a longer time.
The Pie Crust is Shrinking
If the pie crust shrinks while baking, it’s probably because it wasn’t chilled long enough. Make sure to chill the dough for at least 30 minutes before rolling it out. You can also try covering the edges of the crust with foil to prevent them from burning and shrinking.
(Part 7) Exploring Different Pie Crust Flavors
Don't be afraid to get creative with your pie crusts! Here are a few ideas to add some flavor to your baking adventures:
Adding Herbs
For savory pies, consider adding fresh herbs like rosemary, thyme, or oregano to the dough. They add a lovely aroma and a subtle flavor that pairs well with savory fillings. I once made a chicken and mushroom pie with a rosemary crust, and it was a huge hit! It was like having a mini-herb garden in every bite.
Adding Spices
For sweet pies, try adding spices like cinnamon, nutmeg, or ginger. These warm spices complement fruits and custards perfectly. A sprinkle of cinnamon in your apple pie crust is a classic for a reason! It adds a warmth and depth of flavor that just makes the whole pie sing.
Adding Cheese
For a bolder flavor, try adding grated Parmesan cheese to your pie crust. It adds a salty, nutty flavor that pairs well with savory fillings. I've even used cheddar cheese in my pie crusts, and it's surprisingly delicious! It brings a savory, tangy element to the pie crust, which can be a nice contrast to a sweet filling.
Adding Nuts
For a crunchy texture and a nutty flavor, try adding chopped nuts to your pie crust. Pecans, walnuts, and almonds are all great options. I love adding pecans to my pecan pie crust, it just elevates the flavor to another level! The crunchy texture of the nuts adds a delightful contrast to the soft, sweet filling.
(Part 8) Beyond the Basics: pie crust variations
Okay, so now you’re a pie crust pro, but there’s always room to learn more. Let’s explore some fun variations on the classic pie crust.
lattice crust
A lattice crust is a classic and elegant way to top a pie. It's made by weaving strips of dough over the top of the pie. You can get creative with the pattern or stick to a traditional criss-cross design. It adds a beautiful visual element and a crispy texture to your pie.
Double Crust
A double crust pie is a pie with a crust on both the top and the bottom. It’s perfect for pies that need to be completely enclosed, like fruit pies or pot pies. For a double crust pie, you'll need to make two pie crusts, one for the bottom and one for the top. You can use the same recipe for both crusts, or you can try using different flavors or textures. A double crust is ideal for pies that need to be fully contained and prevent any juices from spilling out.
cookie crust
A cookie crust is a fun and delicious alternative to a traditional pie crust. It's made by crushing cookies and then pressing them into the pie plate. You can use any kind of cookie for a cookie crust, but chocolate chip cookies and graham crackers are popular choices. I love making a chocolate cookie crust for my chocolate cream pie. It's rich, decadent, and perfectly complements the filling.
Graham Cracker Crust
A graham cracker crust is a classic base for cheesecakes and other no-bake desserts. It’s made by crushing graham crackers and then pressing them into the pie plate. You can also add butter and sugar to the graham cracker crumbs for a sweeter and more buttery crust. A graham cracker crust provides a nice, crumbly texture and a slightly sweet base for your filling.
FAQs
Here are a few frequently asked questions about pie crusts:
1. Can I use frozen pie crust?
Absolutely! Frozen pie crusts are a great option if you're short on time. Just make sure to thaw them properly before using them. You can also use frozen pie crust for a variety of recipes, from sweet to savory.
2. How long can I keep pie crust in the refrigerator?
You can keep pie crust in the refrigerator for up to 3 days. Just make sure to wrap it tightly in plastic wrap to prevent it from drying out. You can also freeze pie crust for up to 3 months. To freeze pie crust, wrap it tightly in plastic wrap and then place it in a freezer-safe bag. To use frozen pie crust, thaw it in the refrigerator overnight.
3. How can I prevent my pie crust from burning?
There are a few ways to prevent your pie crust from burning. First, make sure to blind bake the crust before adding the filling. This will help to cook the crust evenly and prevent it from burning. You can also cover the edges of the crust with foil to prevent them from burning. And lastly, watch the pie carefully while it's baking and remove it from the oven when it's golden brown.
4. What if my pie crust is too thick?
If your pie crust is too thick, you can try to roll it out again. Just make sure to add a little more flour to the surface to prevent it from sticking. You can also try using a smaller pie plate or baking the pie in a smaller amount of time.
5. What if my pie crust is too thin?
If your pie crust is too thin, it may break when you try to transfer it to the pie plate. You can try to patch the hole with a small piece of dough or you can bake the pie in a smaller amount of time.
And there you have it! Now you’ve got the tools to conquer those pie crusts and finally bake a pie that's as delicious as it looks. Remember, practice makes perfect, and every pie you bake, no matter the outcome, is a step closer to becoming a pie-making master.
Everyone is watching

How to Cook Frozen Lobster Tails Perfectly: A Step-by-Step Guide
RecipesLobster. Just the word conjures up images of lavish meals, special occasions, and a taste of luxury. But let's...

Pigs in a Blanket Cooking Time: How Long to Bake for Perfect Results
RecipesAh, pigs in a blanket. Just the name conjures up images of those delightful little parcels of crispy pastry en...

Pork Fillet Cooking Time: How Long to Cook It Perfectly
RecipesPork fillet, or tenderloin as it's sometimes called, is a real favourite in our house. It's so versatile, and...

The Ultimate Guide to Cooking Delicious Frankfurters
RecipesLet's face it, we all love a good frankfurter. It's a classic, simple, and always satisfying. But let's be rea...

Wolf Meat Recipes: A Guide to Cooking Wild Game
RecipesLet's be honest, you don't see wolf meat at your local butcher shop every day. It's a bit of a wild card, but ...