Let’s be honest, there’s nothing quite like a perfectly cooked steak. That glorious, juicy, and beautifully seared piece of meat is a culinary masterpiece that deserves all the praise it gets. But we've all been there – staring down a tough, chewy steak that’s about as appealing as a week-old sandwich. It's a culinary tragedy!
But fear not, my fellow meat lovers, because I'm about to share my secrets to pan-searing the perfect steak, and it’s easier than you think. I've been a bit of a steak fanatic since I was a teenager, and over the years, I've learned a thing or two about achieving that perfect sear. This isn't just a recipe; it's a journey to steak nirvana. We'll cover everything from choosing the right cut and prepping the steak to mastering the art of pan-searing and crafting a sauce that elevates your masterpiece. So, grab your apron, sharpen your knives, and let’s embark on this delicious adventure together.
(Part 1) The Foundations: Choosing Your Weapon

The Cut: It’s All About the Steak
The first step to pan-searing perfection is picking the right cut. We're not just talking about any old piece of meat here. We’re aiming for a steak that's:
Tender: We want a cut that practically melts in your mouth, not one that requires a lot of chewing.
Flavorful: We want that deep, rich beefy flavor that makes you close your eyes and moan with delight.
Marbled: This is the fat that runs through the muscle, adding flavor and juiciness. Think of it as the steak’s own personal moisturizer.
Thick Enough: We want something thick enough to hold its shape during cooking and develop a nice crust, but not so thick that it’s impossible to cook evenly.
Here are a few popular choices that meet these criteria:
Ribeye: My personal favorite! It's rich, buttery, and marbled to the max. Be prepared to pay a bit more for this luxurious cut.
new york strip: A classic for a reason. It’s leaner than ribeye but still has good flavor and a nice, even texture.
Tenderloin (filet mignon): The most tender cut available, but it can be a bit bland. You'll want to season it generously and serve it with a flavorful sauce.
Sirloin: A good budget-friendly option that offers a good balance of flavor and tenderness.
The Thickness: Getting It Right
When choosing a steak, consider its thickness. A steak that’s about 1 inch thick is ideal for pan-searing. It cooks quickly and evenly, allowing for a nice crust on the outside and a juicy, pink center. Anything less than that, and you risk overcooking the outside before the center is done. Anything more than 1.5 inches, and you’ll need to adjust your cooking time accordingly.
Bringing It Home: Choosing Your Steak
I’m a bit of a snob when it comes to buying my steak. I prefer to buy from a butcher I trust, where I can see the quality of the meat and ask questions. But if you’re hitting the supermarket, here are a few tips:
Look for bright red meat: The color should be a vibrant red, not dull or purplish.
Feel for firmness: The meat should feel firm and springy to the touch, not soft or mushy.
Check for marbling: You want to see streaks of fat running through the muscle.
Avoid any signs of discoloration: This could be a sign of spoilage.
(Part 2) The Preparation: Getting Your Steak Ready

The Rest: Giving Your Steak a Break
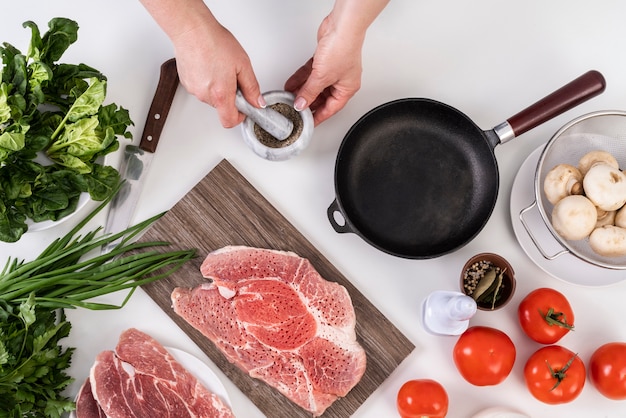
This is crucial. After you've bought your beautiful steak, give it a rest in the refrigerator for at least 30 minutes, preferably up to an hour. This allows the steak to come to room temperature, which is crucial for even cooking. You’ll also want to remove the steak from the fridge about 30 minutes before cooking and pat it dry with paper towels. This will help to ensure that it browns evenly and doesn't steam in the pan.
The Salt: Seasoning Your Steak
Salt is the unsung hero of a great steak. It helps to draw out moisture and season the steak evenly. Salt your steak generously on both sides about 30 minutes before cooking. You can use kosher salt, sea salt, or a blend of salts. Just don’t go overboard – a sprinkle is all you need.
The Pepper: Adding a Touch of Spice
Pepper is another essential seasoning for steak. It adds a bit of heat and helps to enhance the flavor. I like to use freshly ground black pepper, but you can use any type you prefer. Season the steak with pepper right before cooking. You don’t want to overdo it, but a generous sprinkle will do the trick.
The Herbs: Enhancing the Flavour
If you’re feeling adventurous, you can add some herbs to your steak. I’ve always been a fan of fresh rosemary or thyme, but you can also experiment with oregano, basil, or even a pinch of garlic powder. Whatever you choose, sprinkle it generously over the steak right before cooking.
(Part 3) The Tools: Equipping Your Kitchen

The Pan: Choosing the Right Weapon
Now, let’s talk about the heart of this operation: the pan. You need a pan that’s heavy-bottomed and heats evenly. I prefer to use a cast-iron skillet, but a stainless steel or carbon steel pan will also work. The pan should be large enough to accommodate your steak without overcrowding. It should also have a good, thick bottom to distribute heat evenly.
The Oil: Fueling the Fire
Oil is essential for pan-searing. You need something with a high smoke point, like grapeseed, avocado, or peanut oil. Olive oil can work, but it has a lower smoke point, so use it sparingly. You don’t need a lot of oil – just enough to coat the bottom of the pan.
The Thermometer: Getting It Right
A meat thermometer is a must-have for any steak enthusiast. It takes the guesswork out of cooking and ensures that your steak is cooked to your exact preference. There are two types of thermometers: instant-read and probe. I prefer a probe thermometer because it stays in the steak while it’s cooking, allowing you to monitor the temperature in real time.
(Part 4) The Searing: Mastering the Technique
The Heat: Getting the Pan Hot
Heat your pan over medium-high heat. You want the pan to be hot enough to sear the steak quickly and evenly, but not so hot that it burns. I usually let the pan heat up for about 5 minutes before adding the steak. If you add the steak to a cold pan, it will steam instead of sear, resulting in a tough, chewy steak.
The Steak: Putting It to the Test
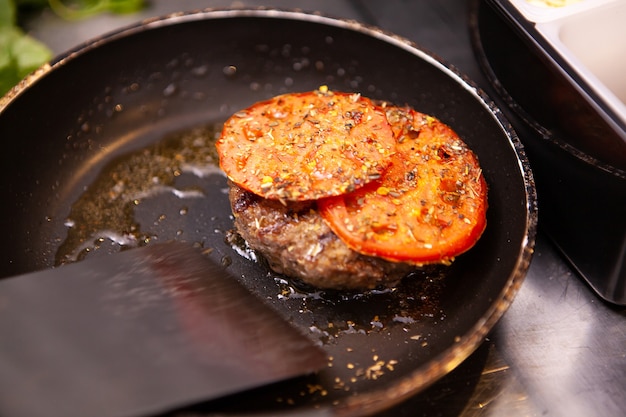
When the pan is hot, add the steak and sear for 2-3 minutes per side. Don’t move the steak around too much, or you’ll interrupt the searing process. You want to let the steak develop a nice crust before flipping it. Let the steak sear until it’s nicely browned and has a crispy crust.
The Flip: Getting It Right
Once the steak is nicely browned, flip it over and sear for another 2-3 minutes. Resist the urge to poke or prod the steak while it’s cooking. It’s best to let it cook undisturbed. This ensures that the steak cooks evenly and doesn’t release all of its juices.
The Sides: Bringing Out the Flavor
Once the steak is cooked to your liking, you can sear the sides. This adds an extra layer of flavour and a bit more crispness. Simply tilt the pan so that the steak is lying on its side and sear for 30 seconds to a minute per side.
(Part 5) The Rest: Giving Your Steak a Chance
The Temperature: Getting It Perfect
Once the steak is cooked to your liking, remove it from the pan and let it rest for 5-10 minutes before slicing and serving. This allows the juices to redistribute throughout the steak, resulting in a more tender and flavorful piece of meat.
The Tent: Keeping It Warm
To keep the steak warm while it’s resting, you can cover it loosely with aluminium foil. This will trap the heat and prevent the steak from cooling down too quickly. But remember, don’t wrap it too tightly, as this can steam the steak and make it soggy.
The Timing: Patience is a Virtue
The time it takes to cook a steak depends on its thickness and your desired level of doneness. Here’s a general guide:
Rare: 125-130°F (52-54°C) – A cool red center with a warm exterior.
Medium-rare: 130-135°F (54-57°C) – The center will be pink and slightly warm.
Medium: 135-140°F (57-60°C) – The center will be mostly cooked through, with a slight pink hue.
Medium-well: 140-145°F (60-63°C) – The center will have a light brown color and be almost fully cooked.
Well-done: 145°F (63°C) or higher – The center will be entirely brown and fully cooked.
The Cut: Getting It Right
Use a sharp knife to slice the steak against the grain. This will make the steak easier to chew and more tender. If you're unsure what "against the grain" means, think of the lines of fat running through the meat. You want to cut perpendicular to those lines.
(Part 6) The Sauce: Elevating Your Steak
The Basics: Keeping It Simple
While a perfectly seared steak is delicious on its own, a simple sauce can take it to another level. There are endless possibilities when it comes to steak sauces, but I prefer to keep it simple.
The Butter: Adding Richness
One of my favourite ways to make a steak sauce is to add a knob of butter to the hot pan after you’ve removed the steak. Let the butter melt and sizzle, then whisk in a tablespoon of fresh herbs, like rosemary or thyme. Season with salt and pepper to taste. The hot butter will infuse with the herbs, creating a rich and flavorful sauce.
The Wine: Bringing Out the Flavor
Another simple but effective sauce is a red wine reduction. After you’ve removed the steak from the pan, add a splash of red wine to the pan and bring it to a simmer. Let the wine reduce until it’s thick and syrupy. Season with salt and pepper to taste. The wine will add a touch of sweetness and acidity to the sauce, complementing the flavor of the steak.
The Mustards: Adding a Touch of Zing
For a touch of zing, you can add a tablespoon of Dijon mustard to your butter or wine sauce. The mustard will add a bit of heat and complexity to the sauce, complementing the richness of the steak.
The Garnishes: Adding the Finishing Touch
Once your steak is cooked to perfection and resting, you can add a few finishing touches. A sprig of fresh rosemary, a sprinkle of chopped parsley, or a pinch of smoked paprika can elevate your dish.
(Part 7) Serving: Presenting Your Masterpiece
The Plate: Setting the Stage
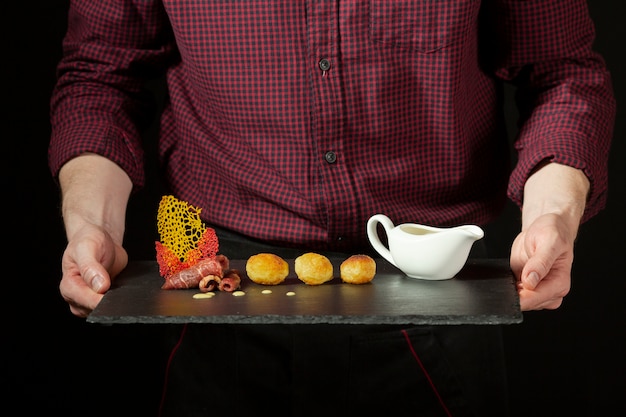
Choose a plate that’s large enough to accommodate the steak and your chosen sauce. I like to use a simple white plate so that the steak and sauce are the stars of the show.
The Presentation: Making it Shine
Carefully arrange your steak on the plate and spoon your sauce over it. You can add a garnish, like a sprig of rosemary or a few slices of cherry tomato, for a pop of color.
The Sides: Completing the Picture
No steak is complete without a side dish. Here are a few of my favorites:
Roasted vegetables: Brussels sprouts, asparagus, or carrots roasted until tender and slightly charred are a classic pairing for steak.
Potato wedges: Crispy, golden brown potato wedges are always a crowd-pleaser.
mashed potatoes: creamy mashed potatoes with a hint of garlic and butter are a comforting and delicious side.
Green salad: A simple green salad with a vinaigrette dressing adds freshness and lightness to the meal.
(Part 8) FAQs: Getting the Answers
1. Can I use a grill pan instead of a regular pan?
Absolutely! A grill pan will give your steak those nice grill marks. Just make sure the pan is hot before adding the steak.
2. What if my steak is too thick?
If your steak is thicker than 1.5 inches, you’ll need to adjust the cooking time. Use a meat thermometer to ensure that the steak is cooked to your desired doneness. You might also consider searing it in a cast iron skillet and then finishing it in the oven to ensure even cooking.
3. Can I sear the steak in a cold pan?
No! You need to heat the pan before adding the steak. A cold pan will steam the steak instead of searing it, resulting in a tough, chewy steak.
4. What if my steak is overcooked?
If you’ve overcooked your steak, there’s not much you can do. But try to cut the steak thinly and serve it with a flavorful sauce to make it more palatable. Adding a dollop of butter or a drizzle of olive oil can help to make it more tender.
5. What’s the best way to reheat steak?
The best way to reheat steak is in a preheated oven at 350°F (175°C) for about 5-10 minutes. This will help to keep the steak moist and tender. Avoid microwaving it, as it can dry out the steak.
So there you have it, my fellow meat lovers: the ultimate guide to pan-searing the perfect steak. With a little practice, you can become a master of this technique, impressing your friends and family with your culinary skills. And remember, the key is to have fun, experiment, and enjoy the process. Happy grilling!
Everyone is watching

How to Cook Frozen Lobster Tails Perfectly: A Step-by-Step Guide
RecipesLobster. Just the word conjures up images of lavish meals, special occasions, and a taste of luxury. But let's...

Pigs in a Blanket Cooking Time: How Long to Bake for Perfect Results
RecipesAh, pigs in a blanket. Just the name conjures up images of those delightful little parcels of crispy pastry en...

Pork Fillet Cooking Time: How Long to Cook It Perfectly
RecipesPork fillet, or tenderloin as it's sometimes called, is a real favourite in our house. It's so versatile, and...

The Ultimate Guide to Cooking Delicious Frankfurters
RecipesLet's face it, we all love a good frankfurter. It's a classic, simple, and always satisfying. But let's be rea...

Wolf Meat Recipes: A Guide to Cooking Wild Game
RecipesLet's be honest, you don't see wolf meat at your local butcher shop every day. It's a bit of a wild card, but ...
