Alright, let's talk steak. You know, that beautiful, juicy, perfectly browned piece of meat that can elevate a simple dinner to a culinary masterpiece. I've been grilling and pan-searing for years, and I've learned a thing or two along the way. There's just something about the satisfying sizzle of a steak in a hot pan that gets my taste buds tingling. And trust me, the difference between a good sear and a great sear is all in the technique. So, grab your trusty skillet, a good quality steak, and let's dive into this ultimate guide to pan-searing perfection.
Part 1: steak selection and Preparation

Let's face it, the star of the show is the steak itself. A good steak is the foundation for an amazing pan-seared masterpiece. choosing the right cut, considering the marbling, and understanding the thickness are crucial steps in achieving a delicious result.
Choosing the Right Cut: Tenderness vs. Flavor
When it comes to pan-searing, there are certain cuts that are ideal. Think about the tenderness you're looking for. For a melt-in-your-mouth experience, go for cuts like ribeye, new york strip, or tenderloin. These cuts are known for their rich marbling and tenderness. If you're after a more robust flavour, consider a sirloin or flank steak. These cuts tend to be leaner and offer a more intense flavor profile.
The Marbling Factor: The Key to Juiciness
Marbling, those streaks of fat running through the meat, is key to juiciness and flavour. Look for steaks with good marbling, especially if you're going for a thicker cut. The fat will render during cooking, adding richness and moisture. You can often identify a good steak by looking for the word "Prime" or "Choice" on the label. These grades indicate a higher level of marbling.
The Thickness Factor: Perfect for High Heat
For pan-searing, I usually go for steaks that are at least 1 inch thick. Thicker steaks can handle higher heat and provide a better sear. They also hold their shape better, preventing them from drying out. However, don't shy away from thinner cuts; just adjust your cooking time accordingly. For thinner cuts, you might want to use a slightly lower temperature to avoid overcooking.
Before the Sizzle: Prepping for a Delicious Sear
There are a few things you can do to prep your steak for a delicious sear. These simple steps will make a big difference in the final outcome.
- Pat it dry: Before you even think about hitting the pan, pat your steak dry with paper towels. This will help achieve a crispy sear instead of a steamy, soggy surface. The moisture on the surface of the steak will create steam, inhibiting the development of a nice crust.
- Seasoning is key: Salt and pepper are your best friends. I love to season generously before the sear. The salt will draw out moisture from the steak, which will help to create a better sear.
- Let it rest: Before you go all in on the pan, give your steak a chance to come to room temperature. This helps it cook more evenly. If the steak is cold, it will take longer to cook and may result in uneven cooking.
Part 2: The Equipment: Your Pan and Your Heat

Now that we've got the steak ready, let's talk about the tools of the trade. The right equipment makes all the difference. A good pan and the right heat are essential for a perfect sear.
The Pan: Your Culinary Canvas
A good pan is essential for a perfect sear. Cast iron is my go-to choice. It distributes heat evenly and retains it well, creating a consistent cooking environment. It also develops a natural patina over time that helps prevent sticking. A heavy-bottomed stainless steel pan can also do the trick. Look for a pan that is heavy and has a thick bottom. This will help ensure even heating and prevent warping.
The Heat: Hot, Hot, Hot!
This is where it gets serious. You want your pan smoking hot before you even think about adding the steak. The high heat is crucial for achieving a beautiful sear.
Here's how to check if your pan is hot enough:
- Water Test: Add a few drops of water to the pan. If it sizzles and evaporates immediately, you're good to go.
- Oil Test: Add a small amount of oil to the pan. It should start to shimmer and smoke very quickly.
If your pan doesn't meet these tests, let it heat up for a few more minutes before adding the steak.
Part 3: The Art of the Sear

Alright, it's showtime! Now that you've got your steak prepped, your pan sizzling, and your nerves steady, let's tackle the sear. This is where the magic happens. The sear is what gives the steak that crispy, flavorful crust. It also locks in the juices, ensuring that the steak is tender and juicy.
The First Touch: Settle It In
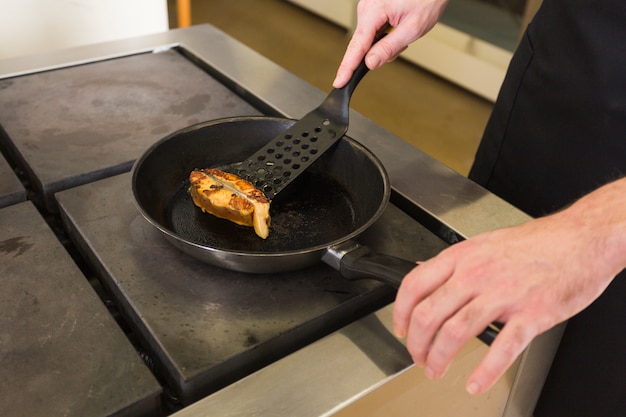
It's a moment of truth. Carefully place your steak in the hot pan. Don't overcrowd the pan; give it some space to breathe. Let the steak settle in, don't move it around for at least 30 seconds to a minute. This is crucial for a beautiful sear. Let the steak create a nice crust on the bottom before you attempt to flip it.
The Flip Technique: Less is More
Here's where things get a little tricky, but don't worry, with practice, you'll get the hang of it. The goal is to create a crusty, flavorful sear without disturbing the steak too much.
- The Don't-Move Method: For thicker steaks, you can even use tongs to flip it instead of a spatula, reducing the risk of disturbing the sear. Just grip the steak firmly and flip it over in one smooth motion.
- The Gentle Slide: For thinner steaks, gently slide a spatula underneath to flip. Make sure the sear is well-formed before you attempt this. If you try to flip the steak too early, the sear will likely break apart.
There's a natural instinct to fidget, but resist the urge to mess with the steak too much. Let it sit, let it sear, and let it achieve that glorious crust.
Part 4: Cooking Time: The Internal Thermometer is Your Guide
The cooking time is going to depend on the thickness of your steak and your desired level of doneness. This is where a trusty meat thermometer becomes your best friend. It's the only way to ensure that your steak is cooked to perfection.
Doneness: A Matter of Preference
Let's talk about the different levels of doneness:
- Rare: 125-130°F (52-54°C) - The steak will be red in the centre and very soft. It will have a delicate texture and a slightly cool centre.
- Medium-Rare: 130-135°F (54-57°C) - A slightly pink centre with a firmer texture. It will have a slightly warmer centre and a more pronounced beef flavour.
- Medium: 140-145°F (60-63°C) - A light pink centre, slightly firmer than medium-rare. It will have a warmer centre and a more pronounced flavour.
- Medium-Well: 150-155°F (65-68°C) - A very faint pink in the centre, with a firm texture. It will have a warmer centre and a more developed flavour.
- Well-Done: 160°F (71°C) or above - A completely brown centre, firmest texture. It will have a fully cooked centre and a more intense flavour.
Remember, this is just a guide, and your preference may vary. If you're unsure about your desired doneness, start with medium-rare and adjust your cooking time accordingly.
Timing is Everything
For a 1-inch thick steak, the cooking time will be roughly 3-4 minutes per side for medium-rare. Thicker steaks may take longer. You can use a meat thermometer to check the internal temperature of the steak as it cooks. Once the steak reaches your desired doneness, remove it from the pan and let it rest.
Don't forget to rest your steak after cooking! It will help the juices redistribute and make for a more tender and juicy experience. Cover the steak loosely with foil and let it rest for 5-10 minutes.
Part 5: Elevate Your Steak: Sauce and Sides
Let's take our pan-seared masterpiece to the next level. A flavorful sauce and perfect sides can transform a simple steak into a complete culinary experience.
The Sauce Factor
There's something magical about a good steak sauce that brings it all together. A well-crafted sauce can enhance the flavour of the steak and create a more satisfying and complete meal.
- Pan Sauce: Don't throw away the pan drippings! You can create a delicious pan sauce by deglazing the pan with wine or stock and adding butter and herbs.
- Compound Butter: Whip up a simple compound butter with garlic, herbs, and lemon zest. It's a flavour bomb that melts beautifully over a hot steak. Just soften some butter and mix in your desired ingredients.
- Store-bought: Don't be afraid to use your favourite store-bought sauce. There are many great options available, from classic béarnaise to chimichurri sauce.
side dish Inspiration
The right side dish can complement your steak beautifully. Here are a few ideas to create a well-balanced meal.
- Roasted Vegetables: A classic pairing that always works. roast vegetables like asparagus, broccoli, or Brussels sprouts alongside your steak.
- mashed potatoes: Creamy and comforting. Mashed potatoes are a classic side dish for steak that provides a contrasting texture and adds richness to the meal.
- Asparagus: A light and refreshing side. Roasted or grilled asparagus is a great way to add a bit of freshness and color to your plate.
- Salad: Add a bit of freshness and crunch. A simple salad with vinaigrette dressing is a great way to cleanse the palate and provide a refreshing contrast to the steak.
Part 6: Pan-Seared Steak Variations: Get Creative!
Now that you've mastered the basics, let's explore some variations to spice things up. There are endless possibilities when it comes to pan-searing steak. Experiment with different seasonings, marinades, and even different types of steaks.
Flavour Infusions: Elevate the Basics
Get creative with your seasonings. Here are a few ideas to add a unique touch to your steak.
- Herbs: Rosemary, thyme, oregano, and sage all work beautifully. You can use fresh or dried herbs. Just sprinkle them on the steak before searing.
- Spices: Black pepper, paprika, garlic powder, and cayenne pepper can add a kick. Mix and match your favorite spices to create your own custom blend.
- Citrus Zest: Lemon or orange zest adds a bright flavour. Grate the zest of your favorite citrus fruit over the steak before searing.
steak marinades: A Burst of Flavor
Marinate your steak for a burst of flavour. Here are some marinade ideas to help you get started. Just remember to pat the steak dry before searing.
- Soy-Ginger: Mix soy sauce, ginger, garlic, and honey for a sweet and savory marinade. This marinade will give your steak a beautiful glaze and a delicious Asian-inspired flavour.
- Garlic-Herb: Combine garlic, olive oil, rosemary, thyme, and oregano for a classic flavour. This marinade is simple but delicious, and it will infuse your steak with a robust herbal aroma.
- Citrus-Lime: Combine lime juice, olive oil, garlic, and cilantro for a bright and refreshing marinade. This marinade will add a zesty, citrusy flavor to your steak.
Part 7: Mastering the Technique: Tips and Tricks
Here are some tips and tricks I've learned over the years to take your pan-searing skills to the next level. These are the little details that make all the difference.
The Sear is King: Crispy, Flavorful Perfection
The sear is what gives your steak that crispy, flavorful crust. Make sure your pan is hot enough, and let the steak sit undisturbed for at least 30 seconds to a minute before you even think about flipping it. The Maillard reaction, which is the chemical reaction that creates the brown crust, needs time and heat to develop.
The Importance of Resting: Let the Juices Redistribute
Don't rush into slicing your steak right away. Let it rest for 5-10 minutes after cooking. This allows the juices to redistribute, resulting in a more tender and juicy steak. The steak will continue to cook slightly as it rests, and the juices will become more evenly distributed throughout the meat.
Don't Overcrowd the Pan: Space for a Great Sear
Give your steak some breathing room. Crowding the pan will lower the temperature, making it difficult to achieve a good sear. The steak will steam instead of sear, resulting in a soggy surface.
Keep an Eye on the Heat: Maintain that Sizzle
Your pan will cool down slightly once you add the steak. Keep an eye on the temperature and adjust your heat as needed to maintain a good sear. You want the pan to be hot enough to create a nice crust without burning the steak.
The Right Tools are Essential: Invest in Quality
Invest in a good cast iron pan or a heavy-bottomed stainless steel pan. A meat thermometer is also a must-have for achieving your desired level of doneness. These tools will help you to achieve consistent results and make pan-searing steak a breeze.
Practice Makes Perfect: Get Comfortable with the Technique
Like any culinary skill, mastering the art of pan-searing steak takes practice. Don't be discouraged if your first attempts aren't perfect. Just keep practicing, and you'll soon be creating mouth-watering steak masterpieces. The more you practice, the more confident you will become in your pan-searing skills.
Part 8: FAQs
Here are some frequently asked questions about pan-searing steak:
| Question | Answer |
|---|---|
| How do I know if my pan is hot enough? | You can test the heat of your pan by adding a few drops of water. If it sizzles and evaporates immediately, the pan is hot enough. You can also add a small amount of oil to the pan and check if it shimmers and smokes quickly. |
| What is the best oil for pan-searing? | A high-heat oil like avocado oil or grapeseed oil works best for pan-searing. These oils can withstand high temperatures without smoking, ensuring that the steak sears properly without burning. |
| What if my steak sticks to the pan? | If your steak sticks to the pan, it's likely that your pan wasn't hot enough or you didn't let the steak sit long enough before flipping. Try using a higher heat next time. Also, make sure that the pan is well-seasoned. A properly seasoned cast iron pan will help to prevent sticking. |
| How long should I rest the steak after cooking? | Rest your steak for 5-10 minutes after cooking to allow the juices to redistribute. This will result in a more tender and juicy steak. The steak will continue to cook slightly as it rests, and the juices will become more evenly distributed throughout the meat. |
| Can I pan-sear a steak in a nonstick pan? | While you can technically pan-sear a steak in a nonstick pan, it won't produce the same crispy sear as a cast iron or stainless steel pan. Nonstick pans tend to be less heat-resistant, which can affect the sear. They also don't develop the same patina as cast iron pans, which can lead to sticking. |
Everyone is watching

How to Cook Frozen Lobster Tails Perfectly: A Step-by-Step Guide
RecipesLobster. Just the word conjures up images of lavish meals, special occasions, and a taste of luxury. But let's...

Pigs in a Blanket Cooking Time: How Long to Bake for Perfect Results
RecipesAh, pigs in a blanket. Just the name conjures up images of those delightful little parcels of crispy pastry en...

Pork Fillet Cooking Time: How Long to Cook It Perfectly
RecipesPork fillet, or tenderloin as it's sometimes called, is a real favourite in our house. It's so versatile, and...

The Ultimate Guide to Cooking Delicious Frankfurters
RecipesLet's face it, we all love a good frankfurter. It's a classic, simple, and always satisfying. But let's be rea...

Wolf Meat Recipes: A Guide to Cooking Wild Game
RecipesLet's be honest, you don't see wolf meat at your local butcher shop every day. It's a bit of a wild card, but ...
