There's nothing quite like a perfectly pan-seared ribeye steak. That irresistible crust, the juicy, tender interior, the symphony of flavors – it's a culinary experience that never fails to impress. And while it might seem intimidating, mastering the art of pan-searing a ribeye is actually surprisingly easy. Let me take you on a journey, sharing my hard-earned tips and tricks, to help you achieve steakhouse-quality results in the comfort of your own kitchen.
(Part 1) choosing the right ribeye
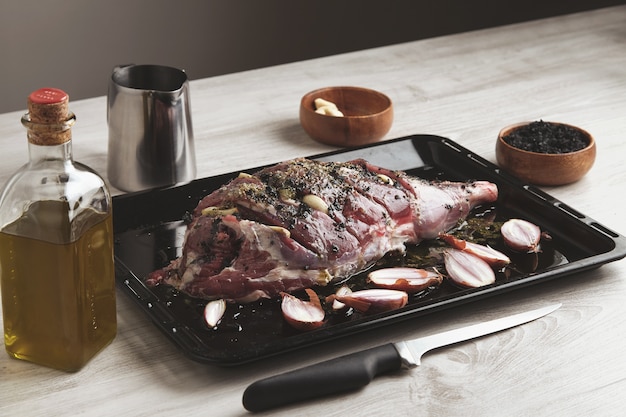
The first step, and arguably the most crucial, is selecting the right ribeye. You want a cut that’s going to be both flavorful and forgiving, and I've learned over the years that a thick-cut, bone-in ribeye is the way to go. The bone acts like a natural insulator, helping to distribute heat evenly and ensuring a steak that's juicy and tender from edge to edge.
The Anatomy of a Ribeye
Before we dive into the specifics, let's talk about what makes a ribeye so special. It’s a cut of beef taken from the rib section, boasting a rich, marbled texture. This marbling, those beautiful streaks of fat, is essential for flavor and juiciness. When you cook the steak, the fat renders down, basting the meat and creating a luscious, melt-in-your-mouth experience.
What to Look For
At the butcher counter, your eyes should be drawn to a ribeye that’s well-marbled, with those fat streaks evenly distributed throughout the meat. You want to avoid cuts that are too lean, as they can turn out dry and tough. Aim for a thickness of 1.5 to 2 inches – this will allow for a nice, even sear while keeping the inside perfectly pink. Of course, if you're feeling adventurous, you can always try a thicker cut, but be prepared to cook it for a bit longer.
The Magic of Bone-In
As I mentioned, I'm a big fan of bone-in ribeyes. The bone adds another layer of flavor, imparting a subtle, smoky aroma that complements the rich beefiness. It also helps to keep the meat moist while cooking, preventing those pesky dry edges. Plus, it just looks more impressive on the plate, making for a truly satisfying presentation. However, if you prefer a boneless ribeye, that's perfectly fine too. Just make sure it's thick enough to achieve a good sear.
Now that you've chosen your champion ribeye, let's get it prepped for the pan.
(Part 2) Prepping the Ribeye: Simplicity is Key
The beauty of pan-searing is that it doesn’t require a complex marinade. Keep it simple, and let the quality of the beef shine. Your main focus should be on seasoning.
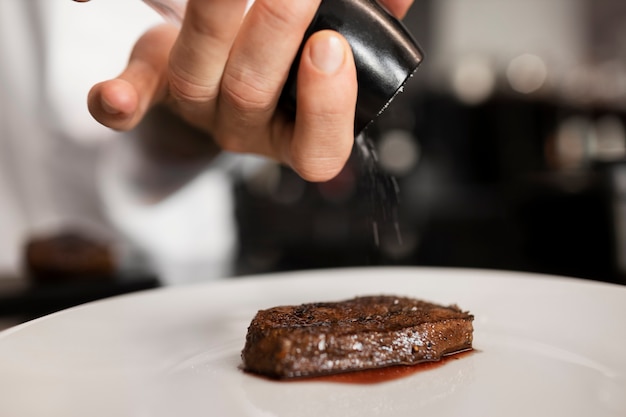
Salt – Your Best Friend
Salt is the hero of this story. I use kosher salt, which has larger crystals that cling to the meat beautifully, creating a nice salt crust. But regular table salt will do just fine too. Generously salt the ribeye all over, covering both sides and even the edges. Don’t be shy – you want to enhance the natural flavors of the beef.
A Touch of Pepper
After generously salting the ribeye, I like to add a touch of freshly ground black pepper. This adds a subtle spiciness that complements the beef perfectly. If you're feeling adventurous, you can also experiment with other spices like garlic powder or onion powder, but I find that a simple salt and pepper combination truly lets the beef’s flavor shine.
Resting is Essential
Once your ribeye is seasoned, resist the urge to jump straight into cooking. Let it rest at room temperature for about 30 minutes. This allows the meat to come to room temperature, which helps ensure more even cooking and prevents shocking the meat with the sudden heat. You'll notice the difference in the final product.
(Part 3) Choosing the Right Pan: The Foundation of a Great Sear
Choosing the right pan is crucial for achieving that perfect sear. My go-to is cast iron. It retains heat superbly, ensuring an even, consistent sear, and it gets beautifully seasoned over time. If you're using a cast iron pan, preheat it over medium-high heat for at least 10 minutes.
If you don't have a cast iron pan, a heavy-bottomed stainless steel pan will work just fine. Just make sure it's big enough to accommodate your ribeye without overcrowding the pan.
Once your pan is screaming hot, it’s time to add the oil.
(Part 4) The Oil: Choosing Wisely
A good oil is essential for that glorious crust. I recommend using high-heat oils like avocado oil or grapeseed oil. They have a high smoke point, which means they won’t burn easily at high temperatures.
Add about 1 tablespoon of oil to your pan. You want a thin layer that covers the bottom of the pan evenly. Once the oil is shimmering, it’s time to sear.
(Part 5) The Sear: A Culinary Dance
This is the moment of truth. Carefully place the ribeye in the scorching hot pan. Resist the urge to move it around for at least 3 minutes. This crucial step allows the steak to develop a beautiful, crusty sear on the bottom, locking in the juices and creating a symphony of textures.
Resist the Urge to Flip
I know it's tempting, but resist the urge to flip the steak too early. If you move it too soon, it will stick to the pan, disrupting the sear and leaving you with a less-than-perfect result. Be patient – the reward will be worth it.
After 3 minutes, use tongs to carefully flip the steak over. You should hear a satisfying sizzle as it hits the pan, a sound that signals a perfect sear. Continue searing the other side for another 3 minutes, or until you achieve the desired level of crust.
As your steak is reaching perfection in the pan, let's talk about cooking time.
(Part 6) Timing is Key: Doneness Defined
The cooking time for your ribeye will depend on how you like your steak. Here’s a quick guide to help you navigate the world of doneness:
steak doneness Guide
| Doneness | internal temperature (°F) | Internal Temperature (°C) | Description |
|---|---|---|---|
| Rare | 125-130 | 52-54 | Cool red centre, warm outer edge |
| Medium-Rare | 130-135 | 54-57 | Warm red centre, hot outer edge |
| Medium | 135-140 | 57-60 | Pink centre, hot outer edge |
| Medium-Well | 140-145 | 60-63 | Slight pink centre, hot outer edge |
| Well Done | 145 | 63 | No pink, hot throughout |
For a precise reading, you can use a meat thermometer, inserting it into the thickest part of the steak, making sure not to touch the bone.
Once your steak has reached the desired internal temperature, it's time to let it rest.
(Part 7) Resting: A Culinary Pause
After searing, remove the steak from the pan and place it on a cutting board. Cover it loosely with foil to keep it warm. Let it rest for at least 5 minutes.
This crucial step allows the juices to redistribute throughout the meat, resulting in a more tender and flavorful steak. Trust me, it's worth the wait.
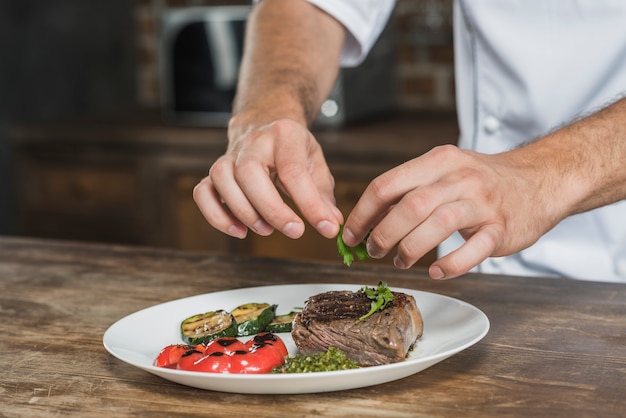
(Part 8) Slicing and Serving: The Grand Finale
After your steak has rested, it's time for the grand finale – slicing and serving.
Use a sharp knife to slice the steak against the grain. This makes it easier to chew and helps to release those delicious juices. Arrange the slices beautifully on a plate and serve immediately.
(Part 9) Accompaniments: The Supporting Cast
No steak is complete without a supporting cast of delicious side dishes. Here are a few of my personal favourites:
- Creamy mashed potatoes: The ultimate comfort food, perfect for soaking up those rich steak juices.
- roasted asparagus: A vibrant, seasonal side that adds a touch of lightness and freshness.
- grilled portobello mushrooms: A hearty, savory alternative to traditional vegetables, with a satisfying texture.
- Sauteed spinach: Simple, flavorful, and a great source of nutrients.
- green beans with almonds: A crunchy, nutty side that adds a textural contrast.
Choose your favorite sides and create a meal that's as delicious as it is impressive.
(Part 10) Final Thoughts: Mastering the Craft
There you have it: the perfect pan-seared ribeye steak. It’s a simple yet satisfying dish that will have your friends and family raving.
Remember, practice makes perfect. Don’t be afraid to experiment with different seasonings, oils, and cooking times to find what works best for your taste buds. And most importantly, enjoy the process and the delicious results.
FAQs
1. What if my ribeye is too thick?
If your ribeye is thicker than 2 inches, you might need to cook it for a longer time. Use a meat thermometer to monitor the internal temperature and adjust the cooking time accordingly. You can also try searing the steak on each side for a longer time to create a more substantial crust.
2. How can I make sure my steak doesn't stick to the pan?
Make sure your pan is screaming hot before adding the oil. Use a high-heat oil like avocado oil or grapeseed oil. Don’t overcrowd the pan – if you’re cooking more than one steak, make sure there’s enough space between them to allow for even cooking.
3. What if I don't have a meat thermometer?
You can still cook a great steak without a meat thermometer. Just use the touch test to gauge the doneness. Press the steak with your finger. If it feels firm, it’s well done. If it feels soft and springy, it’s medium. If it feels soft and gives easily, it’s rare.
4. What should I do with the leftover steak?
Leftover steak is perfect for sandwiches, salads, or even tacos. You can also dice it up and use it in stir-fries or pasta dishes.
5. What are some other good cuts of beef for pan-searing?
Other excellent cuts of beef for pan-searing include:
- new york strip: Known for its rich flavor and tender texture.
- filet mignon: The most tender cut of beef, perfect for a luxurious meal.
- Top sirloin: A leaner cut with a good amount of flavor.
- Tenderloin: A versatile cut that can be grilled, roasted, or pan-seared.
Experiment with different cuts and find your favourites. Happy grilling!
Everyone is watching

How to Cook Frozen Lobster Tails Perfectly: A Step-by-Step Guide
RecipesLobster. Just the word conjures up images of lavish meals, special occasions, and a taste of luxury. But let's...

Pork Fillet Cooking Time: How Long to Cook It Perfectly
RecipesPork fillet, or tenderloin as it's sometimes called, is a real favourite in our house. It's so versatile, and...

Pigs in a Blanket Cooking Time: How Long to Bake for Perfect Results
RecipesAh, pigs in a blanket. Just the name conjures up images of those delightful little parcels of crispy pastry en...

The Ultimate Guide to Cooking Delicious Frankfurters
RecipesLet's face it, we all love a good frankfurter. It's a classic, simple, and always satisfying. But let's be rea...

Wolf Meat Recipes: A Guide to Cooking Wild Game
RecipesLet's be honest, you don't see wolf meat at your local butcher shop every day. It's a bit of a wild card, but ...