(Part 1) Choosing the Right Meat

The Importance of Fat Content
We all know that fat equals flavor, and when it comes to burgers, that's especially true. You need enough fat to create that beautiful, crispy sear and to keep the patty juicy. I'm talking about that irresistible "melt-in-your-mouth" experience. A mix of 80/20 or 85/15 ground beef is usually perfect – 80% lean, 20% fat. It might sound like a lot of fat, but trust me, it's worth it.The Beef
For a classic burger, I recommend going for chuck or sirloin. These cuts have a good amount of marbling, which means the fat is evenly distributed throughout the meat. This gives your burger a more even texture and richer flavor. If you can, get your butcher to grind it for you, or do it yourself at home, making sure it's coarsely ground. This will help the burger hold its shape and prevent it from turning into a dense, compacted patty.(Part 2) The Burger Blend

Why Blending Makes a Difference
Different cuts of meat have different textures. Chuck is known for its great flavor and moisture, sirloin for its leanness and texture, and short rib for its deep, rich flavor. By blending them together, you create a patty that's more cohesive, flavorful, and overall just better. It's a bit of culinary magic, and it makes a world of difference.My Go-to Blend
My personal favorite blend is a mix of chuck, sirloin, and a little bit of short rib. This combination gives you that perfect balance of flavor, texture, and juiciness. It's a symphony of deliciousness in every bite. But remember, this is just a starting point. Experiment with different blends, find what you love, and let your creativity run wild.The Importance of Salt
Don't forget the salt! Seasoning your meat is absolutely crucial, especially if you're using a blend. Salt helps to break down the proteins in the meat, making it more tender and flavorful. It also helps to enhance those delicious flavors. I usually season my patties with salt and pepper about 30 minutes before I cook them. Just a light sprinkle – you don't want to overdo it.(Part 3) Shaping the Burger

The Right Size and Thickness
I prefer to make my burgers about 1/2 inch thick. It's a good balance – not too thin, not too thick. If you want a thicker patty, go for it, but just remember that thicker patties will take a bit longer to cook. As for size, a smaller patty cooks faster, but you want a substantial burger, so don't go too small.Create a Well
Here's a little secret I picked up from a seasoned chef: create a small well in the center of each patty. This helps to prevent the burger from puffing up unevenly during cooking. Simply press your thumb gently into the center of the patty, and you're good to go.The Importance of Proper Handling
Remember, the key to a tender and juicy burger is to gently handle the meat. Overworking it can make the patties tough and dry. Just shape the patties gently and avoid compacting them too much. Let the meat do its thing.(Part 4) The Pan-Searing Magic
This is the moment you've been waiting for, the moment where those simple ingredients transform into a culinary masterpiece. This is where the magic of pan-searing comes in.Choosing the Right Pan
Start with a good quality cast iron pan. It's a classic for a reason. It heats evenly, retains heat well, and gives your burgers those beautiful, crispy sear marks. If you don't have a cast iron pan, a heavy-bottomed stainless steel pan will also work well.Getting the Pan Hot
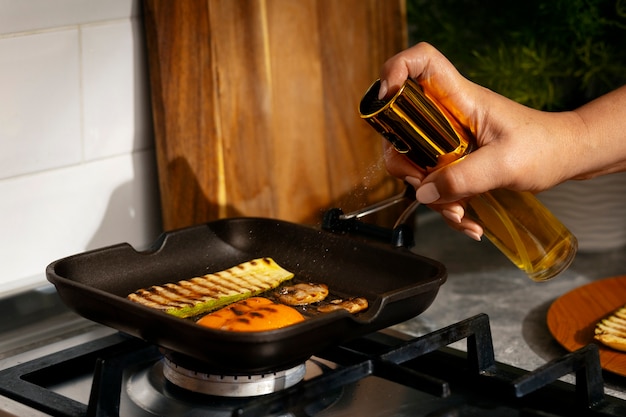
The key to a perfect sear is high heat. Don't be afraid to crank up the burner – it's worth the wait. Heat the pan for about 5 minutes, then add a drizzle of neutral oil. I usually use canola or vegetable oil, but feel free to experiment with other oils.The Perfect Sear
Carefully place the patties in the hot pan, making sure they have plenty of space to cook evenly. Don't crowd the pan, or the burgers won't sear properly. Now, this is where patience comes in. Let them sit undisturbed for about 3-4 minutes. It's tempting to flip them sooner, but resist. The sear is crucial for that delicious crust and juicy interior.(Part 5) The Flip
Okay, the moment of truth: the flip.Flip Only Once
Flipping the patty only once is key. It allows the juices to stay locked in, resulting in a juicier, more flavorful burger. When you do flip, do it quickly and confidently.The Importance of Timing
It takes a little practice, but you'll know when it's time to flip. The bottom of the patty should be nicely browned, and the edges should be starting to firm up.Cook Time
Cook the other side for about 3-4 minutes, or until the patty reaches your desired level of doneness. I prefer medium-rare to medium, but you can cook your burger to your liking.(Part 6) The Temperature Check
We're nearing the finish line, but before you declare your burgers "done," it's important to check their internal temperature.Doneness Guide
Here's a quick guide to burger doneness:| Doneness | Internal Temperature (°F) | Internal Temperature (°C) |
|---|---|---|
| Rare | 125-130 | 52-54 |
| Medium-Rare | 130-135 | 54-57 |
| Medium | 140-145 | 60-63 |
| Medium-Well | 150-155 | 65-68 |
| Well Done | 160 | 71 |
Use a Thermometer
The most accurate way to check doneness is with a meat thermometer. Simply insert the thermometer into the thickest part of the burger, making sure it doesn't touch the pan. If you don't have a thermometer, you can gently press the center of the patty. If it feels springy, it's medium-rare. If it feels firmer, it's closer to medium or medium-well.Resting
Once your burgers are cooked, take them off the heat and let them rest for a few minutes before serving. This allows the juices to redistribute throughout the patty, resulting in a juicier, more flavorful burger.(Part 7) Building the perfect burger
We're in the home stretch, folks! Your burgers are cooked to perfection, and now it's time to assemble your masterpiece.Choosing the Bun
The bun is the foundation of your burger, so choose wisely. I prefer a soft, slightly sweet bun that can hold up to the juicy burger without crumbling. Sesame seed buns are a classic, but you can also experiment with brioche, pretzel, or potato rolls.Toasting the Bun
Don't forget to toast the bun! It adds a nice crispy texture and complements the flavor of the burger beautifully. Toast it in the same pan you used for the patties for a few seconds, until it's golden brown.The Toppings
Now, for the fun part – the toppings! This is where you can really let your creativity shine. Here are a few of my personal favorites:- Classic: Cheese (American or cheddar), lettuce, tomato, onion, pickle, and mayo.
- Bacon Cheeseburger: Bacon, cheddar cheese, lettuce, tomato, and a drizzle of bbq sauce.
- Mushroom Swiss: Sautéed mushrooms, Swiss cheese, caramelized onions, and a dollop of Dijon mustard.
- Avocado Ranch: Avocado slices, crumbled bacon, red onion, and a dollop of ranch dressing.
- The Works: Pick your favorite toppings and go wild!
Assembly
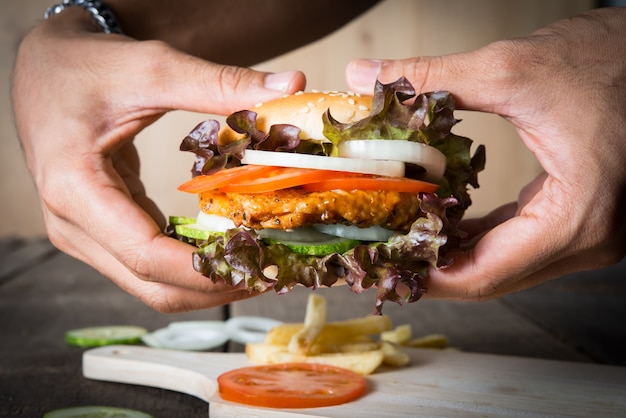
Once your toppings are ready, it's time to assemble your masterpiece. Start with the bottom bun, add your patty, then pile on those delicious toppings. Finish with the top bun and enjoy!(Part 8) Tips and Tricks
Here are a few extra tips and tricks to help you create the best pan-seared burgers ever:- Don't be afraid to experiment with different burger blends and toppings. There are no rules here!
- If you're feeling fancy, add a pinch of smoked paprika or garlic powder to your burger blend for an extra kick of flavor.
- To prevent your burgers from sticking to the pan, spray the pan with non-stick cooking spray before you add the patties.
- Serve your burgers with a side of fries, onion rings, or a salad for a complete meal.
- And most importantly, have fun!
FAQs
1. How do I know when my burger is cooked to the right level of doneness?
The best way to check is with a meat thermometer. Insert it into the thickest part of the burger, making sure it doesn't touch the pan. Check the internal temperature according to the doneness guide in Part 6.
2. Can I use a grill pan instead of a cast iron pan?
Absolutely! A grill pan is great for adding those iconic grill marks. Just make sure the grill pan is heated up properly before you add the patties.
3. Can I make pan-seared burgers in advance?
You can definitely make the patties in advance. Just shape them, season them, and store them in the fridge for up to a day. When you're ready to cook, let them come to room temperature before you sear them.
4. What's the best way to clean my cast iron pan?
Wash your cast iron pan with hot water and a little bit of soap. Don’t use harsh detergents or scrub it too hard, as this can damage the seasoning. Dry it thoroughly and rub a thin layer of oil onto the surface to help prevent rust.
5. What can I do with leftover burger patties?
Leftover burger patties can be used in so many ways! You can slice them and add them to sandwiches, salads, or pasta dishes. Or, you can even freeze them for later use.
There you have it, folks! Your complete guide to pan-searing the perfect burger. Now go forth and conquer!
Everyone is watching

How to Cook Frozen Lobster Tails Perfectly: A Step-by-Step Guide
RecipesLobster. Just the word conjures up images of lavish meals, special occasions, and a taste of luxury. But let's...

Pigs in a Blanket Cooking Time: How Long to Bake for Perfect Results
RecipesAh, pigs in a blanket. Just the name conjures up images of those delightful little parcels of crispy pastry en...

Pork Fillet Cooking Time: How Long to Cook It Perfectly
RecipesPork fillet, or tenderloin as it's sometimes called, is a real favourite in our house. It's so versatile, and...

The Ultimate Guide to Cooking Delicious Frankfurters
RecipesLet's face it, we all love a good frankfurter. It's a classic, simple, and always satisfying. But let's be rea...

Wolf Meat Recipes: A Guide to Cooking Wild Game
RecipesLet's be honest, you don't see wolf meat at your local butcher shop every day. It's a bit of a wild card, but ...
