Let's face it, a perfectly cooked steak is a culinary triumph. That beautiful, caramelized crust on the outside, yielding to a juicy, tender, pink center… pure heaven! But achieving that steakhouse-quality experience at home can feel like a culinary gamble. Sometimes it's dry, sometimes it's overcooked, and sometimes it's just… well, a bit underwhelming. But fear not, my fellow steak enthusiasts! You don't need a fancy grill or years of experience to cook a steak that'll leave you saying "wow!"
Over the years, I've tried countless methods, from searing in a pan to grilling outdoors. Through trial and error, I've learned a thing or two about getting that perfect bite. But my absolute favorite, hands down, is oven-baked steak. Why? Because it's incredibly easy, it gives you more control over the cooking process, and you can consistently achieve amazing results. Trust me, even if you're a kitchen novice, you can become a steak-cooking pro with this method.
So, grab your favorite cut of steak, put on your apron, and let's get started on this delicious journey!
Part 1: choosing the right steak
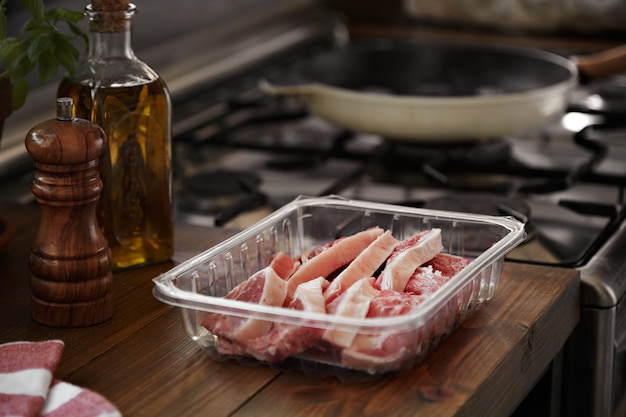
The first step to a delicious steak is choosing the right cut. There are so many options out there, it can feel like a meaty maze. But worry not, I'm here to guide you through the options, and help you find the perfect cut for your steak dreams.
1.1 The Classics: Tried and True
Let's start with the familiar faces – the classic cuts you've probably heard of, and maybe even tried before.
- Rib-Eye: This is the king of marbling, with a rich, buttery flavor. It's known for its melt-in-your-mouth tenderness and generous amount of fat, which makes it incredibly juicy. This is my personal favorite, a classic for a reason.
- Sirloin: A leaner option compared to the rib-eye, offering a slightly firmer texture and a more pronounced, robust beefy flavor. This is a good choice if you prefer a less fatty steak and want a more robust taste.
- new york strip: Very similar to a sirloin, but with a slightly wider surface area. This makes it great for grilling or pan-searing, and it's also a perfect candidate for oven baking.
1.2 The Less-Known Gems: Hidden Treasures
Now, let's dive into some less-common cuts that are often overlooked, but offer incredible flavor and tenderness. Think of them as hidden culinary gems just waiting to be discovered.
- Flat Iron: This is a lesser-known but increasingly popular cut. It's a relatively lean steak, offering a good balance of flavor and tenderness. It's a fantastic option for budget-conscious cooks who want quality without breaking the bank.
- Top Blade: This cut is similar to the flat iron, but with a slightly more marbled texture, giving it a more intense flavor. It's an excellent choice for oven-baking, as it becomes incredibly tender when cooked properly. It's a bit of a hidden gem in the world of steak.
- flank steak: This is a long, thin cut that's fantastic for marinating and grilling, due to its inherent flavor. However, it can be tough if not cooked properly, so I'd recommend choosing another cut for oven-baking. If you're up for the challenge, try marinating it for extra flavor and tenderness.
Ultimately, when it comes to choosing a steak, it boils down to personal preference. I tend to opt for the rib-eye or the top blade, as I love the combination of tenderness and flavor they offer. But don't be afraid to try something new! You might discover your new favorite steak cut.
1.3 Thickness Matters: Getting the Right Gauge
The thickness of your steak plays a crucial role in achieving perfect results. A steak that's too thin will cook too quickly and can easily dry out. A steak that's too thick will require a longer cooking time and may not cook evenly. Ideally, you want a steak that's about 1-1.5 inches thick.
Don't worry if you can't find a steak that fits this criteria exactly. You can adjust the cooking time based on the thickness of your steak, which I'll explain later on. But for the most consistent results, aim for that 1-1.5-inch thickness.
Part 2: Preparing Your Steak

Now that you've chosen your perfect steak, it's time to prepare it for baking. This is where the magic truly begins, transforming your raw steak into a culinary masterpiece.
2.1 Patting it Dry: The Key to a Crisp Crust
The first step is to pat the steak dry with paper towels. This might seem simple, but it's essential for achieving a nice, crispy crust during cooking. Think of it this way: water is the enemy of a good sear! A moist surface won't allow for that golden brown crust we're after. So, take your time and ensure your steak is thoroughly dried.
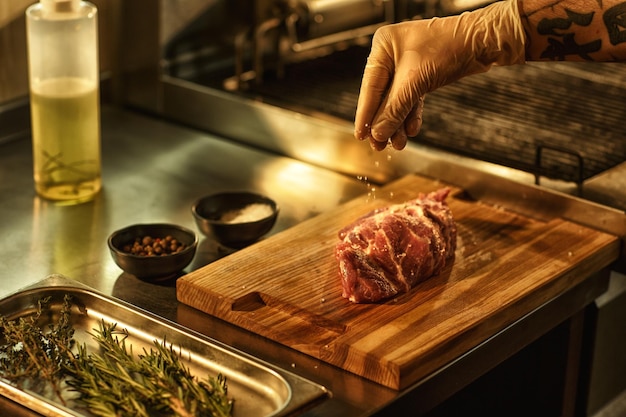
2.2 Seasoning is Key: Unlocking the Flavor
Now comes the fun part: seasoning your steak! This is where you can truly get creative and add your own personal touch. Remember, less is more. You don't want to overwhelm the natural flavor of the steak with too many seasonings. I'm a huge fan of a simple salt and pepper combination, but feel free to experiment with other herbs and spices. Just keep it balanced and let the steak shine.
Here's my go-to recipe, a simple yet effective blend that enhances the natural flavor of the steak:
- Salt: Use a generous amount of kosher salt. It's coarser than table salt and dissolves more slowly, creating a more flavorful crust. You can't go wrong with a good sprinkle of kosher salt.
- Pepper: Freshly ground black pepper adds a lovely aroma and depth of flavor. Don't be shy! A generous grinding of fresh pepper will elevate your steak to new heights.
- Garlic Powder (Optional): This adds a subtle, savory flavor. You can also add some onion powder for an extra layer of depth, creating a complex flavor profile.
- Paprika (Optional): A dash of paprika adds a beautiful color and a touch of sweetness to the steak. I like to use smoked paprika, but regular paprika works just fine. It adds a hint of smokiness that complements the steak beautifully.
Remember, these are just suggestions. Experiment with different seasonings and find what you enjoy most. Just be sure to season liberally, as the salt will help to draw out moisture from the steak during cooking.
2.3 Letting it Rest: A Moment of Patience
Once your steak is seasoned, let it rest at room temperature for about 30 minutes. This allows the steak to come to room temperature, ensuring that it cooks evenly. I know, it can be tempting to rush the process, but trust me on this one. Letting the steak rest will help to prevent it from being cold in the centre while the outside cooks too quickly. It's a small step with a big impact.
While you're waiting, preheat your oven to 400°F (200°C). You want that oven hot! This will help to create a beautiful sear on the steak, that perfect caramelization we're after.
Part 3: Baking Your Steak to Perfection
Now, the moment you've been waiting for… baking your steak! This is where the real magic happens. We're going to combine the power of the oven with a few extra techniques to achieve a truly delicious steak.
3.1 Searing First: Achieving that Crisp Crust
While an oven-baked steak might sound a bit bland, let me tell you, you don't have to miss out on that delicious, caramelized crust. Start by searing your steak in a hot pan for a few minutes per side. This will give you that irresistible crispy crust that makes steak so delicious.
To sear your steak, heat a heavy-bottomed pan over high heat. Add a tablespoon or two of oil, and let it get good and hot. Then, carefully place your steak in the pan and cook for 2-3 minutes per side, or until it's nicely browned. The key is to let the steak sit undisturbed so it can develop a good sear. You'll be rewarded with a beautiful, crispy crust.
Now, here's a little trick I've learned: don't move your steak around too much in the pan! Let it sit there and get a good sear. If you keep flipping it, it won't have time to develop that beautiful crust. Trust me, it's worth the patience. A few minutes of stillness will lead to a significantly better outcome.
3.2 Into the Oven it Goes: Even Cooking for Tender Results
After searing, transfer the steak to a baking sheet lined with parchment paper. This will help prevent the steak from sticking to the pan. And don't forget to move the pan to a lower rack in the oven. You want that steak to cook evenly, not burn on the top! A lower rack ensures the heat is distributed evenly throughout the oven.
3.3 Cooking Time: Achieving Your Desired Doneness
Now comes the important part – cooking time. This is where you need to pay attention to your desired level of doneness. I've created a handy table to help you out, providing guidelines for different levels of doneness, from rare to well done. Remember, these are just guidelines, and the cooking time will vary depending on the thickness of your steak and the heat of your oven.
| Doneness | internal temperature (°F) | Cooking Time (Minutes) |
|---|---|---|
| Rare | 125-130 | 10-12 |
| Medium Rare | 130-135 | 12-14 |
| Medium | 140-145 | 14-16 |
| Medium Well | 150-155 | 16-18 |
| Well Done | 160 | 18-20 |
I personally like my steak medium-rare, so I aim for an internal temperature of 130-135°F. But you can adjust the cooking time to achieve your desired doneness.
3.4 Using a Thermometer: Ensuring Accuracy and Precision
The most accurate way to check for doneness is to use a meat thermometer. Insert the thermometer into the thickest part of the steak, making sure it doesn't touch any bones. Once the thermometer reaches the desired internal temperature, it's time to take the steak out of the oven.
Don't have a meat thermometer? No problem. You can also use the "finger test" to estimate the doneness. Press your finger against the center of the steak. If it feels firm like your nose, it's rare. If it feels firm like your chin, it's medium-rare. If it feels firm like your forehead, it's medium. I find this method a bit less accurate, but it's a good alternative if you're in a pinch. The meat thermometer is the more reliable option for achieving perfect results.
Part 4: Resting Your Steak: The Importance of Patience
Once your steak is cooked to perfection, it's crucial to let it rest for at least 5-10 minutes before slicing and serving. This allows the juices to redistribute throughout the steak, resulting in a more tender and flavorful bite.
I know, waiting can be torture, especially when your steak smells so delicious. But trust me, the wait is worth it. During this time, you can prepare any sides you want to serve with your steak, like mashed potatoes, roasted vegetables, or a simple salad. While you wait, the steak will reach its full potential, and your patience will be rewarded with a truly remarkable culinary experience.
Part 5: Serving Your Steak: The Grand Finale
The moment you've been waiting for – it's time to enjoy the fruits of your labor! But before you slice and serve your steak, here are a few tips to make it even more delicious.
5.1 Slicing it Right: Ensuring Tenderness
To ensure even slices, it's important to slice against the grain. The grain refers to the direction of the muscle fibres in the steak. Cutting against the grain will make the steak more tender, as it breaks down the muscle fibers, allowing for a smoother and more enjoyable texture. If you cut with the grain, the muscle fibres will be tough to chew. You'll see the grain running along the steak – just slice perpendicular to that.
And don't worry if you're a bit unsure about the grain. Just look closely and try to follow the direction of the fibers. It might take a little practice, but you'll get the hang of it soon enough.
5.2 What to Serve With It: Complementary Companions
Now, what to serve with your steak? The options are endless! Some of my favourites include:
- Mashed Potatoes: Classic comfort food that pairs perfectly with steak. You can get fancy with herbs or garlic, or keep it simple with butter and salt. The creamy texture of mashed potatoes provides a wonderful contrast to the savory richness of the steak.
- Roasted Vegetables: A healthy and flavorful side that adds a burst of color to your plate. Try roasting asparagus, broccoli, carrots, or Brussels sprouts. The roasted vegetables offer a lovely balance of sweetness and earthiness, complementing the steak beautifully.
- Green Salad: A refreshing contrast to the rich flavour of the steak. Try a simple salad with mixed greens, tomatoes, and a light vinaigrette. The crisp, fresh salad cuts through the richness of the steak, creating a harmonious balance of flavors and textures.
- Garlic Bread: Who can resist a slice of garlicky bread? It's a delicious and easy way to add another layer of flavour. The warm, garlicky goodness of the bread adds a savory note to the meal, making it even more satisfying.
Don't be afraid to experiment with different combinations and find your own favourite pairings. The possibilities are truly endless!
Part 6: A Few Tips for Success: Mastering the Art of Steak
Now, let's talk about some extra tips that can help you achieve steak-cooking greatness. These are the little tricks that make a big difference in achieving that perfect steak.
6.1 Using a cast iron pan: A Kitchen Essential for Searing
A cast iron pan is an excellent tool for searing steak. It gets incredibly hot and distributes heat evenly, ensuring that the steak gets a nice crispy crust. Just be careful when handling a hot cast iron pan. It can get scorching hot! Handle with care, and you'll be rewarded with a beautiful sear.
6.2 Don't Overcrowd the Pan: Even Cooking for Every Steak
If you're cooking multiple steaks, make sure not to overcrowd the pan. This will cause the temperature to drop, resulting in uneven cooking. If your pan is too crowded, cook the steaks in batches. Give each steak the space it needs to achieve that perfect sear.
6.3 Let the Steak Rest: A Crucial Step for Tenderness and Flavor
I can't stress this enough: let your steak rest before slicing and serving! This allows the juices to redistribute, making for a more tender and flavorful steak. It's a small step that makes a huge difference in the final outcome.
6.4 Don't Be Afraid to Experiment: Embrace Your Inner Culinary Artist
There are so many different ways to cook steak. Don't be afraid to try different methods, seasonings, and sides. You might discover your new favorite steak recipe! Experimentation is key to finding your own unique style and preferences.
Part 7: Oven-Baked Steak vs. Grill: Choosing the Right Method for You
You might be thinking, "Why bake my steak when I can grill it?" It's a valid question! But I personally prefer oven-baked steak for a few reasons. While grilling does provide a unique flavor that can't be replicated in the oven, oven-baked steak offers a number of advantages.
- Consistency: Oven-baking gives you more control over the cooking process. You can monitor the internal temperature of the steak more accurately, ensuring it's cooked to perfection. The oven provides a more controlled environment, allowing you to achieve consistent results.
- Even Cooking: A hot oven cooks the steak evenly, preventing it from being undercooked in the centre or overcooked on the outside. The even heat distribution ensures every bite is cooked to your exact preferences.
- No Smoke: If you're cooking in a small space or if the weather isn't cooperating, oven-baking is a great alternative. You won't have to worry about smoke filling up your kitchen. Perfect for those who want to enjoy the deliciousness without the smoke.
- Easy Clean-Up: The mess involved with grilling can be a bit overwhelming. Oven-baking is much easier to clean up, as you're only dealing with one pan. A clean kitchen is a happy kitchen!
Part 8: FAQs
Here are some frequently asked questions about oven-baked steak, covering those burning questions you might have.
8.1 What Temperature Should I Cook My Steak?
The ideal temperature for cooking steak is 400°F (200°C). This allows for a beautiful sear on the outside and a tender, juicy centre. A hot oven is key for achieving that perfect balance.
8.2 How Long Should I Cook My Steak?
The cooking time for steak varies depending on the thickness and doneness you desire. A general guideline is 10-20 minutes for a 1-inch thick steak. I recommend using a meat thermometer to ensure your steak is cooked to perfection. The thermometer takes the guesswork out of the process, ensuring you achieve your desired doneness.
8.3 Can I Cook Steak in a slow cooker?
While you can technically cook steak in a slow cooker, it's not recommended. slow cooking can lead to a tough and dry steak. Oven-baking or grilling are much better options for achieving a tender and juicy steak. Save your slow cooker for other dishes, and let the oven or grill handle the steak.
8.4 What If My Steak Is Too Thin?
If you're working with a thin steak, you'll need to adjust the cooking time. Cook for a shorter time to avoid overcooking. You can also use a pan-searing method to achieve a crispy crust. Thin steaks can be delicious, just be sure to adjust your cooking time accordingly.
8.5 Can I Marinate My Steak?
Absolutely! Marinating your steak adds flavor and tenderness. I recommend marinating your steak for at least 30 minutes, but it can be left in the marinade overnight for even more flavor. A marinade is a great way to enhance the flavor and tenderness of your steak, and it's a simple way to add an extra layer of deliciousness.
Now, go forth and conquer the world of steak-cooking!
Everyone is watching

How to Cook Frozen Lobster Tails Perfectly: A Step-by-Step Guide
RecipesLobster. Just the word conjures up images of lavish meals, special occasions, and a taste of luxury. But let's...

Pork Fillet Cooking Time: How Long to Cook It Perfectly
RecipesPork fillet, or tenderloin as it's sometimes called, is a real favourite in our house. It's so versatile, and...

Pigs in a Blanket Cooking Time: How Long to Bake for Perfect Results
RecipesAh, pigs in a blanket. Just the name conjures up images of those delightful little parcels of crispy pastry en...

The Ultimate Guide to Cooking Delicious Frankfurters
RecipesLet's face it, we all love a good frankfurter. It's a classic, simple, and always satisfying. But let's be rea...

Wolf Meat Recipes: A Guide to Cooking Wild Game
RecipesLet's be honest, you don't see wolf meat at your local butcher shop every day. It's a bit of a wild card, but ...