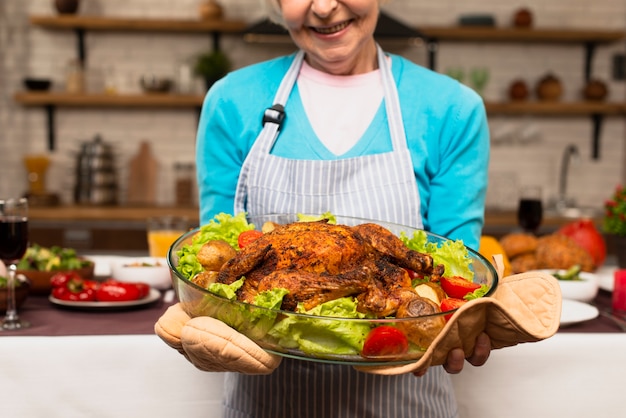
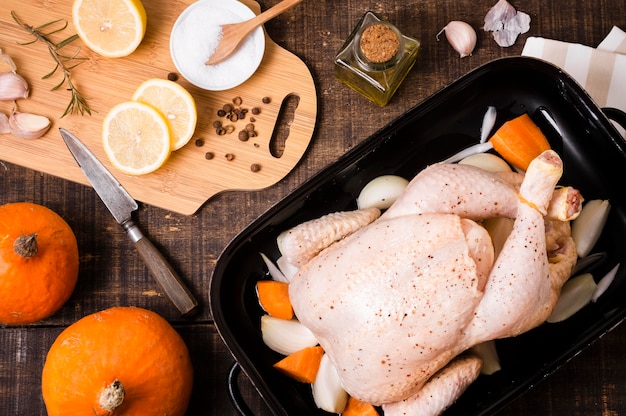
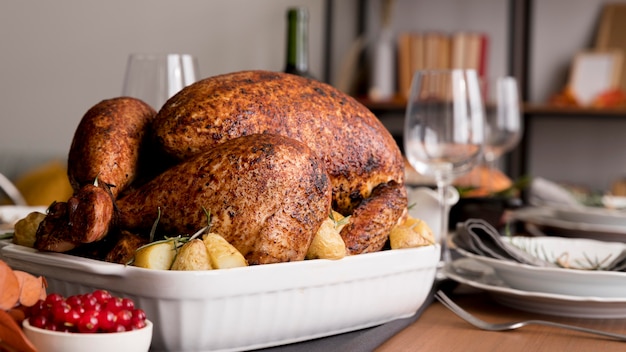
Ah, the turkey. The undisputed king of the Christmas table, a symbol of festive cheer and family gatherings. But let’s face it, roasting a turkey can be a bit daunting, especially when it comes to that magnificent 16-pound bird. You want it to be perfect – juicy, tender, and with that beautiful golden-brown skin that makes everyone’s mouth water. But fear not, my culinary comrades! I’ve spent years perfecting my turkey-roasting techniques, and I’m here to share my secrets with you. This guide will take you step by step, from selecting the perfect bird to creating a mouthwatering gravy, ensuring you achieve a Christmas dinner that’s truly unforgettable.
(Part 1) The Foundation of a Festive Feast

Choosing Your Turkey: A Matter of Preference
First things first, we need a star of the show. That’s where selecting your turkey comes in. Now, the great debate rages on: fresh or frozen? I personally lean towards fresh turkeys. They tend to have a more pronounced flavour, and you can achieve that coveted crispy skin with ease. However, if you prefer the convenience of frozen, just make sure to give it plenty of time to thaw in the fridge – a good 3-4 days is ideal.
Brining: A Secret Weapon for Juiciness
Ah, brining. This is where the magic really starts. Think of it as a spa treatment for your turkey, infusing it with moisture and flavour. I can’t emphasize enough how much of a difference it makes. No, those pre-brined turkeys you find in the supermarket just won’t cut it. We’re talking homemade, from-scratch brining.
My go-to brine recipe:
1 gallon of water (you can use filtered water for a cleaner taste)
1 cup kosher salt (it dissolves better than table salt)
1/2 cup brown sugar (adds a touch of sweetness)
1/4 cup lemon juice (brightens the flavour)
1 tablespoon black peppercorns (for a hint of spice)
1 bay leaf (adds a subtle earthiness)
1 sprig of rosemary (a classic flavour pairing for poultry)
1 sprig of thyme (another aromatic herb that works wonders)
Here’s how to make it work its magic:
1. Bring the water to a rolling boil in a large saucepan.
2. Add all the other ingredients and stir until the salt and sugar dissolve completely.
3. Allow the brine to cool down completely before introducing your turkey.
4. For a 16-pound turkey, I recommend a minimum brining time of 12 hours, but you can go up to 24 hours without any issues. Just make sure the turkey is fully submerged in the brine. You can either use a large container or a brine bag, which can be easier to manage.
Preparing for the Roast: Patting, Stuffing, and Trussing
Now that your turkey has soaked up all that delicious brine, it’s time to give it a final touch. Pat the bird dry thoroughly with paper towels – this ensures a lovely crispy skin.
If you’re feeling adventurous, you can stuff your turkey. I recommend using a moist stuffing, as a dry stuffing can take longer to cook through and might not be fully cooked by the time the turkey is done. Remember to stuff the turkey loosely, as this helps with even cooking. If you’re skipping the stuffing, you can still add some herbs and vegetables like carrots, celery, and onions inside the cavity for extra flavour.
Now, onto the art of trussing. This means tying the turkey’s legs together with kitchen twine. It helps the bird cook evenly and keeps it from spreading out in the oven. If you’re a little hesitant about trussing, don’t worry! You can always use a roasting rack, which will keep the turkey lifted off the bottom of the pan and ensure even heat distribution.
(Part 2) Setting the Stage for Roasting Perfection

Preheating the Oven: The Key to Even Cooking
We’re nearing the grand finale, and preheating the oven is a crucial step. Set it to 325 degrees Fahrenheit (165 degrees Celsius). This temperature is perfect for roasting a turkey – it ensures even cooking and helps achieve that beautiful crispy skin we all crave.
Choosing the Right roasting pan: A Sturdy Companion
You’ll need a roomy roasting pan that can comfortably accommodate your 16-pound turkey. A heavy-duty roasting pan with a rack is ideal. The rack elevates the turkey, allowing air to circulate freely, preventing it from sitting in its own juices.
The Butter and Herb Treatment: A Touch of Magic
Before sending your turkey to the oven, give it a luxurious massage. Gently rub softened butter all over the skin. This adds moisture, enhances flavour, and contributes to that golden-brown, glistening appearance. Don’t be shy with the herbs! I love using a combination of fresh rosemary, thyme, and sage. A few cloves of garlic can also add a lovely punch of flavour.
A Splash of Liquid: Keeping it Moist
Pour about a cup of chicken broth or water into the bottom of the roasting pan. This will create steam, helping to keep the turkey moist and prevent it from drying out during cooking.
(Part 3) The culinary journey to Turkey Nirvana

Setting the Timer: Time to Let it Bake
Finally, it's time to place your masterpiece in the oven. A 16-pound turkey typically takes 3-4 hours to cook, but it's always a good idea to check the internal temperature to ensure it's fully cooked.
Checking the Temperature: Ensuring food safety
It’s absolutely crucial to check the turkey’s internal temperature using a meat thermometer. Insert the thermometer into the thickest part of the thigh, avoiding the bone. The safe internal temperature for poultry is 165 degrees Fahrenheit (74 degrees Celsius). Don’t rely solely on visual cues – the thermometer is your ultimate guide to ensure your turkey is cooked through and safe to eat.
Basting and Resting: The Finishing Touches
Basting is optional, but it can add a touch of magic. It helps keep the turkey moist and enhances that beautiful golden-brown colour. You can baste every 30-45 minutes with the pan juices or a mixture of butter, broth, and herbs. Remember, the goal is to keep the turkey moist and flavourful.
After the turkey has reached its desired internal temperature, let it rest for at least 15-20 minutes before carving. This allows the juices to redistribute, resulting in a wonderfully juicy and flavorful turkey.
(Part 4) The Carving Ceremony: Unveiling the Masterpiece
Tools of the Trade: A Sharp Knife and a Steady Hand
You'll need a sharp carving knife to slice through the turkey with ease. A carving fork can also be helpful for holding the turkey steady while you carve.
The Art of Carving: A Delicate Dance
Start by carving the legs and thighs. Then, move onto the breast, carving slices against the grain. Be mindful not to pierce the skin, as this can make it difficult to keep the slices intact. Remember, practice makes perfect, and with a little patience, you'll be carving like a pro in no time.
(Part 5) Leftover Magic: Putting Those Delicious Scraps to Good Use
Storing Leftovers: Keeping the Feast Alive
Once you’ve carved your turkey, it’s time to think about those delicious leftovers. To keep them fresh and flavourful, store them in an airtight container in the refrigerator for up to 4 days. You can also freeze leftover turkey for up to 2 months, ensuring you can enjoy the Christmas flavours long after the festivities have ended.
Leftover Inspiration: Turning Scraps into Culinary Delights
Don’t let those leftover turkey scraps go to waste! There are countless ways to transform them into new culinary adventures. Here are a few ideas to get your creative juices flowing:
turkey sandwiches: A classic for a reason – simple, satisfying, and perfect for a quick lunch.
turkey salad: A refreshing and flavourful option, combining chopped turkey with mayonnaise, celery, onion, and your favorite seasonings.
turkey soup: A hearty and comforting soup, simmering leftover turkey with vegetables, broth, and spices.
turkey pot pie: A delightful combination of layers of turkey, vegetables, and gravy, all encased in a flaky pastry crust.
Turkey pasta salad: A light and flavorful salad, combining leftover turkey with pasta, vegetables, and your favorite dressing.
(Part 6) The Gravy: A Rich and Savoury Finale
Making the Most of Pan Drippings: A Source of Deliciousness
Don’t throw away those precious pan drippings! They’re the secret ingredient to creating a truly mouthwatering gravy.
Here’s how to make a simple turkey gravy:
1. Deglaze the pan: Pour a cup of water or broth into the roasting pan and scrape up all the browned bits from the bottom. These bits are packed with flavour!
2. Bring it to a boil: Bring the pan drippings to a boil, allowing the flavours to meld.
3. Thicken it up: In a separate bowl, whisk together cornstarch and cold water. Slowly whisk this mixture into the boiling pan drippings. Continue whisking until the gravy has reached your desired consistency.
4. Season and serve: Season the gravy with salt and pepper to taste.
Alternatives to Traditional Gravy: Adding a Twist of Flavour
If you’re looking for a change from traditional gravy, consider a cranberry sauce or a cranberry-orange sauce. These options offer a delightful combination of sweetness and tartness, adding a festive touch to your Christmas feast.
(Part 7) The Sides That Make the Feast Complete
Classic side dishes: Timeless Favourites
mashed potatoes: Creamy, comforting, and a perfect accompaniment to the roasted turkey.
Stuffing: A quintessential holiday dish, offering a blend of textures and flavours.
Cranberry Sauce: A sweet and tart contrast to the savory turkey, adding a festive touch.
green bean casserole: A creamy and cheesy side dish, bringing a touch of indulgence.
sweet potato Casserole: A warm and comforting casserole, boasting sweet and spiced flavors.
Creative Side Dishes: Adding a Touch of Novelty
roasted brussels sprouts: A healthy and flavorful side dish, offering a delightful balance of sweetness and savoriness.
roasted asparagus: A light and refreshing option, adding a vibrant touch to the table.
cauliflower mash: A delicious and healthy alternative to mashed potatoes, boasting a creamy texture and delicate flavour.
quinoa salad: A nutritious and flavorful side dish, offering a blend of textures and a burst of freshness.
(Part 8) The Grand Finale: Sweet Delights to Finish the Feast
Traditional Treats: Classic Christmas Desserts
Pumpkin Pie: A classic Thanksgiving dessert, offering a warm and comforting flavour.
Apple Pie: Another timeless favourite, showcasing the sweet and tart flavour of apples.
Pecan Pie: A rich and nutty dessert, perfect for those who appreciate a touch of indulgence.
Modern Delights: Adding a Touch of Contemporary Flair
Chocolate Pecan Pie: A decadent twist on a classic pecan pie, offering a rich and chocolatey flavour.
Key Lime Pie: A tangy and refreshing dessert, perfect for those who prefer a lighter option.
Cheesecake: A smooth and creamy dessert, offering a luxurious and satisfying finish to the meal.
FAQs
1. Can I freeze a turkey after brining?
While brining a turkey is a wonderful way to enhance its flavour and juiciness, it's not recommended to freeze it after brining. Freezing can affect the texture of the meat and make it difficult to cook evenly. If you need to freeze your turkey, do it before brining.
2. What’s the best way to tell if a turkey is cooked through?
The most reliable way to ensure your turkey is cooked through is to use a meat thermometer. Insert the thermometer into the thickest part of the thigh, avoiding the bone. The turkey is fully cooked when the temperature reaches 165 degrees Fahrenheit (74 degrees Celsius).
3. How long should I let my turkey rest after cooking?
Allowing your turkey to rest for at least 15-20 minutes after cooking is crucial. This resting period allows the juices to redistribute, resulting in a juicier, more flavorful turkey.
4. What if my turkey is undercooked?
If your turkey is undercooked, even after the recommended cooking time, it's best to cook it for a bit longer. Check the temperature every 15-20 minutes until it reaches 165 degrees Fahrenheit (74 degrees Celsius).
5. What’s the best way to reheat leftover turkey?
You can reheat leftover turkey in the oven, microwave, or on the stovetop. If you’re reheating it in the oven, cover it with foil to prevent it from drying out. For microwave reheating, cover the turkey with a damp paper towel to retain moisture. If you’re reheating on the stovetop, add a little broth or water to prevent sticking.
And there you have it – my ultimate guide to roasting a 16-pound turkey. Now you have all the tools and knowledge you need to create a truly impressive Christmas feast. Go forth, my culinary friends, and conquer the turkey! You’ve got this!
Everyone is watching

How to Cook Frozen Lobster Tails Perfectly: A Step-by-Step Guide
RecipesLobster. Just the word conjures up images of lavish meals, special occasions, and a taste of luxury. But let's...

Pigs in a Blanket Cooking Time: How Long to Bake for Perfect Results
RecipesAh, pigs in a blanket. Just the name conjures up images of those delightful little parcels of crispy pastry en...

Pork Fillet Cooking Time: How Long to Cook It Perfectly
RecipesPork fillet, or tenderloin as it's sometimes called, is a real favourite in our house. It's so versatile, and...

The Ultimate Guide to Cooking Delicious Frankfurters
RecipesLet's face it, we all love a good frankfurter. It's a classic, simple, and always satisfying. But let's be rea...

Wolf Meat Recipes: A Guide to Cooking Wild Game
RecipesLet's be honest, you don't see wolf meat at your local butcher shop every day. It's a bit of a wild card, but ...
