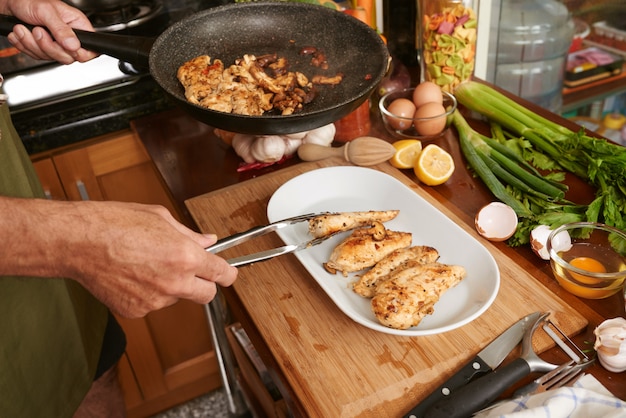
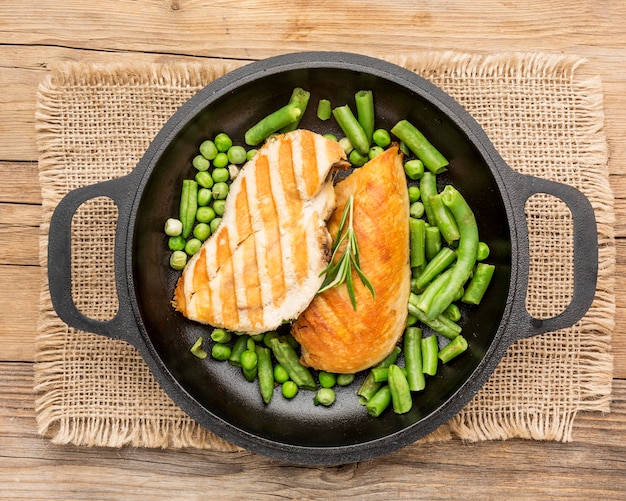
Let's be honest, folks. We've all been there - staring at a package of chicken breasts, wondering how to make them anything other than dry and bland. But fear not! A perfectly pan-seared chicken breast, bursting with flavour and juicy to the core, is within your reach. It's a culinary feat that'll make you feel like a seasoned chef, and trust me, it's easier than you think.
This comprehensive guide will walk you through every step, from choosing the right chicken to mastering the art of searing, leaving you with a recipe for success every single time. Get ready to elevate your chicken game and impress your tastebuds (and maybe even your dinner guests)!
Part 1: The Chicken - The Foundation of Flavour

Choosing the Right Chicken: Quality Matters
You wouldn't build a house on shaky ground, would you? The same applies to a delicious pan-seared chicken breast. Let's start by selecting the right foundation - the chicken itself.
Size Matters: Forget the "one size fits all" approach. Look for chicken breasts that are roughly the size of your palm. Smaller breasts tend to dry out quickly, while larger ones can be tricky to cook evenly.
Skin On or Off?: It's a classic debate, but I'm a firm believer in skin-on chicken breasts. The skin adds a depth of flavour and acts as a natural barrier, helping to keep the meat moist during cooking. Plus, you can always remove it before serving.
Fresh or Frozen?: Fresh is always best, but if you're using frozen chicken breasts, make sure to defrost them properly in the fridge overnight. Rushing this step can lead to uneven cooking and potentially undercooked chicken.
Preparing the Chicken: Setting the Stage for Success
Now that you've chosen your ideal chicken, let's get it ready for its starring role in our pan-searing masterpiece.
1. Pat Them Dry: It's all about that sear! Before you even think about putting the chicken in the pan, give it a good pat down with paper towels. This removes excess moisture, which helps the chicken develop a beautiful, crispy crust.
2. Salt and Pepper: Don't be shy! A generous seasoning of salt and pepper is the foundation of flavour. Remember, you can always add more later, but it's harder to remove excess salt.
3. Seasoning: Get Creative!: Now for the fun part - the seasoning. You can go for a simple classic blend of garlic powder, onion powder, and paprika, or get adventurous with herbs, spices, or even citrus zest. The possibilities are endless!
Pro Tip: If you're using a dry rub, apply it at least 30 minutes before cooking, allowing the flavours to penetrate the chicken.
Part 2: The Pan - Your Kitchen's Unsung Hero

Choosing the Right Pan: The Perfect Partner for Your Chicken
Just like a good chef needs the right tools, your chicken needs the perfect pan to shine.
Cast Iron: The undisputed champion of pan-searing, cast iron pans are known for their even heating and heat retention. They create a beautiful, crispy crust and impart a hint of iron-infused flavour.
Stainless Steel: A versatile choice, stainless steel pans also work well for searing. Look for a heavy-bottomed pan with a well-seasoned surface.
Nonstick: While nonstick pans are great for preventing sticking, they don't achieve the same crispy sear as cast iron or stainless steel. They are, however, a good option if you're concerned about the chicken sticking.
Heating the Pan: Setting the Stage for a perfect sear
The key to a successful pan-sear is heat!
Medium-High Heat: Aim for medium-high heat. You want the pan hot enough to sear the chicken without burning it.
Oil: Add a tablespoon or two of oil with a high smoke point, such as avocado oil, grapeseed oil, or peanut oil. This will help prevent the oil from smoking and ensure the chicken cooks evenly.
Pro Tip: Let the oil heat up in the pan for a minute or two before adding the chicken. This will ensure that the oil is hot enough to sear the chicken properly.
Part 3: The Sear - The Moment of Truth

Searing the Chicken Breast: Creating a Crispy Crust
Okay, it's showtime!
1. Place the Chicken: Gently place the chicken breasts in the hot pan, making sure to leave enough space between them for even browning.
2. Don't Touch It!: This is a critical step. Resist the urge to move the chicken for at least 3-4 minutes. Let it sit undisturbed to develop that glorious golden crust.
3. Flip it Over: Once the first side is perfectly seared, carefully flip the chicken using tongs. Now, repeat the process on the other side.
4. Reduce Heat: After searing both sides, reduce the heat to medium or medium-low. This will allow the chicken to cook through without drying out.
Checking for Doneness: Ensuring Your Chicken is Cooked Through
No one wants dry, rubbery chicken, right? Here's how to ensure your chicken is cooked perfectly:
Touch Test: Gently press the chicken. If it feels firm and springs back, it's likely cooked through.
Juice Test: Cut a small slit into the thickest part of the chicken. If the juices run clear, it's cooked. If they're pink, it needs more time.
meat thermometer: For the ultimate accuracy, use a meat thermometer to ensure the internal temperature of the chicken reaches 165 degrees F (74 degrees C).
Pro Tip: Allow the chicken to rest for 5-10 minutes before slicing. This allows the juices to redistribute, resulting in a more tender and flavorful chicken breast.
Part 4: Cooking Methods: Beyond the Pan
Oven-Finishing: Ensuring Tenderness
Once your chicken has a beautiful sear, you can finish cooking it in the oven for a perfectly tender result.
Preheat Oven: Preheat your oven to 350 degrees F (175 degrees C).
Transfer Chicken: Carefully transfer the chicken breasts to a baking sheet lined with parchment paper.
Cook Until Done: Bake for 10-15 minutes, or until the internal temperature reaches 165 degrees F (74 degrees C).
Skillet Method: One-Pan Convenience
If you prefer the convenience of cooking everything in one pan, try this method:
Reduce Heat: After searing, reduce the heat to low.
Cover the Pan: Cover the skillet with a lid.
Cook Until Done: Cook for 8-10 minutes, or until the chicken is cooked through.
sous vide method: Ultimate Tenderness and Precision
For the ultimate in tenderness and precise cooking, consider sous vide.
Season Chicken: Season the chicken as usual.
Vacuum Seal: Vacuum seal the chicken breast in a bag.
Sous Vide: Cook in a water bath at 145 degrees F (63 degrees C) for 1-2 hours.
Sear: After sous vide, sear the chicken breast in a hot pan for 1-2 minutes per side to achieve a crispy crust.
Part 5: Resting and Serving - Finishing Touches
Resting the Chicken: A Crucial Step for Tenderness
Let's not rush this step! Resting the chicken is essential for allowing the juices to redistribute throughout the meat, resulting in a more tender and flavorful final product.
Cover Loosely: Cover the chicken with foil to keep it warm and allow those juices to settle back into the meat.
Serving the Chicken: Time to Shine
Now for the moment we've all been waiting for!
Sides: Pair your perfectly pan-seared chicken breast with a variety of sides, such as roasted vegetables, a simple salad, creamy mashed potatoes, or a comforting rice pilaf.
Sauce: Enhance the flavour by drizzling over a delicious pan sauce. Deglaze the pan with a little wine or broth, and simmer until it reduces to a luscious sauce.
Presentation: Elevate your meal with a beautiful presentation. Arrange the chicken artfully on a plate and garnish with fresh herbs, a squeeze of lemon, or a sprinkle of toasted nuts.
Part 6: Tips and Tricks - Mastering the Art of Pan-Searing
Tip 1: Don't Overcrowd the Pan
Give your chicken breasts room to breathe! Overcrowding the pan will prevent even searing and result in steamed chicken instead of a crispy crust.
Tip 2: Use a Thermometer
A meat thermometer is your best friend for ensuring your chicken is cooked to perfection.
Tip 3: Don't Overcook
Chicken breast is delicate and easily overcooked. Remember, overcooked chicken is dry and tough!
Tip 4: Rest the Chicken
This is a step you absolutely cannot skip. It's crucial for tender and flavorful results.
Tip 5: Get Creative with Seasonings
Experiment with different seasonings to find your favourite combinations. A sprinkle of herbs, spices, or a citrus zest can elevate your chicken to new heights.
Part 7: Variations - Endless Flavour Possibilities
Lemon-Herb Chicken
For a bright and refreshing twist, try a lemon-herb chicken.
Seasoning: Combine lemon zest, chopped fresh herbs like thyme or rosemary, salt, and pepper. Rub the mixture all over the chicken breast.
Garlic-Parmesan Chicken
This is a classic combination that's always a crowd-pleaser.
Seasoning: Mix grated Parmesan cheese, garlic powder, dried oregano, salt, and pepper. Season the chicken with the mixture.
Honey-Soy Glazed Chicken
For a sweet and savory glaze, try a honey-soy glaze.
Glaze: Combine honey, soy sauce, ginger, and garlic in a small bowl. Brush the glaze over the chicken breast before serving.
Part 8: FAQs - Answers to Your Chicken Questions
Q: Can I use boneless, skinless chicken breasts?
A: Absolutely! Boneless, skinless chicken breasts work great for pan-searing. Just be sure to season them generously and cook them carefully to prevent them from drying out.
Q: What if my chicken breasts are uneven in size?
A: No worries! You can always pound the thicker breasts to even out the thickness. This helps them cook more evenly.
Q: What are some good sides for pan-seared chicken breast?
A: The possibilities are endless! Some of my favorites include roasted vegetables, mashed potatoes, rice pilaf, couscous, or a simple salad.
Q: What if the chicken is sticking to the pan?
A: If your chicken is sticking, it's probably because the pan isn't hot enough or the oil is not hot enough. Make sure the pan is hot before you add the chicken. You can also try using a nonstick pan or adding more oil to the pan.
Q: How long can I store leftover chicken?
A: You can store leftover cooked chicken breast in the refrigerator for up to 3-4 days. Make sure to store it in an airtight container.
Part 9: Conclusion - A Culinary Triumph
There you have it! Your complete guide to achieving juicy, perfectly pan-seared chicken breasts. With these tips and tricks, you'll be whipping up delicious chicken dishes that will impress your taste buds and delight your dinner guests. Don't be afraid to experiment, have fun, and embrace the culinary journey!
And remember, practice makes perfect. The more you cook chicken breast, the more confident and skilled you'll become. Happy cooking!
Everyone is watching

How to Cook Frozen Lobster Tails Perfectly: A Step-by-Step Guide
RecipesLobster. Just the word conjures up images of lavish meals, special occasions, and a taste of luxury. But let's...

Pigs in a Blanket Cooking Time: How Long to Bake for Perfect Results
RecipesAh, pigs in a blanket. Just the name conjures up images of those delightful little parcels of crispy pastry en...

Pork Fillet Cooking Time: How Long to Cook It Perfectly
RecipesPork fillet, or tenderloin as it's sometimes called, is a real favourite in our house. It's so versatile, and...

The Ultimate Guide to Cooking Delicious Frankfurters
RecipesLet's face it, we all love a good frankfurter. It's a classic, simple, and always satisfying. But let's be rea...

Wolf Meat Recipes: A Guide to Cooking Wild Game
RecipesLet's be honest, you don't see wolf meat at your local butcher shop every day. It's a bit of a wild card, but ...
