chicken breast, oh chicken breast. You can be a real culinary chameleon, transforming from a bland, dry disappointment to a succulent, flavorful masterpiece. But getting you just right takes a bit of know-how, some practice, and a dash of confidence. Let me tell you, I've been there, battling dry chicken more times than I care to admit. But after years of experimentation and countless culinary mishaps (let's just say there were some burnt offerings in my past), I've finally cracked the code to perfectly pan-seared chicken breasts. Today, I'm sharing all my secrets, from the right temperature to the perfect resting time, so you can finally conquer this kitchen staple.
(Part 1) The Science of Searing: Understanding Heat

Before we even think about timing, let's talk about the foundation of a delicious pan-seared chicken breast: heat. It's not just about cranking up the stovetop to high and hoping for the best. It's about finding the sweet spot, the golden temperature that creates a beautiful crust without burning the outside before the inside is cooked through.
Medium-High Heat: Your New Best Friend
Think of your pan like a stage, and your chicken breast is the star performer. Medium-high heat is the spotlight – bright enough to illuminate the chicken's potential, but not so intense that it scorches the act. We want a sizzling, lively pan, not a raging inferno.
The Water Test: A Simple Gauge
Here's a handy trick I've learned over the years: the water test. A few drops of water should sizzle and evaporate instantly on a properly heated pan. If it takes a while to evaporate, your pan needs a bit more time to warm up. This simple test ensures you have the right temperature to achieve that beautiful golden sear we're after.
(Part 2) Prepping for Success: The Art of Preparation

Now that we've got the temperature sorted, let's prep our chicken for a flawless performance. A few simple steps can make all the difference between a bland, dry breast and a juicy, flavorful one.
Pat it Dry: A Little TLC
Imagine your chicken breast like a canvas, ready for a masterpiece. But before you start painting, you need a clean surface. That's where patting dry comes in. Moisture on the surface hinders browning, preventing that coveted crispy crust. So, grab some kitchen paper and give those breasts a gentle pat. Think of it as a little spa treatment before the big show!
Seasoning with Savvy: Flavor is Key
Here's where the real magic happens. Don't be afraid to get bold with your seasonings. A simple sprinkle of salt and freshly ground black pepper is always a good starting point, but feel free to unleash your creativity. Think of herbs and spices as your culinary paint palette. A dash of paprika, a sprinkle of rosemary, or a pinch of garlic powder can transform your chicken breast into a flavor sensation.
The Butterfly Effect: Thinning Thick Breasts
Thick chicken breasts can be notoriously tricky to cook evenly. They tend to dry out before the center reaches a safe temperature. That's where the butterfly cut comes in. It's a simple trick that makes a world of difference. Make a horizontal incision through the thickest part of the breast, but stop just short of cutting all the way through. This creates a thinner, more even piece of chicken that cooks more uniformly. It's like giving your chicken wings to fly!
(Part 3) The Grand Entrance: mastering the sear

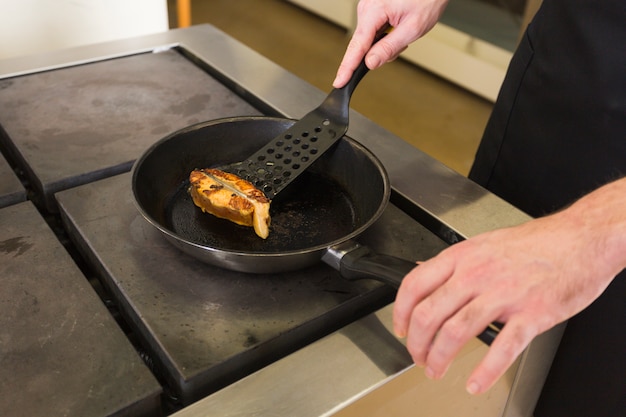
Now, we're ready for the star of the show – the sear! This is where we transform our chicken from a plain, pale breast into a golden-brown, crispy culinary masterpiece.
Choosing the Right Weapon: The Power of the Pan
For a perfect sear, you need a pan that can handle the heat. A cast iron pan is a classic choice, known for its ability to retain heat and create an even sear. A sturdy stainless steel pan is another excellent option. Avoid flimsy pans that warp under heat, as they'll result in an uneven sear and potentially stuck chicken. We want our chicken to glide gracefully across the stage, not get trapped in a sticky situation!
Spacing is Key: Giving Chicken Room to Breathe
One of the most common mistakes people make is overcrowding the pan. It's like cramming too many performers on stage – there's no room to move, and everyone ends up cramped and sweaty. Ensure there's enough space between each chicken breast so they can brown evenly and release their delicious juices. If you're cooking multiple breasts, consider cooking them in batches.
Patience is a Virtue: Don't Touch!
I know, it's hard to resist peeking at the chicken, wanting to see that beautiful crust forming. But trust me, resist the urge! Moving the chicken around too much will prevent it from browning properly. Let it rest undisturbed until it reaches the desired color. You'll thank me later for the beautiful, crispy result.
(Part 4) Timing is Everything: The Cooking Time Guide
Now, let's get down to the nitty-gritty: cooking times. This is where things get a little more personal, as every chicken breast is unique. But don't worry, I'm here to guide you with some general guidelines. Remember, the key is to cook until the internal temperature reaches 165°F (74°C), ensuring the chicken is safe to eat.
Thickness Matters: A Quick Guide
Here's a general guide for pan-searing chicken breasts of different thicknesses. Keep in mind these are just guidelines, and the actual cooking time may vary depending on your pan's heat and the chicken's individual thickness. Always use a meat thermometer to check the internal temperature to ensure it's perfectly cooked.
| Thickness (inches) | Cooking Time (per side) |
|---|---|
| 1/2 - 3/4 | 4-6 minutes |
| 3/4 - 1 | 6-8 minutes |
| 1 - 1 1/2 | 8-10 minutes |
Remember, patience is key. Resist the urge to rush the process. A few extra minutes can make all the difference between a dry, tough chicken breast and a juicy, flavorful one.
(Part 5) The Final Act: Resting for Perfection
Your chicken breasts have reached their culinary peak, but the show isn't over yet. We need a brief intermission, a moment of quiet reflection to allow the juices to redistribute. This is the final act, the resting time, that transforms your chicken from good to truly great.
Let It Rest: The Magic of Redistribution
After you remove the chicken from the heat, let it rest for 5-10 minutes before slicing. This might seem like an unnecessary pause, but it's crucial for creating a juicy, flavorful chicken breast. During resting, the juices have time to redistribute throughout the meat, preventing them from running out when you slice into it. It's a simple step that makes a huge difference in the final result.
(Part 6) Finishing Touches: Elevate Your Dish
Your chicken breast is perfectly cooked, but it's time to take it to the next level. A few finishing touches can transform your dish from ordinary to extraordinary.
Sauce It Up: The Power of Pan Sauces
A simple pan sauce can add a burst of flavor and moisture to your chicken breast. Use the delicious drippings in the pan as the base, adding a splash of wine, broth, or even a squeeze of lemon juice. Stir in some butter and herbs for a rich, aromatic sauce that elevates your chicken to new heights.
side dishes: The Supporting Cast
Now, what's a delicious chicken breast without a supporting cast? Think roasted vegetables, creamy mashed potatoes, or a refreshing salad. Let your creativity run wild! I always keep a few go-to side dishes in my arsenal for those quick and easy meals.
(Part 7) Common Mistakes: Avoiding Culinary Mishaps
We've all been there – those moments where a perfectly good chicken breast turns into a culinary disaster. But fear not, learning from our mistakes is part of the culinary journey. Here are some common mistakes to avoid:
Overcrowding the Pan: A Recipe for Disaster
We've already discussed the importance of spacing, but it's worth repeating. Overcrowding the pan will prevent the chicken from browning properly and lead to uneven cooking. Think of it like a crowded bus – everyone ends up uncomfortable and not quite right. Give your chicken room to breathe!
Ignoring the Thermometer: A Dangerous Oversight
Don't rely on looks alone. Check the internal temperature of your chicken with a meat thermometer to ensure it's cooked through. It's the only way to be sure! There's no room for guesswork when it comes to food safety.
Undercooking or Overcooking: The Chicken's Dilemma
Finding the sweet spot between undercooked and overcooked is crucial. undercooked chicken is a health hazard, and overcooked chicken is dry and tough. Use the cooking time guidelines and the thermometer as your trusted guides to avoid these culinary pitfalls.
Skipping the Resting Time: A Missed Opportunity
Don't be impatient! Resting the chicken after cooking allows the juices to redistribute, resulting in a much juicier, more flavorful breast. It's a short wait for a big reward! Just give it a few minutes to cool down and relax.
(Part 8) FAQs: Your Chicken Breast Q&A
You've got questions? I've got answers! Let's tackle those common chicken breast conundrums.
What if My Chicken Breast Is Too Thin?
Thin chicken breasts can be tricky to pan-sear, as they tend to dry out quickly. You might want to consider using a different cooking method, like baking or grilling, for thin breasts. But if you're set on pan-searing, keep the cooking time short and check the internal temperature frequently to avoid overcooking.
What Can I Do If My Chicken Breast Is Stuck to the Pan?
Even with a well-seasoned pan, chicken can sometimes stick. This can happen if the heat is too high or if the chicken isn't fully cooked. If your chicken is stuck, gently try to loosen it with a spatula. If it's stubborn, you can add a little bit of liquid to the pan, like water or wine, to help release it.
How Do I Store leftover chicken breast?
Leftover chicken breasts can be stored in an airtight container in the refrigerator for up to 3-4 days. You can also freeze leftover chicken breasts for up to 2-3 months. Just make sure to wrap them tightly in plastic wrap or aluminum foil before freezing.
Can I Use Other Types of Poultry for This Recipe?
Absolutely! This method can be used for other types of poultry, like chicken thighs, turkey breast, or even duck. Just adjust the cooking time accordingly. Keep in mind that thicker cuts will require longer cooking times.
What Are Some Other Ways to cook chicken breast?
Pan-searing isn't the only way to cook chicken breasts! Here are some other methods you might enjoy:
- Baking
- Roasting
- Grilling
- Air-frying
- Sous vide
Remember, every chicken breast is unique, so experiment and find what works best for you! Just be sure to use a thermometer to check the internal temperature, and you'll be on your way to creating delicious chicken breasts that will impress your family and friends. Happy cooking!
Everyone is watching

How to Cook Frozen Lobster Tails Perfectly: A Step-by-Step Guide
RecipesLobster. Just the word conjures up images of lavish meals, special occasions, and a taste of luxury. But let's...

Pigs in a Blanket Cooking Time: How Long to Bake for Perfect Results
RecipesAh, pigs in a blanket. Just the name conjures up images of those delightful little parcels of crispy pastry en...

Pork Fillet Cooking Time: How Long to Cook It Perfectly
RecipesPork fillet, or tenderloin as it's sometimes called, is a real favourite in our house. It's so versatile, and...

The Ultimate Guide to Cooking Delicious Frankfurters
RecipesLet's face it, we all love a good frankfurter. It's a classic, simple, and always satisfying. But let's be rea...

Wolf Meat Recipes: A Guide to Cooking Wild Game
RecipesLet's be honest, you don't see wolf meat at your local butcher shop every day. It's a bit of a wild card, but ...
