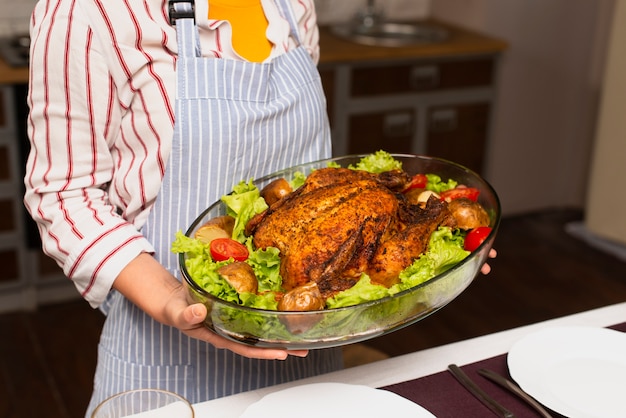
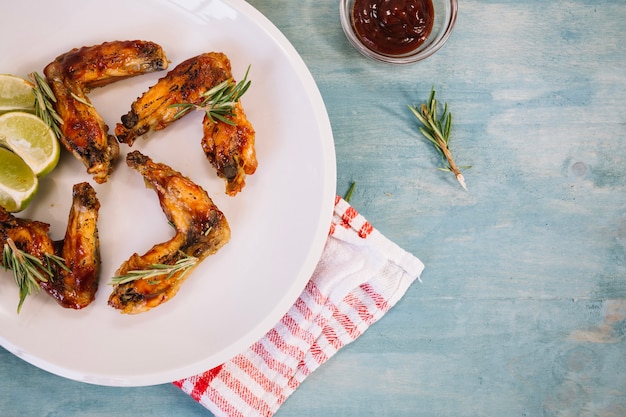
Let’s be honest, chicken legs are the unsung heroes of the poultry world. They’re packed with flavor, juicy, and incredibly versatile. Plus, they’re way more forgiving than breasts – no more dry, rubbery chicken! Today, we’re not talking about just any roasted chicken legs, though. We’re aiming for the ultimate: crispy skin, succulent meat, and that irresistible golden-brown color. I’m talking about the kind of chicken leg that makes you lick your fingers and crave for more.
Over the years, I’ve cooked countless chicken legs, trying every method imaginable, from the basic oven roast to fancy techniques I found in culinary magazines. Through trial and error, I’ve learned a thing or two about how to achieve that perfect roast chicken leg, and I’m here to share my secrets with you. Get ready to level up your chicken game, because this is the ultimate guide to juicy, crispy chicken legs – you’re welcome!
(Part 1) The Art of Choosing Your Chicken Legs

First things first, you need to start with quality chicken. It’s not about buying the most expensive organic stuff, but about avoiding those watery, pale chicken legs. You want plump, well-shaped legs with firm, yellowish skin. The skin should look healthy, with a slight sheen. It's a good indicator of the chicken's overall quality.
Tip:
- Look for legs that have a good amount of fat, as it will render during cooking, adding flavor and moisture to the meat. The fat will melt down, basting the chicken and giving it a rich flavor.
- If possible, choose legs that are still attached to the thigh, as this will keep the meat more juicy. The thigh meat is naturally more moist and flavorful than the leg meat.
(Part 2) Prepping Your Chicken Legs

Once you’ve got your beautiful chicken legs, it’s time to prep them. This is where the magic happens, so pay attention.
Pat Dry Those Babies:
First off, pat the chicken legs dry with paper towels. This is crucial for achieving that crispy skin – damp skin will just steam during cooking, and we want to avoid that. Think of it as a lesson in moisture control. We want the moisture to evaporate, leaving behind crispy skin.
Seasoning is Key:
Now for the fun part – seasoning! I use a simple blend of salt, pepper, garlic powder, and paprika. But feel free to get creative! The key is to balance the flavors and let the chicken shine.
Tip:
- Don’t be afraid to experiment with different herbs and spices. Try a sprinkle of dried thyme, rosemary, or even a touch of smoked paprika for a different depth of flavor.
- I also love adding a pinch of cayenne pepper for a little kick, or a sprinkle of rosemary for a more earthy flavor.
- If you’re feeling fancy, try using a dry rub, like a jerk seasoning or something with smoky paprika. You can find pre-made rubs at the grocery store or whip up your own blend using your favorite spices.
The Secret Weapon:
Now for my secret weapon – olive oil. Rub it all over the chicken legs, ensuring every bit of skin gets a good coating. The olive oil will help the skin crisp up beautifully and enhance the flavor of the chicken. The olive oil creates a barrier, preventing the skin from sticking to the pan and helping to develop a golden-brown crust.
(Part 3) The Oven-Roasting Process

Alright, we’re ready to roast! This part is pretty straightforward, but there are a few key things to keep in mind to ensure those chicken legs turn out perfect.
Pre-Heating is Essential:
Always preheat your oven to 400 degrees Fahrenheit (200 degrees Celsius). This ensures that your chicken legs cook evenly and develop that beautiful golden-brown colour. A preheated oven allows for a consistent cooking temperature, ensuring the chicken cooks evenly and develops a delicious crust.
Choosing the Right Baking Dish:
I use a roasting pan with a rack. This allows the air to circulate evenly around the chicken legs, resulting in crispier skin. This is crucial for maximizing airflow, ensuring the skin gets crispy and doesn’t steam. If you don’t have a rack, you can place the chicken legs on a bed of chopped vegetables like onions or carrots. The vegetables will add flavor and moisture to the pan while absorbing some of the drippings, making for a delicious sauce.
The Secret to juicy chicken:
Now, here’s a little trick I learned from my grandmother: to keep the chicken legs juicy, pour a little bit of water into the bottom of the pan. The steam created will help prevent the chicken from drying out. The steam helps maintain moisture, ensuring the chicken stays tender and juicy even after a long roasting time.
Timing is Everything:
Cook the chicken legs for about 45-60 minutes, or until the internal temperature reaches 165 degrees Fahrenheit (74 degrees Celsius).
Tip:
- To check the temperature, use a meat thermometer. Insert it into the thickest part of the thigh, making sure it doesn't touch the bone.
- If the skin starts to brown too quickly, you can loosely cover the pan with foil. This will help to slow down the browning process, allowing the chicken to cook through without burning.
(Part 4) The Resting Period
Once the chicken legs are cooked through, resist the temptation to dig in immediately. Let them rest for 10-15 minutes before carving. This will allow the juices to redistribute, resulting in more tender and flavorful meat. This is a crucial step that's often overlooked. The resting time lets the juices reabsorb into the meat, making it more flavorful and tender.
(Part 5) Garnishing Your Roasted Chicken Legs
Now, the fun part! This is where you get to add those final touches to your delicious chicken legs.
Herbs and Spices:
A sprinkle of fresh herbs like parsley, thyme, or rosemary adds a lovely burst of flavor. You can use a combination of herbs, or choose one to complement the chicken's flavor.
Citrus:
A squeeze of lemon or lime juice adds a touch of brightness. Citrus adds acidity, which balances the richness of the chicken and adds a refreshing touch.
Tip:
- If you’re feeling really fancy, try a drizzle of honey or a sprinkle of toasted sesame seeds. Honey adds a touch of sweetness, while toasted sesame seeds add a nutty crunch.
- You can also use a flavorful sauce like bbq sauce or teriyaki sauce. Just be sure to add it during the last few minutes of cooking to prevent it from burning.
(Part 6) Serving Your Masterpiece
Now, your chicken legs are ready to be devoured! They’re perfect on their own, but they also go well with various sides.
side dishes:
- mashed potatoes: A classic pairing, mashed potatoes provide a creamy and comforting contrast to the crispy chicken.
- Roasted vegetables: Roasted vegetables like carrots, broccoli, or asparagus bring a vibrant touch of color and flavor to the plate.
- Green salad: A fresh and light salad balances the richness of the chicken and adds a refreshing element.
- Rice: A simple side of rice provides a neutral backdrop for the chicken's flavors.
- Pasta salad: A pasta salad with a vinaigrette dressing can offer a tangy and flavorful complement to the chicken.
Tip:
- You can even use the leftover chicken in sandwiches, salads, or pasta dishes.
- The possibilities are endless! Get creative and have fun with it.
(Part 7) Variations and Experimentation
Now, this is just a basic recipe, but there are so many ways to put your own spin on it. Feel free to experiment with different flavors and techniques.
Spicy Chicken Legs:
Add a tablespoon or two of hot sauce to the marinade for a spicy kick. If you love heat, consider using a hot sauce with a smoky flavor, or try a blend of different hot sauces for a complex kick.
Lemon-Herb Chicken Legs:
Mix lemon zest, garlic, and fresh herbs like rosemary and thyme into the marinade. The lemon zest adds a bright citrus flavor, while the garlic and herbs create a savory and aromatic blend.
Honey-Glazed Chicken Legs:
Brush the chicken legs with a honey-soy glaze during the last 15 minutes of cooking. The honey-soy glaze adds a sticky sweetness and a beautiful glossy finish to the chicken.
Tip:
- Don’t be afraid to get creative and try new things.
- Cooking is about having fun and experimenting!
(Part 8) Oven-Roasted Chicken Legs: A Step-by-Step Guide
Alright, ready for the full recipe? Here’s a step-by-step guide to create your own perfect oven-roasted chicken legs:
Ingredients:
- 4 chicken legs
- 1 tablespoon olive oil
- 1 teaspoon salt
- 1/2 teaspoon black pepper
- 1/2 teaspoon garlic powder
- 1/4 teaspoon paprika
- 1/4 cup water
Instructions:
- Preheat your oven to 400 degrees Fahrenheit (200 degrees Celsius).
- Pat the chicken legs dry with paper towels.
- In a small bowl, combine the olive oil, salt, pepper, garlic powder, and paprika.
- Rub the seasoning mixture all over the chicken legs, ensuring each piece is well-coated.
- Place the chicken legs on a roasting rack in a baking pan.
- Pour 1/4 cup of water into the bottom of the pan.
- Roast for 45-60 minutes, or until the internal temperature reaches 165 degrees Fahrenheit (74 degrees Celsius).
- Let the chicken legs rest for 10-15 minutes before carving.
- Serve with your favorite side dishes and enjoy!
(Part 9) The Science Behind Oven-Roasted Chicken Legs
Now, let's get a bit nerdy about the science behind it all. It’s not just about throwing some chicken in the oven – it’s about understanding how heat and moisture work together to create that perfect roast.
The Maillard Reaction:
The beautiful golden-brown colour you see on the chicken skin is the result of the Maillard reaction, a chemical reaction that occurs when sugars and amino acids in food react with heat. This reaction also creates complex flavors and aromas. The Maillard reaction is responsible for the delicious crust you get on roasted chicken, as well as the rich, savory flavors.
Moisture and Fat Rendering:
The fat in the chicken skin renders as it cooks, creating a delicious crispy texture. The water in the pan helps to prevent the chicken from drying out. The fat melting down helps to baste the chicken, keeping it juicy and flavorful. The steam from the water helps to maintain moisture and prevent the chicken from becoming dry.
Internal Temperature and Doneness:
Cooking the chicken to an internal temperature of 165 degrees Fahrenheit (74 degrees Celsius) ensures that it is safe to eat and also guarantees that it’s cooked through. cooking chicken to the proper internal temperature ensures that all harmful bacteria are killed, making it safe to eat.
Tip:
- Understanding these scientific principles will help you to improve your cooking skills. The more you know about what’s happening in your kitchen, the better your results will be.
(Part 10) Chicken Leg Storage and Leftovers
Alright, you’ve cooked up a storm, but you might have some leftovers. Don't worry – those chicken legs are just as delicious the next day. Here’s how to store them:
Refrigeration:
Let the chicken legs cool to room temperature, then store them in an airtight container in the refrigerator for up to 3-4 days. Refrigerating the chicken quickly helps to prevent bacterial growth and ensure its safety.
Freezing:
You can also freeze leftover chicken legs for up to 3 months. Freezing is a great way to preserve leftovers and have a quick meal ready to go later.
Tip:
- To reheat, simply place the chicken legs in a preheated oven at 350 degrees fahrenheit (175 degrees Celsius) for about 15-20 minutes, or until heated through. Reheating in the oven helps to retain moisture and flavor.
- You can also reheat them in the microwave, but the texture might not be as crisp. Microwaving can sometimes dry out the chicken, so it's best to use this method only if you're short on time.
(Part 11) Chicken Leg Variations: Beyond the Roast
Let’s face it, sometimes you just don’t have time for a full-blown roast. That’s where the versatility of chicken legs comes in. You can cook them in so many other ways!
pan-fried chicken Legs:
This is a quick and easy way to cook chicken legs with crispy skin. Simply heat some oil in a pan over medium-high heat and cook the chicken legs until golden brown and cooked through. Pan-frying is a great option for weeknight meals, as it requires minimal prep and cooking time.
grilled chicken Legs:
For a smoky flavor, grill the chicken legs over medium heat for about 20-25 minutes, turning them once or twice to ensure even cooking. Grilling gives the chicken legs a smoky flavor and a slightly charred exterior.
slow cooker chicken Legs:
For the ultimate tender and juicy chicken legs, try cooking them in a slow cooker with your favorite sauce. slow cooking breaks down the connective tissue in the chicken, resulting in exceptionally tender and flavorful meat.
Tip:
- The possibilities are endless, so get creative and try different cooking methods!
- Use your imagination, and you’ll be amazed by the delicious ways you can cook chicken legs!
FAQs
1. Can I use bone-in or boneless chicken legs?
Both bone-in and boneless chicken legs work well for roasting. Bone-in legs will have more flavor and juiciness, as the bone helps to retain moisture. However, boneless legs are easier to cook and slice. Ultimately, the choice is yours, based on your preference and what you have available.
2. What’s the best way to get crispy skin?
The key is to pat the chicken legs dry before roasting, and to make sure the oven is preheated to a high temperature. You can also rub the chicken legs with olive oil, which will help the skin to crisp up. The oil acts as a barrier, preventing the skin from steaming and helping to create a crispy crust.
3. How long should I roast the chicken legs?
The cooking time will vary depending on the size of the chicken legs and the temperature of your oven. As a general rule, you should cook them for 45-60 minutes, or until the internal temperature reaches 165 degrees Fahrenheit (74 degrees Celsius). Using a meat thermometer is the most reliable way to check for doneness.
4. What happens if I overcook the chicken legs?
Overcooked chicken legs will be dry and tough. To avoid this, make sure to cook them to an internal temperature of 165 degrees Fahrenheit (74 degrees Celsius) and don’t overcook them. Overcooked chicken loses its moisture and becomes dry and rubbery. Use a meat thermometer to ensure the chicken is cooked through without being overdone.
5. Can I use different spices and herbs?
Absolutely! Experiment with different herbs and spices to create your own unique flavor combinations. There are endless possibilities for seasoning your chicken legs, so have fun with it!
Well, there you have it! Now you’re equipped with all the knowledge you need to conquer the art of oven-roasted chicken legs. Go forth, my friends, and create a culinary masterpiece!
Everyone is watching

How to Cook Frozen Lobster Tails Perfectly: A Step-by-Step Guide
RecipesLobster. Just the word conjures up images of lavish meals, special occasions, and a taste of luxury. But let's...

Pigs in a Blanket Cooking Time: How Long to Bake for Perfect Results
RecipesAh, pigs in a blanket. Just the name conjures up images of those delightful little parcels of crispy pastry en...

Pork Fillet Cooking Time: How Long to Cook It Perfectly
RecipesPork fillet, or tenderloin as it's sometimes called, is a real favourite in our house. It's so versatile, and...

The Ultimate Guide to Tender, Juicy Pulled Pork
RecipesRight, let's talk pulled pork. It's one of those dishes that just screams "comfort food," doesn't it? I mean...

The Ultimate Guide to Cooking Sweet Potatoes: From Roasting to Mashing
RecipesSweet potatoes. Just the name conjures up images of warm, comforting dishes, bursts of vibrant color, and a to...
