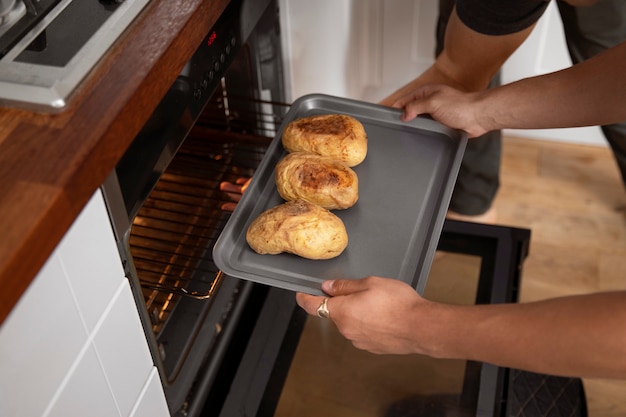
As a seasoned cook, I've spent years mastering the art of preparing chicken breast. While I've experimented with various techniques, oven baking consistently delivers juicy, flavorful results, especially for those delicate, thin breasts that can easily become dry. The key, of course, is mastering the perfect cooking time. And that's precisely what I'm here to share with you.
Over the years, I've learned a thing or two about oven-baked chicken. I've experimented with different temperatures, timings, and even tried out a few fancy gadgets. But ultimately, it's about understanding the basics and adapting them to your specific needs. So, let's dive in and explore the world of oven-baked chicken breast together.
(Part 1) The Foundation: Mastering the Basics
Before we delve into specific timings, let's build a solid foundation for a successful oven-baked chicken breast. I believe in keeping things simple, so we'll avoid unnecessary complications. Here's what you need to know:
1. Choosing the Right Chicken Breast
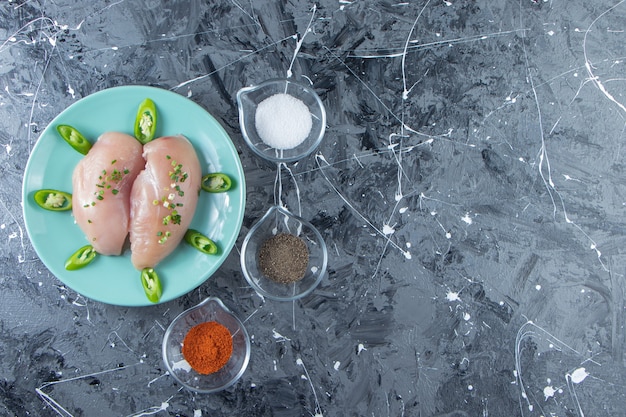
You can't expect a perfect result without starting with high-quality ingredients. So, let's talk about selecting the right chicken breast. First off, aim for thin, evenly sized breasts. Those thick, bulky ones will take longer to cook through, potentially resulting in dry edges. Secondly, ensure your chicken is fresh and has a good colour – a pale, pinkish hue and free of any unpleasant odours. I always check for a "sell by" date to ensure freshness.
2. Prepping Your Chicken for Success
A little bit of prep goes a long way. To ensure even cooking, gently pound your thin chicken breasts to an even thickness. This will help them cook more evenly and prevent those pesky dry edges. I use a meat mallet for this, but a heavy saucepan can also do the trick. Be careful not to pound them too thin, as they might become overly fragile.
Now, let's season! Don't be shy with the spices. I love a good mix of paprika, garlic powder, onion powder, and a pinch of salt and pepper. But feel free to experiment with your favorite herbs and spices. Some popular combinations include Italian seasoning, herbs de Provence, or even a touch of cayenne pepper for a bit of heat.
3. The Magic of Brining: A Game Changer
You've probably heard about brining, but I'll admit, I used to be a bit skeptical. But let me tell you, it's a game-changer. Brining involves soaking your chicken in a salt water solution, which helps to retain moisture and enhance flavor. It's a simple technique that can make a huge difference in the tenderness and juiciness of your chicken.
For a basic brine, combine a cup of salt with 4 cups of water. Submerge your chicken in this solution for at least 30 minutes, or even better, overnight. This will make your chicken incredibly juicy and tender, even if it's a thin cut. I like to add a few sprigs of fresh herbs or a bay leaf to the brine for an extra flavor boost.
(Part 2) Temperature Matters: Finding the Sweet Spot
Now, let's talk about oven temperature. You've got two main options:
1. High Heat: 400°F (200°C) - The Quick and Crispy Option
This is my go-to temperature for thin chicken breasts. The high heat helps to sear the surface quickly, locking in moisture and flavour. It also ensures that the chicken cooks through in a reasonable amount of time. With this method, you're looking at about 15-20 minutes for your thin breasts to cook through. The result is a crispy skin and juicy interior.
2. Moderate Heat: 350°F (175°C) - The Gentler Approach
If you prefer a slightly gentler approach, you can bake your chicken at a lower temperature. This will take a little longer, around 20-25 minutes for thin breasts, but it can be a good option if you're worried about overcooking. This method tends to produce a more tender, moist chicken, especially if you're using thinner breasts.
(Part 3) Decoding the Perfect Cooking Time
Now, here's the heart of the matter – the cooking time. This is where things get a bit tricky, because it all depends on the thickness of your chicken breast. Don't worry, I've got you covered! Here's a detailed guide to help you nail the perfect cooking time for different thicknesses:
1. Thin Chicken Breast (About ?? Inch Thick)
- 400°F (200°C) - 15-20 minutes - 350°F (175°C) - 20-25 minutes
2. Medium Chicken Breast (About 1 Inch Thick)
- 400°F (200°C) - 20-25 minutes - 350°F (175°C) - 25-30 minutes
3. Thick Chicken Breast (Over 1 Inch Thick)
- 400°F (200°C) - 25-30 minutes - 350°F (175°C) - 30-35 minutes
Remember, these are just general guidelines. It's always best to check the chicken's internal temperature to ensure it's cooked through. Use a meat thermometer to make sure the internal temperature reaches 165°F (74°C). This is the safe temperature to ensure the chicken is fully cooked and bacteria-free.
(Part 4) Tips and Tricks for Perfect Results
Now that we've got the basics down, let's talk about some tips and tricks that will help you achieve perfect oven-baked chicken breasts every time. These are my tried-and-true methods for ensuring juicy, flavorful chicken:
1. Don't Overcrowd the Pan: Space is Key
One of the biggest mistakes people make is overcrowding the pan. This prevents the chicken from cooking evenly and can lead to steam buildup, which can make the chicken soggy. So, make sure to give each breast enough space. If you're baking more than two breasts, use a larger baking sheet or bake them in batches. I usually aim for about an inch of space between each breast.
2. The Power of Roasting: Crispy Skin and Enhanced Flavor
Want to take your oven-baked chicken to the next level? Try roasting it! Roasting involves cooking the chicken at a slightly higher temperature (usually around 425°F/220°C) for a shorter time. This gives the chicken a beautiful crispy skin and adds a lovely depth of flavor. It's a great way to elevate the overall taste and texture of your chicken.
3. Embrace the Baking Sheet: A Simple and Effective Tool
I'm a big fan of using a baking sheet for my oven-baked chicken. It's simple, affordable, and allows for even cooking. If you want to get fancy, you can use a roasting rack placed on top of the baking sheet. This helps to create airflow and promotes even browning. But honestly, a regular baking sheet works perfectly well.
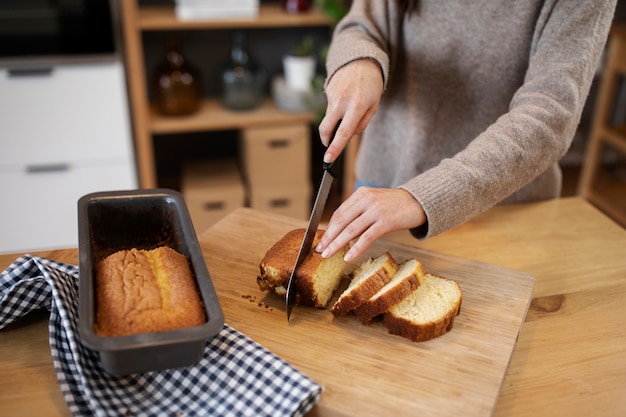
(Part 5) The Importance of Resting: Letting the Juices Settle
This is something many people overlook, but it's crucial for juicy, tender chicken. Once your chicken is cooked through, resist the urge to cut into it right away. Let it rest for at least 5-10 minutes before slicing. This allows the juices to redistribute throughout the breast, resulting in a much more tender and flavorful piece of chicken. I usually cover the chicken loosely with foil while it rests, helping to trap the heat and moisture.
(Part 6) Delicious Oven-baked chicken breast recipes
Now, let's get into some specific recipes! These are my personal favorites, tried and tested in my own kitchen. Each recipe offers a unique flavor profile and is sure to become a staple in your own culinary repertoire.
1. Classic Lemon Herb Chicken: A Fresh and Flavorful Delight
This is a simple yet incredibly delicious recipe. You'll need a few lemons, some fresh herbs like rosemary and thyme, and a good dose of garlic. This recipe is all about fresh flavors and minimal fuss. You can serve it with roasted vegetables for a complete meal.
Ingredients:
- 4 thin chicken breasts
- 2 lemons, juiced
- 2 tablespoons olive oil
- 2 cloves garlic, minced
- 1 tablespoon fresh rosemary, chopped
- 1 tablespoon fresh thyme, chopped
- Salt and pepper to taste
Instructions:
- Preheat oven to 400°F (200°C).
- In a small bowl, whisk together lemon juice, olive oil, garlic, rosemary, and thyme.
- season chicken breasts with salt and pepper.
- Place chicken breasts on a baking sheet and drizzle with lemon herb mixture.
- Bake for 15-20 minutes, or until the internal temperature reaches 165°F (74°C).
- Let the chicken rest for 5-10 minutes before slicing.
2. Creamy Dijon Chicken: A Rich and Tangy Treat
This recipe is perfect for those who love a touch of sweetness and tang. The creamy Dijon sauce is rich and flavorful, and it goes perfectly with the juicy chicken.
Ingredients:
- 4 thin chicken breasts
- 2 tablespoons olive oil
- 1 tablespoon Dijon mustard
- ?? cup heavy cream
- 2 cloves garlic, minced
- Salt and pepper to taste
Instructions:
- Preheat oven to 400°F (200°C).
- In a small bowl, whisk together olive oil, Dijon mustard, heavy cream, and garlic.
- Season chicken breasts with salt and pepper.
- Place chicken breasts on a baking sheet and drizzle with creamy Dijon mixture.
- Bake for 15-20 minutes, or until the internal temperature reaches 165°F (74°C).
- Let the chicken rest for 5-10 minutes before slicing.
3. Honey Garlic Chicken: A Sweet and Savory Symphony
For a sweet and savory flavor combination, try this honey garlic chicken recipe. The combination of honey and garlic creates a sticky, delicious glaze that's sure to please even the pickiest eaters.
Ingredients:
- 4 thin chicken breasts
- 2 tablespoons olive oil
- 2 tablespoons honey
- 2 cloves garlic, minced
- 1 tablespoon soy sauce
- Salt and pepper to taste
Instructions:
- Preheat oven to 400°F (200°C).
- In a small bowl, whisk together olive oil, honey, garlic, and soy sauce.
- Season chicken breasts with salt and pepper.
- Place chicken breasts on a baking sheet and drizzle with honey garlic mixture.
- Bake for 15-20 minutes, or until the internal temperature reaches 165°F (74°C).
- Let the chicken rest for 5-10 minutes before slicing.
(Part 7) Serving Your Oven-Baked Chicken: Endless Possibilities
You've got your perfectly cooked chicken breast, now what? There are endless possibilities for serving this versatile dish. Here are a few ideas to inspire you:
1. The Classics: Simple and Satisfying
For a simple yet satisfying meal, serve your chicken with a side of roasted vegetables, like broccoli, asparagus, or Brussels sprouts. A fluffy bed of mashed potatoes or a simple salad also makes for a delicious pairing.
2. Get Creative: Beyond the Basics
If you're feeling adventurous, try incorporating your chicken into a salad. A chopped chicken salad with a creamy dressing, or a simple chicken Caesar salad are both great options. You can also use your cooked chicken to create wraps, sandwiches, or even pizza toppings. The possibilities are endless!
(Part 8) Frequently Asked Questions
Now, let's address some common questions that might pop up about oven-baked chicken breasts.
1. Can I bake chicken breasts from frozen?
It's not recommended to bake chicken breasts directly from frozen. Baking from frozen can lead to uneven cooking and a dry result. If you need to cook frozen chicken breasts, it's best to thaw them in the refrigerator overnight before baking. This ensures that the chicken cooks evenly and retains moisture.
2. How do I know if my chicken is cooked through?
The best way to determine if your chicken is cooked through is to use a meat thermometer. Insert the thermometer into the thickest part of the breast, making sure it doesn't touch any bone. The internal temperature should reach 165°F (74°C) for safe consumption. This is the only way to be sure that the chicken is fully cooked.
3. Can I reuse the chicken juices?
Absolutely! The juices from your baked chicken can be used to create a delicious sauce. Simply strain the juices through a fine-mesh sieve to remove any solids, then whisk in a little butter, flour, or cornstarch to thicken. You can also add herbs, spices, or even a splash of wine for added flavor. It's a wonderful way to add depth and richness to your meal.
4. What if my chicken breast is overcooked?
overcooked chicken breasts can be dry and tough. If this happens, there's not much you can do to salvage the situation. However, you can try to add some moisture back in by adding a sauce or topping. A creamy sauce, like a Dijon or mushroom sauce, can help to mask the dryness. You can also try shredding the chicken and using it in a salad or other dishes where the texture isn't as critical.
5. Can I bake chicken breast in a microwave?
While you can technically bake chicken breasts in a microwave, it’s not the ideal method. Microwaving chicken often leads to uneven cooking and a dry, rubbery texture. It’s best to stick to conventional oven baking for the best results. The dry heat of the oven produces a much more flavorful and tender chicken.
(Part 9) Final Thoughts: Mastering the Art of Oven-Baked Chicken
Oven-baked chicken breasts are a staple in my kitchen. They’re versatile, affordable, and easy to cook. With a little practice and these tips, you can create juicy, flavorful chicken breasts that will impress everyone at the dinner table. So go ahead, try out these techniques, experiment with different flavors, and enjoy the delicious results!
Everyone is watching

How to Cook Frozen Lobster Tails Perfectly: A Step-by-Step Guide
RecipesLobster. Just the word conjures up images of lavish meals, special occasions, and a taste of luxury. But let's...

Pigs in a Blanket Cooking Time: How Long to Bake for Perfect Results
RecipesAh, pigs in a blanket. Just the name conjures up images of those delightful little parcels of crispy pastry en...

Pork Fillet Cooking Time: How Long to Cook It Perfectly
RecipesPork fillet, or tenderloin as it's sometimes called, is a real favourite in our house. It's so versatile, and...

The Ultimate Guide to Tender, Juicy Pulled Pork
RecipesRight, let's talk pulled pork. It's one of those dishes that just screams "comfort food," doesn't it? I mean...

The Ultimate Guide to Cooking Delicious Frankfurters
RecipesLet's face it, we all love a good frankfurter. It's a classic, simple, and always satisfying. But let's be rea...