Let's be honest, there's something utterly primal about ribs. Maybe it's the way they practically melt in your mouth, or the satisfaction of pulling that meat clean off the bone with a gentle tug. For me, oven-baked ribs represent a culinary triumph, a symphony of flavours and textures that always leaves me feeling utterly satisfied. And over the years, I've learned a thing or two about crafting those perfect, fall-off-the-bone ribs right in my own kitchen. So, grab a comfy seat, because I'm about to share my ultimate guide to achieving rib nirvana.
(Part 1) The Anatomy of a Rib
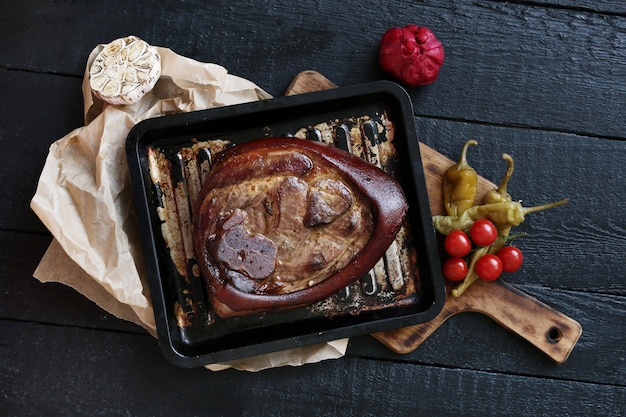
Before we dive into the nitty-gritty, it's essential to understand the different types of ribs we're working with. Think of it as a rib-lovers' anatomy lesson.
The Different Cuts
While there are plenty of rib options out there, we're focusing on the stars of the show: pork ribs. And within that category, we have two main players: spare ribs and baby back ribs.
- Spare ribs: These are the larger, meatier ribs, often referred to as “St. Louis-style” ribs. They have a wider, flatter shape, and contain a membrane on the underside called the "silverskin" that's best removed before cooking. The membrane is tough and can make the ribs chewy, so don't skip this step! Spare ribs tend to be more budget-friendly, making them ideal for larger gatherings or family feasts.
- baby back ribs: These ribs are smaller, leaner, and have a more curved shape, often considered the "fancier" option. They boast a more tender texture and a slightly sweeter taste. Baby back ribs are perfect for a more intimate meal, a special occasion, or simply indulging in a bit of rib luxury.
So, which cut should you choose? It really comes down to personal preference. Both are delicious, but spare ribs are the classic option for a hearty meal, while baby backs offer a more delicate and tender experience.
(Part 2) The Rib-Rub Revolution
Imagine a blank canvas, ready for a masterpiece. That's what ribs are like before they're transformed with the magic of a good rub. A rib rub is a dry spice mixture that acts as a foundation for flavour, adding depth and complexity to the ribs as they cook.
The Benefits of a Rub
A good rub does more than just add flavour; it also helps create a delicious, crispy bark, which is that outer layer of caramelized goodness that adds another layer of textural delight to your ribs.
- Seasoning: The rub provides a flavour base, incorporating a combination of spices to enhance the natural taste of the pork.
- Tenderization: The salt in the rub helps draw out moisture and break down the protein, resulting in tender, succulent ribs.
- Bark Formation: As the ribs cook, the sugars in the rub caramelize, creating a beautifully crispy, flavorful bark that's essential for a truly satisfying rib experience.
Building Your Own Rub
While you can definitely buy pre-made rubs, making your own is a rewarding experience that allows you to customize the flavour profile to your liking.
A classic rub typically includes:
- Salt: Essential for flavour and tenderization. Use kosher salt for its larger crystals and even distribution.
- Black pepper: Adds a bit of heat and depth. Freshly ground black pepper is always best.
- Paprika: Adds a sweet, smoky flavour and a vibrant colour. You can opt for sweet paprika for a milder flavour or smoked paprika for a deeper, smokier taste.
- Garlic powder: Boosts the savoury notes.
- Onion powder: Adds another layer of sweetness and depth.
- Brown sugar: Provides a touch of sweetness and helps create a caramelized crust.
Don't be afraid to experiment! Try adding other spices like chili powder, cayenne pepper, cumin, oregano, thyme, or even a touch of mustard powder for a kick of flavour. Remember, the beauty of a rib rub is that it's entirely customizable, so feel free to get creative!
(Part 3) The Low-and-Slow Method
Tender, succulent ribs aren't created overnight. They require patience and a slow, gentle cooking method that allows the meat to break down and the flavours to meld.
The low-and-slow approach, the backbone of most classic rib recipes, involves cooking the ribs at a low temperature for an extended period, creating a symphony of flavour and texture.
Here's how I break it down:
The Oven's Role
Preheat your oven to 275°F (135°C). This low temperature is crucial for gentle, even cooking. The goal is to cook the ribs slowly and thoroughly without drying them out, allowing the fat to render and the connective tissues to break down, resulting in melt-in-your-mouth tenderness.
The water bath
To keep the ribs moist and prevent them from drying out, I always use a water bath. Simply pour about 1 cup of water into the bottom of your roasting pan. This creates a steamy environment that helps lock in moisture and prevent the ribs from becoming too dry.
The Foil Wrap
Once the oven is preheated, I wrap the ribs tightly in aluminum foil. This creates a sealed environment where the steam from the water bath works its magic, breaking down the connective tissues in the meat and creating that legendary fall-off-the-bone texture.
The Timing
The cooking time for ribs varies depending on the size and cut of the ribs, but generally, you can expect to cook them for 3-4 hours in the oven. Remember, patience is key here! The longer you cook them, the more tender and flavorful they will become.
The Smoke Option
For an extra layer of depth and complexity, consider adding a smoky element to your ribs. While a smoker is ideal for achieving that signature wood-smoked flavour, you can also achieve a smoky taste in the oven by using wood chips.
Simply soak the wood chips in water for about 30 minutes, then drain them and place them in a small, foil-wrapped packet. Create a few small holes in the foil packet, then place it on the bottom of the oven along with the ribs. The heat from the oven will cause the wood chips to smoke, adding a subtle smoky aroma to your ribs.
(Part 4) The Sauce Situation
The sauce is the final act in the rib opera, a harmonious blend of flavours that elevates the dish from good to truly spectacular.
The Sauce Basics
Most rib sauces have a few key components in common:
- Tomato base: Provides a tangy sweetness and rich flavour.
- Vinegar: Adds a bright, acidic counterpoint to the sweetness.
- Sugar: Sweetens the sauce and helps create a sticky glaze.
- Spices: Add depth and complexity.
Making Your Own Sauce
As with rubs, creating your own sauce allows you to customize the flavour profile to suit your palate. A classic barbecue sauce typically includes:
- Ketchup: A convenient and readily available tomato base.
- Apple cider vinegar: A mild, balanced vinegar that adds a subtle tang.
- Brown sugar: Adds a touch of sweetness and helps create a sticky glaze.
- Worcestershire sauce: A secret ingredient that adds umami and depth.
- Garlic powder: Enhances the savoury flavour.
- Onion powder: Adds a touch of sweetness and complexity.
Get creative with spices! Experiment with smoked paprika, chili powder, black pepper, cayenne pepper, or even mustard powder to add your own signature flavour. You can also use a combination of spices to create a truly unique and unforgettable sauce.
The Saucing Strategy
Here's where timing comes into play. I usually apply the sauce during the last 30-45 minutes of cooking. This prevents the sauce from burning and allows the ribs to absorb the flavours without becoming too sticky.
(Part 5) The Unwrapping Ritual
After the long and slow cooking process, it's time to unleash the deliciousness.
Carefully remove the ribs from the oven and set them aside. Unwrap the foil, revealing the succulent, tender ribs beneath. The steam that rises up will be intoxicatingly delicious.
The Finishing Touches
If the ribs are still slightly tough, you can return them to the oven for another 30 minutes, unwrapped, to allow the sauce to caramelize and the ribs to crisp up.
Once the ribs are cooked to perfection, it's time for a little TLC. I like to baste them with additional sauce and sprinkle a bit of fresh chopped parsley or cilantro for a vibrant finishing touch.
(Part 6) The Ultimate Rib Experience
The moment of truth has arrived. It's time to sink your teeth into those glorious, succulent ribs.
There's no better feeling than seeing that meat fall off the bone with a gentle tug, revealing the tender, juicy meat beneath. The flavour is rich and complex, the meat is tender and juicy, and the sauce is a perfect complement.
Enjoy your rib masterpiece!
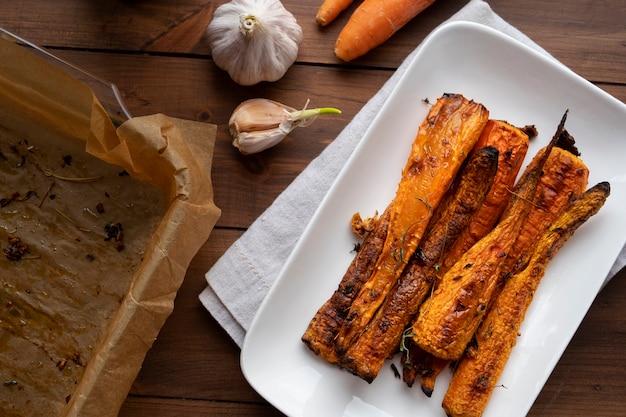
(Part 7) Rib-tastic Sidekicks
No rib feast is complete without a crew of tasty sidekicks to round out the meal.
I like to keep things simple with classic companions:
- Coleslaw: A creamy, crunchy counterpoint to the rich ribs, offering a refreshing contrast in texture and flavour.
- Macaroni and cheese: A comfort food classic that pairs perfectly with the smoky, sweet flavours of the ribs.
- Cornbread: Sweet, crumbly, and delicious, it provides a delightful textural contrast.
- Baked beans: A sweet and smoky side dish that complements the ribs beautifully.
Don't be afraid to get creative! Experiment with other side dishes like potato salad, potato wedges, or even a simple green salad to round out your rib experience.
(Part 8) The Leftover Love
Let's face it, you might have some leftovers. And that's okay! Ribs are even better the next day.
You can simply reheat the ribs in the oven or microwave, or you can get creative and use them in other dishes like:
- Rib sandwiches: A classic and delicious way to enjoy leftovers. Pile those ribs onto a crusty roll and add your favourite toppings, like coleslaw, pickles, and a drizzle of your favourite sauce.
- Rib salad: Chop up the ribs and add them to a salad for a protein-packed meal. Toss them with your favourite salad greens, vegetables, and a light dressing.
- Rib pizza: Use the ribs as a topping on your favourite pizza crust. They'll add a smoky, savory flavour to your pizza, creating a truly unique culinary experience.
Leftover ribs are a culinary treasure waiting to be repurposed, so get creative and find new ways to enjoy those delicious leftovers.
(Part 9) FAQs
Got questions? Here are some common inquiries about oven-baked ribs.
1. How long can I keep ribs in the fridge?
You can keep cooked ribs in the fridge for up to 3-4 days.
2. Can I freeze ribs?
Yes, you can freeze cooked ribs for up to 2-3 months. Just make sure to wrap them tightly in freezer-safe plastic wrap or foil to prevent freezer burn.
3. How can I tell if ribs are cooked?
You can tell if ribs are cooked by checking the internal temperature with a meat thermometer. The ribs should reach an internal temperature of 145°F (63°C). If the meat pulls away easily from the bone, it's a good indication that they are cooked through.
4. Can I use a different type of meat for ribs?
You can use beef ribs instead of pork ribs, but they have a tougher texture and require a longer cooking time. They also have a different flavour profile, with a more robust, beefy taste.
5. What if my ribs are too dry?
If your ribs are too dry, you can try adding more sauce or braising them in a liquid like broth or beer. You can also try adding a few tablespoons of water to the bottom of the roasting pan to create more steam and prevent the ribs from drying out.
Well, there you have it, my ultimate guide to oven-baked ribs. Go forth and conquer the rib world!
Everyone is watching

How to Cook Frozen Lobster Tails Perfectly: A Step-by-Step Guide
RecipesLobster. Just the word conjures up images of lavish meals, special occasions, and a taste of luxury. But let's...

Pigs in a Blanket Cooking Time: How Long to Bake for Perfect Results
RecipesAh, pigs in a blanket. Just the name conjures up images of those delightful little parcels of crispy pastry en...

Pork Fillet Cooking Time: How Long to Cook It Perfectly
RecipesPork fillet, or tenderloin as it's sometimes called, is a real favourite in our house. It's so versatile, and...

The Ultimate Guide to Cooking Delicious Frankfurters
RecipesLet's face it, we all love a good frankfurter. It's a classic, simple, and always satisfying. But let's be rea...

Wolf Meat Recipes: A Guide to Cooking Wild Game
RecipesLet's be honest, you don't see wolf meat at your local butcher shop every day. It's a bit of a wild card, but ...