There's something truly satisfying about sinking your teeth into a perfectly cooked rack of ribs. The tender, juicy meat falling off the bone, the smoky flavour, the tangy sauce – it's a culinary experience that makes you feel like you're in barbecue heaven. But let's be honest, not all ribs are created equal. There's nothing worse than biting into a dry, tough rib that leaves you feeling disappointed. That's where this guide comes in. I'm here to share my secrets, my tried-and-true methods, and my hard-earned tips to help you achieve oven-baked ribs that will have everyone asking for your recipe.
We'll cover everything from picking the perfect rack to mastering the art of the dry rub and sauce. So grab a comfy spot, a refreshing beverage (maybe a cold beer?), and let's embark on a delicious journey together.
Part 1: Picking the Perfect pork spare ribs

Before we even think about the oven, we need to get our hands on the right ingredients. And when it comes to ribs, the choice of cut makes all the difference. Forget those skinny little baby back ribs – we're going for the big, bold flavour of pork spare ribs.
Why Spare Ribs?
Spare ribs are the longer, meatier ribs, and they're perfect for oven baking. They have a higher fat content, which contributes to that melt-in-your-mouth tenderness we crave. They're also naturally more flavourful, thanks to the presence of a fatty layer called the "belly," which adds a rich depth of flavour that baby back ribs just can't match.
Choosing the Right Rack
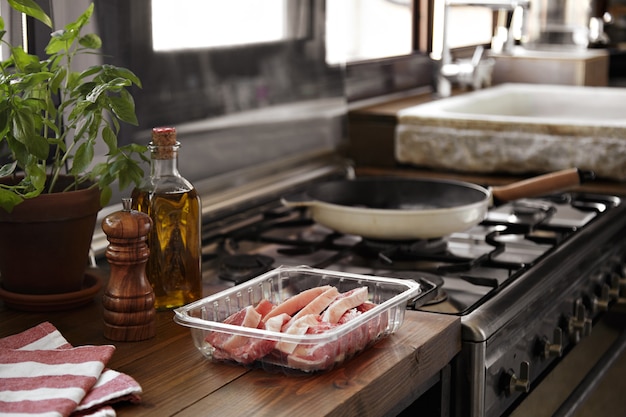
Now, let's talk about how to pick the perfect rack. First, check for marbling. Those little white streaks of fat throughout the meat are essential for moisture and flavour. You want a rack with good marbling, not a lean one, otherwise you'll be facing dry ribs. Next, take a look at the colour. It should be a nice, even pink colour, with no signs of discolouration or bruising. Finally, give it a sniff. Fresh pork ribs should have a clean, slightly sweet aroma. If you smell anything off, it's best to choose a different rack.
The Membrane: It Has to Go!
Here's a little trick you might not know: there's a thin membrane on the back of the ribs that needs to go. This membrane is tough and acts like a barrier, preventing the ribs from absorbing the delicious flavours of your dry rub and sauce. It's a pain to remove, but it's essential. You can use a sharp knife, or try using a paper towel to help you peel it off – it's a bit like removing a sticker.
Part 2: The Dry Rub: The Secret Weapon for Flavor

Now, it's time to get those ribs ready for their oven adventure. And the first step is creating a flavour bomb – a dry rub that's going to infuse the ribs with a symphony of deliciousness.
My Go-To Dry Rub
I've been tweaking my dry rub recipe for years, and this one has become my ultimate favourite. It's a balanced blend of spices that enhance the natural flavour of the ribs without overwhelming them.
- 1 tablespoon paprika: A classic for a vibrant colour and a touch of smokiness.
- 1 tablespoon brown sugar: Adds sweetness and helps the rub stick to the ribs.
- 1 tablespoon smoked paprika: That smoky flavour is what takes ribs to the next level.
- 1 teaspoon onion powder: Adds a subtle sweetness and a hint of oniony goodness.
- 1 teaspoon garlic powder: A must-have for that garlicky punch that elevates any dish.
- 1 teaspoon black pepper: Provides a grounding element and adds a touch of heat.
- 1 teaspoon salt: Brings out the flavours of all the ingredients.
- ?? teaspoon cayenne pepper (optional): For those who like a little kick, add some cayenne pepper for a touch of heat.
Simply combine all the ingredients in a bowl and rub them generously all over your ribs, making sure to get into all the nooks and crannies. Don't be shy, give them a good massage!
The Power of Overnight Resting
After you've applied your dry rub, it's time to let those ribs rest. Wrap them tightly in a double layer of cling film, then place them in a large resealable bag (I find freezer bags work best as they're stronger). Pop them in the fridge for at least 4 hours, or even better, overnight. This allows the dry rub to penetrate the meat, creating a beautiful flavour explosion when they're cooked.
Part 3: Oven-Baking for Tenderness and Flavor

It's finally time to take those ribs out of the fridge and get them into the oven. This is where the magic happens.
Low and Slow is the Key
The key to perfectly tender, juicy ribs is to cook them low and slow. This allows the connective tissues to break down, resulting in that fall-off-the-bone texture that makes ribs so satisfying. Preheat your oven to 150°C (300°F) and place the ribs in a baking dish, making sure they're not touching the sides.
Timing is Everything
Now, the cooking time will vary depending on the size of your rack. But as a general rule of thumb, you can expect to cook them for about 2-3 hours. However, don't just set a timer and walk away.
Check those ribs every hour or so. You'll want to make sure the meat is tender and starting to pull away from the bone.
Basting for Extra Magic
About an hour before your ribs are done, it's time to bring in the big guns – a delicious barbecue sauce. Not only will it add a layer of sweet and smoky flavour, but it will also help to caramelize the ribs, creating a beautiful glaze.
My Favourite Barbecue Sauce
I've been experimenting with different barbecue sauce recipes for years, and this one is a winner. It's a classic blend with just the right balance of sweet, tangy, and smoky.
- 1 cup ketchup: Provides the base for the sauce and adds a tangy flavour.
- ?? cup brown sugar: Adds sweetness and balances out the tangy flavours.
- ?? cup apple cider vinegar: Adds a sharp tang that cuts through the sweetness of the brown sugar.
- 2 tablespoons Worcestershire sauce: Gives the sauce a savory umami depth.
- 1 tablespoon Dijon mustard: Adds a bit of heat and complexity.
- 1 teaspoon onion powder: Enhances the overall flavour profile with a subtle oniony sweetness.
- 1 teaspoon garlic powder: Adds a garlicky punch that complements the ribs beautifully.
- 1 teaspoon smoked paprika: Smokiness is a must for any barbecue sauce.
- ?? teaspoon black pepper: Adds a grounding element and a touch of heat.
Simply combine all the ingredients in a saucepan and bring to a simmer, stirring until the sugar is dissolved. Let it simmer for about 10 minutes, or until it thickens slightly. Remove from heat and let cool slightly before basting your ribs.
The Final Blast of Heat
As your ribs are approaching the end of their cooking time, you'll want to check them frequently. Use a fork or a pair of tongs to gently test the meat. When it's very tender, it's time for the finishing touch.
Increase the oven temperature to 200°C (400°F) and cook for another 10-15 minutes. This will give those ribs a beautiful caramelized crust and intensify the flavours.
Part 4: The Resting Ritual
Those ribs are looking amazing, but don't rush to dig in just yet. Resting is crucial to ensure the most succulent, juicy results.
Transfer the ribs to a cutting board and tent them with foil. This will help to trap the steam and moisture, allowing the juices to redistribute throughout the meat. Let them rest for at least 15 minutes.
Part 5: Serving Up a Rib Feast
Alright, the moment of truth has arrived! It's time to enjoy the fruits of your labour. The best way to serve ribs is to cut them into individual ribs. If you're feeling fancy, use a pair of kitchen shears. If not, a sharp knife will do the trick.
side dishes: The Perfect Pairings
Ribs are a versatile dish that goes perfectly with a variety of side dishes. Here are a few ideas to get you started:
- Coleslaw: The classic pairing for ribs, offering a refreshing contrast to the rich flavour of the ribs.
- Mac and cheese: Creamy, cheesy goodness that's a perfect complement to the smoky, tangy ribs.
- Baked beans: A sweet and smoky side dish that's a barbecue staple.
- corn on the cob: A classic summer favourite that adds a touch of sweetness to the meal.
- potato salad: A creamy, tangy side dish that's perfect for picnics and barbecues.
But don't be afraid to get creative! Try serving your ribs with something a little more adventurous:
- Fried plantains: Sweet and savory plantains add a unique flavour and texture.
- spicy rice and beans: A vibrant and flavourful side dish that adds a touch of spice to the meal.
- Grilled pineapple: Sweet and tangy grilled pineapple adds a refreshing contrast to the savoury ribs.
Drinks: The Perfect Accompaniments
Of course, no rib feast is complete without the perfect drink. A cold beer is a classic choice, but you can also go for something a little more refreshing, like a lemonade or a fruity cocktail.
Part 6: Leftovers? No Problem!
You've made a delicious batch of ribs, but chances are you won't be able to eat them all in one sitting. Don't worry, leftovers are a delicious problem to have!
Store any leftover ribs in an airtight container in the refrigerator for up to 3 days. You can also freeze them for up to 3 months.
To reheat, simply bake them in the oven at 150°C (300°F) for about 15 minutes, or until heated through.
Part 7: Tips and Tricks for Rib Perfection
Here are some extra tips and tricks I've picked up over the years that will help you achieve oven-baked ribs that are truly out of this world:
The Smoking Option
If you're really serious about ribs, consider smoking them. Smoking adds a depth of smoky flavour that can't be replicated in the oven. You can smoke them in a dedicated smoker, or you can use a grill with a smoker box.
Bone-In for Best Results
Don't be afraid to leave those ribs bone-in. The bone helps to keep the meat moist and tender during cooking, adding to the overall deliciousness.
Patience is Key
Remember, ribs are a long and slow cooking process. Don't rush them! Let them cook low and slow, and they'll reward you with the most tender, succulent results.
Overcooked Ribs are a Tragedy
It's tempting to overcook ribs, but resist the urge. You want them to be tender and juicy, not dry and tough. If they're not tender enough, you can always cook them for a bit longer. But if they're overcooked, there's no turning back!
The Thermometer Test
If you're unsure if your ribs are cooked, use a meat thermometer to check the internal temperature. It should be at least 90°C (195°F).
The Mop for Extra Moisture
A mop, which is a simple solution of water, vinegar, and spices, can be used to keep your ribs moist during the cooking process. Simply brush it over the ribs every hour or so. It's a great way to add extra flavour and moisture.
Part 8: FAQs: Your Rib Questions Answered
Here are some frequently asked questions about oven-baked pork spare ribs:
1. What's the best way to choose a rack of ribs?
Look for a rack with good marbling, a nice even pink colour, and no signs of discolouration or bruising. Make sure the membrane is removed from the back of the ribs.
2. Why do I need to wrap the ribs in foil?
Wrapping the ribs in foil helps to keep them moist and tender during cooking. The foil traps steam and moisture, preventing the ribs from drying out.
3. How long should I cook the ribs?
The cooking time will vary depending on the size of the rack, but you can expect to cook them for about 2-3 hours, or until the meat is falling off the bone. Check them every hour or so.
4. How do I know if the ribs are done?
The meat should be very tender and pull away easily from the bone. You can also check the internal temperature of the ribs with a meat thermometer. The internal temperature should be at least 90°C (195°F).
5. How do I reheat leftover ribs?
Reheat them in the oven at 150°C (300°F) for about 15 minutes, or until heated through. You can also reheat them in the microwave, but they won't be as tender and juicy.
Part 9: The Final Word: A Rib-tastic Journey
And there you have it! My ultimate guide to oven-baked ribs. Remember, it's all about the dry rub, the wrap, the low and slow cook, and the delicious sauce. With a little bit of effort and patience, you can create ribs that are so good, they'll have everyone coming back for more. So, get out there and give it a go!
And if you're looking for more inspiration, be sure to check out my other recipes and cooking tips. I'm always here to help you become a better cook.
Everyone is watching

How to Cook Frozen Lobster Tails Perfectly: A Step-by-Step Guide
RecipesLobster. Just the word conjures up images of lavish meals, special occasions, and a taste of luxury. But let's...

Pigs in a Blanket Cooking Time: How Long to Bake for Perfect Results
RecipesAh, pigs in a blanket. Just the name conjures up images of those delightful little parcels of crispy pastry en...

Pork Fillet Cooking Time: How Long to Cook It Perfectly
RecipesPork fillet, or tenderloin as it's sometimes called, is a real favourite in our house. It's so versatile, and...

The Ultimate Guide to Cooking Delicious Frankfurters
RecipesLet's face it, we all love a good frankfurter. It's a classic, simple, and always satisfying. But let's be rea...

The Ultimate Guide to Tender, Juicy Pulled Pork
RecipesRight, let's talk pulled pork. It's one of those dishes that just screams "comfort food," doesn't it? I mean...
