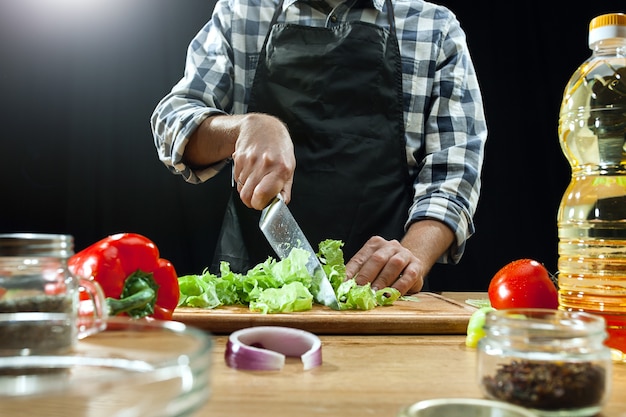
Right, so you're looking to cook some neck bones, eh? Good choice! They're a real bargain, packed with flavour, and make for a truly satisfying meal. But here's the thing - you need to get the cooking time right, or you'll end up with a chewy mess. Don't worry, I'm here to help! I've been cooking with neck bones for years, and I've learned a thing or two about getting them perfectly tender. This guide will take you through everything you need to know, from choosing the right cut to perfecting your cooking technique. So, grab your apron, let's get started!
Part 1: Choosing the Right Neck Bones
Before we dive into cooking, let's talk about choosing the right neck bones. This is crucial for ensuring a tender and delicious result. Trust me, you don't want to end up with tough, chewy bones that are impossible to eat. Imagine trying to pull the meat off the bone with all your might, only to be left with a mouthful of gristle. Not a pleasant experience, I assure you!
1.1. Fresh or Frozen?
Fresh neck bones are my personal favourite. They just taste better, don't they? The flavour is brighter, more intense, and the meat is more succulent. Plus, you can usually find them at your local butcher, where you can ask for them to be cut into manageable sizes. However, if you're in a pinch or can't find fresh ones, frozen will do the trick. Just make sure they're not freezer burnt. You can tell if they are by looking for white patches or an off-putting smell. If you see those, it's best to skip them and find another batch.
1.2. Bone Size
The size of the bones can affect your cooking time. Generally, smaller bones will cook faster than larger ones. This is because they have a smaller surface area to heat. But don't worry too much about it - you can always adjust the cooking time based on the size of your bones. Just remember that larger bones will likely need a little extra time to become tender.
1.3. The Cut
Neck bones are usually sold as a single piece or as individual bones. If you're buying a single piece, make sure you ask the butcher to chop it into smaller pieces for easier cooking. This will also help ensure even cooking throughout, as smaller pieces cook more evenly than a large chunk of bone.
Part 2: Preparing Your Neck Bones

Now that you've chosen your neck bones, it's time to prep them for cooking. A little bit of preparation goes a long way! You want to make sure your neck bones are clean and seasoned properly before they go in the pot, so you get the best flavour and texture possible.
2.1. Rinsing and Cleaning
Give your neck bones a good rinse under cold water. You'll want to remove any loose bits and make sure they're clean. If you find any excess fat, feel free to trim it off - this will help prevent your stew from getting too greasy. You can also use a little bit of salt to help remove any lingering impurities. It's like a little cleaning ritual for your bones before they get the star treatment in your kitchen.
2.2. Seasoning
Here's where the fun begins! Seasoning your neck bones is all about personal preference. I like to keep things simple with salt, pepper, and paprika. It creates a flavour profile that's both classic and delicious. But you can get really creative with your seasonings. You could also add herbs like thyme, rosemary, or bay leaves, depending on the flavour profile you're going for. For a more robust flavour, try adding a few cloves of garlic. It adds a beautiful complexity to the dish. Don't be afraid to experiment!
Part 3: Cooking Methods
Now, let's talk about the actual cooking. There are a few different ways to cook neck bones, and each has its own unique advantages. Choosing the right method depends on your time constraints, equipment, and desired level of tenderness. Let's explore them!
3.1. slow cooking
My go-to method for neck bones is slow cooking. It's easy, hands-off, and produces the most tender and flavourful results. Simply throw your seasoned neck bones into your slow cooker, add some liquid (like broth or water), and let it cook on low for 6-8 hours, or on high for 4-6 hours. Imagine coming home to the aroma of a delicious stew simmering away, filling your home with warmth and comfort. It's pure magic!
3.2. Pressure Cooking
If you're short on time, a pressure cooker is a great option for cooking neck bones. This method cooks them quickly and efficiently, with minimal effort. You can usually have a delicious pot of neck bones ready in under an hour. Be careful though, as pressure cookers can be a bit intimidating for some people. Just follow the manufacturer's instructions carefully and you'll be fine. Remember, safety first!
3.3. Oven Cooking
Yes, you can also cook neck bones in the oven! Preheat your oven to 350°F (175°C) and place your seasoned neck bones in a baking dish. Add a little bit of liquid (broth, water, or even wine) and cover the dish with foil. This helps to trap the moisture and steam the neck bones, ensuring they cook evenly and remain juicy. Cook for 2-3 hours, or until the bones are tender. The oven is a great option if you prefer a more hands-off cooking method.
3.4. Stovetop Cooking
If you're a fan of old-school cooking, you can cook neck bones on the stovetop in a large pot. This method takes a bit more time and attention, but you can control the cooking process more closely. Simply place your seasoned neck bones in a pot with some liquid and bring it to a simmer. Remember to keep the heat low and gentle. This will help prevent the meat from becoming tough. Cook for 2-3 hours, or until the bones are tender. Stovetop cooking allows you to watch the process unfold and adjust the heat as needed.
Part 4: Checking for Tenderness
So you've been cooking your neck bones for a while, but how do you know when they're done? The most reliable way is to check for tenderness. You can do this by gently poking the meat with a fork. If it easily pulls away from the bone, you're good to go! You'll know you've reached that perfect stage when the meat melts in your mouth, leaving just the bone behind.
4.1. The Fork Test
The fork test is a simple and effective way to check for tenderness. Gently insert a fork into the thickest part of the meat. If it slides in easily and the meat pulls away from the bone with little resistance, your neck bones are cooked to perfection. It's like the meat should practically fall off the bone.
4.2. The bone test
Another way to check for tenderness is to look at the bone itself. If the bone is easily coming away from the meat, you know the neck bones are ready. This is a good indicator that the collagen in the meat has broken down, resulting in a soft, melt-in-your-mouth texture.
4.3. The Taste Test
Don't be afraid to give your neck bones a little taste test! This is a great way to check for flavour and tenderness. If the meat is tender and the flavours are developing nicely, you're ready to move on to the next stage. After all, who doesn't love a little taste test? It's a culinary adventure!
Part 5: Recommended Cooking Times
Here's a handy table summarizing the recommended cooking times for neck bones, based on the cooking method and the desired level of tenderness. Remember, these are just guidelines, and you may need to adjust the cooking time based on the size and thickness of your neck bones. It's always better to err on the side of caution and cook them a little longer than you think you need to. A little extra time will ensure that they are perfectly tender and succulent.
| Cooking Method | Cooking Time (Low/High) | Tenderness Level |
|---|---|---|
| Slow Cooker | 6-8 hours (Low) / 4-6 hours (High) | Very Tender |
| Pressure Cooker | 45-60 minutes | Tender |
| Oven | 2-3 hours | Tender |
| Stovetop | 2-3 hours | Tender |
Part 6: Using Leftover Neck Bones
Neck bones are incredibly versatile, and you can use leftovers in a variety of ways. They're not just for a one-time meal. Get creative and explore the possibilities!
6.1. Neck Bone Soup
You can use leftover neck bones to make a delicious and hearty soup. Simply simmer the bones in a pot with water, vegetables, and your favourite herbs and spices. The longer you simmer the soup, the richer and more flavourful it will become. The bones will infuse the broth with their natural collagen, creating a rich, velvety texture. Think of it as a second wave of flavour and goodness.
6.2. Neck Bone Stew
Neck bones are perfect for making a thick and satisfying stew. You can add vegetables, potatoes, beans, or even rice to your stew for a complete meal. Think hearty, rustic, and bursting with flavour. You can even add a little bit of wine for extra depth of flavour.
6.3. Neck Bone Salad
Don't be afraid to get creative! You can use leftover neck bones in a salad for a unique and satisfying meal. The bones add a nice textural element to the salad, and the meat provides a protein boost. Imagine a salad with tender, shredded neck bones, crisp vegetables, and a tangy vinaigrette. It's a delightful twist on a classic dish.
6.4. Neck Bone Sandwiches
For a quick and easy meal, try using leftover neck bones to make sandwiches. Simply shred the meat, add your favourite toppings, and enjoy! Think of a hearty sandwich with pulled neck bones, tangy bbq sauce, and creamy coleslaw. It's a real crowd-pleaser!
Part 7: Troubleshooting Common Issues
Even with all the tips and tricks in the world, sometimes you might encounter a few hiccups along the way. Don't worry, I've got you covered! Every cook has their moments of frustration, but with a little knowledge and perseverance, you can overcome any challenge.
7.1. Neck Bones Too Chewy
If your neck bones are too chewy, it likely means they haven't cooked long enough. Think of it as a reminder to be patient. Try adding more liquid to the pot and cooking them for another hour or two. Keep an eye on them, and you'll soon have those bones melting in your mouth.
7.2. Neck Bones Falling Apart
If your neck bones are falling apart, it means they've been cooked for too long. You can still enjoy them, but they might be a bit mushy. It's a sign that you've gone a bit overboard with the cooking time. Next time, aim for a slightly shorter cooking time to achieve a more desirable texture.
7.3. Neck Bones Not Tender Enough
If your neck bones aren't tender enough, simply cook them for a little longer. Keep checking them every 30 minutes until they reach the desired tenderness. Persistence is key when it comes to cooking neck bones.
7.4. Neck Bones Too Greasy
If your neck bones are too greasy, you can skim off the excess fat from the surface of the cooking liquid. You can also try cooking them in a pan with a non-stick coating. This will help to reduce the amount of fat that is released during cooking.
7.5. Neck Bones Not Flavourful Enough
If your neck bones aren't flavourful enough, you can try adding more herbs and spices to the pot. You can also add a splash of wine or vinegar for extra depth of flavour. Remember, flavour is a journey, and you can always adjust it along the way.
Part 8: FAQs
Let's answer some of the questions you might have about neck bones.
8.1. What is the best way to cook neck bones?
The best way to cook neck bones is by slow cooking. This method produces the most tender and flavourful results. Slow cooking allows the heat to penetrate the meat slowly and evenly, breaking down the tough connective tissues and creating a truly melt-in-your-mouth experience.
8.2. How long should I cook neck bones?
The cooking time for neck bones varies depending on the cooking method, the size of the bones, and the desired level of tenderness. Consult the table above for general guidelines. It's always a good idea to err on the side of caution and cook them a little longer than you think you need to. A little extra time will ensure that they are perfectly tender and succulent.
8.3. What can I serve with neck bones?
You can serve neck bones with a variety of sides, such as mashed potatoes, rice, cornbread, coleslaw, or green beans. The possibilities are endless! Think about what flavours complement the rich and savoury taste of the neck bones.
8.4. Can I freeze neck bones?
Yes, you can freeze neck bones. They'll last in the freezer for up to 3 months. Thaw them in the refrigerator overnight before cooking. This ensures they thaw evenly and don't get freezer burnt.
8.5. What are the health benefits of eating neck bones?
Neck bones are a good source of protein, collagen, and nutrients like iron and zinc. They are also relatively low in fat. Collagen is a type of protein that is essential for healthy skin, bones, and joints. It's a real nutritional powerhouse!
Part 9: Final Thoughts
So, there you have it! My ultimate guide to cooking neck bones. Don't be intimidated by this humble cut of meat. With a little patience and the right technique, you can create a truly delicious and satisfying meal. So, get your apron on, gather your ingredients, and let's cook some neck bones! You won't regret it.
Everyone is watching

How to Cook Frozen Lobster Tails Perfectly: A Step-by-Step Guide
RecipesLobster. Just the word conjures up images of lavish meals, special occasions, and a taste of luxury. But let's...

Pigs in a Blanket Cooking Time: How Long to Bake for Perfect Results
RecipesAh, pigs in a blanket. Just the name conjures up images of those delightful little parcels of crispy pastry en...

Pork Fillet Cooking Time: How Long to Cook It Perfectly
RecipesPork fillet, or tenderloin as it's sometimes called, is a real favourite in our house. It's so versatile, and...

The Ultimate Guide to Tender, Juicy Pulled Pork
RecipesRight, let's talk pulled pork. It's one of those dishes that just screams "comfort food," doesn't it? I mean...

The Ultimate Guide to Cooking Sweet Potatoes: From Roasting to Mashing
RecipesSweet potatoes. Just the name conjures up images of warm, comforting dishes, bursts of vibrant color, and a to...