Let's talk meatloaf, folks. I know what you're thinking: "Isn't that a bit old-fashioned?" But trust me, a good meatloaf is an absolute triumph. It's comforting, it's versatile, it's perfect for a crowd, and it's surprisingly easy to make. It's one of those dishes that always feels like a warm hug from your grandma – you know, the one who always makes you feel loved and cared for. And let's be honest, who doesn't need a little bit of that in their lives?
Now, I've been whipping up meatloaves for years, and I've learned a thing or two along the way. Cooking it at 400 degrees is my go-to method. It creates that gorgeous browning on the outside and a tender, juicy interior. But here's the catch: getting the cooking time just right is absolutely crucial. You don't want to overcook it, or you'll end up with a dry, crumbly mess. And you definitely don't want to undercook it, because nobody wants to be dealing with raw meat. Let's dive into the details of making the perfect 400-degree meatloaf, step by delicious step.
Part 1: The Essence of Meatloaf
Meatloaf: More Than Just a Loaf
First things first, let's talk about what meatloaf actually is. It's a blend of ground meat, usually beef, but you can also incorporate pork or veal for added richness. You mix in a bunch of delightful additions – breadcrumbs, eggs, spices, onions, even vegetables – and shape it into, you guessed it, a loaf. And there you have it – the name tells you exactly what it is!
The Magic of 400 Degrees
So, why 400 degrees? Well, it's the sweet spot for even cooking and browning. It's not too hot, so you won't burn the outside before the inside is cooked through. And it's not too low, so you're not waiting forever for it to be ready. It's a happy medium, and the temperature most ovens come pre-set at, making it a convenient choice.
Part 2: Selecting the Perfect Meat
Beef, Pork, or Veal: A Meaty Decision
You're ready to start your meatloaf journey, so the first step is choosing the meat. Tradition leans towards ground beef, but don't be afraid to get fancy. Adding some pork or veal can create a truly special flavour and juicy texture. I have a real fondness for a mix of ground beef and pork. It's a personal preference, but it adds a richness that's hard to resist.
Quality Counts: Don't Settle for Less
When you're at the butcher counter, don't be shy to ask for 80/20 ground beef. This means it's 80% lean meat and 20% fat. That little bit of fat is your secret weapon for keeping the meatloaf moist and flavorful. If you go for something super lean, you'll end up with a dry and tough loaf – not what you want!
Part 3: The Unsung Heroes: Secret Ingredients
The Binding Force: Breadcrumbs
One of the keys to a good meatloaf is the binder – the ingredient that holds it all together and gives it structure. My go-to is plain old breadcrumbs. I prefer using fresh breadcrumbs made by blitzing leftover crusty bread in a food processor. But if you don't have any crusty bread on hand, store-bought breadcrumbs will do the trick.
Moisture Boost: The Power of Eggs
Eggs are another crucial ingredient. They add moisture and richness, and they're essential for binding everything together. You'll usually need around 1-2 eggs, depending on the size of your meatloaf. They're the secret to a smooth, even texture, preventing the meatloaf from falling apart.
Flavor Boost: spices and herbs
Now, here's the fun part – the seasoning! This is your chance to get creative and personalize your meatloaf. I always start with a base of salt, pepper, and paprika, but I love adding additional herbs and spices for extra flavor. A little garlic powder, onion powder, oregano, thyme, even a pinch of cayenne for a bit of heat – the possibilities are endless! It's all about your own taste preferences.
Part 4: Time to Get Your Hands Dirty
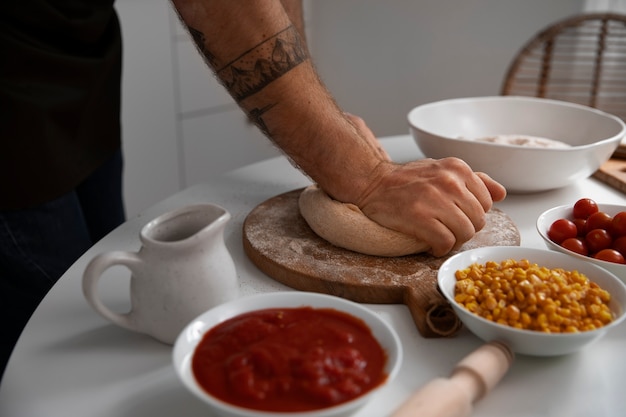
Mix It Up: Combining the Ingredients
You've got your meat, breadcrumbs, eggs, and seasonings – now it's time to combine them all. You can mix it by hand, but I find a large mixing bowl and a sturdy wooden spoon make the process much easier. Gently combine the meat, breadcrumbs, eggs, and spices until everything is evenly distributed.
Shape It Up: Creating the Loaf
Once the mixture is combined, it's time to shape the meatloaf. You can make it as big or as small as you like. I usually go for a standard-sized loaf, about 9x5 inches. I like to line a baking dish with parchment paper, which makes lifting it out later a breeze. Now, gently pat the mixture into a loaf shape, making sure it's even and has smooth, rounded edges. Don't worry about perfection; it's the taste that counts!
The Final Touch: Glazing It Up
Before you send your meatloaf to the oven, you can add a glaze. This adds a beautiful shine and extra flavor. A classic choice is ketchup, but I also enjoy a mix of brown sugar, Dijon mustard, and Worcestershire sauce. Let your taste buds guide you!
Part 5: The 400-Degree Bake: Cooking TimePreheating: Setting the Stage
The moment of truth is here – the oven! The first step is to preheat your oven to 400 degrees. Give it at least 15 minutes to heat up properly. This ensures your meatloaf cooks evenly and beautifully.
Into the Oven: Baking Time
Once your oven is nice and hot, it's time to pop your meatloaf in. Place it on a baking sheet in the middle rack of your oven. Now, here's the crucial part – cooking time!
Cooking Time: 45-60 Minutes
The general rule of thumb is to cook a meatloaf for about 45-60 minutes at 400 degrees. You'll know it's done when the internal temperature reaches 160 degrees Fahrenheit. You can use a meat thermometer to check the temperature, but here's a little tip: if you insert a toothpick into the center of the meatloaf and it comes out clean, it's likely done.
Part 6: Don't Overdo It: Avoiding Overcooked meatloaf
Signs of Overcooked Meatloaf: A Dry and Crumbly Disaster
We've all been there. You've cooked the meatloaf for the recommended time, but it still seems a bit dry and crumbly. This is a classic sign of overcooked meatloaf. It can happen if you cook it at too high a temperature or for too long. You might also notice the outside is dark and crusty, while the inside is dry and tough. Not ideal.
Preventing Overcooking: A Matter of Observation
The best way to avoid overcooked meatloaf is to keep a watchful eye on it while it's in the oven. You can use a meat thermometer to check the internal temperature, but you can also tell by its appearance. If the top of the meatloaf starts to look too brown or crusty, cover it with some foil to prevent it from drying out further.
Part 7: Patience is a Virtue: The Importance of Resting
Letting it Rest: A Key Step for Juiciness
Once your meatloaf is cooked through, let it rest. This is a crucial step that many people skip, but it makes a huge difference in the final result. Allowing it to rest gives the juices a chance to redistribute throughout the meatloaf. If you cut into it right away, all the juices will run out, leaving you with a dry and crumbly mess. No one wants that!
Resting Time: 10-15 Minutes for Maximum Flavor
Let the meatloaf rest for 10-15 minutes before slicing and serving. This ensures it's nice and juicy and stays together when you cut into it. Cover it loosely with foil and let it sit on the counter. This allows the meat to relax and absorb its own juices. Think of it as a little spa treatment for your meatloaf!
Part 8: Serving Your Culinary Creation
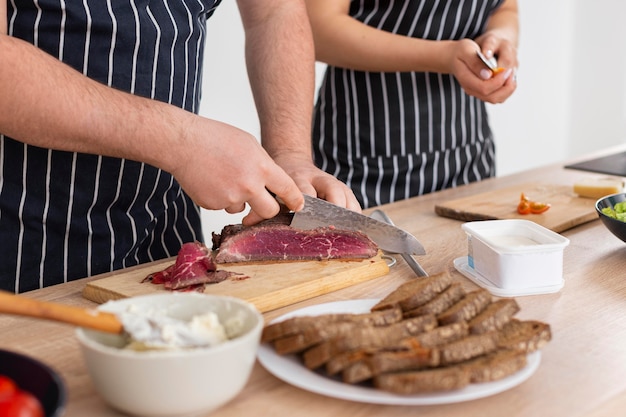
Slicing and Serving: Showcasing Your Meatloaf
After your meatloaf has rested, it's time to slice and serve. Use a sharp knife to cut the meatloaf into thick slices, and arrange them on a platter. Don't be afraid to get creative with your presentation – a few sprigs of parsley or some cherry tomatoes can add a nice touch. Make it a feast for the eyes, too!
Perfect Pairings: Accompanying Your Masterpiece
There are endless possibilities for serving meatloaf. I love it with mashed potatoes, gravy, and a green salad. But it also goes beautifully with roasted vegetables, pasta, or even a side of rice. You can even serve it on a toasted bun with some cheese and pickles for a tasty meatloaf sandwich. It's a versatile dish that can be adapted to any occasion.
Part 9: Leftovers: Don't Waste a Bite!
Storing Leftovers: Keeping the Flavor Fresh
If you have leftovers, which is a common occurrence with a dish like meatloaf, store them in an airtight container in the refrigerator for up to 3-4 days. You can reheat them in the oven or microwave until they're warmed through.
Freezing for Later: Meatloaf on Demand
You can also freeze leftovers for up to 3 months. When you're ready to enjoy it again, just thaw it in the refrigerator overnight, then reheat it in the oven until it's warmed through. You can freeze uncooked meatloaf as well – just wrap it tightly in plastic wrap and then in foil. When you're ready to bake it, just thaw it in the refrigerator overnight and bake it as usual.
Part 10: FAQs: Addressing Your Meatloaf Queries
Q1: What if my meatloaf is still a bit pink in the middle?
If the meatloaf is still a little pink in the middle after the recommended cooking time, don't panic. It's probably just because of the spices and herbs you added. Just cook it for a few more minutes until it reaches an internal temperature of 160 degrees Fahrenheit. You can always use a meat thermometer to check the temperature.
Q2: Can I make meatloaf in a loaf pan?
Absolutely! A loaf pan is actually the traditional way to make meatloaf. Just make sure you grease it well so the meatloaf doesn't stick. Also, check the cooking time for a loaf pan – it might be a bit shorter than baking it on a baking sheet.
Q3: What if my meatloaf falls apart?
A meatloaf falling apart is often a sign that it wasn't mixed well enough or that it wasn't cooked long enough. Make sure you mix the ingredients thoroughly and cook it until it's completely set. You can also try using a little more binder, like breadcrumbs, if you find your meatloaf is prone to falling apart.
Q4: Can I add vegetables to my meatloaf?
Yes, definitely! You can add any number of chopped vegetables to your meatloaf, such as carrots, celery, onions, bell peppers, or even spinach. Just make sure to chop them finely and mix them evenly into the meat mixture.
Q5: How can I make my meatloaf more flavorful?
There are many ways to boost the flavor of your meatloaf. You can try adding different spices and herbs, such as garlic powder, onion powder, oregano, thyme, or even a pinch of cayenne for a bit of heat. You can also experiment with different glazes, like brown sugar, mustard, or Worcestershire sauce. You can even add a few slices of bacon to the top for extra richness and flavor.
Part 11: Variations on a Theme: Meatloaf Gets Creative
Meatloaf Around the World: From Italy to the Middle East
Okay, so you've mastered the basics of meatloaf, but you're ready for more. Let's explore some variations on the classic meatloaf. You can travel the world with your meatloaf – think Italian-style meatloaf with sun-dried tomatoes and basil, or a Middle Eastern-inspired meatloaf with cumin, coriander, and turmeric.
Meatloaf Gets Fancy: From Turkey to Chicken
No more boring beef! You can switch things up with ground turkey or chicken, too. They offer a lighter option, but just as delicious. It's all about finding what your taste buds are craving.
Meatloaf Goes Vegetarian: The Meat-Free Alternative
For all my veggie friends out there, you can even create a fantastic meatloaf without any meat! A veggie meatloaf uses ingredients like lentils, chickpeas, and mushrooms, packed with flavor and textures. You'll be surprised how delicious it is!
Part 12: The Final Word: Meatloaf – A comfort food Classic
There you have it – a complete guide to cooking the perfect meatloaf at 400 degrees. Now, go forth and create your own meatloaf masterpieces! I'm confident that with a bit of practice, you'll become a meatloaf maestro in no time. Remember, it's all about experimentation, so have fun with it. And most importantly, enjoy the comfort and satisfaction of a home-cooked meal!
Part 13: Bonus Tip: The Importance of Temperature
I know I mentioned checking the internal temperature, but it's worth emphasizing. Using a meat thermometer is absolutely essential for ensuring your meatloaf is cooked safely and thoroughly. There's nothing worse than biting into a piece of meatloaf and realizing it's not quite done. So, invest in a good meat thermometer – it's a small investment that can make a big difference.
Part 14: A Final Note: Meatloaf is for Everyone
Meatloaf isn't just a dish for grandma's kitchen, although it's a great way to honor those family traditions. It's a dish that can be adapted to any palate and any occasion. Whether you're serving it up for a casual weeknight dinner or a fancy holiday gathering, a well-made meatloaf is always a crowd-pleaser. So, go out there, experiment, and create your own meatloaf magic!
Everyone is watching

How to Cook Frozen Lobster Tails Perfectly: A Step-by-Step Guide
RecipesLobster. Just the word conjures up images of lavish meals, special occasions, and a taste of luxury. But let's...

Pigs in a Blanket Cooking Time: How Long to Bake for Perfect Results
RecipesAh, pigs in a blanket. Just the name conjures up images of those delightful little parcels of crispy pastry en...

Pork Fillet Cooking Time: How Long to Cook It Perfectly
RecipesPork fillet, or tenderloin as it's sometimes called, is a real favourite in our house. It's so versatile, and...

The Ultimate Guide to Cooking Delicious Frankfurters
RecipesLet's face it, we all love a good frankfurter. It's a classic, simple, and always satisfying. But let's be rea...

The Ultimate Guide to Tender, Juicy Pulled Pork
RecipesRight, let's talk pulled pork. It's one of those dishes that just screams "comfort food," doesn't it? I mean...