Meatloaf. Just the word evokes images of comforting, hearty meals, perfect for a family gathering or a cozy night in. But getting it right can be a bit of a culinary puzzle. You want it to be juicy, flavorful, and cooked to perfection, but not dry or crumbly. That's where the magic of baking time at 350 degrees comes in. Join me as I share my secrets, personal anecdotes, and tips for crafting the most delicious meatloaf that'll leave you craving for more.
Part 1: The Foundation of a Truly Great Meatloaf

1. The Meat: The Heart of the Matter
Now, let's talk meat. The first step in this journey is choosing the right ingredients. I've always been a fan of mixing ground beef and pork. This combination gives the meatloaf a beautiful, juicy texture, and that subtle porky richness that elevates the flavor profile. My go-to mix is usually 80/20 ground beef (meaning 80% lean, 20% fat) – the bit of fat helps keep things moist – and about 1/3 of that volume in ground pork. Of course, if you're feeling adventurous, you could add in a bit of veal or even lamb, but I find the classic beef and pork blend delivers a wonderfully balanced flavor. It's all about personal preference, so experiment and see what you like best!
2. The Binders: Holding it All Together
We need to make sure all those delicious meaty bits stay together, right? That's where our trusty binders come in. Eggs are essential. They provide structure and moisture, creating that classic meatloaf texture. I typically use two medium eggs for a standard-sized loaf. You can also add a splash of milk or even some breadcrumbs for extra binding power. I remember once, I was out of milk, and I found myself using a little bit of leftover beer! It was surprisingly delicious. It gave the meatloaf a slightly more robust flavor, and I've been using it ever since.
3. The Flavor: Seasoning and More
This is where the real magic happens! Flavoring a meatloaf is an art form, and there's no limit to what you can create. I always start with a basic blend of salt, pepper, garlic powder, and onion powder. It's the foundation of any good meatloaf. But then I like to get creative. A dash of Worcestershire sauce is a must – it adds a savory depth that's hard to resist. I also love incorporating dried herbs like thyme or rosemary, which give a lovely herbaceous aroma and taste. If you want a touch of sweetness and smokiness, try adding a tablespoon of brown sugar or a sprinkle of smoked paprika. Once you've got your base, feel free to experiment! A little bit of mustard, a pinch of chili powder, or even a handful of chopped fresh herbs can add a whole new dimension of flavor.
Part 2: Building the Perfect Loaf

1. Mixing it Up: The Art of the Blend
You've got all your ingredients prepped and ready to go, now it's time to get your hands dirty! I prefer mixing the meatloaf by hand. It gives me a better feel for the texture and allows me to make sure everything is evenly combined. Just remember to avoid overmixing. You want everything to be well blended, but not overly compact. If you're feeling a little more adventurous, you could use a stand mixer with the paddle attachment. Just be careful not to overwork the meat.
2. Shaping the Loaf: Getting the Form Right
Here's a little secret I've learned over the years: use a loaf pan slightly larger than the amount of meat you're working with. It allows the meatloaf to cook more evenly and prevents it from feeling crowded. Once you've got your mixture in the pan, gently press it into a neat, even shape. If you want to add a touch of elegance, you can create a little dip in the center. This will create a perfect space for a dollop of your favorite sauce or gravy when serving.
3. The Glaze: Adding that Final Touch
Before popping your meatloaf into the oven, consider giving it a beautiful glaze. It adds color, shine, and a touch of extra flavor. My personal favorite is a simple mixture of ketchup, brown sugar, and a touch of Dijon mustard. It creates a lovely, glossy finish and a tangy flavor that perfectly complements the savory meatloaf. Feel free to experiment with other glazes, like honey-mustard or even barbecue sauce. Remember, the key is to create a glaze that you love.
Part 3: Baking Time: 350 Degrees, Your Meatloaf's Best Friend

1. The Temperature: 350 Degrees, Just Right
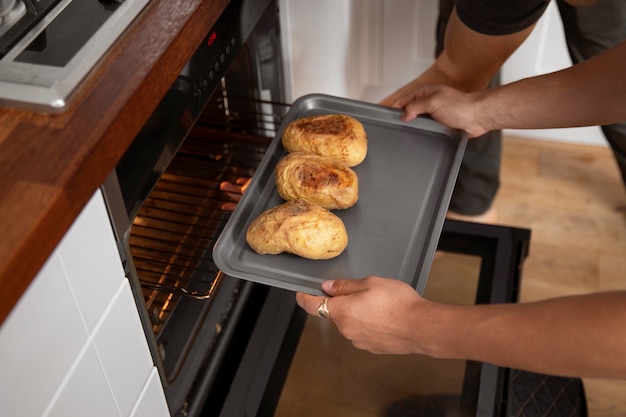
Now, let's talk about baking. Preheating your oven to 350 degrees fahrenheit (175 degrees Celsius) is crucial. This ensures the meatloaf cooks evenly throughout, creating a perfectly cooked center without leaving the outside dry and tough. You want that beautiful, golden-brown crust, but a juicy, tender interior.
2. Baking Time: A General Guide
This is where things get a little more specific. Baking time varies based on the size of your meatloaf. For a standard-sized loaf, I typically bake it for about 1 hour and 15 minutes. However, it's always best to rely on a meat thermometer to check for doneness.
3. The doneness test: A Thermometer is Your Hero
Here's where your trusty meat thermometer becomes your hero. You want the internal temperature to reach 160 degrees Fahrenheit (71 degrees Celsius). This ensures the meat is cooked to a safe temperature, but still remains tender and juicy.
Part 4: Resting Time: Let it Relax
After baking, resist the urge to slice into your meatloaf immediately. Let it rest for at least 10 minutes before slicing. This allows the juices to redistribute, creating a beautifully moist and flavorful loaf. It's like giving your meatloaf a little time to cool down and settle in after its oven adventure.
Part 5: Serving Your Masterpiece
Your meatloaf is cooked, rested, and ready to be enjoyed. I love serving it with a side of creamy mashed potatoes, rich gravy, and a medley of roasted vegetables. It's a classic combination for a reason.
Part 6: Variations on the Classic
Now, let's talk about putting your own stamp on the classic meatloaf. There's a world of possibilities waiting to be explored. Here are a few ideas to get your creative juices flowing:
- Veggie Power: Add some chopped vegetables to your meat mixture. Onions, peppers, mushrooms, and even finely chopped carrots can add a burst of flavor and texture.
- Sweet and Savory Glazes: Experiment with different glazes. A honey-mustard glaze adds a touch of sweetness and tang, while a smoky barbecue sauce glaze creates a rich and flavorful finish.
- Beyond Beef: Branch out with different types of meat. Ground turkey or chicken provide a lighter, leaner option. You can even create a blend of ground lamb and beef for a more robust flavor.
- Mini Meatloaves: Divide your meat mixture into smaller loaf pans for a fun and easy way to serve individual portions.
- Toppings Galore: Add a layer of bacon or cheese on top of your meatloaf for an extra layer of flavor and indulgence.
Part 7: Tips for Baking Success
Here are a few more tips to help you achieve that perfect meatloaf every time:
- Gentle Hands: Don't overmix the meat mixture. Overmixing can make the meatloaf tough. Just gently combine the ingredients until everything is evenly blended.
- Non-Stick Protection: Grease your loaf pan well to prevent the meatloaf from sticking. A little bit of butter or cooking spray will do the trick.
- Temperature Check: Use a meat thermometer to ensure your meatloaf is cooked to the desired temperature. This is the most accurate way to determine doneness.
- Rest is Key: Let the meatloaf rest for at least 10 minutes before slicing. This allows the juices to redistribute, preventing a dry and crumbly texture.
- Skewer Test: If you don't have a meat thermometer, you can use a wooden skewer to check for doneness. The skewer should come out clean when inserted into the center of the meatloaf.
Part 8: Troubleshooting Common Problems
Even seasoned cooks have those moments. Here's what to do if your meatloaf doesn't turn out quite right:
1. Meatloaf is Dry
A dry meatloaf can happen if you didn't use enough fat or if you overcooked it. Next time, try adding a bit more fat to your mixture, like ground pork or even a few slices of bacon. You can also try adding a little bit of milk or breadcrumbs to help retain moisture. And remember, don't overcook it. Use your trusty meat thermometer to ensure it reaches the desired temperature.
2. Meatloaf is Crumbly
A crumbly meatloaf often means you haven't used enough binder. Try adding an extra egg or a tablespoon of breadcrumbs to help hold everything together.
3. Meatloaf is Undercooked
This is something we want to avoid. Make sure the internal temperature reaches 160 degrees Fahrenheit. If you suspect your meatloaf is undercooked, pop it back in the oven for a few more minutes. Just check the temperature again with your meat thermometer to ensure it's cooked through.
Part 9: FAQs: Your Meatloaf Questions Answered
Let's address some of the most common questions about making a perfect meatloaf.
1. Can I use a different type of meat for my meatloaf?
Absolutely! Feel free to experiment with ground turkey, chicken, lamb, or even a combination of meats. Just remember to adjust the baking time accordingly. A leaner meat like turkey or chicken will take a bit less time to cook.
2. Do I have to use breadcrumbs in my meatloaf?
No, breadcrumbs are optional, but they do help to bind the meatloaf together and add moisture. If you're not using breadcrumbs, you can use oats, crushed crackers, or even finely chopped vegetables.
3. What's the best way to store leftover meatloaf?
You can store leftover meatloaf in an airtight container in the refrigerator for up to 3 days.
4. Can I freeze meatloaf?
Absolutely! You can freeze meatloaf for up to 3 months. Wrap it tightly in plastic wrap and aluminum foil, and store it in the freezer. To thaw, place the meatloaf in the refrigerator overnight.
5. How can I make my meatloaf more flavorful?
The key is to experiment! Try different seasonings, herbs, and vegetables. Add chopped onions, peppers, mushrooms, or even some dried fruits for a touch of sweetness.
Part 10: Conclusion: Your Meatloaf Awaits
So, there you have it. My guide to creating the most delicious, perfectly cooked meatloaf. Remember, it's all about finding what you love. Don't be afraid to experiment with different flavors and techniques, and above all, enjoy the process. There's something truly satisfying about crafting something delicious from scratch. Now, go forth and create your culinary masterpiece! Happy baking!
Everyone is watching

How to Cook Frozen Lobster Tails Perfectly: A Step-by-Step Guide
RecipesLobster. Just the word conjures up images of lavish meals, special occasions, and a taste of luxury. But let's...

Pork Fillet Cooking Time: How Long to Cook It Perfectly
RecipesPork fillet, or tenderloin as it's sometimes called, is a real favourite in our house. It's so versatile, and...

Pigs in a Blanket Cooking Time: How Long to Bake for Perfect Results
RecipesAh, pigs in a blanket. Just the name conjures up images of those delightful little parcels of crispy pastry en...

The Ultimate Guide to Cooking Delicious Frankfurters
RecipesLet's face it, we all love a good frankfurter. It's a classic, simple, and always satisfying. But let's be rea...

Wolf Meat Recipes: A Guide to Cooking Wild Game
RecipesLet's be honest, you don't see wolf meat at your local butcher shop every day. It's a bit of a wild card, but ...
