You know that feeling when you’re craving a simple yet satisfying breakfast? That’s when the humble omelette comes to mind. But let’s be honest, making an omelette that’s perfectly cooked, fluffy, and bursting with flavour can be a real challenge. I've spent years in the kitchen, tackling countless culinary experiments, and I've definitely had my fair share of omelette disasters – burnt edges, watery centres, the dreaded rubbery texture… you name it. But over time, I've learned a thing or two, and I'm thrilled to share my secrets with you. So, gather your favourite ingredients, put on your apron, and let's embark on a culinary adventure to master the art of the perfect omelette.
(Part 1) The Foundation: Setting the Scene
The Tools of the Trade: Equipping Your Kitchen
First things first, we need to get our tools in order. Don't think any old pan will do for this culinary masterpiece. You'll need a reliable non-stick pan, ideally one with a slightly curved bottom like a crepe pan. This shape allows the omelette to cook evenly and flip with ease, preventing sticking and creating a smooth, beautiful surface. I'm not talking about a fancy, expensive pan here. A good quality, affordable one will serve you well. I've got a trusty one that's been my go-to for years, and it's seen its fair share of egg adventures! And don't forget a sturdy spatula – it's your trusty sidekick for flipping and shaping the omelette.
The Eggs: Picking Your Players: The Heart of the Matter
Now, let's talk about the real stars of the show – the eggs! Freshness matters! If you can, go for free-range eggs. They have a wonderfully rich and flavourful yolk that just can't be beat. But, if you're on a budget, supermarket eggs will do the trick just fine. I always choose medium-sized eggs because they’re the perfect size for achieving that fluffy, golden texture we’re aiming for. And here's a little tip for extra fluffiness: separate the yolks and whites, beat the whites until they're frothy and airy, and then gently fold them into the yolks. This will give your omelette a fantastic light and fluffy texture.
(Part 2) The Art of the Heat: The Goldilocks Zone
The Temperature is Key: Finding the Right Balance
This is where things can get a little tricky. You need medium-high heat, but not too high. It’s all about finding that sweet spot – the Goldilocks zone of heat. Too high, and the outside will burn before the inside is cooked. Too low, and you’ll end up with a greasy mess. You want that nice, even sizzle – a clear indication that your pan is ready for the egg action!
The Oil: A Little Goes a Long Way: Adding the Right Touch
A tablespoon of butter or oil is all you need. Too much, and your omelette will be swimming in grease. You want to coat the pan evenly, so the eggs slide around like a dream. I prefer to use butter – it adds that lovely, buttery flavour. But if you’re feeling adventurous, try a little olive oil or even coconut oil. Just make sure it's not too strong; you don't want to overpower the delicate egg flavour.
(Part 3) The Flourish: Cooking the Omelette: The Choreography of Cooking
The Crack: A Gentle Touch: Starting the Process
Alright, let's get cracking! Crack those eggs into a bowl, but do it gently. We want to keep those yolks intact for maximum flavour and richness. Now, whisk them together until they're smooth and silky, but don't over-whisk. You don't want them frothy – just smooth and consistent.
The Pour: A Controlled Motion: Creating a Smooth Canvas
Pour your whisked eggs into the hot pan. Don't just chuck them in! You want a smooth, even pour that evenly coats the pan. You’ll notice the eggs start to set almost immediately, forming a delicate film on the surface.
The Wait: Patience is Virtue: Allowing the Magic to Happen
Here’s where patience comes into play. Leave the omelette alone for a minute or two. Don't go poking or prodding at it! Let it cook undisturbed. This allows the bottom to set properly, creating a nice, even base for the omelette. You'll know it’s ready when the edges start to set and you can see a little bit of browning underneath. That’s the signal that it’s time for the next stage!
The Flip: A Confident Movement: The Moment of Truth
Now comes the exciting part – the flip! Grab your spatula and gently lift the edge of the omelette to check if it's set. It should move easily, indicating that the bottom has cooked through. Now, take a deep breath and flip it over, using a smooth, confident movement. If you're feeling bold, you can try tossing the pan in the air – but be warned, it's a risky move! If you’re new to this, a gentle flip with your trusty spatula is perfectly acceptable.
(Part 4) The Finishing Touches: Adding the Flavour: Personalizing Your Omelette
The Filling: A Matter of Taste: The Choices Are Endless
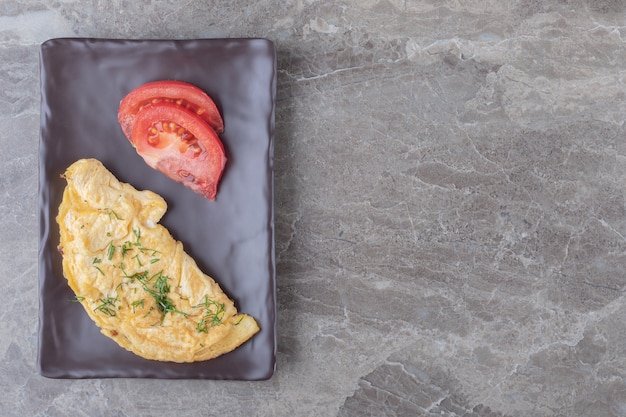
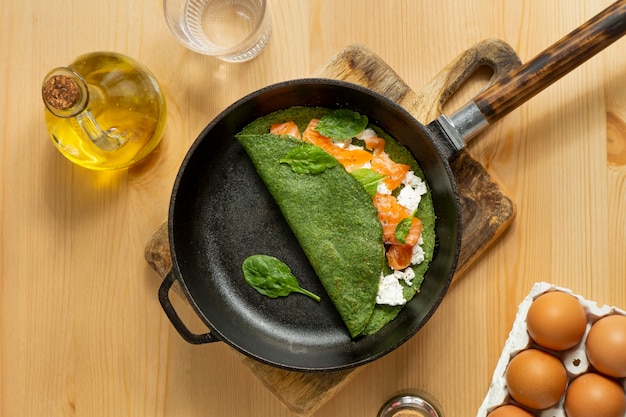
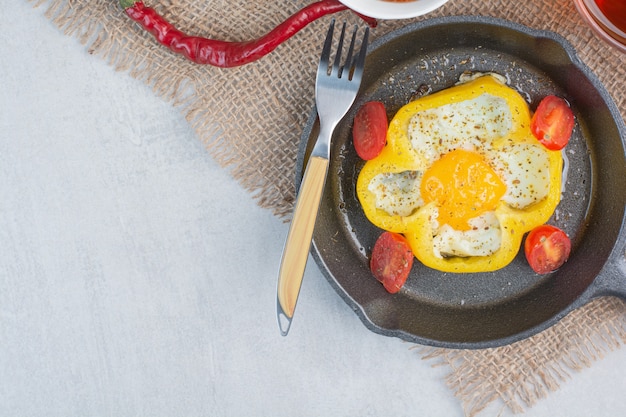
Now, let’s talk about the fun part – the fillings! The world is your oyster when it comes to omelette fillings. Cheese, ham, mushrooms, spinach, onions, peppers, tomatoes – the possibilities are endless. I like to keep it simple with just some grated cheese and a few herbs, but feel free to experiment and create your own flavour combinations. The best part about omelettes is that they can be tailored to your own tastes. Whatever you choose, make sure your fillings are cooked and chopped into small pieces, so they're easy to fold into the omelette.
The Fold: A Gentle Embrace: Bringing It All Together
Once you've added your fillings, gently fold the omelette in half, or in thirds if you're feeling fancy. You want to keep it nice and compact, creating a beautiful, symmetrical shape.
The Cook: A Final Touch: Perfecting the Texture
Cook for another minute or so until the omelette is cooked through. It should be firm to the touch, but not dry. If it feels a bit soft, give it another minute or two on the heat, but keep a close eye on it so it doesn't burn.
The Slide: A Smooth Exit: Presenting Your Culinary Creation
Now, to remove the omelette from the pan. Slide it onto a plate using your spatula, being careful as it will be hot! The gentle slide will ensure you don’t break the delicate shape you've carefully created.
(Part 5) The Presentation: Putting it All Together: The Finishing Touches
The Garnish: A Final Flourish: Adding Visual Appeal
Now, this is the fun part – the finishing touches! Garnish your omelette with fresh herbs, chopped chives, a sprinkle of paprika, or a dollop of sour cream. You can even add a few slices of tomato or some avocado for a bit of colour and texture. These final touches add a touch of elegance and visual appeal, transforming your omelette from a simple dish into a culinary masterpiece.
(Part 6) Beyond the Basics: Taking it Up a Notch: Expanding Your Omelette Horizons
The French Connection: The Omelette Soufflé: A Touch of Elegance
For the more adventurous, there's the classic French omelette soufflé. This takes a bit more skill, but the results are truly worth the effort. It's all about getting the whites whipped into a fluffy meringue and folding it gently into the yolks. The key is to cook it slowly over low heat, and to resist the temptation to open the pan while it’s cooking. This creates a wonderfully light and airy omelette that melts in your mouth – a true testament to French culinary finesse.
The Italian Twist: The Frittata: A Hearty Delight
If you're looking for a heartier option, try a frittata. This is essentially a baked omelette, and it's packed with flavour and protein. The beauty of a frittata is that you can add almost any ingredients you like – vegetables, cheese, meat, or even leftovers. Simply mix your ingredients with the beaten eggs, pour them into a baking dish, and bake until set. It’s a perfect way to use up leftover vegetables or to make a delicious and satisfying meal for a crowd. The versatility of the frittata makes it a kitchen favourite.
The Asian Inspiration: The Japanese Tamagoyaki: A Sweet and Savoury Journey
For something truly unique, give the Japanese tamagoyaki a try. This is a sweet omelette, made with sugar and soy sauce. The technique is a bit different, as the omelette is cooked in a rectangular pan and rolled up as it cooks. The result is a beautiful, rolled omelette with layers of flavour, showcasing the intricate culinary artistry of Japanese cuisine.
(Part 7) The Omelette Experience: A culinary journey: More Than Just a Dish
Cooking the perfect omelette is more than just a recipe, it's an experience. It's about the sizzle of the pan, the smell of the butter, the anticipation of the flip, and the satisfaction of creating something beautiful and delicious. It's about experimenting with flavours, trying new combinations, and discovering what you love. And it's about sharing those experiences with others, whether it’s a casual breakfast with family, a weekend brunch with friends, or a special dinner for a loved one. The omelette brings people together over a shared passion for good food and good company.
(Part 8) The Omelette Legacy: Passing It On: A Culinary Tradition
The beauty of the omelette is that it's a dish that can be passed down through generations. From grandma’s secret recipe to the latest culinary trend, there’s always something new to discover. It’s a dish that evolves with each cook, reflecting their own personal style and preferences. And that's what makes it so special. So, go forth and conquer! Get creative, have fun, and most importantly, enjoy the journey.
(Part 9) FAQs: Answering Your Questions
Q1. What if my omelette is too dry?
This is often because of overcooking. If your omelette is too dry, it's likely because you cooked it for too long. Next time, try cooking it over lower heat, and keep a close eye on it. You want it to be firm, but not rubbery. A slightly moist texture is what we’re aiming for.
Q2. What if my omelette is too wet?
This is usually a sign that you haven't cooked it long enough. Make sure you let it cook undisturbed for a couple of minutes before flipping it. If it’s still too wet, cook it for another minute or two after flipping it. Just keep an eye on it; you don’t want it to burn. The goal is to cook it through without overdoing it.
Q3. How do I make a really fluffy omelette?
The secret is in the egg whites! Separate the whites from the yolks, and whip them until they’re frothy and stiff peaks form. Then, gently fold the whites into the yolks. This will give your omelette a lovely, airy texture that’s both visually appealing and delicious. The key is to incorporate the whites without deflating them, resulting in a light and airy omelette.
Q4. What are some good omelette fillings?
The possibilities are endless! Some of my favourites include:
- Cheese and ham – a classic combination that never fails to please.
- Mushrooms and spinach – a healthy and flavourful option.
- Onions and peppers – a touch of sweetness and spice.
- Tomatoes and basil – a fresh and vibrant flavour combination.
- Sautéed vegetables – a versatile option that allows you to use up any leftover vegetables.
- Leftover grilled chicken – a hearty and satisfying choice.
- smoked salmon and cream cheese – a luxurious and indulgent option.
You can also get creative and use different combinations of ingredients, or even add a spoonful of your favourite salsa or hot sauce for a bit of kick. The beauty of omelettes is that they allow for endless creativity.
Q5. How do I store leftover omelette?
Leftover omelette can be stored in an airtight container in the refrigerator for up to 3 days. It's best reheated in the oven or microwave, but you can also enjoy it cold. It's a great option for a quick and easy lunch or snack. Just make sure to store it properly to maintain its freshness and flavour.
(Part 10) A Final Thought: Embracing the Journey
Ultimately, the perfect omelette is the one that you enjoy the most. So don’t be afraid to experiment, try new things, and find what works best for you. And remember, even if your omelette isn’t perfect, it’s still a delicious and satisfying meal. So grab your pan, crack those eggs, and get cooking! You've got this. The joy of cooking is in the process, the experimentation, and the satisfaction of creating something delicious.
Now, go forth and conquer the world of omelettes, one perfect flip at a time!
Everyone is watching

How to Cook Frozen Lobster Tails Perfectly: A Step-by-Step Guide
RecipesLobster. Just the word conjures up images of lavish meals, special occasions, and a taste of luxury. But let's...

Pigs in a Blanket Cooking Time: How Long to Bake for Perfect Results
RecipesAh, pigs in a blanket. Just the name conjures up images of those delightful little parcels of crispy pastry en...

Pork Fillet Cooking Time: How Long to Cook It Perfectly
RecipesPork fillet, or tenderloin as it's sometimes called, is a real favourite in our house. It's so versatile, and...

The Ultimate Guide to Cooking Sweet Potatoes: From Roasting to Mashing
RecipesSweet potatoes. Just the name conjures up images of warm, comforting dishes, bursts of vibrant color, and a to...

The Ultimate Guide to Tender, Juicy Pulled Pork
RecipesRight, let's talk pulled pork. It's one of those dishes that just screams "comfort food," doesn't it? I mean...