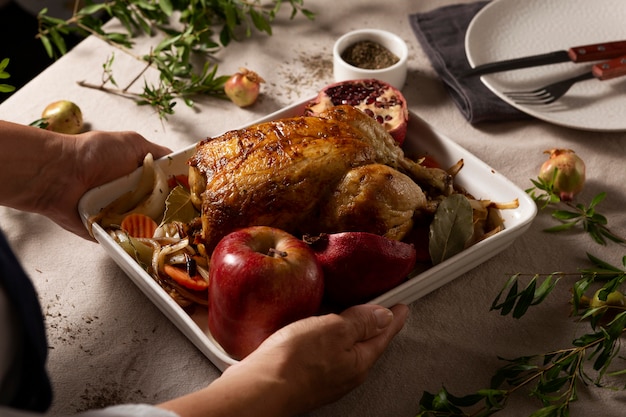
The aroma of roasted turkey, the warmth of family gathered around the table, the comforting feeling of shared gratitude – Thanksgiving is a time for cherished traditions. But let's face it, the pressure to deliver a flawless thanksgiving feast can be a real turkey-sized challenge! Don't worry, my fellow foodies, I'm here to help you navigate the treacherous waters of turkey prep and emerge victorious. I've spent years in the trenches of thanksgiving cooking, and let me tell you, I've learned a thing or two along the way. So grab a cuppa, settle in, and let's dive into the juicy secrets of Thanksgiving perfection.
(Part 1) Picking the Perfect Bird: A Turkey Tale
The first step on this culinary journey is selecting your star attraction: the turkey. Picking the right bird is crucial for a succulent and satisfying centerpiece. You wouldn't just grab any old bottle of wine for a special occasion, would you? The same goes for your thanksgiving turkey. A good bird will make a world of difference in your meal, so let's get into the details of choosing the perfect one.
The Great Debate: Fresh vs. Frozen
There's an age-old debate among seasoned cooks: fresh or frozen? Both have their own pros and cons, so let's break it down. Fresh turkeys are, well, fresher, offering a more intense flavor and often a juicier texture. Think of it like the difference between fresh-baked bread and a loaf from the freezer aisle – it's a matter of texture and flavor. However, fresh turkeys can be harder to find, especially closer to Thanksgiving, and require more planning to thaw properly. It's a bit like trying to find a good vintage wine – sometimes you need to plan ahead. frozen turkeys, on the other hand, are readily available and offer the convenience of thawing in advance. This is perfect for those who want to avoid the last-minute rush. Just remember to plan your thawing time carefully, as it can take days for a large bird to thaw completely. You wouldn't want to be left scrambling on Thanksgiving morning, would you?
Size Matters: Finding the Right Fit
Now, let's talk size. How many guests are you expecting? A good rule of thumb is to allow about 1 pound of turkey per person. Don't be afraid to go a little over if you plan on having leftovers (because let's be honest, thanksgiving leftovers are the best part!). A 12-pound turkey will likely feed a family of 10-12 comfortably. Remember, a larger bird takes longer to cook, so factor that into your timeline. It's always better to have a bit more than not enough, trust me!
The "Tom" vs. "Hen" Decision
Do you want a tom or a hen? This is a question that often leaves people scratching their heads. Tom turkeys are generally larger and more flavorful, but can be tougher. They're like the seasoned veterans of the turkey world, with a bolder, more intense flavor. Hens are smaller and more tender, think of them as the graceful dancers of the turkey world, delivering a smooth and delicate flavor. Ultimately, it comes down to personal preference. I personally prefer hens, as they tend to be more consistently moist and tender. But hey, there's no right or wrong answer here! It's your Thanksgiving, choose what you love.
(Part 2) Brining Basics: Injecting Flavor and Moisture
Brining is the secret weapon for juicy, flavorful turkey. It's like giving your bird a spa day, but with salt and water instead of cucumber masks. Brining essentially involves soaking the turkey in a salt-water solution, which helps to tenderize the meat and retain moisture during cooking. This results in a turkey that's bursting with flavor and exceptionally moist, even after hours in the oven. It's a game-changer, folks. I can't stress enough how much of a difference it makes.
The Power of Salt: It's Not Just for Flavor
You might be wondering, "Why salt?" Well, salt is a magical ingredient when it comes to cooking. It doesn't just add flavor; it also draws out moisture and helps to create a more even cooking process. The salt draws out water from the turkey, creating a salty brine that then reabsorbs back into the meat. This process helps to tenderize the meat and lock in moisture. It's like a little culinary alchemy happening right in your kitchen!
A Brine Recipe for the Ages
There are countless brine recipes out there, but I've got a tried-and-true one that's always a hit. Simply combine 1 cup of salt, 1 cup of sugar, and 1 gallon of cold water. The sugar helps balance the saltiness and adds a touch of sweetness. You can also add some herbs and spices for an extra flavor boost. I love adding a few bay leaves, peppercorns, and sprigs of rosemary for a touch of holiday magic. Simply submerge your turkey in the brine for 12-24 hours, making sure it's fully immersed in the liquid. Once the brining is done, rinse the turkey thoroughly and pat it dry before roasting.
(Part 3) Butter Basted Bliss: A Symphony of Flavors
Now, let's talk about butter basting. This technique is like giving your turkey a luxurious massage with melted butter, ensuring that every inch of the bird is kissed with flavor. Butter basting not only adds richness and depth to the turkey, but it also helps to create a beautiful, golden-brown skin. Think of it as the finishing touch that makes your turkey truly shine. It's a truly satisfying sensory experience.
The Art of Butter Basting: A Step-by-Step Guide
Here's how to achieve butter-basted perfection. Firstly, melt a generous amount of butter in a saucepan. Then, add your favorite herbs and spices. I like to add some fresh thyme, rosemary, and sage for that classic Thanksgiving flavor profile. You can also experiment with other spices like garlic powder, onion powder, or even a sprinkle of paprika. Let your imagination run wild, but be sure to choose spices that complement the flavor of the turkey. Once the butter is melted and infused with your desired flavors, use a basting brush to apply the butter mixture to the turkey every 30-45 minutes during roasting. Be sure to baste the entire bird, including the breasts, legs, and wings. This technique will ensure that your turkey cooks evenly and develops a delicious, crispy skin.
Butter Basting Tools: A Kitchen Essential
To make butter basting a breeze, invest in a good quality basting brush. You can find them at any kitchen supply store or online. Look for a brush with silicone bristles that are heat resistant and easy to clean. A long handle will also come in handy, especially when basting a large turkey. Another helpful tool is a baster, which allows you to easily suck up the melted butter and pour it over the turkey. These tools are small investments that can make a big difference in your Thanksgiving cooking experience.
(Part 4) roasting time: Getting It Right
The moment of truth has arrived: roasting time! This is where all your hard work comes together, and the anticipation builds. Don't worry, I'll guide you through every step, ensuring a perfect roast for a truly memorable Thanksgiving.
The Oven's Secret Temperature: 325°F is the Magic Number
The ideal oven temperature for roasting a turkey is 325°F (160°C). Why this temperature? It allows for even cooking, ensuring that the turkey cooks through without drying out. Higher temperatures might result in a crispy skin but could also lead to a dry breast. So stick with 325°F and trust the process. It's the key to a tender and juicy turkey.
cooking time: A Guide to Perfection
The cooking time for a turkey depends on its size and weight. A good rule of thumb is to allow 15 minutes per pound for an unstuffed turkey and 20 minutes per pound for a stuffed turkey. For example, a 12-pound unstuffed turkey would take approximately 180 minutes (3 hours) to cook, while a stuffed turkey of the same weight would take about 240 minutes (4 hours). However, it's always best to use a meat thermometer to ensure that the turkey is cooked to perfection. Insert the thermometer into the thickest part of the thigh, avoiding the bone. The turkey is cooked when the internal temperature reaches 165°F (74°C). Remember, overcooked turkey is dry turkey, so don't overcook it!
The Resting Ritual: Letting the Turkey Rest
Once the turkey is cooked, resist the temptation to carve it immediately. Let it rest for at least 15-20 minutes before carving. This allows the juices to redistribute throughout the turkey, resulting in a more flavorful and moist bird. Think of it as a mini-spa treatment for your turkey, allowing it to relax and recover from its time in the oven. This step is essential for ensuring a juicy and flavorful turkey.
(Part 5) Stuffing Secrets: A Thanksgiving Staple
Stuffing, the quintessential Thanksgiving side dish, is a staple for many families. It's a delicious combination of bread, vegetables, herbs, and spices, all baked to golden perfection. But making stuffing can be tricky. You want it to be moist and flavorful, but not soggy or dry. Here are some tips to ensure stuffing success.
Don't Stuff the Bird: A Safety Tip
First things first, never stuff the bird! It's a common misconception that stuffing should be cooked inside the turkey, but this can actually be a safety hazard. The stuffing won't cook evenly, and the internal temperature of the turkey might not reach a safe level, increasing the risk of foodborne illness. Instead, bake the stuffing separately in a casserole dish. It's a safer and more reliable way to ensure your stuffing is cooked through.
Moist and Flavorful: The Key to Perfect Stuffing
To achieve a moist and flavorful stuffing, use a combination of stale bread and vegetables. Stale bread absorbs the liquid from the stuffing and helps it to hold its shape. Onions, celery, and herbs like sage, thyme, and rosemary add depth and aroma to the stuffing. Don't be afraid to experiment with different vegetables and herbs to create your own unique flavor combinations. I like to add some chopped apples or cranberries for a touch of sweetness.
Don't Overcook: Keep the Stuffing Moist
One of the biggest mistakes people make with stuffing is overcooking it. Overcooked stuffing can become dry and crumbly. The best way to ensure that your stuffing stays moist is to bake it in a covered casserole dish for the first 30-45 minutes. After that, remove the lid and bake for another 15-20 minutes, or until the stuffing is golden brown and cooked through. You want the stuffing to be cooked but still slightly moist and fluffy.
(Part 6) Gravy Goodness: The Perfect Finishing Touch
What's Thanksgiving without gravy? It's the creamy, savory sauce that ties everything together. Think of it as the glue that binds all those delicious Thanksgiving flavors into a harmonious symphony. But don't be intimidated by the thought of making gravy. It's actually quite simple. With a few key tips, you can create a gravy that will have your guests saying, "Wow, this is amazing!"
The Gravy Base: A Delicious Foundation
The base for your gravy is the drippings left in the roasting pan after cooking the turkey. These drippings are packed with flavor and will form the foundation of your gravy. Once the turkey is out of the oven, let the pan rest for a few minutes, allowing the drippings to settle. Then, carefully pour the drippings into a saucepan or fat separator. You can also add some butter or oil to the pan if you want to create a richer gravy.
Thickening Up: Achieving That Perfect Consistency
To thicken the gravy, you'll need to use a thickening agent. The most common options are flour or cornstarch. Mix your chosen thickening agent with a little cold water to create a slurry. Gradually whisk the slurry into the drippings, stirring constantly. As the gravy simmers, it will thicken and become velvety smooth. Be careful not to overcook the gravy, as it can become too thick and gluey.
Flavor Boost: Adding Herbs and Spices
Once the gravy is thickened, you can add herbs and spices to enhance its flavor. I like to add a pinch of black pepper, a bay leaf, and some fresh thyme. You can also experiment with other spices like garlic powder, onion powder, or a pinch of cayenne pepper for a touch of heat. Remember, gravy should be seasoned to taste, so don't be afraid to add more herbs and spices if needed. A good gravy should have a balance of flavors, and a touch of spice can elevate the entire meal.
(Part 7) Sides Galore: A Culinary Feast
Thanksgiving is a time to indulge in a smorgasbord of delicious side dishes. From creamy mashed potatoes to crispy green bean casserole, the possibilities are endless! Here are a few of my go-to side dishes that always impress.
The Classics: Mashed Potatoes and Green Bean Casserole
Mashed potatoes are a Thanksgiving must-have. They're creamy, comforting, and perfect for soaking up all that delicious gravy. For an extra indulgent treat, add a dollop of butter and sour cream. Green bean casserole, with its crispy fried onions and creamy sauce, is another classic Thanksgiving side dish that's always a hit. You can find countless recipes online, but I like to keep it simple with a combination of canned green beans, cream of mushroom soup, and crispy fried onions.
Sweet and Savory: Cranberry Sauce and Stuffing
Cranberry sauce adds a touch of sweetness and tartness to the Thanksgiving table. You can buy it pre-made, but making it from scratch is surprisingly easy. Simply combine cranberries, sugar, and orange zest in a saucepan and simmer until the cranberries burst. Stuffing is another essential side dish that complements the turkey beautifully. Use my tips from Part 5 to create a stuffing that's moist, flavorful, and cooked to perfection.
Beyond the Basics: Explore New Flavors
Don't be afraid to get creative with your side dishes. Experiment with new flavors and combinations. Consider incorporating roasted sweet potatoes, butternut squash, or Brussels sprouts into your Thanksgiving spread. You can also try a simple salad with a vinaigrette dressing for a refreshing touch.
(Part 8) Pie Perfection: A Sweet Ending
No Thanksgiving feast is complete without a delicious pie. From pumpkin to apple to pecan, there's a pie for every taste bud. Here's how to bake a pie that will have your guests begging for seconds.
The Crust: A Key Ingredient
The crust is the foundation of any great pie. You can buy pre-made crusts, but making your own is surprisingly easy and rewarding. Use a good quality flour, cold butter, and ice water to create a flaky and tender crust. Don't overwork the dough, as this can make it tough. Let the dough chill for at least 30 minutes before rolling it out and placing it in the pie plate. A good crust should be both flaky and flavorful, adding another layer of enjoyment to the entire experience.
The Filling: A Symphony of Flavors
The filling is what makes the pie special. Use fresh, high-quality ingredients for the best flavor. For pumpkin pie, combine pumpkin puree, spices, and condensed milk for a creamy and flavorful filling. Apple pie is a classic choice, with a combination of apples, cinnamon, and sugar. Pecan pie is another popular option, with its rich and nutty flavor. These are all timeless classics, but feel free to experiment with different pie variations based on your preferences and what your guests would enjoy.
baking tips: Achieving Pie Perfection
When baking your pie, make sure the oven is preheated to the correct temperature. Blind-bake the crust for 10-15 minutes before adding the filling to prevent it from getting soggy. Bake the pie until the crust is golden brown and the filling is set. Let the pie cool completely before slicing and serving.
FAQs
1. What are some tips for keeping the turkey moist?
Brining is your best bet for a moist turkey! Soaking it in a salt-water solution helps retain moisture during cooking. Think of it as giving the turkey a spa treatment that keeps it juicy and tender. Another trick is to use a meat thermometer to ensure the turkey doesn't overcook. Overcooking can lead to dry meat, so it's crucial to monitor the temperature carefully. Finally, let it rest for at least 15-20 minutes after cooking to allow the juices to redistribute. This resting period is vital for a flavorful and moist turkey.
2. How do I know when the turkey is done?
The most reliable way to check is with a meat thermometer. Insert it into the thickest part of the thigh, avoiding the bone. The turkey is cooked when the internal temperature reaches 165°F (74°C). This ensures that the turkey is cooked through and safe to eat.
3. How long should I thaw a frozen turkey?
Thawing a turkey in the refrigerator is the safest way. Allow about 24 hours for every 5 pounds of turkey. So, a 10-pound turkey would take about 48 hours to thaw. This is important to ensure that the turkey thaws evenly and safely. If you're short on time, you can thaw the turkey in cold water, but be sure to change the water every 30 minutes to keep it cold.
4. What are some good alternatives to traditional stuffing?
You can create a delicious side dish by baking the stuffing separately in a casserole dish. Explore variations like cornbread stuffing, sausage stuffing, or even a wild rice stuffing. These alternatives offer a variety of flavors and textures, catering to different preferences.
5. What are some tips for carving the turkey?
Use a sharp carving knife and a cutting board. Start by carving the breast meat in thin slices. Then, remove the legs and thighs, and separate the meat from the bone. It's also helpful to use a carving fork to hold the turkey steady while you carve. Practice your carving technique in advance to avoid any last-minute stress.
Everyone is watching

How to Cook Frozen Lobster Tails Perfectly: A Step-by-Step Guide
RecipesLobster. Just the word conjures up images of lavish meals, special occasions, and a taste of luxury. But let's...

Pigs in a Blanket Cooking Time: How Long to Bake for Perfect Results
RecipesAh, pigs in a blanket. Just the name conjures up images of those delightful little parcels of crispy pastry en...

Pork Fillet Cooking Time: How Long to Cook It Perfectly
RecipesPork fillet, or tenderloin as it's sometimes called, is a real favourite in our house. It's so versatile, and...

The Ultimate Guide to Cooking Delicious Frankfurters
RecipesLet's face it, we all love a good frankfurter. It's a classic, simple, and always satisfying. But let's be rea...

Wolf Meat Recipes: A Guide to Cooking Wild Game
RecipesLet's be honest, you don't see wolf meat at your local butcher shop every day. It's a bit of a wild card, but ...