There's something undeniably satisfying about a perfectly cooked chicken drumstick. That crispy, golden-brown skin, giving way to tender, succulent meat... pure culinary bliss! But achieving that perfect balance of crispness and juiciness can be a bit of a culinary puzzle. Fear not, fellow food enthusiasts, because I'm here to guide you through the art of making mouthwatering stovetop chicken drumsticks, sharing my tried-and-true techniques and personal insights along the way.
Part 1: Why Stovetop?
You might be thinking, "Stovetop? Why not just bake or roast?" Those methods certainly have their merits, particularly for achieving that signature crispy skin. But hear me out! Stovetop cooking for chicken drumsticks offers a unique set of advantages:
1. Speed Demon
Let's face it, we're all busy people. Stovetop cooking is a time-saver. You can have those delicious drumsticks ready to devour in under 30 minutes, making it perfect for busy weeknights.
2. Hands-On Control
Stovetop cooking allows for more direct control. You can adjust the heat as needed, ensuring your chicken cooks evenly and doesn't dry out. You can even add a splash of liquid for a flavorful sauce.
3. Unmatched Sear
Ah, the sear! That beautifully caramelized crust you get on the stovetop is simply unmatched. It creates a layer of flavor that's both rich and satisfying, enhancing the chicken's natural taste.
Part 2: Choosing the Right Drumsticks
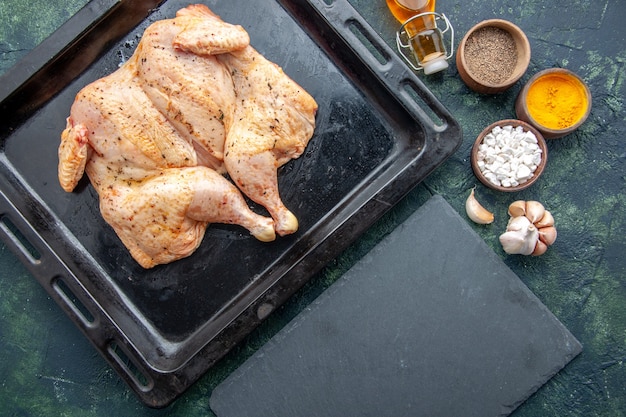
1. Freshness is Key
Always aim for fresh drumsticks. Head to your local butcher for the best selection. They'll often have a variety of sizes to choose from, so you can pick the perfect fit for your recipe. If you're buying pre-packed drumsticks from the supermarket, make sure they're not dry or discolored. You want those plump, juicy beauties!
2. Size Matters
Choosing the right size matters too. Medium-sized drumsticks are ideal for even cooking. Smaller ones tend to dry out quickly, while larger ones may take longer to cook through.
3. Skin-On or Skin-Off?
The age-old question! For optimal flavor and crispiness, I always recommend skin-on. The skin helps lock in moisture and creates that irresistible golden-brown crust. Plus, who doesn't love a bit of crispy chicken skin?
Part 3: The Secret to juicy drumsticks
1. The Brine: A Moisture Miracle
Here's a game-changer: Brining. This simple technique involves soaking the drumsticks in a salt water solution, which helps draw moisture into the meat, resulting in incredibly tender and juicy chicken. My go-to brine is a simple mix of water, salt, and a touch of sugar. I usually let the drumsticks soak for at least 30 minutes, but I often leave them in for a couple of hours for maximum juiciness.
2. The Marinade: Flavour Boost
But moisture alone isn't enough. We want those drumsticks bursting with flavor! That's where marinades come in. They infuse your chicken with delicious aromas and create a depth of flavor that's simply irresistible. I love using a combination of herbs, spices, and citrus juices in my marinades. A simple yet delicious option is a blend of olive oil, lemon juice, garlic, and oregano.
Part 4: Mastering the Stovetop
1. Preparation is Key
Before you fire up the stove, make sure your chicken is prepped. Pat those drumsticks dry with kitchen paper to ensure a beautifully crisp skin. Then, season generously with salt and pepper. Feel free to add your favourite spices as well. I often add a sprinkle of paprika or cayenne pepper for a bit of heat.
2. Choosing the Right Pan
The right pan is crucial. A heavy-bottomed skillet or cast iron pan distributes heat evenly, preventing hot spots and ensuring your chicken cooks evenly. If you're using a non-stick pan, ensure it's oven-safe so you can finish cooking in the oven if needed.
3. The Searing Process
Here's where the magic happens. Heat your pan over medium-high heat and add a generous amount of oil. Once the oil is shimmering, carefully place the drumsticks in the pan, making sure not to overcrowd it. Cook for about 5 minutes on each side, or until they're golden brown and crispy. This sear creates that irresistible crust and locks in the juices.
4. The Gentle Simmer
Once the drumsticks are seared, it's time to lower the heat. Reduce it to low and add a splash of liquid to the pan. This could be chicken broth, water, wine, or even beer. The liquid will simmer gently, creating a delicious sauce for your chicken. Cover the pan and let the drumsticks cook for another 15-20 minutes, or until they're cooked through.
5. The doneness test
To check if the chicken is cooked through, use a meat thermometer. The internal temperature should reach at least 165°F (74°C). If you don't have a thermometer, you can pierce the thickest part of the drumstick with a knife. The juices should run clear and the meat should be no longer pink.
Part 5: Variations and Add-Ins
1. Spice Things Up!
Don't be afraid to experiment with different herbs and spices. You can add them to your marinade or sprinkle them on the chicken before cooking. I love to add a pinch of smoked paprika, a dash of cayenne pepper, or a sprinkle of cumin.
2. Embrace Global Flavors
There's a world of flavours to explore! For a Mediterranean twist, use lemon juice, oregano, and garlic in your marinade. For an Asian-inspired flavour, try using soy sauce, ginger, and garlic.
3. Add Some Veggies
Enhance your meal by adding some vegetables to the pan. Onion, garlic, bell peppers, mushrooms, and carrots all pair beautifully with chicken. Add them during the simmering stage and cook until tender.
Part 6: Serving and Enjoying
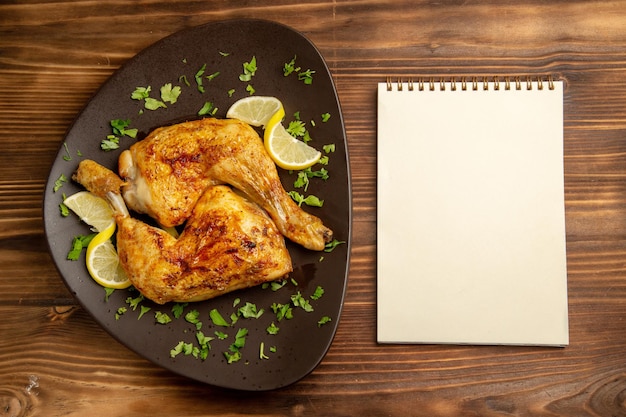
1. Perfect Accompaniments
These juicy drumsticks are perfect served with a side of mashed potatoes, roasted vegetables, or a simple green salad. And don't forget the sauce! The pan juices will have reduced to a delicious, flavourful sauce. Serve it over the chicken or on the side for dipping.
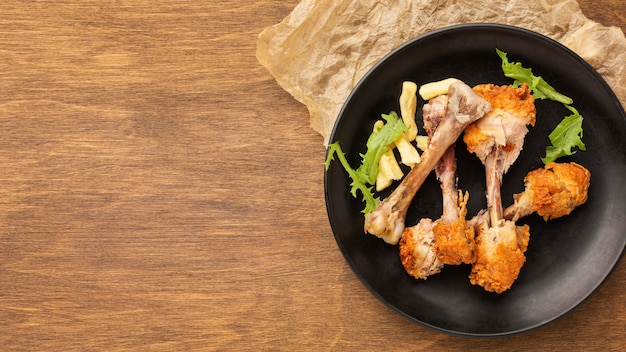
2. A Feast for the Senses
The aroma of those golden-brown drumsticks will fill your kitchen with warmth and comfort. Their crispy skin will crackle under your teeth, releasing an explosion of flavour. The tender, juicy meat will melt in your mouth, leaving you wanting more. It's a truly satisfying meal that will have everyone asking for seconds.
Part 7: Tips and Tricks
1. Don't Overcook the Chicken
Overcooked chicken is dry and tough. Cook it just until it's done, and then remove it from the pan immediately. Let it rest for a few minutes before serving. This allows the juices to redistribute, ensuring your chicken is perfectly moist.
2. Use a Spatula for Flipping
A spatula is the ideal tool for flipping chicken drumsticks. A fork can pierce the skin, allowing juices to escape. Use the spatula to gently lift and flip the drumsticks.
3. Add a Splash of Wine
For a touch of sophistication, add a splash of white or red wine to the pan during the simmering stage. The wine will add acidity and complexity to the sauce.
4. Experiment Fearlessly
Remember, there are no hard and fast rules in the kitchen! Use this guide as a starting point and feel free to experiment with different flavours, ingredients, and techniques.
Part 8: FAQs
1. Can I Use frozen chicken Drumsticks?
Yes, you can use frozen chicken drumsticks, but they must be completely thawed before cooking. Thaw them in the refrigerator for 24 hours before brining or marinating. You can also thaw them in cold water, but this can affect the quality of the meat.
2. How Long Can I Store Cooked Chicken?
Cooked chicken can be stored in the refrigerator for up to 3 days. Make sure to refrigerate it properly, and reheat it thoroughly before eating. You can also freeze cooked chicken for up to 3 months.
3. What If the Chicken Isn't Cooked Through?
If the chicken isn't cooked through, return it to the pan and cook for a few more minutes. Check the internal temperature with a meat thermometer to ensure it reaches at least 165°F (74°C).
4. Can I Use a Different Type of Meat?
Yes, you can use other types of poultry, such as chicken breasts, thighs, or wings. Just adjust the cooking time accordingly. Chicken breasts will cook faster than drumsticks, while thighs will take longer.
5. Can I Cook Chicken Drumsticks in the Oven?
Absolutely! If you prefer oven cooking, preheat it to 375°F (190°C). Place the drumsticks on a baking sheet lined with parchment paper and bake for 30-40 minutes, or until they're cooked through. For extra crispy skin, you can broil them for a few minutes at the end.
Now, go forth and create culinary magic with your stovetop chicken drumsticks! Remember, it's all about mastering the techniques, experimenting with flavors, and enjoying the delicious journey. Happy cooking!
Everyone is watching

How to Cook Frozen Lobster Tails Perfectly: A Step-by-Step Guide
RecipesLobster. Just the word conjures up images of lavish meals, special occasions, and a taste of luxury. But let's...

Pigs in a Blanket Cooking Time: How Long to Bake for Perfect Results
RecipesAh, pigs in a blanket. Just the name conjures up images of those delightful little parcels of crispy pastry en...

Pork Fillet Cooking Time: How Long to Cook It Perfectly
RecipesPork fillet, or tenderloin as it's sometimes called, is a real favourite in our house. It's so versatile, and...

The Ultimate Guide to Tender, Juicy Pulled Pork
RecipesRight, let's talk pulled pork. It's one of those dishes that just screams "comfort food," doesn't it? I mean...

The Ultimate Guide to Cooking Sweet Potatoes: From Roasting to Mashing
RecipesSweet potatoes. Just the name conjures up images of warm, comforting dishes, bursts of vibrant color, and a to...