(Part 1) Choosing the Right Rib Roast

The first step to cooking a magnificent rib roast is choosing the right one. Now, I know it might seem obvious, but trust me, there's a bit more to it than simply picking the biggest one you can find. You want to make sure you're getting a cut that's not only delicious but also suitable for your cooking method.
The Cut: prime rib vs. standing rib roast
Let's clarify something first – "prime rib" and "standing rib roast" are often used interchangeably, but they're not exactly the same thing. Prime rib refers to the quality of the beef, meaning it comes from the highest grade of meat with a significant amount of marbling. A standing rib roast, on the other hand, is the cut of meat, which refers to a bone-in roast from the rib section of the cow.
So, you can have a prime rib roast, which is a high-quality standing rib roast, or a standing rib roast that's not necessarily prime. You can also find standing rib roasts that aren't prime rib, but these will likely have less marbling and might be a bit tougher.
What to Look For:
- Marbling: You want a roast that's nicely marbled, meaning it has streaks of fat throughout the meat. This fat will melt during cooking, adding flavour and keeping the meat moist. Look for a good balance of fat and lean meat.
- Colour: A good rib roast will have a bright red colour, indicating freshness. Avoid any discolouration or bruising.
- Bone: I always go for bone-in rib roasts. The bone adds flavour and keeps the meat juicy, plus it looks impressive on the table.
- Weight: Consider the number of guests you'll be serving and the amount of meat each person might eat. A 3-4 pound roast is ideal for a small gathering, while a larger roast (6-8 pounds) is perfect for a bigger crowd.
Remember, a good butcher can be your best friend when choosing a roast. Don't be afraid to ask questions! They'll be happy to help you pick the perfect cut.
(Part 2) Getting Ready: Preparing the Roast

Alright, you've got your beautiful rib roast, now it's time to get it prepped. You've got to make sure that bad boy is ready to hit the oven, and trust me, there's a bit of prep work involved. This might seem a bit overwhelming at first, but it's really quite simple.
Step 1: Pat it dry
Before you do anything, you need to pat the roast dry with paper towels. This helps to get rid of any excess moisture, which can hinder browning and make for a less crispy exterior. A dry surface will create a better sear.
Step 2: Seasoning is key
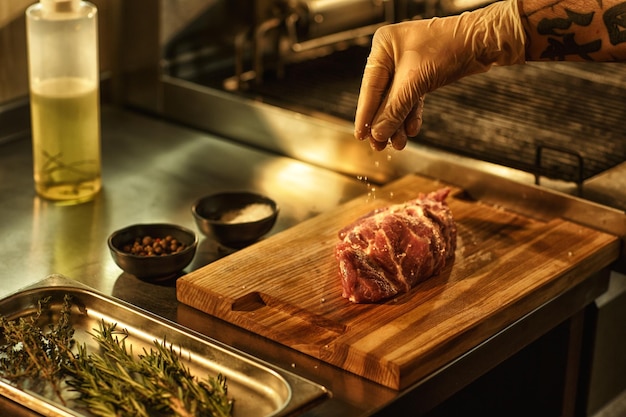
This is where the magic happens. Now, don't get carried away and just go crazy with the seasoning. You want to choose your flavours wisely. I usually opt for a simple salt and pepper rub. Salt helps to draw out the juices and enhance the flavour, while pepper adds a bit of kick. You can also add other spices like garlic powder, onion powder, or even paprika for a bit more depth of flavour. Don't be afraid to experiment and find what you like best. I've also tried a rosemary and thyme mix that was quite delightful.
You can season the roast directly or you can create a nice, thick rub. Just make sure you rub it all over evenly, getting into all the nooks and crannies.
Here's a basic salt and pepper rub you can try:
- 2 tablespoons kosher salt
- 1 tablespoon freshly ground black pepper
Mix the salt and pepper together and rub it all over the roast. If you want to add additional flavours, just adjust the proportions of the spices to your liking.
Step 3: Let it rest
Once your roast is seasoned, it's important to let it rest for at least 30 minutes, preferably an hour, uncovered in the fridge. This will help the seasoning to penetrate the meat and distribute evenly, resulting in a more flavourful roast. Think of it as giving the seasoning time to mingle and become besties with the meat. It's like a little pre-party for your roast.
If you have time, you can also tie the roast with kitchen twine to help it maintain its shape during cooking and ensure even cooking. This is especially helpful for larger roasts.
(Part 3) The Big Day: Cooking the Roast

Now comes the exciting part! The day of your roast feast has arrived, and you're ready to cook up a storm. This is where you get to showcase your culinary skills, so let's get this right.
Step 1: Preheat your oven
First things first, preheat your oven to 450°F (232°C). This high heat will create a nice, crispy crust on the outside of your roast.
Step 2: Searing the Roast
Searing is a crucial step. You might be wondering why bother searing a roast? Well, it's all about flavour and texture. Searing creates a beautiful, caramelized crust, which not only adds a lovely flavour but also helps to lock in the juices. It's like giving your roast a little hug of flavour.
So, get a large, oven-safe skillet or roasting pan and heat it over high heat until it's smoking hot. Then, carefully place the roast in the pan and sear it on all sides for about 2-3 minutes per side. Make sure you get a nice, even brown crust. This is where your patience comes in. Don't rush the searing process; take your time and do it right.
If you're using a cast iron skillet, you can even transfer the roast to the oven in the same skillet, but make sure it's oven safe. If not, move the roast to a roasting pan.
Step 3: roasting time!
Now that your roast is nicely seared, it's time to transfer it to your roasting pan. I recommend using a roasting pan with a rack, as this allows air to circulate around the roast, resulting in a more even cook.
Now, it's time to pop your roast into the preheated oven. This is where you need to adjust your oven temperature. For a perfectly medium-rare roast, you want to cook it at 325°F (163°C) for about 15-20 minutes per pound.
But remember, these are just guidelines! You want to cook your roast to your desired level of doneness. And the best way to do that? Use a meat thermometer!
(Part 4) The Importance of Temperature
Okay, let's talk temperatures. This is crucial, because no one wants a dry, overcooked roast. A meat thermometer is your new best friend. It's how you'll ensure your roast is cooked perfectly, not a moment too long.
How to Use a Meat Thermometer
It's simple, really. Just insert the thermometer into the thickest part of the roast, making sure it doesn't touch any bones. The ideal spot is in the center of the roast, avoiding the bone and any fat.
Temperature Guide:
| Doneness | internal temperature |
|---|---|
| Rare | 125°F (52°C) |
| Medium-Rare | 130-135°F (54-57°C) |
| Medium | 140-145°F (60-63°C) |
| Medium-Well | 150-155°F (66-68°C) |
| Well-Done | 160°F (71°C) |
Now, you've got to be careful. Don't just yank that thermometer out every two minutes! Let the roast rest for about 10 minutes before you check the temperature again. This allows the internal temperature to even out, ensuring a more consistent cook.
Also, remember that the roast will continue to cook slightly even after you remove it from the oven. It's called "carryover cooking." So, it's better to take the roast out of the oven a few degrees below your desired temperature, knowing that it will continue to cook as it rests.
(Part 5) Resting is Key
After the roast has reached your desired temperature, it's time for the final step – resting. You've just put your roast through a lot, so it needs a little break.
Why Resting is Essential
Resting allows the juices to redistribute throughout the meat, ensuring a tender and juicy roast. This is a crucial step that often gets overlooked, but it's a game-changer. It's like giving your roast a chance to catch its breath and relax.
How to Rest a Roast
Simply remove the roast from the oven and cover it loosely with foil. Let it rest for at least 15-20 minutes. It may seem like a long time, but it's worth it, trust me!
You can also create a tent with the foil to keep the roast warm while it rests.
(Part 6) The Grand Finale: Carving and Serving
The moment you've been waiting for has finally arrived! It's time to carve and serve your masterpiece. Now, this is a skill that takes practice, but don't worry, I'm here to guide you.
Step 1: Carving the Roast
You'll need a sharp carving knife for this. And remember, don't rush! Take your time and be careful. First, slice the meat between the bones. Then, slice the meat across the grain, which means cutting perpendicular to the muscle fibers.
If you're struggling to slice the roast, you can always use a meat cleaver to break down the roast into smaller pieces, making it easier to carve.
Step 2: Serving the Roast
Now, the fun part – serving! There are so many ways to serve a rib roast. It's a real blank canvas for culinary creativity. You can serve it with classic sides like mashed potatoes, roasted vegetables, or a green salad.
And don't forget the gravy! The drippings from the roast can be used to make a delicious gravy. Simply strain the drippings into a saucepan, add some flour, and whisk until smooth. Then, gradually add some broth or water, whisking constantly, until the gravy reaches your desired consistency.
You can also add some herbs, spices, or even a splash of wine to the gravy for additional flavour.
(Part 7) Tips and Tricks for a Perfect Roast
I've got a few more tips up my sleeve for making your rib roast even more spectacular.
Tips for an Extra-Juicy Roast
Want a roast that's so juicy, it practically melts in your mouth? Try these tricks:
- Use a meat thermometer: This is the best way to ensure your roast is cooked to your desired level of doneness, avoiding overcooking.
- Don't overcrowd the pan: Make sure the roast has plenty of room to cook evenly. Give the roast some space to breathe.
- Roast at a lower temperature: A lower temperature will result in a more tender and juicy roast.
- Let the roast rest: This allows the juices to redistribute throughout the meat, making it more tender and juicy.
- Basting: Basting the roast with its own juices or with a mixture of broth, wine, or herbs can help keep it moist and flavorful during cooking.
Tips for a Crispy Crust
A crispy crust is a must! Here's how to get it:
- Pat the roast dry: Excess moisture can prevent the roast from browning properly.
- Preheat the pan: Make sure the pan is smoking hot before searing the roast.
- Don't overcrowd the pan: The roast needs plenty of space to brown evenly.
- Don't move the roast too much: Let it sit in the pan for a few minutes before flipping it to prevent it from sticking.
(Part 8) FAQs
Now, I know you're probably thinking, "What if I forget to take it out in time?" Or "What if my oven is too hot?" These are all valid concerns.
1. What if I overcook the roast?
Oh no! It happens to the best of us. If you've overcooked your roast, don't despair. It's not the end of the world. The roast might be a bit dry, but it's still edible. Try slicing it thinly to help it feel less dry. You can also serve it with a rich sauce or gravy to add moisture.
You can also try shredding the overcooked roast and using it in sandwiches, tacos, or other dishes where texture isn't as important.
2. How long can I keep a rib roast in the refrigerator?
A raw rib roast can be safely stored in the refrigerator for 3-5 days. It's important to wrap it tightly in plastic wrap or foil to prevent freezer burn.
3. Can I freeze a rib roast?
Absolutely! A rib roast can be frozen for up to 3 months. It's best to wrap it tightly in plastic wrap and then in foil. When you're ready to use it, defrost it in the refrigerator for 2-3 days.
You can also freeze a cooked rib roast, but it's best to slice it into portions before freezing to make it easier to thaw and reheat.
4. What are some good side dishes for a rib roast?
The possibilities are endless! Here are a few of my favourites:
- Mashed Potatoes: A classic and always a crowd-pleaser.
- Roasted Vegetables: Asparagus, Brussels sprouts, carrots, and potatoes are all excellent choices.
- Green Salad: A refreshing and light side dish to balance out the rich roast.
- Yorkshire Pudding: This classic British side dish is a perfect accompaniment to a roast.
- Roasted Garlic: The sweetness of roasted garlic pairs beautifully with the savory flavor of the roast.
- Creamed Spinach: Creamy and delicious, creamed spinach is a comforting side dish that complements the roast.
5. Can I make a rib roast ahead of time?
Yes, you can! You can even make the roast up to a day ahead of time. Just prepare it as usual, then let it cool completely. Cover it tightly in plastic wrap and refrigerate. When you're ready to cook it, bring it to room temperature before roasting.
Remember, the key to a perfect rib roast is to have confidence and be willing to experiment. Don't be afraid to try different seasoning combinations or cooking methods. And most importantly, have fun!
Everyone is watching

How to Cook Frozen Lobster Tails Perfectly: A Step-by-Step Guide
RecipesLobster. Just the word conjures up images of lavish meals, special occasions, and a taste of luxury. But let's...

Pigs in a Blanket Cooking Time: How Long to Bake for Perfect Results
RecipesAh, pigs in a blanket. Just the name conjures up images of those delightful little parcels of crispy pastry en...

Pork Fillet Cooking Time: How Long to Cook It Perfectly
RecipesPork fillet, or tenderloin as it's sometimes called, is a real favourite in our house. It's so versatile, and...

The Ultimate Guide to Cooking Delicious Frankfurters
RecipesLet's face it, we all love a good frankfurter. It's a classic, simple, and always satisfying. But let's be rea...

Wolf Meat Recipes: A Guide to Cooking Wild Game
RecipesLet's be honest, you don't see wolf meat at your local butcher shop every day. It's a bit of a wild card, but ...
