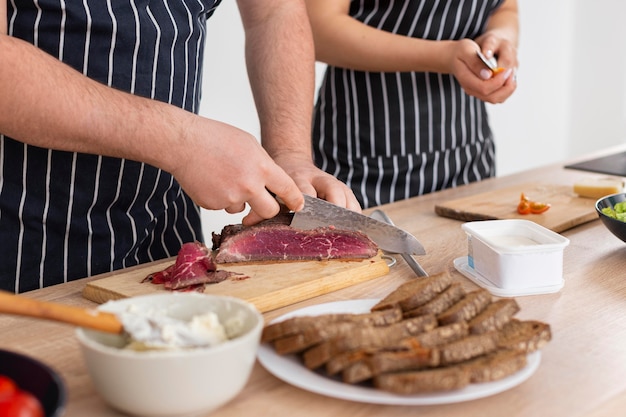
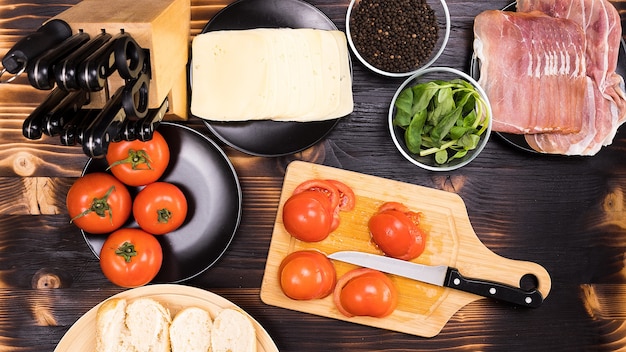
Ah, ham. The quintessential centerpiece of a celebratory feast, a comforting addition to a simple weeknight dinner, and a guaranteed crowd-pleaser. I’ve been cooking ham for years, and I’ve learned that a perfectly cooked ham is more than just throwing it in the oven and calling it a day. It’s about understanding the nuances of different types of ham, knowing how to prepare it for optimal flavor and tenderness, and, of course, finding that perfect glaze that elevates it from good to truly remarkable. So, grab a fork, let’s get into it, and let me share my secrets to cooking a ham that'll leave everyone wanting more.
Part 1: Choosing the Right Ham

Choosing the right ham is like picking the perfect ingredient for a dish—it’s crucial for the final result. Think of it as a culinary journey that begins with the right starting point. You wouldn’t use a delicate fish for a hearty stew, and you wouldn’t choose a bone-in ham if you’re looking for a quick, easy meal. Here’s how to navigate the ham aisle:
Types of Ham
- spiral-sliced ham: This is my personal favorite for everyday cooking. It's a time-saver, as it’s already pre-sliced, making carving a breeze. They're usually fully cooked, which means a quick reheat in the oven is all you need. It’s perfect for those busy weeknights or casual gatherings when you want a delicious meal without fuss.
- Bone-In Ham: If you’re looking for a more traditional experience and a flavor that’s a bit more intense, a bone-in ham is your best bet. It's typically juicier because the bone helps to retain moisture. The downside? It takes a bit longer to cook, and you’ll need to score the skin to prevent it from getting tough. But believe me, the extra effort is worth it.
- canned ham: Canned ham is a real lifesaver when you need a quick meal. It’s already cooked and seasoned, so you simply heat it up and enjoy. Think of it as a pantry staple for those nights when you’re short on time but still want something satisfying.
Ham Size and Weight
Now, let's talk about the size. The last thing you want is a ham that’s too big or too small for your needs. A good rule of thumb is to plan for about 1/2 pound of ham per person. So, if you’re feeding 10 people, you’d want a 5-pound ham. Don’t worry if you end up with leftovers! Ham is fantastic reheated, and it’s great for making sandwiches, salads, or even a hearty soup.
Choosing the Right Glaze
Here’s where the fun really begins. The glaze is the finishing touch, the element that elevates the ham from ordinary to extraordinary. Think of it as the icing on the cake. You’ve got a world of options, from sweet and fruity to tangy and savory. Personally, I’m a sucker for a classic honey mustard glaze. It’s sweet, it’s savory, and it gives the ham a beautiful golden color. But the sky’s the limit! Experiment with different glazes, find what you like, and create your own signature flavor profile.
Here are a few glaze ideas to get you started:
- Sweet and Savory: Honey mustard, maple syrup and brown sugar, pineapple and ginger
- Tangy and Spicy: Dijon mustard and brown sugar, orange marmalade and chili flakes
- Fruity and Aromatic: Apricot preserves, cranberry sauce, fig jam
Part 2: Preparing the Ham

Now that you’ve got your ham, it’s time to prepare it for its starring role. This step sets the stage for a delicious outcome, so don’t rush it.
Scoring the Ham
Scoring a bone-in ham is a crucial step, especially if you want to achieve that beautiful, crisp skin. It’s like giving the ham a little “massage” to help the fat render and the flavor to penetrate. Use a sharp knife to make shallow cuts across the fat, about 1/2 inch apart. Don’t cut too deeply, as you just want to score the surface, not cut all the way through. This also helps the glaze to stick to the ham and create that gorgeous, glistening crust.
Pre-Heating the Oven
Get your oven ready! Preheat it to 325°F (165°C). You want that oven nice and toasty to give the ham a good head start. It's like inviting the ham to a warm hug—it’ll help it cook evenly and develop that irresistible golden-brown crust.
Placing the Ham in the Oven
Time to place your ham in the oven! Use a roasting pan that's large enough to comfortably hold the ham. If you’re using a pre-made glaze packet, toss it in the bottom of the roasting pan for extra flavor. Now, here’s a little trick: add about 1 cup of water to the bottom of the pan. This creates steam, which helps to keep the ham moist and tender.
Part 3: Cooking the Ham

You’ve done the prep work, so now it’s time to let the oven work its magic. But there are a few things to keep in mind to ensure your ham comes out perfect.
cooking time
Cooking time depends on the size and weight of your ham. For a bone-in ham, a general rule of thumb is about 15-20 minutes per pound. So, a 5-pound ham would take around 75-100 minutes. For spiral-sliced ham, check the packaging for cooking instructions. They’re typically pre-cooked, so they only need a quick reheat.
Checking for Doneness
Now, how do you know if your ham is done? This is where a meat thermometer comes in handy. You want the internal temperature to reach 140°F (60°C). It’s a simple way to ensure the ham is cooked through and safe to eat. If you don’t have a meat thermometer, you can also use a few visual cues. The ham should be cooked through and no longer pink. The juices should run clear, and the fat should be rendered.
Glazing the Ham
About 30 minutes before your ham is done, it’s time to give it that final touch of flavor and beauty—the glaze! Use a pastry brush to apply the glaze evenly over the entire ham. This helps it to caramelize and create that gorgeous golden crust. It also adds a fantastic flavor dimension to the ham. If you’re using a pre-made glaze, follow the instructions on the package. But remember, you can always create your own! Experiment with different ingredients, flavors, and textures.
For example, try:
- A tangy glaze: Mix Dijon mustard, brown sugar, and a splash of apple cider vinegar.
- A sweet and smoky glaze: Combine honey, maple syrup, and a pinch of smoked paprika.
- A fruity glaze: Use apricot preserves, cranberry sauce, or fig jam for a touch of sweetness and complexity.
Part 4: Resting the Ham
Patience, young padawan! After your ham is cooked, let it rest for about 15-20 minutes before carving. Think of it as giving the ham a moment to catch its breath and redistribute its juices. This will make it even more tender and flavorful. Don’t be tempted to dive in right away!
Part 5: Carving the Ham
The moment has arrived! It's time to carve that beautiful ham. Take your time, and don’t be afraid to show off your carving skills. It's a little performance art, a chance to showcase your culinary prowess (and maybe impress your guests in the process).
Tips for Carving
- Use a sharp carving knife: This is crucial for clean, even slices. A dull knife will just shred the ham.
- Cut against the grain: This will help to prevent the ham from shredding. Think of it like cutting a steak—you want to cut across the muscle fibers, not with them.
- If you’re carving a bone-in ham, start by removing the bone: This will make it easier to carve the rest of the ham.
Serving the Ham
Now comes the fun part—serving! You can serve the ham on a platter, surrounded by your favorite side dishes, or use it as a base for sandwiches, salads, or other culinary creations. Go ahead, get creative and have fun!
Part 6: leftover ham
Leftover ham? Don’t fret! This is a culinary treasure trove of delicious possibilities. It’s perfect for adding a hearty flavor to breakfast, lunch, or dinner.
Ham and bean soup
A classic comfort food, and it’s surprisingly easy to make. Simply add your leftover ham to a pot of beans, vegetables, and broth. Let it simmer until the flavors meld together. Serve it with crusty bread for dipping.
ham and cheese quiche
A savory and satisfying quiche that’s perfect for brunch or a light lunch. Combine eggs, cream, cheese, and your leftover ham. Pour the mixture into a pastry crust and bake until golden and set.
Ham and Potato Hash
This is a great way to use up leftover ham and potatoes. Simply dice the ham and potatoes and sauté them in a pan with onions and peppers. Season with salt and pepper, and serve with a fried egg.
Here are some other ideas for leftover ham:
- ham and cheese sandwiches: Classic and delicious!
- Ham Salad: Combine diced ham, mayonnaise, celery, and onion for a tasty sandwich filling or salad topping.
- Ham and broccoli stir-fry: Add diced ham to a stir-fry for a protein boost and a burst of flavor.
Part 7: Storing Leftover Ham
Proper storage is crucial for keeping your leftover ham fresh and delicious. Here’s what you need to know:
Refrigerating Leftover Ham
Wrap your leftover ham tightly in plastic wrap or aluminum foil. Store it in the refrigerator for up to 4 days.
Freezing Leftover Ham
You can also freeze leftover ham for up to 2 months. Wrap it tightly in plastic wrap and then place it in a freezer-safe bag. When you’re ready to use it, thaw it in the refrigerator overnight.
Part 8: Tips and Tricks
Here are a few extra tips to make your ham-cooking experience even more enjoyable and successful:
- Don’t overcook the ham: Overcooked ham can become dry and tough. Check the internal temperature regularly to ensure it doesn’t get too hot.
- Use a meat thermometer: It's the most reliable way to ensure your ham is cooked through.
- Add a splash of apple cider vinegar: A tablespoon or two of apple cider vinegar can help to tenderize the ham and enhance its flavor.
- Get creative with glazes: Experiment with different flavors and textures to find your favorites.
- Serve it with your favorite sides: Ham is incredibly versatile and goes well with so many different side dishes. From roasted vegetables to potato salad, there’s something for everyone!
- Don’t be afraid to experiment: The best part about cooking is having fun and trying new things. Experiment with different cooking methods, glazes, and side dishes to find your perfect ham recipe.
Part 9: FAQs
Got questions about cooking a ham? Here are some answers to common questions:
1. What if I don’t have a meat thermometer?
While a meat thermometer is the most reliable way to check for doneness, you can also use a few visual cues. The ham should be cooked through and no longer pink. The juices should run clear, and the fat should be rendered. However, a meat thermometer is always the safest and most accurate way to check for doneness.
2. Can I use a slow cooker to cook a ham?
Yes, you can! It’s a great way to ensure a tender and juicy ham. Simply place the ham in the slow cooker, add a cup of water, and cook on low for 6-8 hours.
3. Can I cook a ham on the grill?
Yes, absolutely! Grilling a ham adds a smoky flavor that’s truly delicious. Just make sure you have a grill that’s big enough to accommodate the ham. Preheat the grill to medium heat, then place the ham on the grill. Cook for about 15-20 minutes per pound, or until the internal temperature reaches 140°F (60°C).
4. What are some creative ways to serve ham?
There are so many ways to serve ham! Try making a ham and cheese sandwich, adding it to a salad, or even using it as a topping for pizza. Get creative and experiment with different flavors!
5. Can I cook a frozen ham?
It’s not recommended to cook a frozen ham. It’s best to thaw it in the refrigerator overnight before cooking. This ensures that the ham cooks evenly and reaches a safe internal temperature.
So there you have it, your complete guide to cooking a delicious ham. From selecting the right ham to carving it up for your guests, I hope you’ve learned some new tips and tricks along the way. Remember, practice makes perfect, and don’t be afraid to get creative. The more you cook ham, the more confident you’ll become. And who knows, you might even discover your own signature glaze!
Everyone is watching

How to Cook Frozen Lobster Tails Perfectly: A Step-by-Step Guide
RecipesLobster. Just the word conjures up images of lavish meals, special occasions, and a taste of luxury. But let's...

Pigs in a Blanket Cooking Time: How Long to Bake for Perfect Results
RecipesAh, pigs in a blanket. Just the name conjures up images of those delightful little parcels of crispy pastry en...

Pork Fillet Cooking Time: How Long to Cook It Perfectly
RecipesPork fillet, or tenderloin as it's sometimes called, is a real favourite in our house. It's so versatile, and...

The Ultimate Guide to Tender, Juicy Pulled Pork
RecipesRight, let's talk pulled pork. It's one of those dishes that just screams "comfort food," doesn't it? I mean...

The Ultimate Guide to Cooking Sweet Potatoes: From Roasting to Mashing
RecipesSweet potatoes. Just the name conjures up images of warm, comforting dishes, bursts of vibrant color, and a to...
